Author: Kevin

Thermostat Replacement: 6 Steps To Install A New One

Is your old thermostat failing to keep your home comfortable? Thermostat replacement might be the solution you need to restore optimal temperature control and potentially save on energy costs. Whether your current unit is outdated, malfunctioning, or simply incompatible with your upgraded HVAC system, installing a new thermostat can significantly improve your home’s comfort and efficiency.

Modern thermostats offer advanced features like programmable schedules, Wi-Fi connectivity, and smart learning capabilities that adapt to your lifestyle. Before diving into this project, it’s helpful to understand the basics of HVAC services and how they connect to your overall home comfort system.

This comprehensive guide will walk you through everything you need to know about thermostat replacement, covering:

  • Why replacing your thermostat is important for home comfort
  • Step-by-step installation instructions for your new thermostat
  • Essential safety considerations and troubleshooting tips
  • When to call professional HVAC technicians for assistance

🔥 Why Thermostat Replacement Is Important

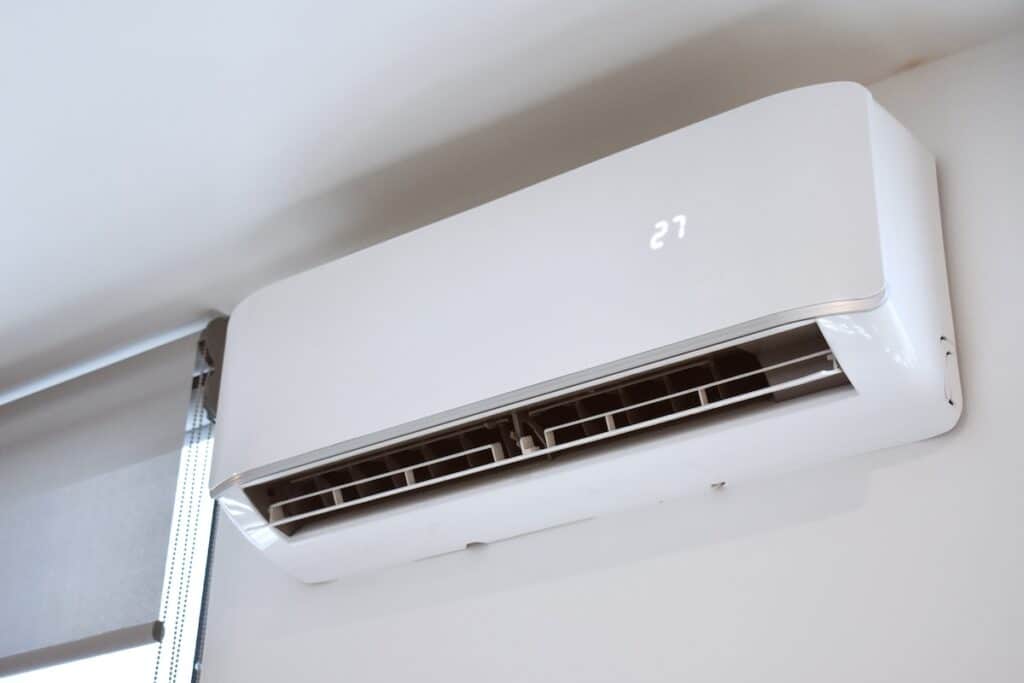
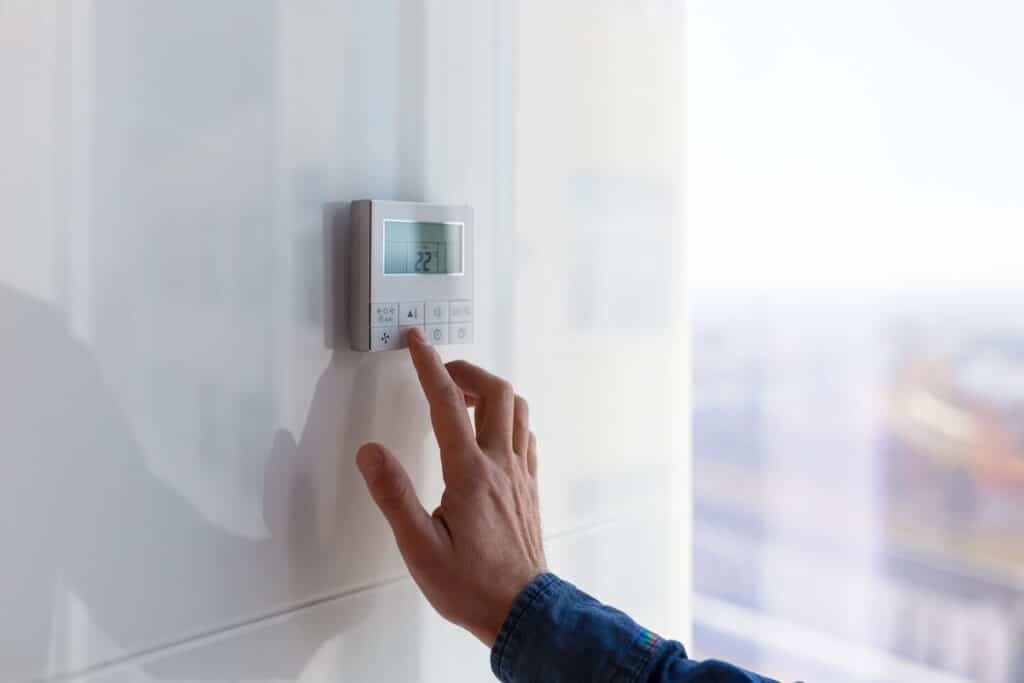
thermostat replacement The air conditioning and heating control panel for the apartment and office is located on a white wall.

A functioning thermostat serves as the command center for your home’s heating and cooling system. When this crucial component fails or becomes outdated, it can impact your entire HVAC system’s performance and your family’s comfort.

Older thermostats often lack the precision and features needed for optimal energy efficiency. Many homeowners discover that upgrading their thermostat can lead to noticeable improvements in both comfort and utility bills.

Key benefits of replacing your thermostat include:

  • Enhanced energy efficiency — Modern programmable thermostats can reduce heating and cooling costs by up to 15%
  • Improved temperature accuracy — Digital thermostats provide more precise temperature readings than older mechanical models
  • Smart scheduling capabilities — Program different temperatures for various times of day to match your routine
  • Remote control features — WiFi-enabled thermostats allow temperature adjustments from anywhere
  • Better system diagnostics — Advanced models can alert you to potential HVAC issues before they become major problems

🔧 6 Steps To Install A New Thermostat

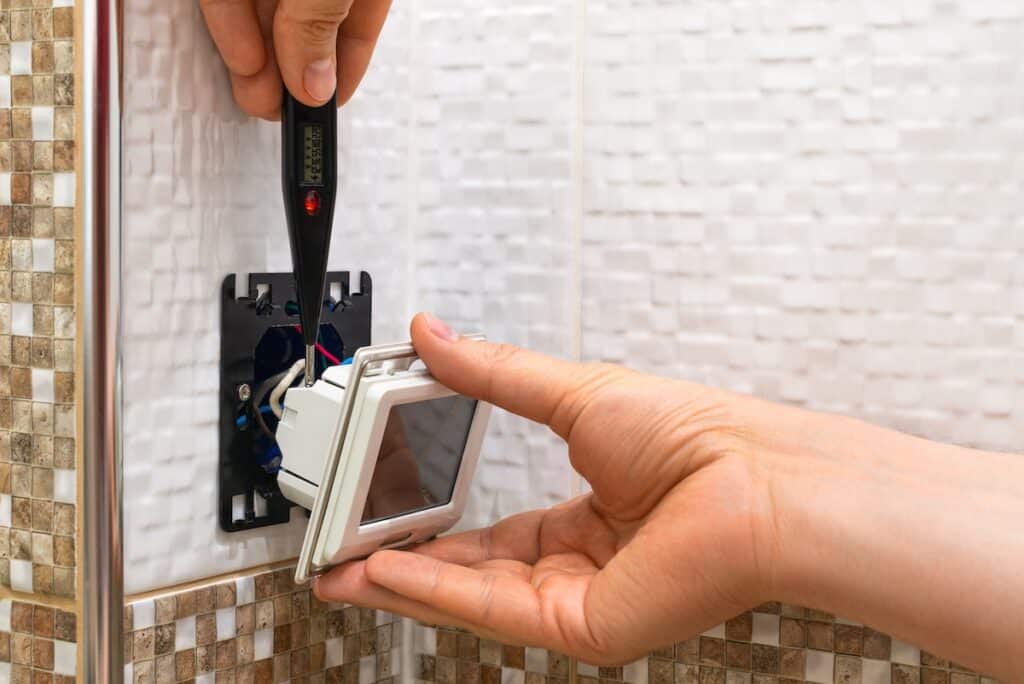
Installation of a floor temperature controller in the house

Replacing a thermostat is a manageable DIY project for many homeowners, though it requires careful attention to electrical safety and proper wire connections. These detailed steps will guide you through the installation process safely and effectively.

Always remember that working with electrical components carries inherent risks. If you’re uncomfortable with any step or encounter unexpected wiring configurations, don’t hesitate to contact professional technicians for assistance.

1. Turn Off Power and Remove Old Thermostat

Safety should be your top priority when beginning any electrical work in your home. Start by locating your home’s electrical panel and switching off the breaker that controls your HVAC system.

  • Test that power is off by trying to adjust the temperature on your current thermostat
  • Take a clear photo of your existing wiring configuration before disconnecting anything

2. Label and Disconnect Wires

Proper wire identification prevents confusion and potential damage during installation. Most residential thermostats use standard color-coded wires, but configurations can vary between systems.

  • Use masking tape or wire labels to mark each wire with its corresponding terminal letter (R, W, Y, G, C)
  • Gently pull wires straight out from terminals—avoid twisting or yanking motions

3. Install New Mounting Plate

The mounting plate serves as the foundation for your new thermostat and must be positioned correctly for proper operation. Choose a location away from direct sunlight, drafts, and heat sources that could affect temperature readings.

  • Use a level to ensure the mounting plate sits perfectly straight
  • Mark screw holes with a pencil before drilling to ensure accurate placement

4. Connect Wires to New Thermostat

Wire connections must be secure and correctly matched to their corresponding terminals. Loose connections can cause system malfunctions or prevent your thermostat from controlling your HVAC equipment properly.

  • Match each labeled wire to its corresponding terminal on the new thermostat
  • Ensure wire connections are tight and fully inserted into terminals

5. Attach Thermostat to Mounting Plate

Once all electrical connections are complete, carefully position the thermostat onto its mounting plate. Most modern thermostats feature a simple snap-on design that secures the unit without additional fasteners.

  • Gently press the thermostat onto the mounting plate until it clicks into place
  • Verify that the display is level and all connections remain secure

6. Restore Power and Configure Settings

With installation complete, restore power to your HVAC system and begin the setup process. Your new thermostat will likely require initial configuration to match your system type and personal preferences.

  • Turn the circuit breaker back on and verify that your thermostat powers up properly
  • Follow the manufacturer’s setup instructions to program schedules and system settings

⚠️ Safety Considerations and Common Issues With Cooling Systems

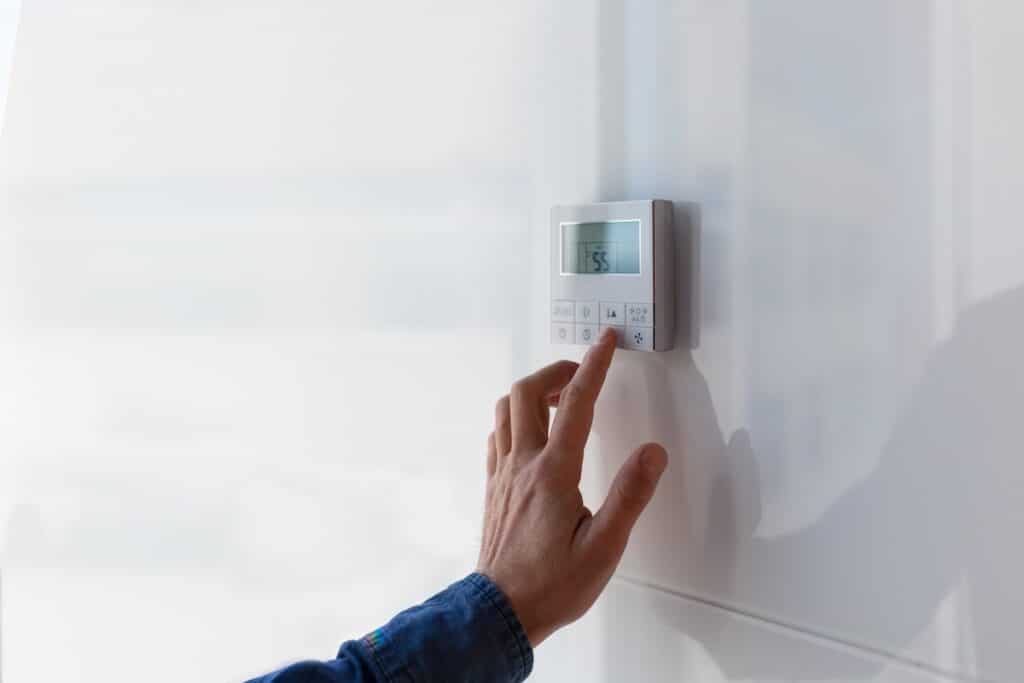
thermostat replacement  Modern furnace setting panel. Depth of field on the buttons

Thermostat installation involves working with electrical systems that power your home’s heating and cooling equipment. Understanding potential hazards and common installation challenges can help you complete the project safely and successfully.

Even seemingly simple electrical work can present unexpected complications. Professional HVAC technicians have the experience and tools to handle complex wiring situations and system compatibility issues that might arise during installation.

Electrical Safety Precautions

Working with electrical components requires constant vigilance and proper safety protocols. Never assume that turning off your thermostat provides adequate protection—always shut off power at the electrical panel.

Essential safety measures:

  • Verify power is off using a non-contact voltage tester before touching any wires
  • Work in good lighting to clearly see wire colors and terminal markings
  • Keep electrical connections dry and avoid working during humid conditions

Compatibility and Wiring Issues

Not all thermostats work with every HVAC system type. Heat pumps, multi-stage systems, and older equipment may require specific thermostat models or additional wiring modifications.

Common compatibility concerns:

  • C-wire requirements — Many smart thermostats need a common wire for power
  • System voltage — Ensure your new thermostat matches your system’s voltage requirements
  • Multi-stage systems — Heat pumps and two-stage systems may need specialized thermostats

When to Call Professional Help

While many homeowners successfully install their own thermostats, certain situations warrant professional assistance. Recognizing when you’re in over your head can prevent costly mistakes and safety hazards.

Contact professional HVAC technicians if you encounter:

  • Unusual wire colors or configurations that don’t match standard wiring diagrams
  • Multiple HVAC systems controlled by a single thermostat
  • System compatibility questions about heat pumps or zoned systems
  • Electrical issues such as tripped breakers or non-functioning equipment

🏠 Make Your Home More Comfortable Today

Installing a new thermostat represents a smart investment in your home’s comfort and energy efficiency. Modern thermostats offer advanced features that can adapt to your lifestyle while potentially reducing your monthly utility bills.

However, successful installation depends on proper planning, safety precautions, and understanding your specific HVAC system requirements. When in doubt, professional installation ensures optimal performance and protects your investment in new equipment.

Ready to upgrade your home’s temperature control system? Contact Thelen Plumbing, Heating, and Air for expert thermostat installation and HVAC services throughout Minneapolis and the Twin Cities area. Our experienced technicians can help you choose the perfect thermostat for your system and ensure professional installation that maximizes your comfort and energy savings.

What Does HVAC Stand For? A Homeowner’s Guide

Ever wondered about those four letters you see on your energy bills and hear from contractors? What does HVAC stand for is one of the most common questions homeowners ask when dealing with home comfort systems. Understanding these essential systems can help you make informed decisions about your home’s heating, cooling, and air quality.

This comprehensive guide will cover:

  • The complete meaning behind HVAC and its components
  • Why understanding your HVAC system matters for homeowners
  • Different types of HVAC systems and how they work
  • Essential maintenance tips to keep your system running efficiently
  • When to call professionals for repairs or replacements

🏠 Why Understanding HVAC Is Important

what does hvac stand for Air Conditioning Repair man hands checking and fixing modern air conditioning system, Technician team checking leakage air conditioning system

Your HVAC system represents one of your home’s most significant investments and energy consumers. Understanding what HVAC stands for and how these systems work empowers you to make smart decisions about maintenance, repairs, and upgrades.

Most homeowners don’t think about their HVAC system until something goes wrong. However, having basic knowledge about these systems can save you money and prevent uncomfortable situations.

Key benefits of understanding your HVAC system include:

  • Lower energy bills through proper maintenance and efficient operation
  • Extended equipment lifespan by recognizing warning signs early
  • Improved indoor air quality for better health and comfort
  • Informed decision-making when speaking with contractors
  • Enhanced home value through well-maintained systems

🔧 What Does HVAC Stand For?

HVAC stands for Heating, Ventilation, and Air Conditioning. These four letters represent the three core functions that keep your home comfortable year-round. Each component plays a crucial role in maintaining optimal indoor temperature, air quality, and humidity levels.

Understanding these individual components helps you communicate effectively with service technicians and make informed decisions about your home’s comfort systems.

H – Heating

The heating component includes furnaces, heat pumps, boilers, and radiant heating systems. These systems warm your home during cold months by distributing heated air or water throughout your living spaces.

  • Gas furnaces burn natural gas to heat air that circulates through ductwork
  • Electric furnaces use electrical resistance to warm air before distribution

V – Ventilation

Ventilation systems exchange indoor air with fresh outdoor air while filtering out pollutants, allergens, and excess moisture. Proper ventilation prevents stale air buildup and maintains healthy indoor air quality.

  • Natural ventilation relies on windows, doors, and architectural features
  • Mechanical ventilation uses fans and ductwork to control airflow

A – Air Conditioning

Air conditioning systems cool and dehumidify indoor air during warm weather. Modern AC units also filter air to remove dust, pollen, and other airborne particles.

  • Central air systems cool entire homes through ductwork
  • Ductless mini-splits provide targeted cooling for specific areas

C – Additional Considerations

While not always included in the acronym, many HVAC professionals include “Control” as the fourth component, referring to thermostats and smart home integration systems that regulate temperature and system operation.

  • Programmable thermostats allow scheduled temperature adjustments
  • Smart thermostats learn your preferences and optimize energy usage

⚙️ 4 Types of HVAC Systems and How They Work

HVAC contractor wearing PPE, servicing a heat pump

Modern homes utilize various HVAC configurations depending on climate, home size, and energy efficiency goals. Understanding different system types helps you identify what’s best for your specific needs.

Each system type offers unique advantages in terms of efficiency, installation costs, and maintenance requirements. The right choice depends on your home’s layout, local climate, and budget considerations.

1. Central HVAC Systems

Central systems use ductwork to distribute conditioned air throughout your home. These systems typically include a furnace or heat pump paired with an air conditioning unit.

Advantages:

  • Consistent temperature control throughout the home
  • Hidden components maintain clean aesthetics
  • Can integrate air filtration and humidity control

Considerations:

  • Requires existing ductwork or installation costs
  • Less efficient for homes with poor duct design

2. Ductless Mini-Split Systems

Mini-splits provide targeted heating and cooling without requiring ductwork. These systems feature an outdoor compressor connected to indoor air handlers in individual rooms.

Advantages:

  • Energy efficient with zone control capabilities
  • Easier installation in homes without existing ducts
  • Quiet operation with minimal maintenance needs

Considerations:

  • Higher upfront costs for multiple zones
  • Indoor units visible on walls or ceilings

3. Heat Pump Systems

Heat pumps provide both heating and cooling by transferring heat energy rather than generating it. These systems work efficiently in moderate climates but may need backup heating in extreme cold.

Advantages:

  • Excellent energy efficiency in mild climates
  • Single system handles both heating and cooling
  • Environmentally friendly operation

Considerations:

  • Reduced efficiency in very cold temperatures
  • May require supplemental heating in harsh winters

🛠️ Essential HVAC Maintenance for Homeowners

what does hvac stand for Technician, clipboard or air conditioning inspection on rooftop for safety, power or maintenance. Electrician, black man or paperwork on hvac system, ac repair or quality assurance for sustainability.

Regular maintenance keeps your HVAC system running efficiently while preventing costly breakdowns. Most homeowners can handle basic maintenance tasks, while others require professional service.

Proper maintenance extends equipment life, improves energy efficiency, and maintains healthy indoor air quality. Creating a maintenance schedule helps ensure you don’t overlook important tasks.

Monthly Maintenance Tasks

Filter Replacement:
Replace air filters every 1-3 months depending on usage and filter type. Dirty filters restrict airflow and force your system to work harder.

  • Check filters monthly during peak usage seasons
  • Use high-quality filters appropriate for your system

Thermostat Check:
Verify your thermostat is functioning correctly and batteries are fresh. Programmable thermostats should maintain their settings.

  • Test both heating and cooling modes seasonally
  • Clean dust from thermostat sensors

Seasonal Maintenance Tasks

Spring Preparation:
Prepare your cooling system before hot weather arrives. Clean outdoor units and schedule professional maintenance.

  • Remove debris from around outdoor AC units
  • Test system operation before peak cooling season

Fall Preparation:
Get your heating system ready for cold weather. Check safety features and ensure proper operation.

  • Test heating system operation and safety features
  • Clean vents and registers throughout your home

Professional Maintenance Services

Annual professional maintenance catches problems early and optimizes system performance. Qualified technicians have tools and expertise to service complex components safely.

  • Comprehensive system inspections identify potential issues
  • Performance optimization ensures efficient operation
  • Safety checks protect your family from carbon monoxide and other hazards

🏡 Ready to Optimize Your Home’s Comfort System?

Understanding what HVAC stands for is the first step toward better home comfort and energy efficiency. Regular maintenance, proper operation, and timely repairs keep these essential systems running smoothly for years to come.

Your HVAC system works hard to keep your family comfortable year-round. Taking proactive steps to understand and maintain these systems protects your investment while ensuring reliable performance when you need it most.

Don’t wait until your system breaks down to get professional help. Contact Thelen Plumbing, Heating, and Air today to schedule a comprehensive system inspection and learn how we can help optimize your home’s comfort systems. Our experienced technicians provide honest assessments and reliable solutions for all your HVAC needs throughout Minneapolis and the Twin Cities Metro area.a

AC Capacitor Guide: What It Does & When To Replace

When the summer heat hits in the Twin Cities, the last thing you want is for your air conditioner to suddenly stop working. One of the most common culprits behind a faulty AC unit is a failed capacitor. Understanding what an ac capacitor does and recognizing the signs of failure can save you from a sweltering home and costly emergency repairs. At Thelen Mechanical, we believe in empowering homeowners with the knowledge they need to keep their systems running smoothly.

A faulty AC capacitor can bring your entire cooling system to a halt, but knowing what to look for can make all the difference. This guide will walk you through everything you need to know about this crucial component.

Here’s what we’ll cover:

  • The essential role of an AC capacitor in your cooling system.
  • The key signs that indicate it’s time for a replacement.
  • The difference between a start capacitor and a run capacitor.
  • Why professional help is necessary for this type of repair.

✅ Why Your AC Capacitor Is So Important

ac capacitor young man electrician installer working on outdoor compressor unit air conditioner at a client's home

Your AC capacitor is a small but mighty component that plays a huge role in your air conditioner’s operation. Think of it as a temporary battery that gives the motors in your AC unit the jolt of energy they need to start up and continue running.

Without a functioning capacitor, the motors in your compressor, blower, and outdoor fan won’t have the power to do their jobs. This is why a capacitor failure can cause your entire system to shut down. Maintaining a healthy capacitor is crucial for several reasons.

  • System Startup: It provides the initial burst of energy required to start the motors in your AC unit.
  • Continuous Operation: It ensures the motors have a steady supply of energy to run smoothly and efficiently throughout a cooling cycle.
  • Energy Efficiency: A healthy capacitor helps your AC run more efficiently, which can lower your energy bills.
  • Prevents Damage: Replacing a failing capacitor promptly can prevent more extensive damage to the AC motor or compressor, which are much more expensive to repair.

⚠️ 5 Signs It’s Time to Replace Your AC Capacitor

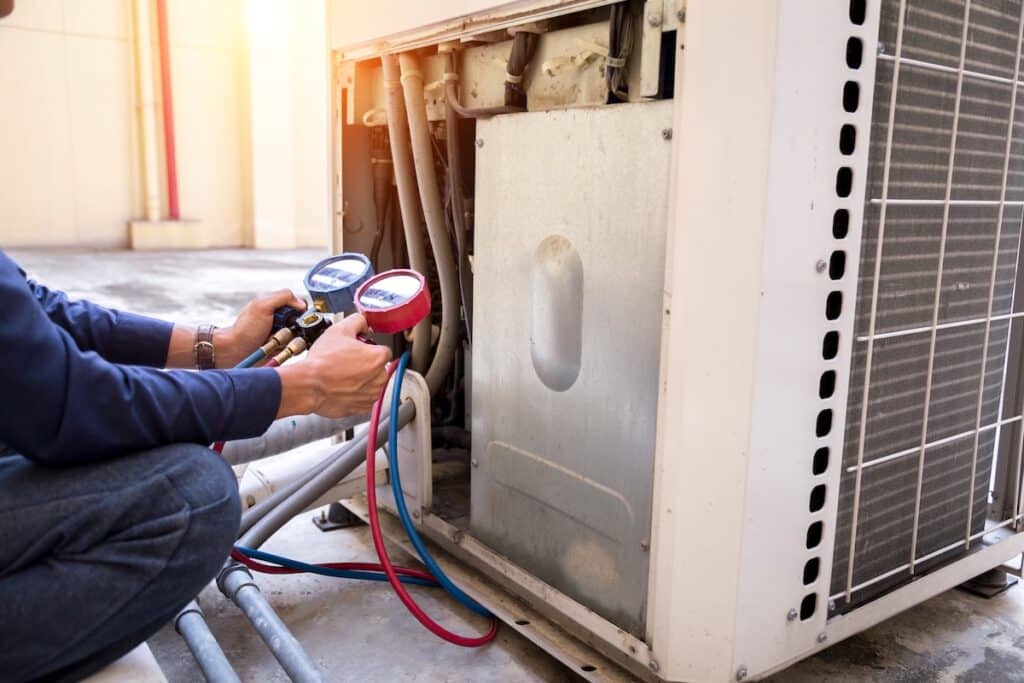
Technician is checking air conditioner ,measuring equipment for filling air conditioners.

Knowing when to replace your AC capacitor can prevent a complete system breakdown, especially during the peak of summer. A failing capacitor will often show clear warning signs before it gives out completely.

Here are the top five indicators that your AC capacitor may need to be replaced.

1. Your AC Unit Won’t Turn On

If your air conditioner doesn’t start at all, a dead capacitor is a likely suspect. The capacitor’s main job is to provide the energy needed to kickstart the system.

  • When you turn on your AC, you might hear a faint humming or clicking sound, but the fans and compressor won’t engage.
  • This indicates the motors are trying to start but aren’t receiving the necessary power boost from the capacitor.

2. The AC Hums but Doesn’t Blow Cold Air

A common sign of a failing capacitor is an audible humming noise coming from your outdoor unit. This sound often means the motor is struggling to start but can’t get the jolt it needs.

  • The capacitor is attempting to provide power, but it’s too weak to fully engage the motor.
  • If you notice this humming, it’s best to turn off your AC unit immediately to prevent burning out the motor and call a professional for an inspection.

3. Your AC Struggles to Start or Shuts Off Randomly

Does your AC unit take a long time to start up after the thermostat kicks in? Or does it shut off unexpectedly in the middle of a cooling cycle? These are classic symptoms of a weak capacitor.

  • A capacitor that is losing its charge will struggle to provide a consistent flow of energy, leading to intermittent operation.
  • This on-and-off cycling can put significant strain on other components of your AC system, leading to more serious problems down the line.

4. You Notice a Clicking Sound

A clicking sound coming from your outdoor unit shortly after it tries to start can also point to a capacitor issue.

  • This sound is often the system trying to turn on and then quickly shutting down because the capacitor can’t supply enough power.
  • Repeated clicking is a clear signal that something is wrong and requires immediate attention from an HVAC technician.

5. Physical Signs of Damage on the Capacitor

If you’re comfortable safely inspecting your outdoor unit (with the power turned off), you might be able to see physical signs of a bad capacitor. A technician will look for these during a maintenance visit.

  • Bulging or Swollen Top: A healthy capacitor is perfectly flat on top. If you see a swollen or bulging top, it’s a definite sign of failure.
  • Leaking Fluid: Capacitors contain an oily fluid. If this fluid is leaking out, the component is compromised and needs immediate replacement.

⚙️ Start Capacitor vs. Run Capacitor

Close up view on HVAC units (heating, ventilation and air conditioning).  ac capacitor

Your air conditioning system actually uses two types of capacitors to function correctly: a start capacitor and a run capacitor. While they work together, they serve distinct purposes, and understanding the difference can help you better communicate with your HVAC technician.

Both types are essential for your AC’s performance, and a failure in either one can cause your system to malfunction.

Start Capacitor

  • Function: Just as the name suggests, the start capacitor’s job is to provide a powerful jolt of electricity to get the AC’s compressor motor started. It only works for a few seconds at the beginning of each cooling cycle.
  • Analogy: Think of it like the initial push you give someone on a swing. It requires a lot of energy to get them going, but once they’re moving, it takes less effort to keep them in motion.
  • Failure Signs: If your start capacitor fails, the motor will likely hum but won’t be able to start running. You might also hear that tell-tale clicking sound as it tries and fails to engage.

Run Capacitor

  • Function: Once the motor is up and running, the run capacitor takes over. It provides a smaller, steady stream of energy to keep the motor and fan running efficiently and smoothly throughout the entire cooling cycle.
  • Analogy: This is like giving small, consistent pushes to keep the person on the swing going. It doesn’t require a big burst of energy, just a constant supply to maintain momentum.
  • Failure Signs: A failing run capacitor can cause the motor to run inefficiently, leading to higher energy bills, overheating, and eventual motor burnout. Your AC might also shut down unexpectedly during operation.

Some modern AC units use a dual run capacitor, which is a single component that serves both the compressor motor and the fan motor. Your HVAC technician will be able to identify which type your system uses and what needs to be replaced.

❄️ Get Your AC Back in Action with Thelen Mechanical

A functioning AC capacitor is essential for keeping your home cool and comfortable. While it might be a small part, its failure can bring your entire system to a halt. Recognizing the signs of a bad capacitor and calling for professional help can save you from bigger, more expensive repairs.

Replacing a capacitor involves handling high-voltage electrical components and should always be left to a trained professional. The expert technicians at Thelen Mechanical have the tools and expertise to safely diagnose and replace your AC capacitor, getting your system back up and running in no time.

If you’re experiencing any of the warning signs discussed in this guide, don’t wait for a complete breakdown. Contact Thelen Plumbing, Heating, and Air today to schedule your AC repair service and enjoy a cool, comfortable home all summer long.

When To Replace Air Conditioner: 8 Main Signs

Keeping your home comfortable during hot summer months depends on having a reliable air conditioning system. However, knowing when to replace air conditioner units can save you from unexpected breakdowns and costly emergency repairs.

Your AC system works hard to maintain comfortable temperatures, but like any major appliance, it won’t last forever. Professional HVAC maintenance can extend your system’s life, but recognizing replacement signs early helps you plan and budget accordingly.

This comprehensive guide will help you identify the key warning signs that indicate it’s time for a new air conditioning system:

  • Eight clear indicators your AC needs replacement
  • Why timely replacement matters for your comfort and budget
  • Cost considerations and energy efficiency benefits
  • How to choose the right replacement system

🔍 Why Recognizing Replacement Signs Is Important

when to replace air conditioner

Understanding when your air conditioner needs replacement protects both your comfort and your wallet. Older systems become increasingly inefficient and unreliable, leading to several problems that impact your daily life.

Failed air conditioners during peak summer heat create uncomfortable living conditions. Emergency replacements often cost more due to limited availability and rushed installation schedules.

Key benefits of timely AC replacement include:

  • Lower energy bills through improved efficiency ratings
  • Reduced repair costs by avoiding frequent breakdowns
  • Better indoor air quality with modern filtration systems
  • Increased home value through updated HVAC equipment
  • Enhanced comfort with consistent temperature control
  • Environmental benefits from energy-efficient operation

🚨 8 Main Signs When It’s Time to Replace Your Air Conditioner

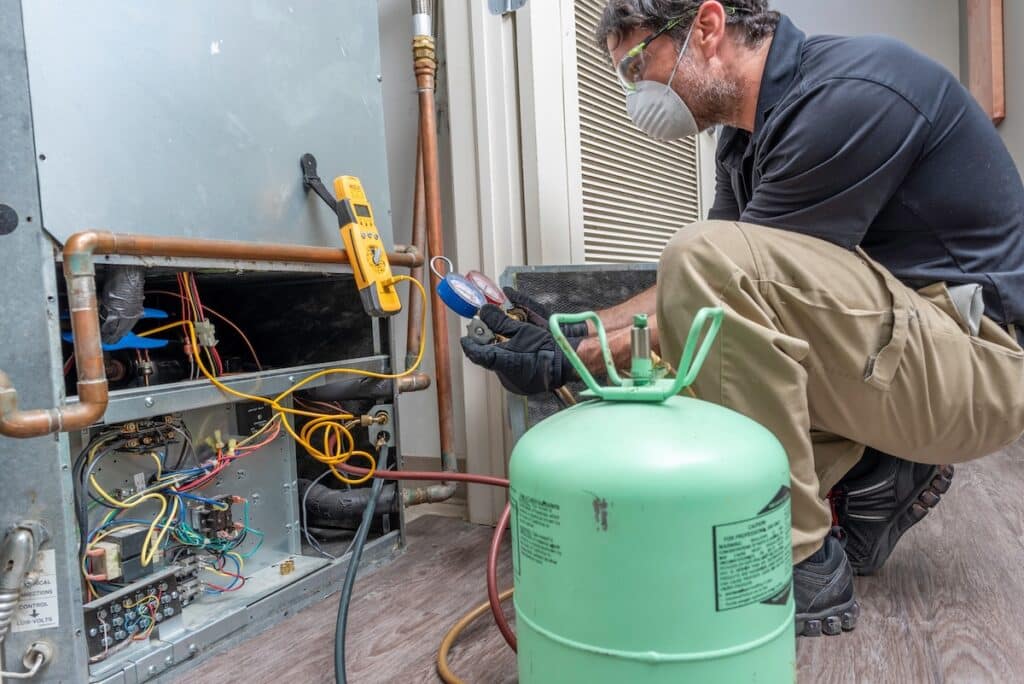
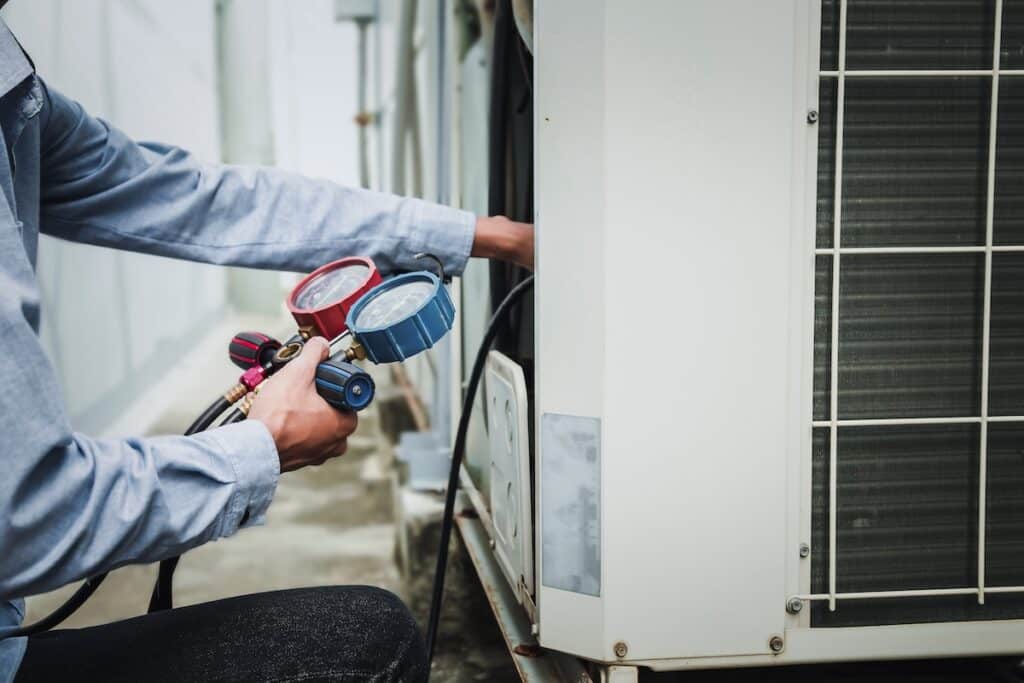
Mechanic  air conditioner technician is using a manifold gauge to check the refrigerant in the system to inspect and repair the outdoor air compressor.

Recognizing these warning signs helps you make informed decisions about your cooling system. Each indicator suggests your current unit may be nearing the end of its useful life.

1. Your System Is 10-15 Years Old

Air conditioning systems typically last between 10-15 years with proper maintenance. Units approaching this age range often experience declining performance and increased repair needs.

  • Older systems use outdated refrigerants that are being phased out
  • Replacement parts become harder to find and more expensive

2. Rising Energy Bills Despite Normal Usage

Significant increases in your cooling costs often indicate declining system efficiency. Your AC works harder to achieve the same comfort levels, consuming more electricity.

  • Compare current bills to previous years during similar weather conditions
  • Energy efficiency ratings have improved dramatically in newer models

3. Frequent and Costly Repairs

When repair costs exceed 50% of a new system’s price, replacement becomes more economical. Multiple breakdowns within a short period suggest systemic problems.

  • Keep records of all repair costs over the past two years
  • Consider the inconvenience and discomfort of repeated service calls

4. Uneven Cooling Throughout Your Home

Inconsistent temperatures between rooms indicate your system can’t properly distribute cooled air. This problem often worsens as systems age and lose capacity.

  • Some rooms feel significantly warmer than others
  • Your system runs constantly but never reaches the desired temperature

5. Strange Noises or Unusual Odors

Grinding, squealing, or banging sounds from your AC unit signal mechanical problems. Musty or burning odors can indicate serious issues requiring immediate attention.

  • Normal operation should be relatively quiet with minimal vibration
  • Unusual smells may suggest electrical problems or mold growth

6. Poor Indoor Air Quality

Older air conditioners struggle to filter air effectively, allowing dust, pollen, and other contaminants to circulate throughout your home. This impacts both comfort and health.

  • Family members experience increased allergy symptoms
  • Visible dust accumulation despite regular cleaning

7. Excessive Humidity Levels

Your air conditioner should remove moisture from indoor air as it cools. Systems that can’t control humidity create uncomfortable, sticky conditions even at proper temperatures.

  • Windows fog up frequently during humid weather
  • Mold or mildew growth in previously unaffected areas

8. Uses R-22 Refrigerant (Freon)

The EPA banned production of R-22 refrigerant in 2020. Systems using this coolant face expensive repairs and limited service options as supplies dwindle.

  • Check your system’s data plate or ask a technician about refrigerant type
  • R-22 replacement costs have increased significantly due to scarcity

💰 Cost Considerations and Energy Efficiency Benefits

when to replace air conditioner

Modern air conditioning systems offer substantial improvements over older models. Understanding these advantages helps justify replacement costs and long-term savings potential.

Energy efficiency ratings have improved dramatically over the past decade. New systems use 20-40% less electricity than units from 2006 or earlier.

Financial Benefits of Replacement

  • Lower Operating Costs: New systems with high SEER ratings significantly reduce monthly electricity bills. The average homeowner saves $200-400 annually on cooling costs.
  • Fewer Repair Bills: Modern systems include better components and improved designs that reduce breakdown frequency. Manufacturer warranties provide additional protection against unexpected costs.
  • Increased Home Value: Updated HVAC systems appeal to potential buyers and often recoup 60-80% of installation costs in resale value.

Environmental Impact Considerations

  • Reduced Carbon Footprint: Energy-efficient systems consume less electricity, reducing environmental impact from power generation.
  • Modern Refrigerants: New systems use environmentally friendly refrigerants that don’t contribute to ozone depletion.
  • Smart Technology Integration: Many new systems include programmable thermostats and zoning capabilities that optimize energy usage based on occupancy patterns.

🎯 Take Action for Your Home’s Comfort

Recognizing when to replace your air conditioner ensures continued comfort while maximizing your investment. Don’t wait for complete system failure to make this important decision.

The signs outlined in this guide help you plan proactively rather than react to emergency situations. Early replacement allows you to research options, compare prices, and schedule installation at your convenience.

Modern air conditioning systems offer improved reliability, energy efficiency, and comfort control compared to older units. These benefits translate to lower operating costs and enhanced indoor air quality for your family.

Ready to upgrade your home’s cooling system? Contact Thelen Plumbing, Heating, and Air today for a free consultation. Our experienced technicians will assess your current system and recommend the best replacement options for your specific needs and budget.

8 Tips On How to Increase Water Pressure in House Systems

Nothing ruins a good shower quite like weak water pressure trickling from your showerhead. Whether you’re trying to rinse shampoo from your hair or wash dishes efficiently, poor water pressure affects daily routines throughout your home.

How to increase water pressure in house situations can stem from various causes, ranging from simple fixes you can handle yourself to more complex plumbing issues requiring professional attention. Understanding these causes and solutions helps you restore proper water flow and improve your home’s overall comfort.

Before diving into major repairs, check out our comprehensive plumbing services guide to understand when professional help might be your best option. Our experienced team at Thelen Plumbing, Heating, and Air has helped countless Minneapolis homeowners resolve water pressure issues quickly and effectively.

This blog post will cover:

  • Common causes of low water pressure in homes
  • Step-by-step solutions you can try yourself
  • Professional services that address complex pressure problems
  • Preventive maintenance tips to avoid future issues

💧 Why Water Pressure Matters in Your Home

how to increase water pressure in house

Adequate water pressure ensures your plumbing fixtures work as designed and your daily routines run smoothly. When pressure drops below optimal levels, simple tasks become frustrating time-wasters.

Low water pressure affects more than just convenience. It impacts your home’s functionality and can signal underlying plumbing problems that may worsen over time. Here are the key benefits of maintaining proper water pressure:

  • Efficient cleaning: Strong water flow helps remove soap, shampoo, and debris effectively
  • Time savings: Higher pressure reduces the time needed for showers, dishwashing, and laundry
  • Appliance performance: Dishwashers, washing machines, and water heaters function better with adequate pressure
  • Early problem detection: Sudden pressure changes often indicate leaks, clogs, or system issues
  • Property value: Homes with consistent water pressure are more attractive to potential buyers

🔧 8 Tips On How to Increase Water Pressure in Your House

Girl filling glass with water from tap at home, closeup

These proven methods address the most common causes of low water pressure. Start with the simplest solutions before moving to more complex repairs.

1. Check Your Water Meter and Main Shutoff Valve

Begin your troubleshooting by ensuring your main water supply is fully open. Sometimes these valves get partially closed during maintenance or repairs.

  • Locate your water meter, usually near the street or property line
  • Find the main shutoff valve and turn it counterclockwise to fully open position

2. Test Multiple Fixtures Throughout Your Home

Determine whether low pressure affects your entire house or specific areas. This helps identify whether the problem is localized or system-wide.

  • Turn on faucets, showers, and other fixtures in different rooms
  • Note which areas have normal pressure versus reduced flow

3. Clean Clogged Aerators and Showerheads

Mineral deposits and debris commonly build up in aerators and showerheads, restricting water flow significantly.

  • Unscrew aerators from faucet spouts and showerheads
  • Soak them in white vinegar overnight, then scrub away deposits with an old toothbrush

4. Check for Leaks in Your Plumbing System

Hidden leaks reduce overall system pressure by diverting water away from your fixtures before it reaches them.

  • Inspect visible pipes under sinks, in basements, and crawl spaces for moisture or drips
  • Monitor your water bill for unexplained increases that might indicate hidden leaks

5. Replace Old or Corroded Pipes

Galvanized steel pipes common in older homes develop internal corrosion that narrows the pipe diameter and reduces flow.

  • Look for signs of pipe corrosion like rust stains or discolored water
  • Consider upgrading to modern materials like copper or PEX piping

6. Install a Water Pressure Booster System

Homes at higher elevations or at the end of municipal water lines often need mechanical assistance to achieve adequate pressure.

  • Consult with a professional about booster pump options for your specific situation
  • Ensure proper sizing and installation for optimal performance and energy efficiency

7. Clear Blocked Water Supply Lines

Sediment, debris, or tree root intrusion can block supply lines leading to your home, reducing overall pressure.

  • Have your main supply line inspected if multiple solutions haven’t improved pressure
  • Professional hydro-jetting can clear stubborn blockages effectively

8. Contact Professional Plumbers for Complex Issues

Some pressure problems require specialized knowledge, tools, and permits that only licensed professionals should handle.

  • Complex pipe replacement projects need proper permits and inspections
  • Pressure regulator adjustments require technical expertise to avoid damage

⚠️ When to Call Professional Plumbers

Professional plumber doing renovation in kitchen home. how to increase water pressure in house

While many water pressure issues respond well to DIY solutions, certain situations require professional expertise. Recognizing these scenarios saves you time, money, and potential damage to your plumbing system.

Signs You Need Professional Help

Professional intervention becomes necessary when basic troubleshooting doesn’t resolve your pressure problems or when you encounter these warning signs:

  • System-wide pressure loss often indicates main line problems, pressure regulator failure, or municipal supply issues that require specialized diagnostic equipment.
  • Fluctuating pressure that changes dramatically throughout the day might signal pump problems, tank issues, or supply line restrictions.
  • No water flow at multiple fixtures could mean a complete blockage, broken main line, or shutoff valve problems.

Complex Repairs Requiring Expertise

Certain repairs go beyond typical homeowner capabilities and require professional training:

  • Pipe replacement projects involve wall access, proper materials selection, code compliance, and system pressure testing.
  • Pressure regulator installation or adjustment requires understanding of your home’s specific pressure needs and proper calibration techniques.
  • Main line repairs often involve excavation, municipal coordination, and specialized equipment for safe, effective completion.

🏠 Take Action to Improve Your Home’s Water Pressure

Poor water pressure doesn’t have to be a permanent frustration in your daily routine. By systematically working through these solutions, you can identify and resolve most common pressure problems affecting your home.

Start with the simple checks like valve positions and aerator cleaning before moving to more involved solutions. Remember that some issues require professional expertise to ensure safe, effective, and code-compliant repairs.

Don’t let water pressure problems disrupt your comfort any longer. Contact the experienced team at Thelen Plumbing, Heating, and Air today for a comprehensive evaluation of your home’s plumbing system. Our skilled technicians serve Minneapolis and the Twin Cities Metro area with reliable solutions that restore proper water flow throughout your home.

Schedule your free plumbing consultation and experience the difference that proper water pressure makes in your daily life.

How an HVAC Zoning System Works (Beginner’s Guide)

Have you ever noticed that some rooms in your home feel like the Arctic while others feel like the Sahara Desert? You’re not alone in this frustrating experience. Many homeowners struggle with uneven temperatures throughout their homes, leading to discomfort and sky-high energy bills.

An HVAC zoning system might be exactly what you need to solve these temperature inconsistencies. This innovative solution allows you to control the climate in different areas of your home independently, ensuring everyone stays comfortable while potentially saving money on energy costs.

This comprehensive guide will cover:

  • Why HVAC zoning systems matter for your home comfort
  • How these systems work from start to finish
  • Key components that make zoning possible
  • Benefits you can expect from proper installation
  • When it makes sense to invest in a zoning system

🌟 Why HVAC Zoning Systems Are Important

hvac zoning system Horizontal photo of female hand opening up heater floor vent with Red Oak Floors in background

Understanding the value of zoning systems starts with recognizing how traditional HVAC systems work. Most homes rely on a single thermostat to control the entire house, which often leads to hot and cold spots that leave family members uncomfortable.

Zoning systems address this fundamental limitation by dividing your home into separate climate-controlled areas. Each zone operates independently, allowing you to customize temperatures based on how each space is used throughout the day.

Key benefits of HVAC zoning systems include:

  • Energy efficiency: Heat or cool only the spaces you’re actually using
  • Enhanced comfort: Eliminate hot and cold spots throughout your home
  • Cost savings: Reduce energy bills by up to 30% with proper zoning
  • Extended equipment life: Less strain on your HVAC system means longer-lasting components
  • Personalized control: Set different temperatures for different family members’ preferences
  • Better air quality: Improved airflow distribution throughout your home

🔧 5 Steps: How an HVAC Zoning System Works

HVAC heating and air conditioning residential units or heat pumps

Now that you understand why zoning matters, let’s break down exactly how these systems operate. The process involves several key components working together to deliver customized comfort to every area of your home.

1. Zone Division and Thermostat Control

The first step involves dividing your home into separate zones based on usage patterns and comfort needs. Each zone gets its own thermostat that communicates with the central control panel.

  • Common zones include bedrooms, living areas, kitchens, and basements
  • Smart thermostats allow remote control and programming for maximum convenience

2. Damper Installation in Ductwork

Motorized dampers are installed in your existing ductwork to control airflow to each zone. These dampers open and close based on signals from the zone control panel.

  • Dampers are typically installed in main trunk lines leading to each zone
  • Professional installation ensures proper sizing and placement for optimal performance

3. Central Control Panel Coordination

The brain of the system is the central control panel, which receives temperature requests from each zone’s thermostat and coordinates the appropriate response.

  • The panel determines which zones need heating or cooling
  • It signals dampers to open or close and tells your HVAC equipment when to run

4. HVAC Equipment Response

When any zone calls for heating or cooling, the control panel activates your furnace, air conditioner, or heat pump to meet that demand.

  • The system runs only as long as needed to satisfy the calling zones
  • Multiple zones can be served simultaneously when needed

5. Continuous Monitoring and Adjustment

The system constantly monitors temperatures in each zone and makes automatic adjustments to maintain your desired comfort levels.

  • Sensors provide feedback to ensure accurate temperature control
  • The system learns your patterns and can make predictive adjustments

🏠 Key Components That Make Zoning Possible

hvac zoning system Close Up Of Mature Woman Adjusting Central Heating Temperature At Home On Thermostat

A properly functioning zoning system relies on several critical components working in harmony. Understanding these parts helps you appreciate the complexity and value of professional installation.

  • Zone Control Panel: This central hub receives signals from all thermostats and coordinates system operation. It’s the brain that makes all the decisions about when and where to direct conditioned air.
  • Motorized Dampers: These automated valves are installed in your ductwork to control airflow to specific zones. High-quality dampers open and close smoothly and maintain proper sealing when closed.
  • Zone Thermostats: Each zone requires its own thermostat for independent temperature control. Modern digital thermostats offer programming capabilities and can be controlled remotely through smartphone apps.
  • Bypass Damper: This component prevents pressure buildup in your system when multiple zones are closed. It automatically opens to allow airflow when system pressure gets too high, protecting your equipment from damage.
  • Temperature Sensors: These devices monitor actual temperatures in each zone and provide feedback to the control system. Accurate sensors are essential for maintaining precise comfort levels.

🎯 Taking the Next Step Toward Perfect Home Comfort

HVAC zoning systems represent a smart investment in your family’s comfort and your home’s energy efficiency. While the initial installation requires professional expertise, the long-term benefits of customized climate control and reduced energy costs make zoning an excellent choice for many homeowners.

The complexity of zoning system installation makes professional service essential for optimal performance. Proper sizing, damper placement, and control panel programming require specialized knowledge and experience that only qualified technicians possess.

Ready to eliminate hot and cold spots in your Minneapolis home? Contact Thelen Plumbing, Heating, and Air today for a free consultation. Our expert technicians will assess your home’s layout and help you design the perfect zoning solution for your family’s comfort needs. Don’t spend another season fighting with your thermostat—let us create the comfortable, efficient home environment you deserve.

How to Save Money on Heating Bills: 12 Best Tips for Homeowners

Rising energy costs have homeowners across Minneapolis and the Twin Cities searching for practical ways to reduce their heating expenses. With winter months accounting for the largest portion of annual energy bills, learning how to save money on heating bill has become essential for budget-conscious families.

Here’s what we’ll cover:

  • Understanding your heating system and energy usage
  • Essential tips to save money on your heating bill
  • Insulation and weatherproofing strategies
  • Smart technology and energy management

🧠 Understanding Your Heating System and Energy Usage

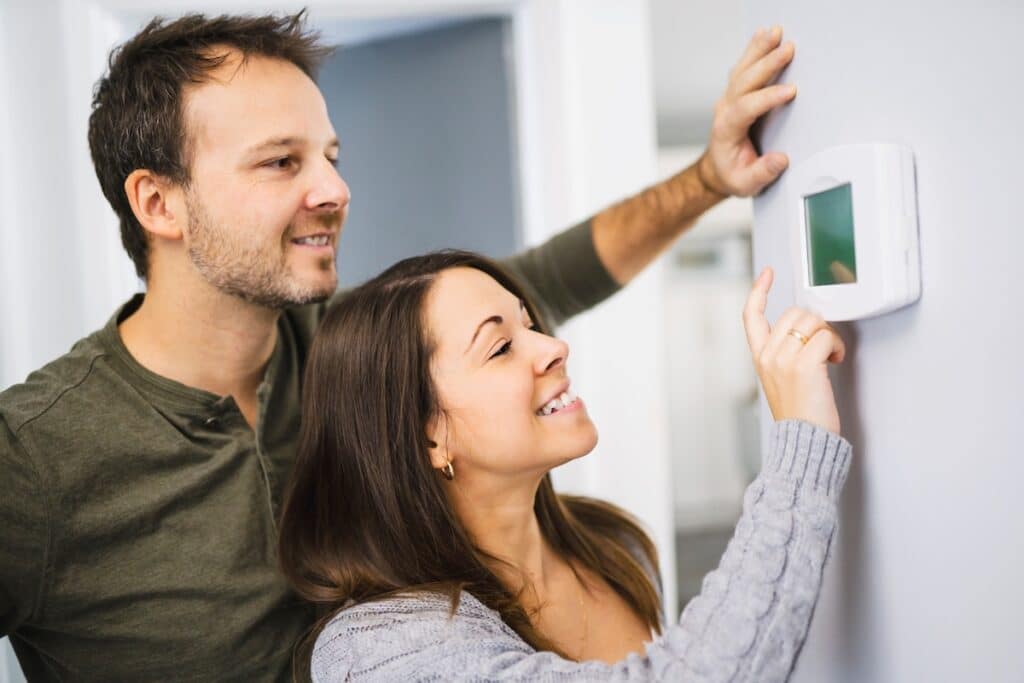
A couple set the thermostat at home

Before implementing money-saving strategies, it’s important to understand how your heating system operates and where energy waste commonly occurs. Most homes use a furnace, boiler, or heat pump, each with unique characteristics influencing energy efficiency and costs.

Furnaces heat air and distribute it through ductwork, boilers heat water for radiators or radiant floors, and heat pumps extract warmth from outside air, even in cold temperatures, making them popular in moderate climates. Energy waste often stems from air leaks, poor insulation, inefficient equipment, and lack of maintenance. With heating and cooling accounting for about 50% of a typical home’s energy use, according to the Department of Energy, targeting your heating system can significantly reduce overall energy costs.

Quick Fixes to Reduce Heating Costs Immediately

  • Adjust Your Thermostat: Lower your thermostat by 7-10 degrees when away or during sleeping hours to save up to 10% on annual heating costs. Invest in a programmable or smart thermostat for automated temperature adjustments based on your schedule and weather conditions.
  • Seal Air Leaks: Use weatherstripping, caulk, or foam to seal drafts around windows, doors, and other openings. Test for leaks by holding a lit candle near potential spots—if the flame flickers, it’s time to seal.
  • Maximize Natural Heat: Open curtains on south-facing windows during sunny days to let in free solar heat and close them at night for insulation. Use ceiling fans on a low clockwise setting to circulate warm air effectively.
🔎 12 Essential Tips to Save Money on Your Heating Bill

how to save money on heating bill

Heating bills can be one of the biggest household expenses, especially during colder months. Learning how to save on heating costs helps you manage your budget while staying warm and comfortable.

1. Lower Your Thermostat by 2-3 Degrees

Even small temperature adjustments can create substantial savings. Most people can comfortably adapt to slightly lower temperatures, especially when wearing appropriate clothing indoors.

2. Use a Programmable Thermostat

Automate temperature adjustments to match your daily schedule. Program lower temperatures during sleep and away periods to maximize savings without sacrificing comfort.

3. Seal Windows and Doors

Apply weatherstripping or caulk around windows and doors to prevent heat loss. Consider adding storm windows or using plastic film covers for additional insulation during winter months.

4. Insulate Your Home Properly

Adequate insulation in attics, basements, and crawl spaces prevents heat loss and reduces energy consumption. Focus on areas with the highest heat loss potential for maximum impact.

5. Maintain Your Heating System

Schedule annual professional maintenance and change filters regularly. Clean, well-maintained systems operate more efficiently and last longer than neglected equipment.

6. Use Ceiling Fans Strategically

Circulate warm air more effectively by running ceiling fans clockwise at low speed. This simple adjustment can make rooms feel warmer without increasing thermostat settings.

7. Close Vents in Unused Rooms

Redirect heated air to frequently used spaces by closing vents in unused rooms. However, don’t close too many vents, as this can create pressure imbalances in your HVAC system.

8. Dress Warmly Indoors

Wear layers and warm clothing to stay comfortable at lower temperatures. This simple habit allows you to reduce thermostat settings while maintaining personal comfort.

9. Use Draft Stoppers

Place draft stoppers at the bottom of doors leading to unheated areas like basements, garages, or unused rooms. This prevents cold air infiltration and heat loss.

10. Maximize Solar Heat Gain

Open curtains and blinds on south-facing windows during sunny days to take advantage of free solar heating. Close them at night to provide additional insulation.

11. Consider Zone Heating

Use space heaters in frequently occupied rooms while lowering the whole-house thermostat. This targeted approach can reduce overall heating costs in homes with good insulation.

12. Upgrade to Energy-Efficient Equipment

Invest in high-efficiency heating systems, programmable thermostats, and ENERGY STAR-rated appliances. While initial costs are higher, long-term savings often justify the investment.

🏠 Insulation and Weatherproofing Strategies

Proper insulation and weatherproofing create a thermal barrier that keeps heated air inside your home and cold air outside. These improvements provide year-round benefits, reducing both heating and cooling costs.

Attic Insulation

Heat rises, making attic insulation crucial for energy efficiency. Most homes benefit from 12-15 inches of insulation in the attic floor. Adding insulation is often a cost-effective DIY project that provides immediate energy savings.

Consider the R-value (thermal resistance) appropriate for your climate zone. Minneapolis and the Twin Cities region require higher R-values due to cold winter temperatures. Proper attic insulation can reduce heating costs by 10-20%.

Basement and Crawl Space Insulation

Insulating basement walls and crawl spaces prevents heat loss through foundation areas. Uninsulated basements can account for 10-15% of total heat loss in cold climates. Focus on areas where conditioned and unconditioned spaces meet.

Seal air leaks around rim joists, foundation penetrations, and utility connections. These areas are common sources of cold air infiltration that can significantly impact heating costs.

Window and Door Improvements

Windows and doors are major sources of heat loss in most homes. Double-pane windows with low-E coatings can reduce heat loss by 25-50% compared to single-pane windows. If replacement isn’t feasible, consider storm windows or window films for improvement.

Upgrade to insulated exterior doors or add storm doors for additional protection. Ensure proper weatherstripping around all doors and windows, replacing worn or damaged materials promptly.

💡 Smart Technology and Energy Management

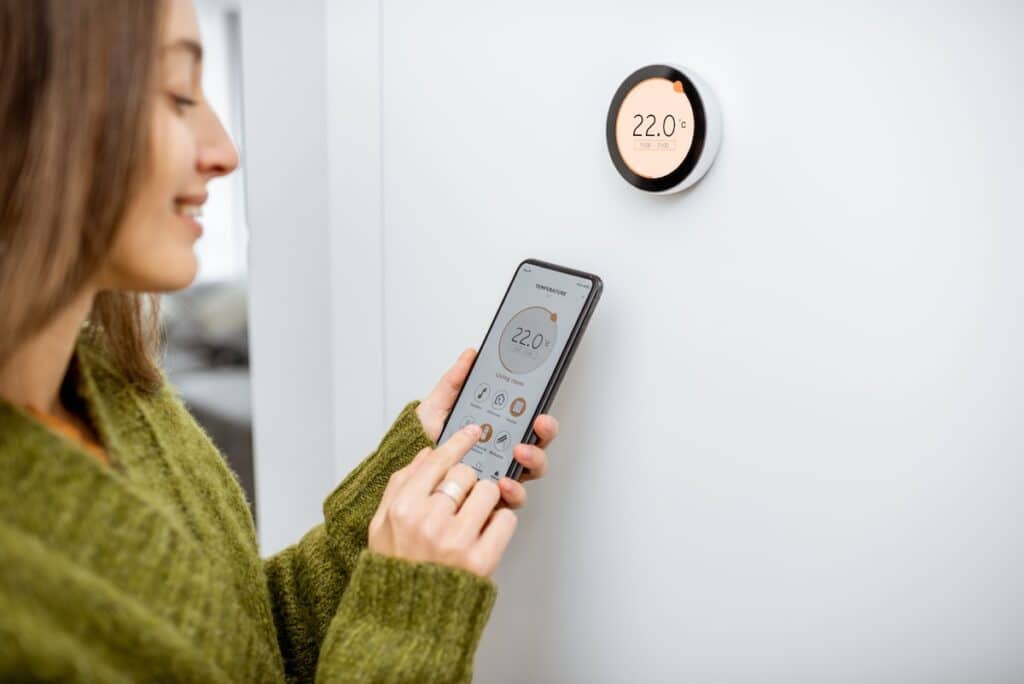
Woman dressed in green sweater regulating heating temperature with a modern wireless thermostat and smart phone at home. Synchronization of thermostat with mobile devices concept

Modern technology offers sophisticated tools for monitoring and managing energy consumption, helping homeowners optimize heating costs through data-driven decisions.

Smart Thermostats

Smart thermostats learn your schedule and preferences, automatically adjusting temperatures for maximum efficiency. Many models can be controlled remotely through smartphone apps, allowing you to adjust settings from anywhere.

Advanced features include weather-based adjustments, energy usage reports, and integration with other smart home devices. Some utility companies offer rebates for smart thermostat installations, reducing the initial investment cost.

Energy Monitoring Systems

Whole-home energy monitors provide real-time data about energy consumption, helping you identify usage patterns and opportunities for savings. These systems can pinpoint energy waste and track the effectiveness of efficiency improvements.

Smart plugs and individual device monitors allow you to identify which appliances and electronics contribute most to your energy bills. This information helps prioritize energy-saving efforts for maximum impact.

Home Automation Integration

Integrate heating controls with other smart home systems for comprehensive energy management. Automated systems can coordinate heating, lighting, and other energy-consuming devices to optimize overall efficiency.

Consider sensors that detect occupancy and adjust heating accordingly. These systems ensure energy isn’t wasted heating empty rooms while maintaining comfort in occupied spaces.

👨‍🔧 Partner with Thelen Plumbing, Heating, and Air for Maximum Savings

Saving money on your heating bill starts with the right strategies and dependable support. At Thelen Plumbing, Heating, and Air, we’re committed to helping homeowners in Minneapolis and the Twin Cities maximize energy efficiency without sacrificing comfort. With years of expertise, transparent pricing, and a reputation for quality craftsmanship, our team is the one you can trust for all your HVAC needs.

Whether it’s routine maintenance, repairs, or system upgrades, we provide personalized solutions to keep your home warm and your energy costs low. Ready to take control of your heating expenses? Contact us today to schedule your free consultation and let us help you stay comfortable while saving money this winter.

8 Signs to Invest in Hydro Jetting ASAP (Benefits, Process, & More)

When your drains start acting up, it’s tempting to reach for a bottle of chemical drain cleaner or call for a quick snake job. But what if there’s a more thorough solution that could save you money and headaches down the road? Hydro jetting might be exactly what your plumbing system needs.

Whether you’re dealing with stubborn clogs, recurring drain issues, or want to prevent future plumbing problems, this article will help you make an informed decision about hydro jetting services. Here’s what we’ll cover:

  • What is hydro jetting?
  • 8 signs you need hydro jetting ASAP
  • When to choose hydro jetting over traditional methods
  • Cost considerations and ROI

🤔 What is Hydro Jetting?

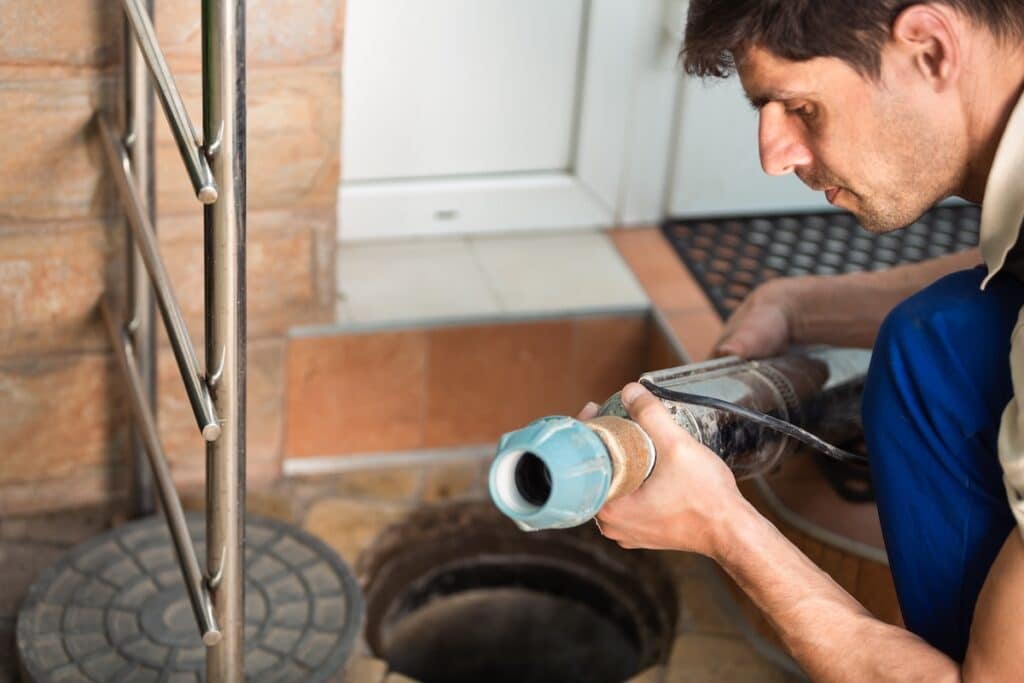
Worker performs the installation of pumping equipment. Sewer cleaning

Hydro jetting is a professional drain cleaning method that uses high-pressure water streams to clear blockages and clean pipe walls. Unlike traditional drain cleaning methods that simply poke holes through clogs, hydro jetting completely removes debris, grease buildup, and mineral deposits from your pipes.

The process involves inserting a specialized hose with a multi-directional nozzle into your drain or sewer line. This equipment delivers water at pressures typically ranging from 1,500 to 4,000 PSI, effectively scouring the interior walls of your pipes and flushing away years of accumulated buildup.

Professional plumbers use hydro jetting for both residential and commercial properties. The method works on various pipe materials including PVC, cast iron, and clay, making it a versatile solution for most plumbing systems.

Key Benefits of Hydro Jetting

Hydro jetting offers several advantages over traditional drain cleaning methods that make it worth the investment for many homeowners.

  • Complete Pipe Cleaning: Hydro jetting clears all debris, including grease, soap scum, hair, food particles, and mineral deposits, restoring pipes to near-original condition.
  • Long-Lasting Results: Unlike traditional methods, hydro jetting removes all buildup, keeping drains clear for years.
  • Eco-Friendly: It uses only water, avoiding harsh chemicals and protecting both your plumbing and the environment.
  • Prevents Future Problems: Regular hydro jetting prevents major blockages and pipe damage, ensuring long-term plumbing health.
  • Cost-Effective: While the initial cost is higher, it saves money by reducing service calls and preventing costly repairs.

⚠️ 8 Signs You Need Hydro Jetting ASAP

service worker cleaning blocked sewer line with hydro jetting

Recognizing when your plumbing system needs professional hydro jetting can save you from more serious and expensive problems down the road. Here are the key warning signs that indicate it’s time to invest in this service:

1. Recurring Drain Clogs

If you find yourself dealing with the same slow or clogged drains repeatedly, despite using drain cleaners or having basic drain cleaning performed, buildup in your pipes is likely the culprit. Hydro jetting addresses the root cause rather than just treating symptoms.

2. Multiple Drains Backing Up Simultaneously

When several drains in your home back up at the same time, it usually indicates a problem in your main sewer line. This serious issue requires immediate professional attention, and hydro jetting is often the most effective solution for clearing major line blockages.

3. Sewage Odors Coming from Drains

Persistent bad smells emanating from your drains suggest that organic matter is decomposing in your pipes. These odors often indicate significant buildup that won’t be resolved with surface-level cleaning methods.

4. Water Backing Up in Unexpected Places

If water appears in floor drains, utility sinks, or other unexpected locations when you run water elsewhere in your home, your main drainage system is likely compromised. This cross-contamination is a health hazard that requires immediate professional intervention.

5. Gurgling Sounds from Drains and Toilets

Strange noises coming from your plumbing fixtures often indicate air pockets caused by partial blockages. These sounds are your plumbing system’s way of telling you that water isn’t flowing properly through your pipes.

6. Slow-Draining Fixtures Throughout Your Home

While one slow drain might indicate a localized problem, multiple slow-draining fixtures suggest system-wide issues. This pattern typically means your main lines need professional cleaning to restore proper flow.

7. Frequent Toilet Backups

Toilets that back up regularly, especially when other water fixtures are in use, often indicate problems in your home’s main drainage system. Standard plunging and snaking may provide temporary relief, but professional hydro jetting addresses the underlying cause.

8. High Water Bills Without Explanation

If your water bills have increased significantly without changes in your usage patterns, hidden leaks or inefficient drainage caused by pipe buildup could be the cause. Professional inspection and hydro jetting can identify and resolve these issues.

👉 When to Choose Hydro Jetting Over Traditional Methods

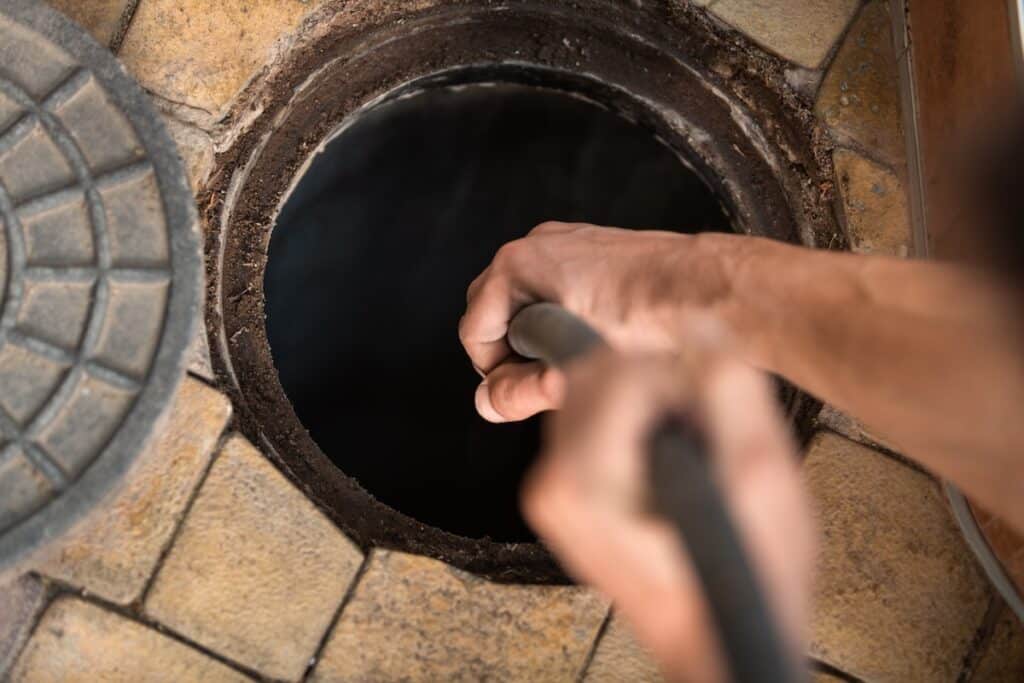
Worker performs the installation of pumping equipment. Sewer cleaning

While hydro jetting is highly effective, it’s not always the right solution for every drain problem. Understanding when to choose this method over traditional approaches helps you make the best decision for your specific situation.

Pipe Condition Considerations

Hydro jetting works best on pipes that are in good structural condition. If your home has very old pipes, especially those made of clay or deteriorated cast iron, the high-pressure water could potentially cause damage. Professional assessment is crucial before proceeding.

Severity of Blockages

For minor, isolated clogs, traditional snaking might be sufficient and more cost-effective. However, when dealing with stubborn blockages, extensive buildup, or recurring problems, hydro jetting provides superior results.

Long-Term vs. Short-Term Solutions

If you’re looking for a quick fix to a simple clog, traditional methods might meet your immediate needs. But if you want a comprehensive solution that prevents future problems and maintains your plumbing system’s health, hydro jetting is the better investment.

Commercial vs. Residential Applications

Commercial properties, restaurants, and homes with large families often benefit more from hydro jetting due to higher usage and greater potential for buildup. The investment pays off more quickly in these high-demand situations.

💵 Cost Considerations and ROI

Understanding the financial aspects of hydro jetting helps you evaluate whether this service makes sense for your situation and budget.

Initial Investment vs. Long-Term Savings

While hydro jetting typically costs more than basic drain cleaning, it often provides better value over time. The thorough cleaning reduces the need for frequent service calls and helps prevent costly emergency repairs.

Factors Affecting Cost

Several factors influence hydro jetting costs, including the severity of blockages, accessibility of your plumbing system, length of pipes requiring cleaning, and regional pricing variations. Professional plumbers provide detailed estimates based on your specific situation.

Preventive Maintenance Benefits

Regular hydro jetting as part of a maintenance program can significantly reduce long-term plumbing costs. By preventing major blockages and pipe damage, you avoid emergency service calls and expensive repairs.

👨‍🔧 Trust Thelen Mechanical for Your Hydro Jetting Needs

At Thelen Plumbing, Heating, and Air, we take pride in being the trusted experts for all your plumbing needs, including hydro jetting. Our skilled technicians, advanced equipment, and commitment to honest, transparent service set us apart. We don’t just fix problems—we provide lasting solutions tailored to your home and budget.

When you choose us, you’re choosing reliable service backed by years of experience and a dedication to customer satisfaction. Don’t let stubborn clogs or recurring drain issues disrupt your life. Contact Thelen Plumbing, Heating, and Air today to schedule your hydro jetting service and experience the difference a professional team can make!

Commercial HVAC Installation: Full Process Explained In 8 Steps

Installing a commercial HVAC system is a complex undertaking that requires careful planning, skilled technicians, and attention to detail. Whether you’re building a new facility or replacing an outdated system, understanding the commercial HVAC installation process helps you make informed decisions and ensures your project runs smoothly.

This comprehensive guide walks you through every aspect of commercial HVAC installation, from initial planning to final testing. You’ll learn about the essential steps involved, common challenges to expect, and how to work with qualified professionals to achieve optimal results. We’ll also cover key considerations like system sizing, equipment selection, and regulatory compliance to help you navigate this important investment with confidence.

Here’s what we’ll explore in this article:

  • Planning and Assessment – Understanding your building’s unique requirements
  • Installation Process – The detailed 8-step installation procedure
  • Testing and Commissioning – Ensuring everything works perfectly
  • Maintenance Planning – Setting up your system for long-term success

🔎 Planning and Assessment

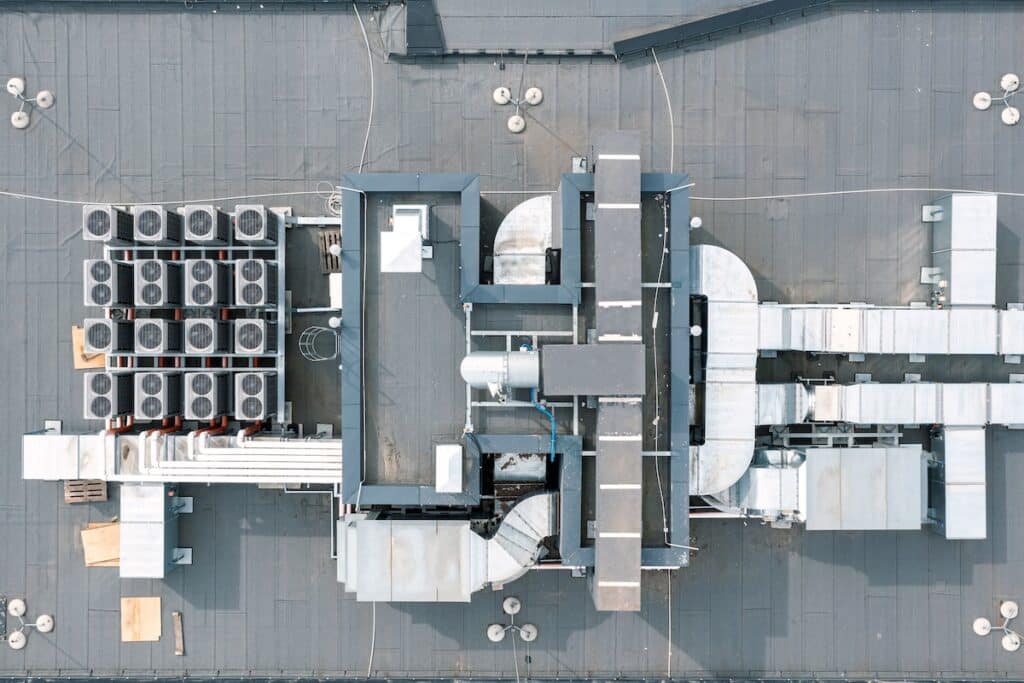
Efficient ventilation system on the roof of the house, air conditioner fans, ventilation system on the roof of residential buildings, aerial view

Thorough planning is the cornerstone of any successful commercial HVAC installation. This process begins with evaluating your building’s specific needs, existing infrastructure, and operational requirements. A qualified HVAC contractor will assess heating and cooling loads by measuring square footage, analyzing insulation, window placement, and occupancy patterns. They will also examine electrical systems, ductwork, and structural elements to ensure compatibility with modern HVAC equipment, especially in buildings with older infrastructure. Addressing these factors early can prevent unexpected costs and ensure the system is both energy-efficient and properly sized.

Budget and timeline planning are also critical components of the process. Commercial HVAC systems are significant investments, with costs varying based on building size, system complexity, and equipment quality. Open discussions with contractors can help identify solutions that balance performance and cost-effectiveness. Additionally, clear timeline planning minimizes disruptions to business operations, especially since installations often require coordination with other trades, building occupants, and facility managers. Establishing schedules and communication protocols is essential to keeping the project on track.

System Design and Engineering

  • Customized HVAC Solutions: Professional system design transforms building assessments into tailored HVAC solutions using specialized software to model airflow, calculate load requirements, and optimize equipment placement.
  • Load Calculations: Engineers determine heating and cooling capacities based on factors like climate, building orientation, internal heat sources, and occupancy levels. Accurate calculations prevent oversized or undersized systems, improving efficiency and comfort.
  • Ductwork Design: Proper duct system design ensures efficient air distribution, minimizing pressure losses and noise while maximizing system performance and reducing energy consumption.
  • Equipment Selection: Engineers choose components like heating and cooling units, air handlers, controls, and accessories based on energy efficiency, maintenance needs, and system compatibility.
  • Zone Planning: Buildings are divided into zones with similar heating and cooling requirements. This approach improves comfort and energy efficiency by allowing independent control of different areas, especially in spaces with varied occupancy or uses..

✅ 8 Step Commercial HVAC Installation Process

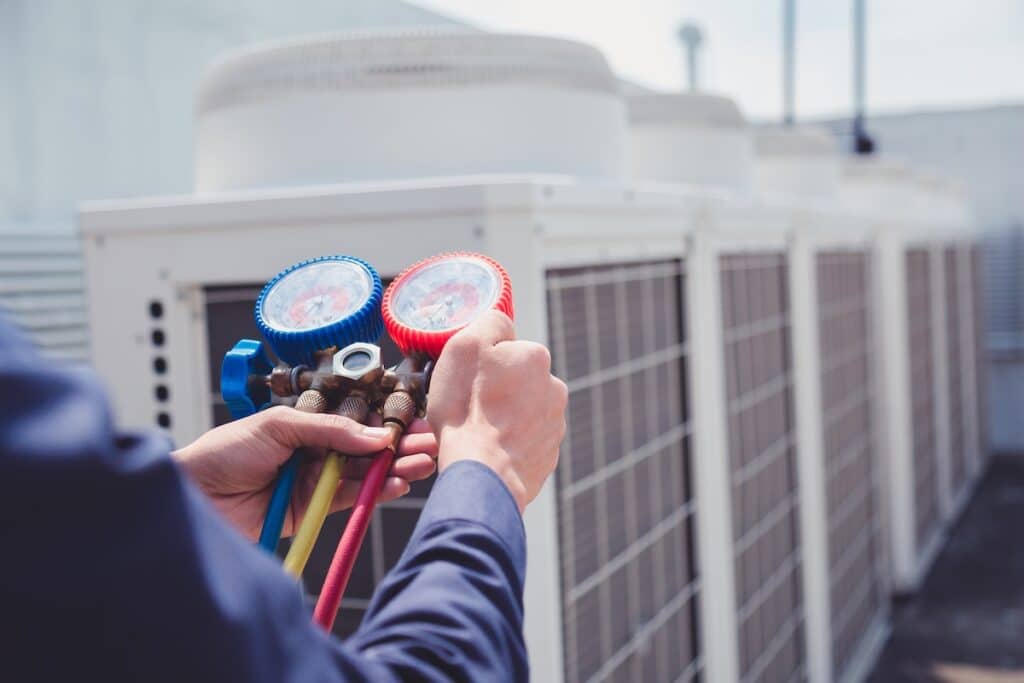
Technician is checking air conditioner ,measuring equipment for filling air conditioners.

The actual installation of a commercial HVAC system follows a systematic approach that ensures proper operation and compliance with all requirements. Here’s the detailed process professional contractors use:

Step 1: Site Preparation and Safety Setup

Installation begins with preparing the work area and establishing safety protocols. Contractors set up protective barriers, ensure proper ventilation, and establish clear access routes for equipment delivery. All team members receive safety briefings and review project-specific hazards.

Step 2: Structural Modifications and Mounting

Any required structural modifications are completed before equipment installation. This may include reinforcing roof structures for rooftop units, creating equipment pads, or modifying walls for unit placement. Proper mounting ensures equipment stability and reduces vibration transmission.

Step 3: Electrical Infrastructure Installation

Electrical work includes installing power supplies, control wiring, and safety disconnects. Licensed electricians ensure all electrical connections meet code requirements and provide proper equipment protection. This step often requires coordination with local utility companies.

Step 4: Ductwork Installation and Sealing

Ductwork installation follows engineered designs to ensure proper airflow distribution. Contractors fabricate and install supply and return ducts, ensuring proper sealing to prevent air leaks. Quality ductwork installation directly impacts system efficiency and performance.

Step 5: Equipment Placement and Connection

HVAC equipment is carefully positioned and secured according to manufacturer specifications. This includes installing outdoor units, indoor air handlers, and associated components. Proper equipment placement ensures optimal performance and simplifies future maintenance.

Step 6: Refrigerant Lines and Gas Connections

Refrigerant lines are installed and pressure tested to ensure leak-free operation. Gas connections for heating equipment require certified technicians and pressure testing for safety. These connections must meet strict safety standards and local codes.

Step 7: Control System Integration

Building automation systems and controls are installed and programmed according to project specifications. This includes installing sensors, thermostats, and communication networks that allow centralized system management. Proper control integration optimizes energy efficiency and comfort.

Step 8: System Startup and Initial Testing

The final installation step involves starting up all equipment and conducting initial performance tests. Contractors verify proper operation, check safety systems, and ensure all components function as designed. This step identifies any issues before the commissioning phase.

🔎 Testing and Commissioning

Comprehensive testing and commissioning ensure your commercial HVAC system operates safely, efficiently, and according to design specifications. This critical phase validates that all components work together properly and meet performance expectations.

Functional Testing

Functional testing verifies that all system components operate correctly. This includes testing heating and cooling equipment, fans, pumps, and control systems under various operating conditions. Contractors document all test results and address any performance issues discovered.

Airflow Testing

Airflow testing ensures proper air distribution throughout the building. Technicians measure airflow rates at supply and return vents, verify proper ventilation levels, and check for adequate air circulation. Proper airflow is essential for comfort and indoor air quality.

Control System Testing

Control system testing validates that building automation systems respond correctly to various inputs. This includes testing temperature sensors, scheduling functions, and emergency shutdown procedures. Proper control operation ensures efficient system operation and occupant comfort.

Performance Verification

Performance verification compares actual system performance to design specifications. This includes measuring capacity, efficiency, and energy consumption under various operating conditions. Performance testing ensures your system meets contractual requirements and operates efficiently.

Documentation Completion

Documentation completion provides you with essential system information. This includes equipment manuals, warranty information, maintenance schedules, and as-built drawings. Proper documentation supports effective system operation and maintenance throughout the equipment lifecycle.

🛠️ Maintenance Planning

commercial hvac installation

Establishing a comprehensive maintenance plan immediately after installation protects your investment and ensures long-term system reliability. Proper maintenance prevents costly breakdowns, extends equipment life, and maintains energy efficiency.

Establish Preventive Maintenance Schedules

Preventive maintenance schedules should be based on manufacturer recommendations and system usage patterns. Regular tasks include filter changes, coil cleaning, belt inspections, and lubricating moving parts. Consistent maintenance prevents small issues from becoming major problems.

Service Agreements with Contractors

Service agreements with qualified contractors provide ongoing support and priority service. These agreements often include regular maintenance visits, emergency repairs, and preferential scheduling. Professional maintenance ensures your system gets expert care throughout its lifecycle.

Training for Facility Staff

Training facility staff helps maintain optimal operation between professional service visits. Basic training should cover filter changes, thermostat use, and recognizing potential issues. Well-trained staff can handle minor problems and support professional maintenance efforts.

Record Keeping and System Monitoring

Record keeping tracks system performance and maintenance history. Detailed records help identify trends, process warranty claims, and guide maintenance decisions. Modern building automation systems can log performance data automatically and alert staff to potential issues.

👉 Why Choose Thelen Mechanical for Your Commercial HVAC Installation

When it comes to commercial HVAC installation, you need a team you can trust to deliver quality, efficiency, and reliability. At Thelen Mechanical, we combine years of expertise, licensed technicians, and a commitment to minimizing business disruptions to ensure your system is installed and maintained to the highest standards. From tailored planning to 24/7 emergency support, we go above and beyond to protect your investment and keep your operations running smoothly.

Ready to partner with a team dedicated to your business’s comfort and success? Contact Thelen Mechanical today to schedule your free consultation. Let us help you create the ideal environment for your business to thrive.

How Long Do AC Units Last? (AC Types & Lifespan Guide)

When your air conditioning system starts making unusual noises or struggling to cool your home, you might wonder if it’s time for a replacement. Understanding how long do AC units last can help you plan for future expenses and recognize when repairs might be more costly than replacement.

Air conditioning systems typically last between 10-20 years, depending on the type of unit, maintenance habits, and environmental factors. However, this lifespan can vary significantly based on several key factors that we’ll explore in this comprehensive guide.

In this article, we’ll cover:

  • Different types of AC units and their expected lifespans
  • Key factors that affect how long your system will last
  • Signs that indicate it’s time for replacement
  • Tips to extend your AC unit’s life

🔎 Different Types of AC Units and Their Lifespans

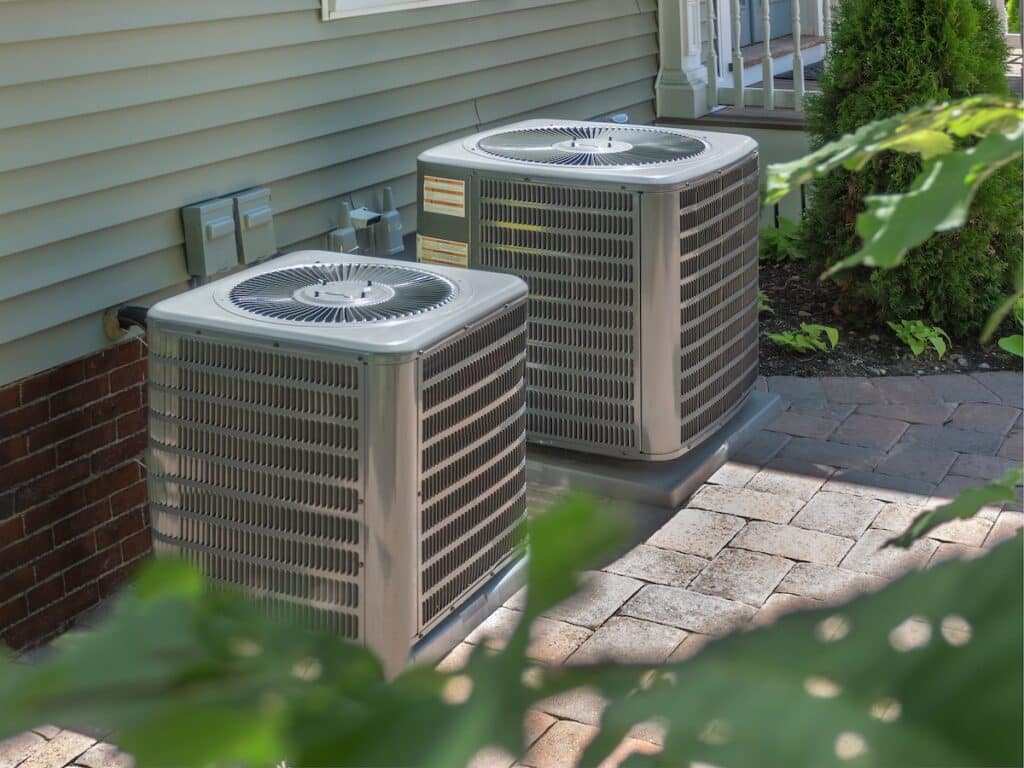
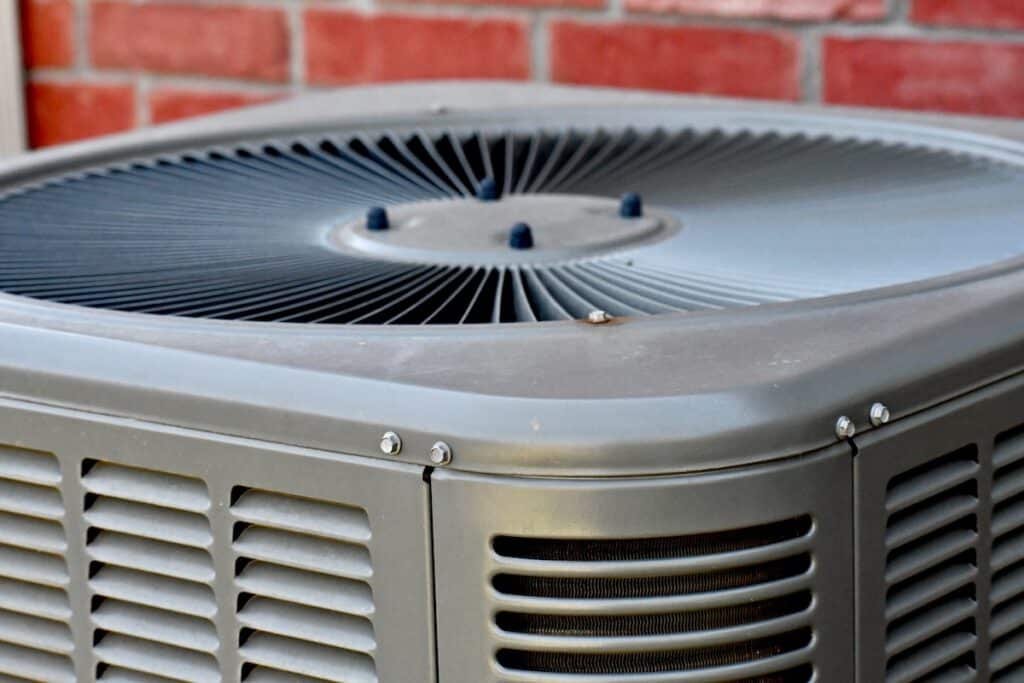
Residential building air conditioning units

Not all air conditioning systems are created equal. The type of unit you have plays a major role in determining how long it will serve your home.

Central Air Conditioning Systems

Central air conditioning systems are the most common type found in homes across the Twin Cities. These systems typically cool entire homes and are built to handle this demanding workload. The outdoor condenser unit usually needs replacement first, while the indoor air handler may last longer. However, after about 15 years, many homeowners notice more frequent repairs and reduced energy efficiency.

  • Lifespan: 15-20 years with proper maintenance

Window Air Conditioners

Window units are more affordable upfront but have a shorter lifespan than central systems. Their compact design makes them more susceptible to mechanical failures, and constant exposure to weather elements can accelerate wear and tear. Despite this, lower replacement costs make them a practical choice for cooling individual rooms.

  • Lifespan: 8-12 years

Ductless Mini-Split Systems

Ductless mini-split systems are highly efficient and have fewer mechanical components, which contributes to their extended longevity. The outdoor unit often outlasts the indoor units, and many homeowners appreciate that individual indoor units can be replaced without affecting the entire system.

  • Lifespan: 15-20 years or more

Portable Air Conditioners

Portable AC units offer flexibility but have the shortest lifespan among all types. Frequent movement and setup can cause wear on components, and they work harder to cool spaces due to lack of permanent installation and proper insulation. They’re best for short-term or occasional use rather than continuous operation.

  • Lifespan: 5-10 years

👉 7 Factors That Affect AC Unit Lifespan

HVAC heating and air conditioning residential units or heat pumps

Several key factors determine how long your air conditioning system will last. Understanding these can help you maximize your unit’s life and performance.

1. Quality of Installation

Professional installation significantly impacts your AC unit’s lifespan. Improperly installed systems work harder to maintain comfortable temperatures, leading to premature wear. Incorrect refrigerant levels, poor ductwork connections, and inadequate electrical work can all shorten your system’s life.

A qualified HVAC technician ensures your system is sized correctly for your home and installed according to manufacturer specifications. This proper installation can add years to your unit’s life.

2. Regular Maintenance Schedule

Consistent maintenance is the most important factor in extending your AC unit’s lifespan. Systems that receive annual tune-ups typically last 3-5 years longer than neglected units.

Regular maintenance includes cleaning coils, checking refrigerant levels, inspecting electrical connections, and replacing filters. These preventive measures help your system run efficiently and catch potential problems before they become major repairs.

3. Filter Replacement Frequency

Air filters protect your AC system from dust, debris, and other contaminants. Clogged filters force your system to work harder, reducing efficiency and shortening its lifespan.

Most filters should be replaced every 1-3 months, depending on your home’s air quality and filter type. Homes with pets or family members with allergies may need more frequent filter changes.

4. Climate and Environmental Conditions

Minneapolis’s extreme temperature variations put extra stress on AC systems. Units that run continuously during hot summers or face harsh winter conditions may have shorter lifespans.

Environmental factors like salt air, industrial pollution, and excessive dust can also accelerate wear. Homes near construction sites or busy roads may need more frequent maintenance to combat these challenges.

5. Usage Patterns

How you use your AC system affects its longevity. Systems that run constantly at very low temperatures work harder and may fail sooner. Setting your thermostat to reasonable temperatures and using programmable settings can extend your unit’s life.

Frequently adjusting temperatures throughout the day causes more wear than maintaining consistent settings. Consider using ceiling fans to improve comfort while allowing higher thermostat settings.

6. Quality of the Unit

Higher-quality AC units with better components typically last longer than budget models. While premium units cost more upfront, they often provide better reliability and longer service life.

Look for units with good warranties, energy-efficient ratings, and positive reviews from other homeowners. Investing in quality can save money over time through fewer repairs and longer lifespan.

7. Ductwork Condition

The condition of your home’s ductwork significantly impacts your AC system’s performance and lifespan. Leaky or poorly insulated ducts force your system to work harder to maintain comfortable temperatures.

Damaged ductwork can reduce efficiency by 20-30%, causing your AC unit to cycle more frequently and wear out faster. Regular duct inspections and sealing can help extend your system’s life.

⚠️ Signs Your AC Unit Needs Replacement

HVAC heating and air conditioning units how long do ac units last

Recognizing when your AC unit is nearing the end of its life can help you plan for replacement before a complete breakdown occurs.

Frequent Repairs

If you’re calling for AC repairs multiple times per year, it may be more cost-effective to replace your system. The general rule is that if repair costs exceed 50% of a new unit’s cost, replacement is the better choice.

Keep track of repair expenses over the past few years. Systems requiring frequent repairs often have underlying issues that will continue to cause problems.

Rising Energy Bills

Older AC units lose efficiency over time, leading to higher energy bills. If your cooling costs have increased significantly without changes in usage patterns, your system may be working harder due to age and wear.

Compare your energy bills from the same months in previous years. A sudden spike in costs often indicates your AC system is struggling to maintain performance.

Inconsistent Cooling

If some rooms in your home are too hot while others are too cold, your AC system may be failing. This inconsistency often indicates problems with the blower motor, ductwork, or refrigerant levels.

Poor airflow or weak air coming from vents can also signal that your system is nearing replacement time. These issues often worsen over time and become more expensive to repair.

Strange Noises or Odors

Unusual sounds like grinding, squealing, or banging indicate mechanical problems that may require expensive repairs. Similarly, strange odors from your AC system can signal electrical issues or mold growth.

While some noises can be repaired, persistent or loud sounds often indicate major component failures that make replacement more economical.

💡 Tips to Extend Your AC Unit’s Life

Taking proactive steps can significantly extend your air conditioning system’s lifespan and improve its performance.

Schedule Annual Professional Maintenance

Professional tune-ups are essential for maximizing your AC unit’s life. HVAC technicians can identify potential problems, clean critical components, and ensure your system operates efficiently.

Annual maintenance typically includes refrigerant level checks, electrical connection inspections, and thorough cleaning of coils and components. This preventive care can prevent major breakdowns and extend your system’s life.

Change Filters Regularly

Replacing air filters is the simplest way to protect your AC system. Clean filters improve airflow, reduce strain on your system, and maintain better indoor air quality.

Set reminders to check filters monthly and replace them as needed. During peak cooling season, you may need to replace filters more frequently due to increased usage.

Keep the Outdoor Unit Clean

Your outdoor condenser unit needs adequate airflow to function properly. Remove debris, leaves, and vegetation from around the unit regularly. Maintain at least two feet of clearance on all sides.

Gently clean the outdoor coils with a garden hose to remove dirt and debris. Avoid using high-pressure water, which can damage the delicate fins.

Use Programmable Thermostats

Programmable thermostats reduce wear on your AC system by maintaining consistent temperatures and avoiding unnecessary cycling. Set temperatures higher when you’re away from home to reduce system runtime.

Smart thermostats can learn your schedule and adjust temperatures automatically, optimizing comfort while minimizing system wear.

Address Repairs Promptly

Small problems can become major issues if left unaddressed. Strange noises, reduced cooling, or unusual odors should be investigated by a professional promptly.

Early intervention can prevent minor repairs from becoming expensive replacements. Regular monitoring of your system’s performance helps catch problems early.

👨‍🔧 Trust Thelen Mechanical for Your AC Needs

At Thelen Plumbing, Heating, and Air, we know how important it is to get the most out of your AC unit’s lifespan while keeping your home comfortable year-round. With our experienced technicians, transparent pricing, and commitment to quality, we’re the team you can trust for all your HVAC needs.

From routine maintenance to repairs and system replacements, we’re here to provide reliable solutions tailored to your home and budget. Ready to keep your AC running at its best? Contact us today to schedule a maintenance appointment or system evaluation and let us help you stay cool and comfortable for years to come.

6 Benefits of a Garage Air Conditioner (+ Installation Tips)

Your garage doesn’t have to be a sweltering workspace or storage area that’s too hot to enter during summer months. A garage air conditioner can transform this space into a comfortable, functional area year-round. Whether you use your garage as a workshop, home gym, or simply need better climate control for stored items, proper cooling makes all the difference.

This comprehensive guide covers everything you need to know about garage air conditioning systems. We’ll explore the key benefits of installing a garage air conditioner, walk through different system types, and provide essential installation tips to help you make the best choice for your space. You’ll also discover maintenance requirements and cost considerations to ensure your investment pays off long-term. Here’s what we’ll cover:

  • Types of garage air conditioning systems
  • 6 reasons to install a garage air conditioner
  • Maintenance and care
  • Cost considerations

👉 Types of Garage Air Conditioning Systems

Outdoor air conditioning unit with brick wall background

Choosing the right garage air conditioner depends on your space size, budget, and specific needs. Each system type offers different advantages and installation requirements.

  • Window Units: Affordable and easy to install, window air conditioners are a budget-friendly choice for cooling smaller garages up to 500 square feet. They’re straightforward to set up and provide basic cooling, but they may struggle to keep up in larger spaces or garages with poor insulation. Regular maintenance, such as cleaning the filter, is essential for optimal performance.
  • Mini-Split Systems: Ductless mini-splits are efficient, quiet, and offer precise temperature control, making them ideal for maintaining a consistent climate in your garage. These systems can both heat and cool, providing year-round comfort. While they’re more expensive upfront, their energy efficiency and superior performance make them a worthwhile investment for homeowners seeking long-term solutions.
  • Portable Air Conditioners: Portable units are flexible, mobile, and easy to set up, requiring only an exhaust hose to vent warm air outside. They’re a great option for smaller garages or temporary cooling needs. While convenient, portable air conditioners are generally less efficient and may struggle to cool larger spaces effectively.
  • Central Air Extension: Extending your home’s central air system to the garage provides seamless cooling and eliminates the need for a separate unit. However, this option often requires professional installation, ductwork modifications, and a higher upfront cost. It’s best suited for those planning to fully integrate their garage into the home’s climate control system.

❗️ 6 Reasons to Install a Garage Air Conditioner

Air conditioning and heating unit for a residential house hidden by holly

Installing a garage air conditioner offers numerous advantages that extend far beyond basic comfort. These systems can completely transform how you use your garage space while protecting your belongings and improving your home’s overall functionality.

1. Enhanced Comfort for Work and Recreation

A climate-controlled garage becomes a truly usable space. You can work on projects, exercise, or pursue hobbies without dealing with extreme temperatures. This is especially valuable if you spend significant time in your garage during summer months.

2. Protection for Stored Items

Heat and humidity can damage stored belongings, from holiday decorations to important documents. A garage air conditioner helps maintain stable temperatures and humidity levels, protecting your valuables from heat-related deterioration.

3. Improved Air Quality

Proper ventilation and cooling help reduce dust, fumes, and stagnant air in your garage. This creates a healthier environment, particularly important if you work with chemicals, paints, or other materials that produce vapors.

4. Increased Home Value

A climate-controlled garage adds functional square footage to your home and can increase property value. Potential buyers often view this as a desirable feature, especially in areas with extreme climates.

5. Better Vehicle Protection

Extreme heat can damage your vehicle’s interior, battery, and other components. A cooler garage helps preserve your car’s condition and extends its lifespan.

6. Extended Usability

With proper cooling, your garage becomes a year-round space rather than one that’s unusable during hot weather. This maximizes your home’s potential and gives you more flexibility in how you use available space.

🛠️ Maintenance and Care

Regular maintenance keeps your garage air conditioner running efficiently and extends its lifespan. Simple maintenance tasks can prevent costly repairs and ensure optimal performance.

Regular Filter Changes

Clean or replace filters monthly during peak usage periods. Dirty filters reduce efficiency and can damage system components. Mark filter change dates on your calendar to maintain consistency.

Coil Cleaning

Both indoor and outdoor coils require regular cleaning to maintain efficiency. Dirt and debris on coils force the system to work harder, increasing energy costs and reducing cooling capacity.

Drainage Maintenance

Keep drainage systems clear of obstructions. Clogged drains can cause water damage and system malfunctions. Check and clean drainage components regularly.

Professional Servicing

Schedule annual professional maintenance to ensure optimal performance. Technicians can identify potential issues before they become major problems and perform maintenance tasks beyond typical homeowner capabilities.

💵 Cost Considerations

Modern residential HVAC air conditioner unit fan.

Understanding the total cost of garage air conditioning helps you make informed decisions and budget appropriately for both initial installation and ongoing operation.

Initial Investment

Window units typically cost $200-$800, while mini-split systems range from $1,500-$5,000 including installation. Central air extensions can cost $2,000-$6,000 depending on complexity and distance from existing systems.

Consider long-term value when evaluating options. Higher-efficiency systems cost more upfront but provide better performance and lower operating costs over time.

Operating Costs

Energy efficiency ratings directly impact operating costs. Look for units with high SEER ratings for cooling efficiency. Proper insulation and sealing also reduce energy consumption significantly.

Calculate estimated annual operating costs based on your local electricity rates and expected usage patterns. This helps determine which system provides the best long-term value.

Maintenance Expenses

Budget for regular maintenance costs including filter replacements, professional servicing, and potential repairs. Well-maintained systems last longer and operate more efficiently, reducing long-term costs.

👨‍🔧 Trust the Experts at Thelen Mechanical

Choosing the right team for your garage air conditioner installation is just as important as choosing the right system. At Thelen Plumbing, Heating, and Air, we bring years of experience, a deep understanding of garage climate control, and a commitment to delivering top-notch service. Our dedication to quality and customer satisfaction has made us a trusted name across Minneapolis, MN, and the Twin Cities Metro Area.

Whether it’s recommending the perfect system or ensuring a seamless installation, we’re here to exceed your expectations. Ready to turn your garage into a comfortable, functional space? Contact us today to schedule your free consultation and let us help you make the most of your garage year-round. depends on your space size, budget, and specific needs. Each system type offers different advantages and installation requirements.

AC Installation Cost: What to Expect from Your Contractor

Installing a new air conditioning system is a significant investment that requires careful planning and budgeting. Understanding the various factors that influence AC installation cost can help you make informed decisions and avoid unexpected expenses. Whether you’re replacing an aging unit or installing AC for the first time, knowing what to expect from your contractor will ensure a smooth process and fair pricing.

This comprehensive guide covers everything you need to know about AC installation costs, from the factors that affect pricing to what’s included in professional installation services. We’ll explore different system types, labor considerations, and additional expenses you might encounter during the installation process. Here’s what we’ll cover:

  • Average AC installation cost breakdown
  • 6 key factors that affect AC installation cost
  • Additional costs to consider
  • Maximizing your AC installation investment

💰 Average AC Installation Cost Breakdown

Young black man repairman checking an outside air conditioner unit close up

The cost of installing a new air conditioning system varies significantly based on several key factors. Most homeowners can expect to pay between $3,000 and $15,000 for a complete AC installation, with the average falling around $5,000 to $8,000 for a standard central air system.

Labor costs typically account for 30-50% of the total installation expense. Professional HVAC technicians charge between $75 and $150 per hour, depending on your location and the complexity of the installation. A standard installation usually takes 6-12 hours, though more complex projects can extend over multiple days.

Equipment costs make up the largest portion of your investment. Basic central air units start around $2,000, while high-efficiency systems with advanced features can exceed $10,000. The size of your home, desired efficiency rating, and brand selection all impact the final equipment price.

Types of AC Systems and Their Installation Costs

  • Central Air Conditioning Systems: Popular for whole-home cooling, central AC installation costs range from $3,500 to $12,000, depending on system size and efficiency. Homes without existing ductwork may need an additional $3,000 to $7,000 for new duct installation. Split systems are typically cheaper, but ductwork impacts overall costs.
  • Ductless Mini-Split Systems: Ideal for homes without ductwork, installation costs range from $2,000 to $5,000 for single-zone systems and $6,000 to $15,000+ for multi-zone setups. These systems require minimal structural changes, making them perfect for additions or older homes, with faster installation and lower labor costs.
  • Window and Portable Units: The most affordable option, with costs between $150 and $800. These units provide single-room cooling and are not suitable for whole-home use. Professional installation ensures proper mounting, electrical connections, and efficient operation.

⭐️ 6 Key Factors That Affect AC Installation Cost

A male air conditioner technician or air conditioning installation. technician is about to repair air conditioning in homes and buildings.

Understanding the key factors that affect AC installation costs helps you budget effectively and avoid unexpected expenses. It also ensures you make informed decisions when choosing the right system for your home or business.

1. System Size and Capacity

Proper sizing is crucial for efficient operation and cost-effective installation. HVAC professionals calculate the required capacity based on your home’s square footage, insulation quality, ceiling height, and local climate conditions. Oversized systems waste energy and money, while undersized units struggle to maintain comfortable temperatures.

2. Energy Efficiency Ratings

Higher efficiency systems cost more upfront but provide long-term savings through reduced energy consumption. SEER (Seasonal Energy Efficiency Ratio) ratings range from 13 to 25, with higher numbers indicating greater efficiency. Energy-efficient systems may qualify for rebates and tax incentives that offset initial costs.

3. Existing Infrastructure

Your home’s current electrical, plumbing, and ductwork systems significantly impact installation costs. Older homes may require electrical panel upgrades, new circuit installation, or extensive ductwork modifications. These improvements ensure safe operation and optimal system performance.

4. Installation Complexity

Straightforward installations in easily accessible locations cost less than complex projects requiring specialized equipment or extensive modifications. Factors such as roof pitch, crawl space accessibility, and structural obstacles can increase labor time and expenses.

5. Geographic Location

Regional differences in labor costs, building codes, and permit requirements affect installation pricing. Urban areas typically have higher labor rates, while rural locations may have limited contractor availability. Local climate conditions also influence system requirements and installation complexity.

6. Seasonal Demand

Installation costs fluctuate based on seasonal demand. Peak cooling season (late spring through early fall) often brings higher prices and longer wait times. Scheduling installation during off-peak periods can result in significant savings and faster service.

💵 Additional Costs to Consider

Beyond the basic installation, several additional expenses may arise during your AC installation project. Being aware of these potential costs helps you budget appropriately and avoid financial surprises.

Ductwork Modifications

Existing ductwork may require cleaning, sealing, or modifications to accommodate your new system. Duct repairs or replacements can add $1,000 to $5,000 to your project cost, depending on the extent of work required.

Electrical Upgrades

New AC systems may require electrical panel upgrades, new circuits, or specialized outlets. These electrical modifications typically cost between $500 and $2,000, depending on your home’s current electrical system.

Permits and Inspections

Building permits for AC installation range from $100 to $500, depending on your location and system type. Professional contractors typically include permit costs in their proposals, but it’s important to verify this information.

Removal and Disposal

Removing and disposing of old equipment adds to installation costs. Most contractors charge $100 to $500 for this service, depending on the size and complexity of the existing system.

🔎 How to Choose the Right AC Installation Contractor

Skilled HVAC technician ensures efficient air conditioning in commercial buildings by installing units, conducting maintenance and safety inspections. ac installation cost

Selecting the right contractor is crucial for ensuring quality installation and long-term system performance. Take time to research potential contractors, verify credentials, and compare proposals before making your decision.

Licensing and Insurance

Verify that contractors hold proper licensing for HVAC work in your area. Additionally, confirm they carry liability insurance and workers’ compensation coverage to protect you from potential accidents or damages during installation.

Experience and Reputation

Choose contractors with extensive experience installing the type of system you’re considering. Check online reviews, ask for references, and verify their standing with the Better Business Bureau to ensure you’re working with reputable professionals.

Detailed Proposals

Quality contractors provide detailed written proposals outlining all aspects of the installation, including equipment specifications, labor costs, materials, permits, and timeline. Avoid contractors who provide vague estimates or pressure you to make immediate decisions.

Warranty and Service Support

Inquire about equipment warranties, installation labor warranties, and ongoing service support. Contractors who stand behind their work provide comprehensive warranty coverage and responsive service when issues arise.

🛠️ Maximizing Your AC Installation Investment

Getting the most value from your AC installation investment requires careful planning and ongoing maintenance. Consider these strategies to optimize your system’s performance and longevity.

Regular Maintenance

Scheduled maintenance keeps your system running efficiently and prevents costly repairs. Annual tune-ups, filter changes, and system inspections ensure optimal performance and extend equipment life.

Energy-Efficient Upgrades

Consider complementary upgrades such as programmable thermostats, improved insulation, and ductwork sealing to maximize your system’s efficiency. These improvements enhance comfort while reducing operating costs.

Professional Service Support

Establish a relationship with a reliable service provider for ongoing maintenance and repairs. Regular professional attention keeps your system operating at peak efficiency and helps identify potential issues before they become major problems.

👉 Trust Thelen Plumbing, Heating, and Air for Your AC Installation

At Thelen Plumbing, Heating, and Air, we understand that AC installation is a major investment, and our goal is to make the process as smooth and stress-free as possible. With our experienced technicians, transparent pricing, and flexible financing options, we’re committed to delivering exceptional service every step of the way. Our 4.9-star rating reflects the trust we’ve earned from homeowners across Minneapolis and the Twin Cities Metro area.

When you choose us, you’re not just getting expert installation—you’re gaining a long-term partner who’s dedicated to your comfort and satisfaction. Ready to get started? Contact us today for a free consultation and see why we’re the team you can trust for all your HVAC needs.

Schedule Service

"*" indicates required fields

This field is for validation purposes and should be left unchanged.