
Author: Kevin

Emergency AC Repair: What to Do When Your AC Breaks Down?

Nothing disrupts a summer day faster than an AC system deciding to call it quits. Whether you’re dealing with skyrocketing temperatures or an unexpected mechanical issue, knowing how to handle an air conditioning breakdown is vital for your comfort and peace of mind.

This guide will walk you through the steps you should take in the event of an air conditioner breakdown and provide tips for staying cool while waiting for an emergency AC repair. Here’s what you’ll learn:

  • Signs your air conditioner might need an immediate repair
  • Steps to take when your AC stops working (including a detailed checklist)
  • Why choosing a reliable HVAC contractor makes all the difference

🔎 How to Know if Your Air Conditioner Needs Emergency Repair

emergency ac repair

Air conditioners don’t always stop working without warning. Often, they leave clues that something isn’t quite right. Spotting these signs early can help prevent a full-on breakdown and potentially save you from costly repairs.

  • Warm air instead of cold: Your AC blowing warm air could mean a refrigerant leak or compressor failure.
  • Weak or no airflow: Blockages, frozen coils, or a failing blower motor may be the cause.
  • Unusual noises: Banging, hissing, or grinding sounds signal loose parts, leaks, or failing components.
  • Strange odors: Burning smells indicate electrical issues, while musty odors suggest mold in ducts.
  • Frequent cycling: Frequent on-and-off cycles can point to thermostat problems or trouble maintaining temperature.

✅ 6 Steps to Take When Your AC Stops Working

Air conditioner check service, leak detection, fill refrigerant, device meter liquid cooling

When your air conditioner unexpectedly stops working, don’t panic. Follow these simple steps to troubleshoot the issue and prepare for a repair technician’s visit.

1. Check Your Thermostat Settings

Start by examining your thermostat to ensure it’s set to the correct mode and temperature. Make sure the thermostat is set to “Cool” mode rather than “Heat” or “Off,” and check that the temperature is set lower than the current room temperature. For example, if your room is 75°F, the thermostat should be set to at least 74°F or lower. A simple mistake like this can sometimes be the reason your AC isn’t turning on. If your thermostat remains unresponsive, the issue may lie in the batteries. Thermostats powered by batteries often stop working properly when the batteries die. Replace the old batteries with fresh ones and recheck the system. If the AC starts functioning after the battery replacement, you’ve solved the issue without further hassle. For smart thermostats, ensure the device is connected to Wi-Fi and functioning correctly.

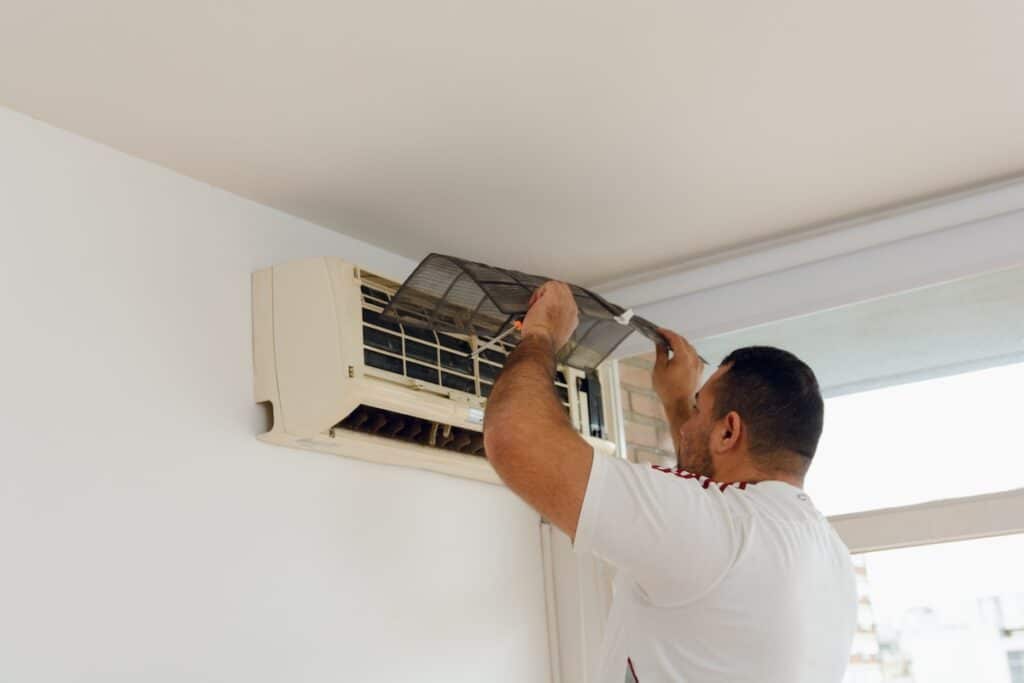
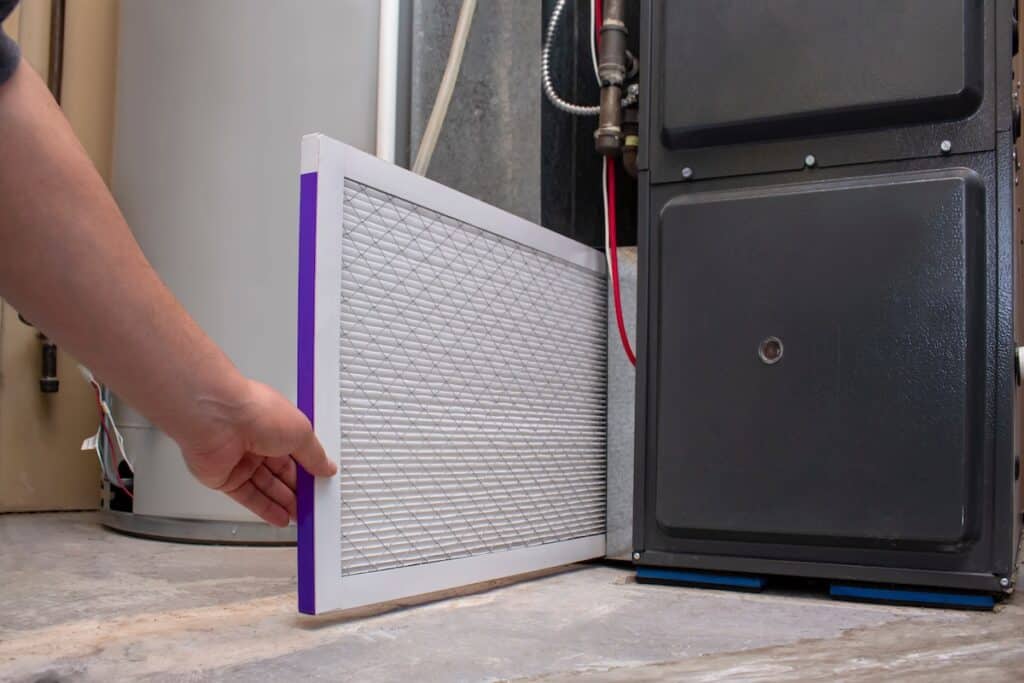
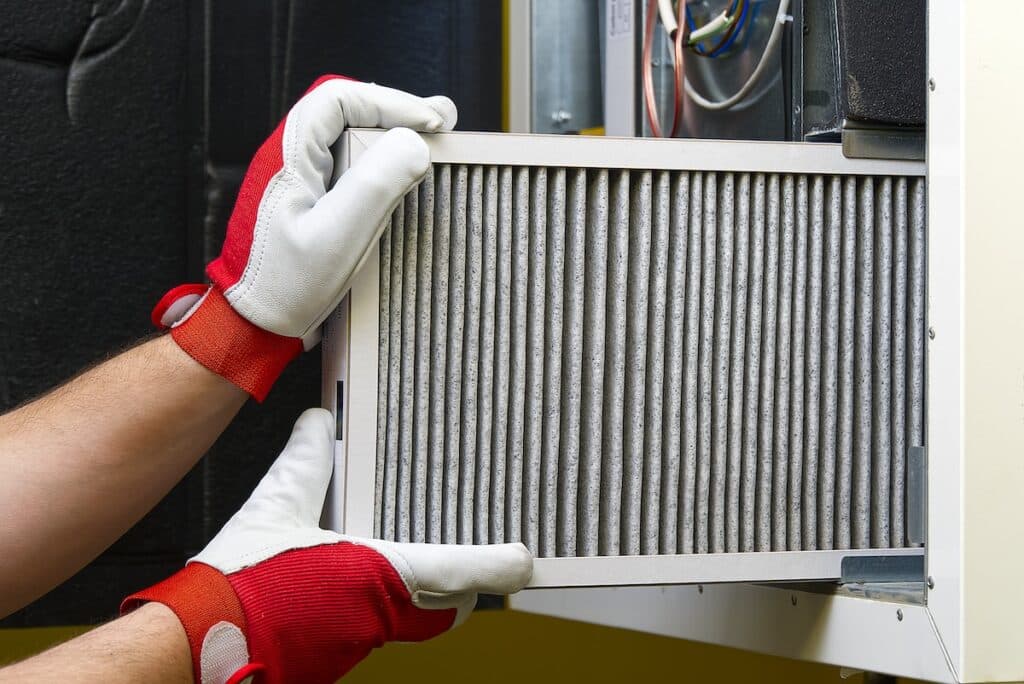
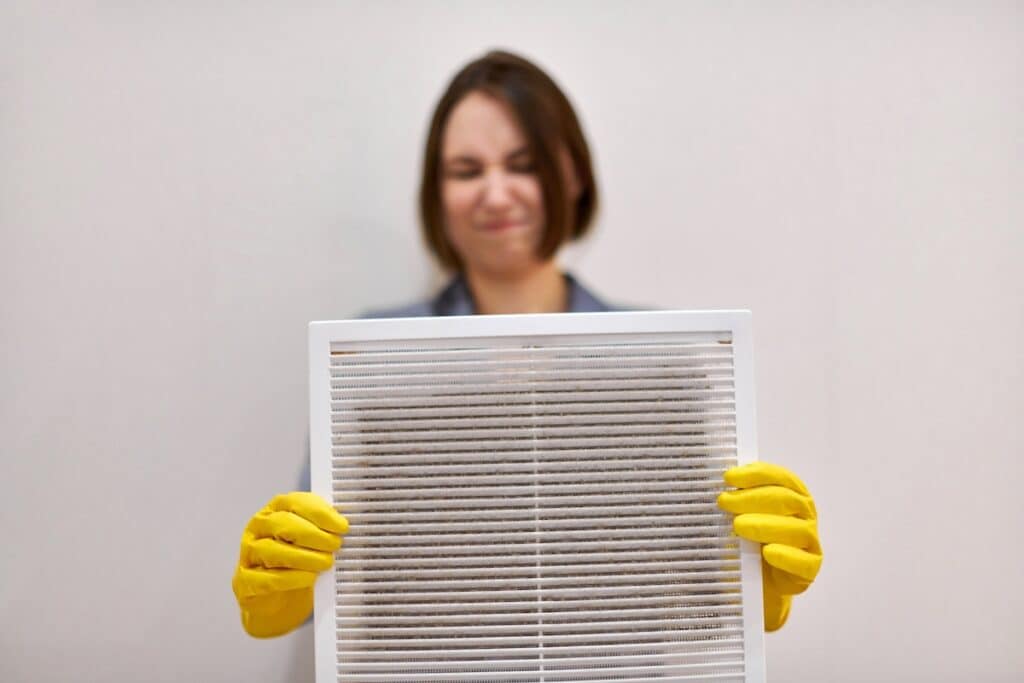
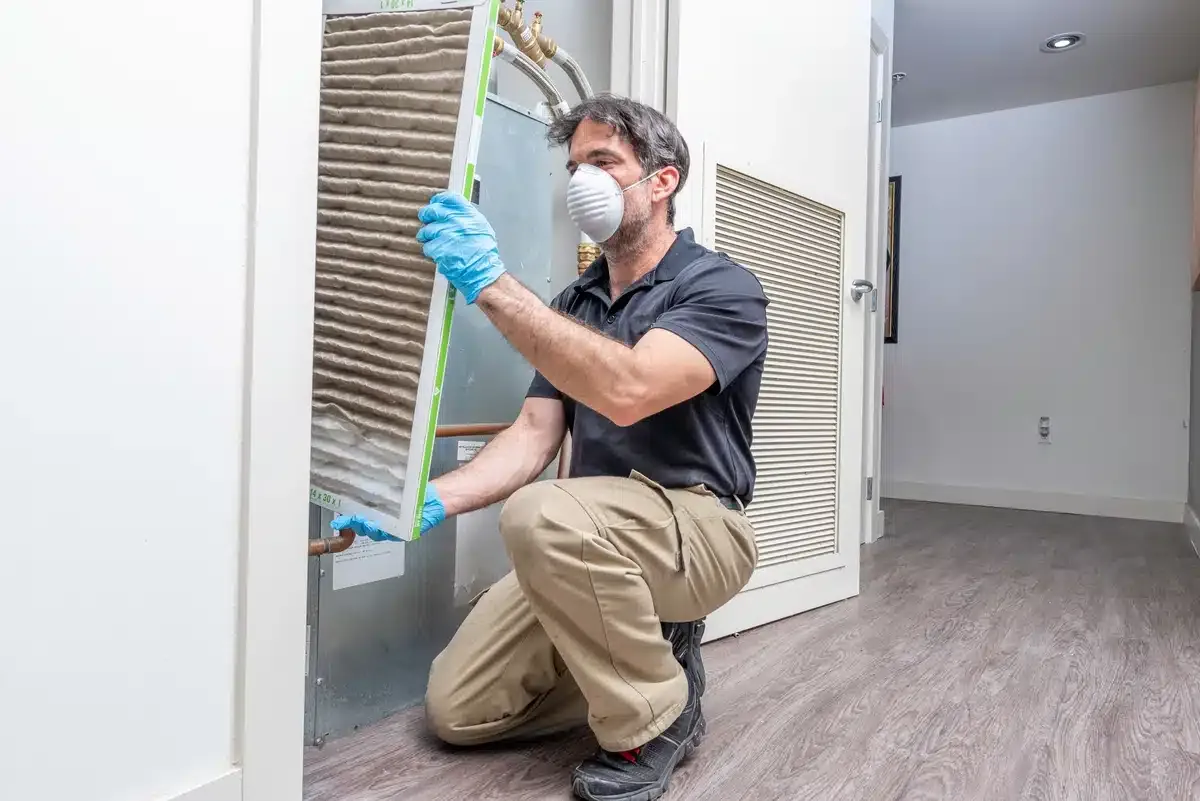
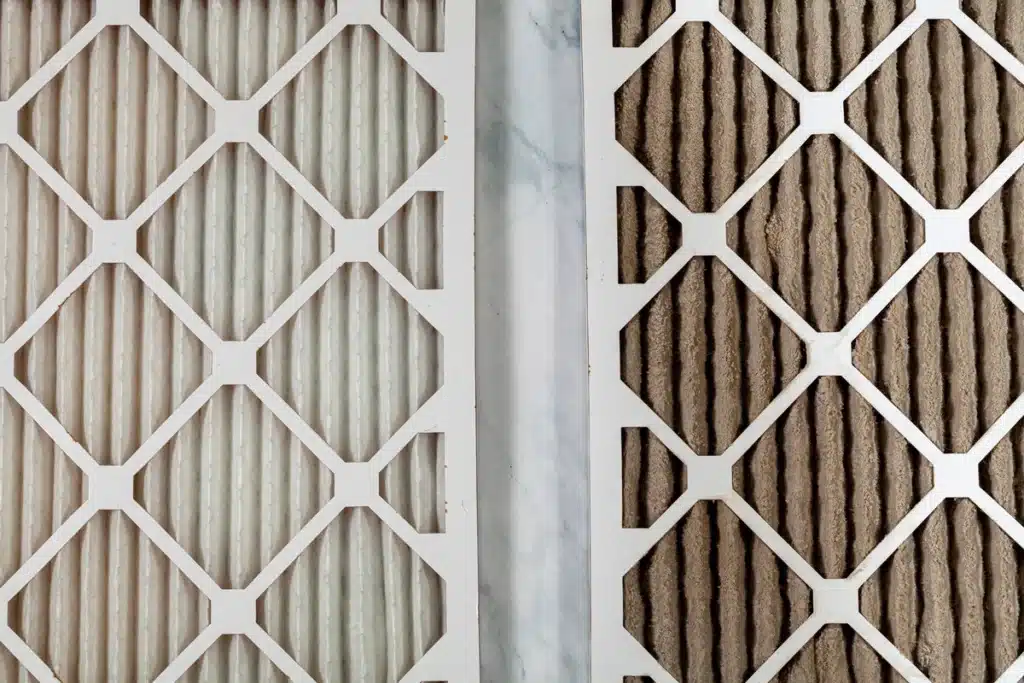
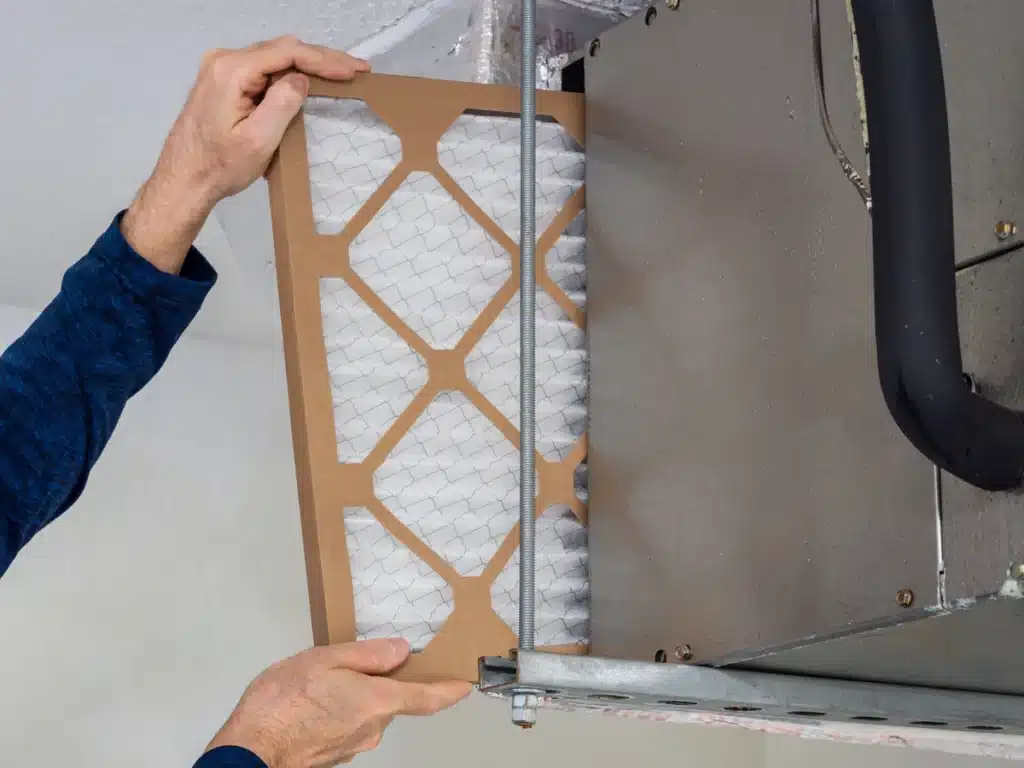
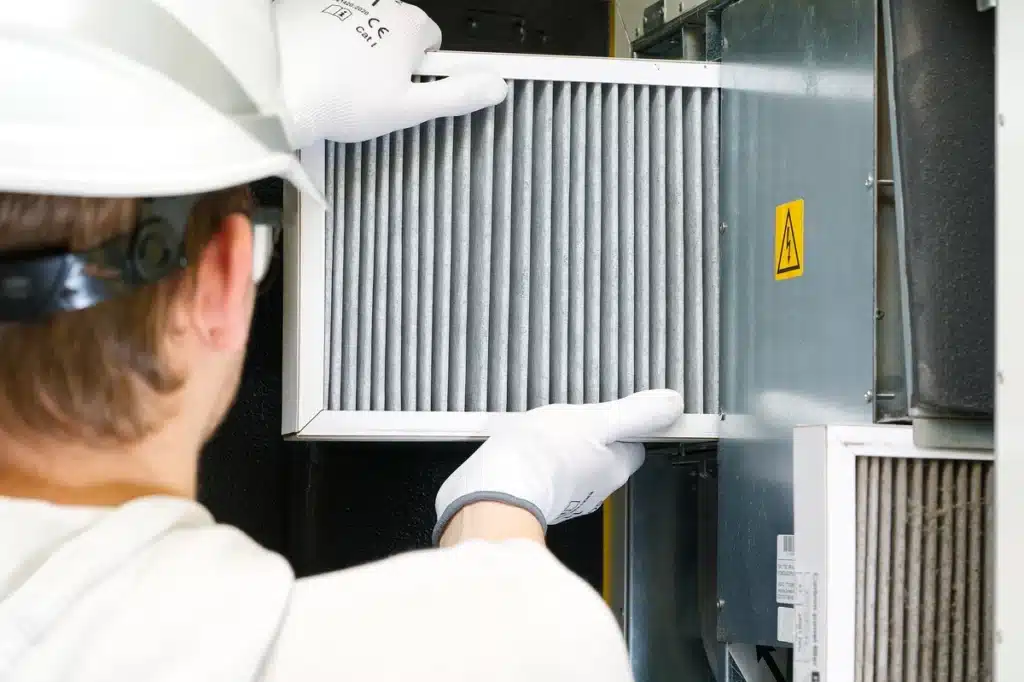
2. Inspect the Air Filter

Air filters play a crucial role in your AC system by trapping dust, debris, and other particles from circulating through your home. However, if the filter becomes too dirty or clogged, it can restrict airflow and reduce your AC’s performance—or even cause it to stop working altogether. Locate the air filter, which is often found near the return air duct or within the air handler. Remove it and inspect its condition. If it’s covered in dust or debris, it’s time to replace it. Air filters should typically be changed every 1–3 months, depending on the manufacturer’s recommendations and your system’s usage. Regular filter changes not only ensure optimal airflow but also improve the overall efficiency and lifespan of your AC system. Additionally, a clean filter enhances indoor air quality by preventing the circulation of allergens and pollutants.

3. Look for Power Issues

If your AC isn’t turning on at all, the problem could be related to power. Start by checking the circuit breaker panel in your home. A tripped breaker can interrupt the power supply to your AC unit. Look for the breaker labeled “AC” or “HVAC System” and see if it’s in the “Off” position. If it is, reset it by flipping it back to “On.” Be cautious, however—if the breaker trips repeatedly, it could indicate a deeper electrical issue that requires professional attention. Next, check the power switch near the outdoor condenser unit. Sometimes, this switch can accidentally be turned off during maintenance or yard work. Ensure it’s in the “On” position. Finally, inspect the AC’s power cord and outlet, especially for window units. Make sure the cord is securely plugged in and that the outlet is providing power. If you suspect a power supply problem, it may be worth testing the outlet with another device.

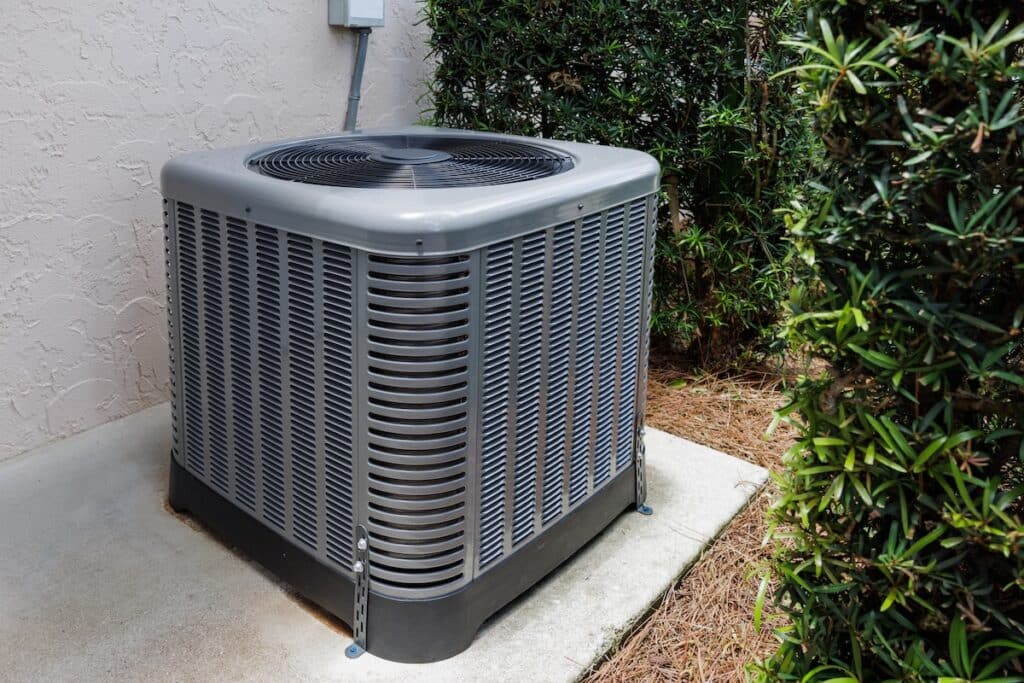
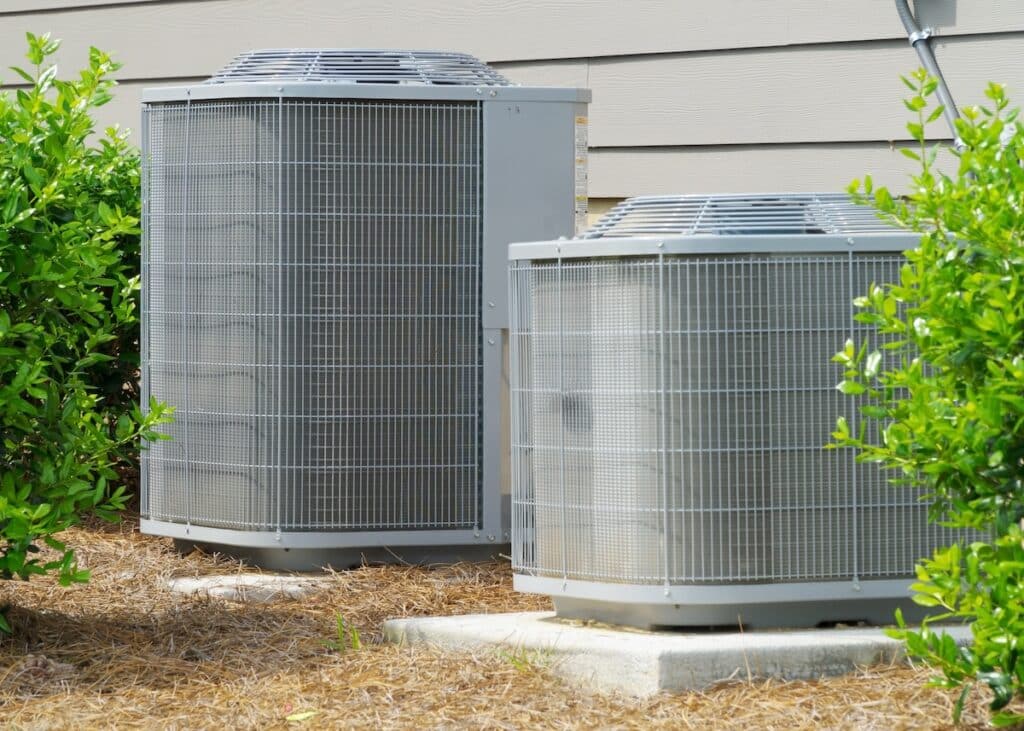
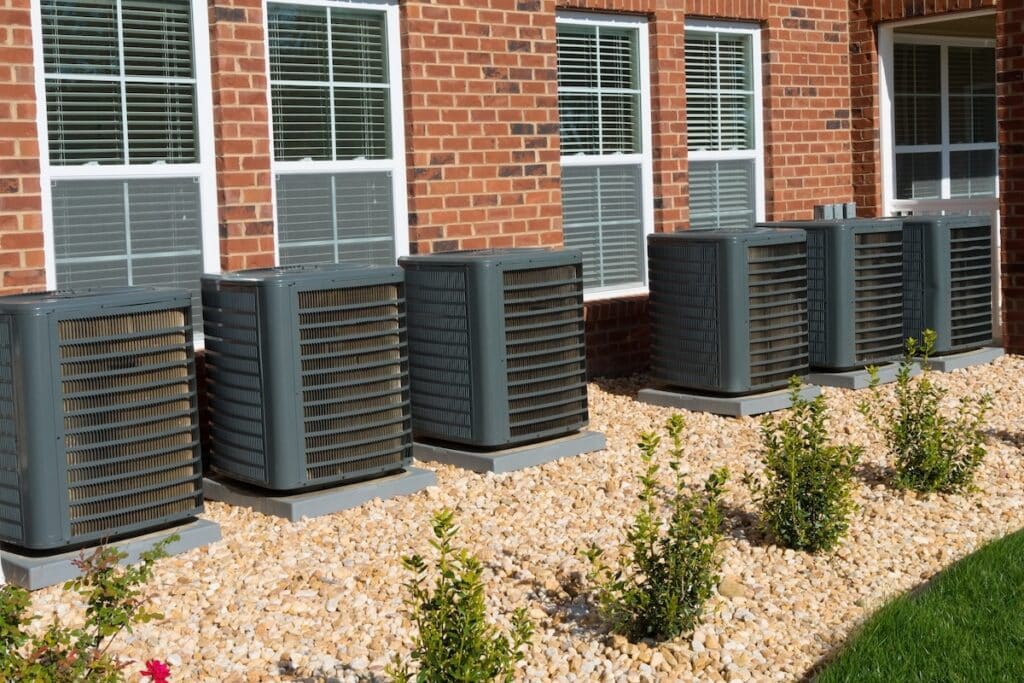
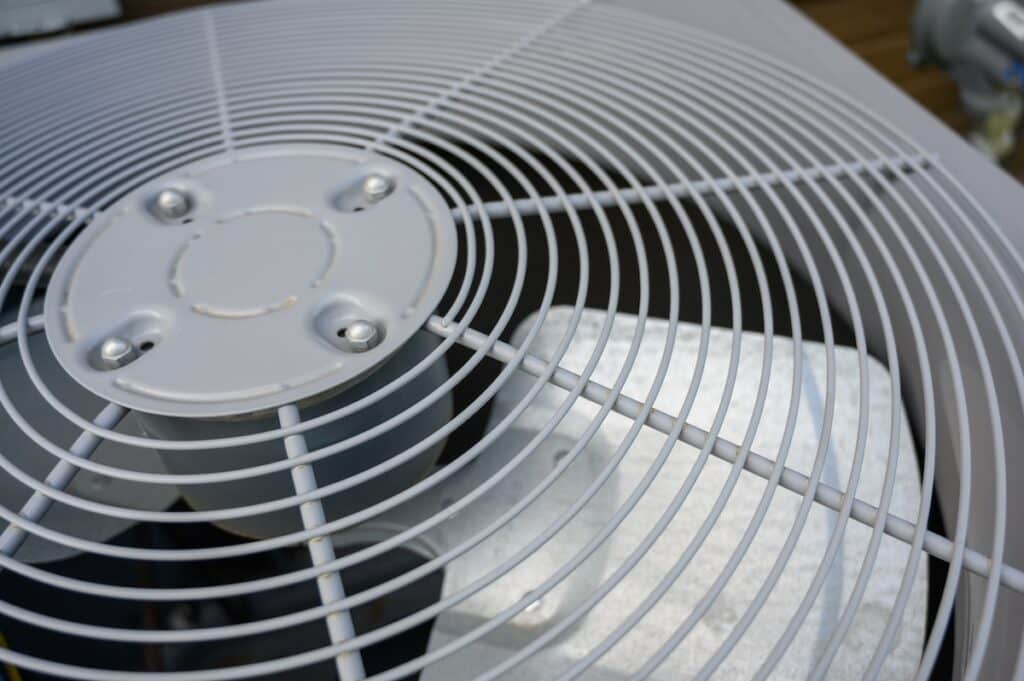
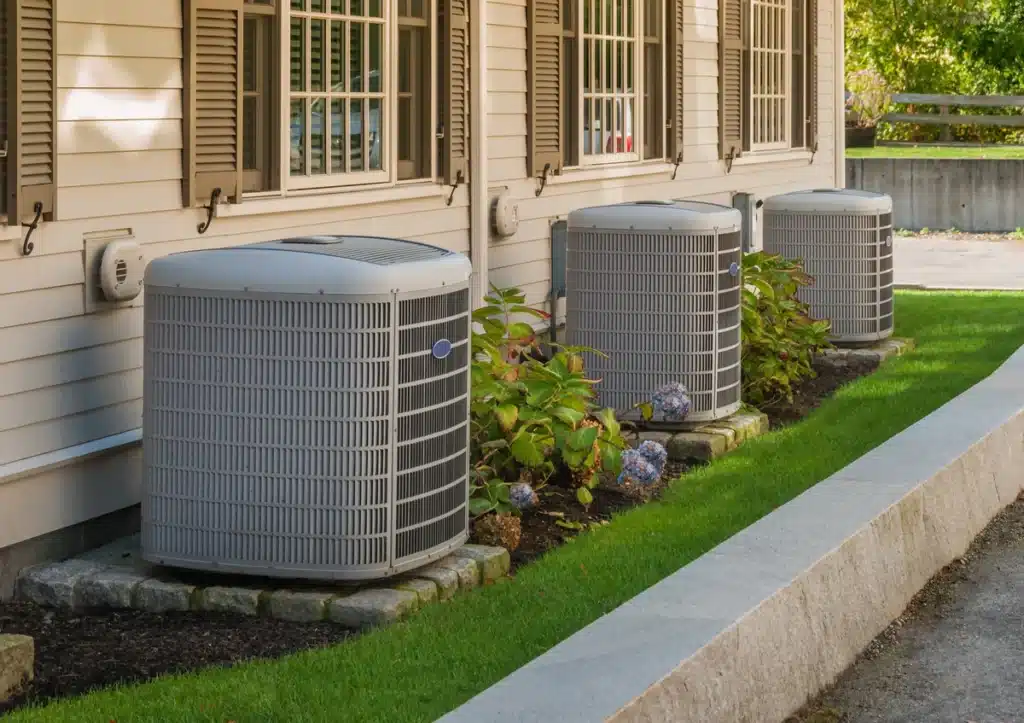
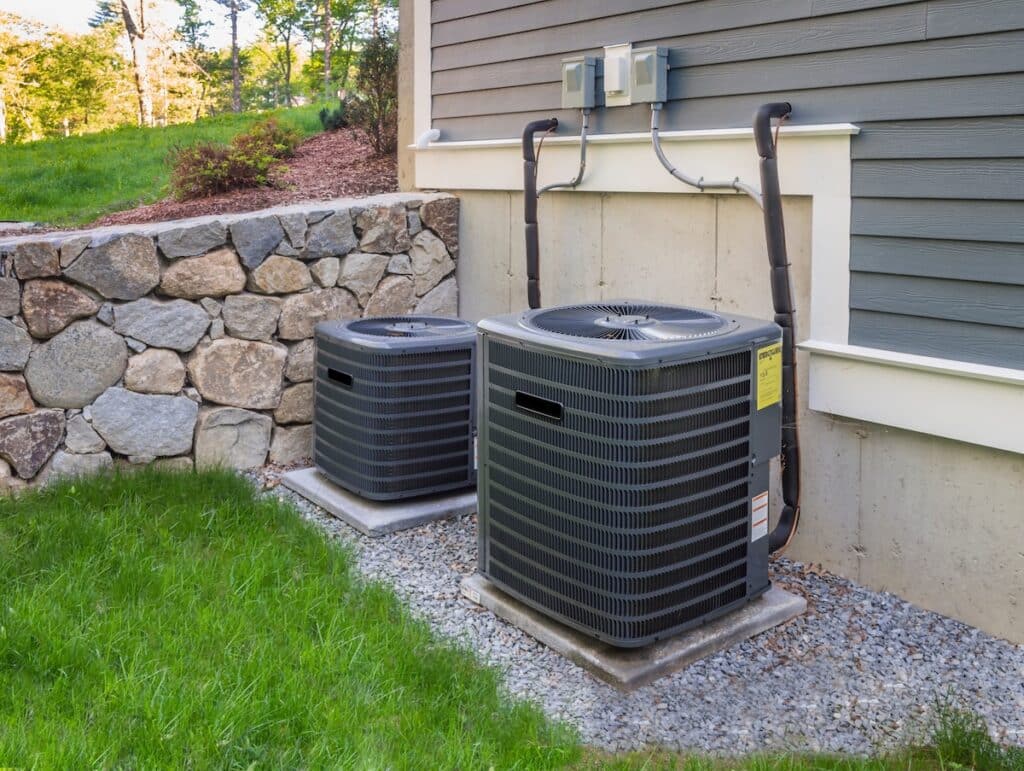
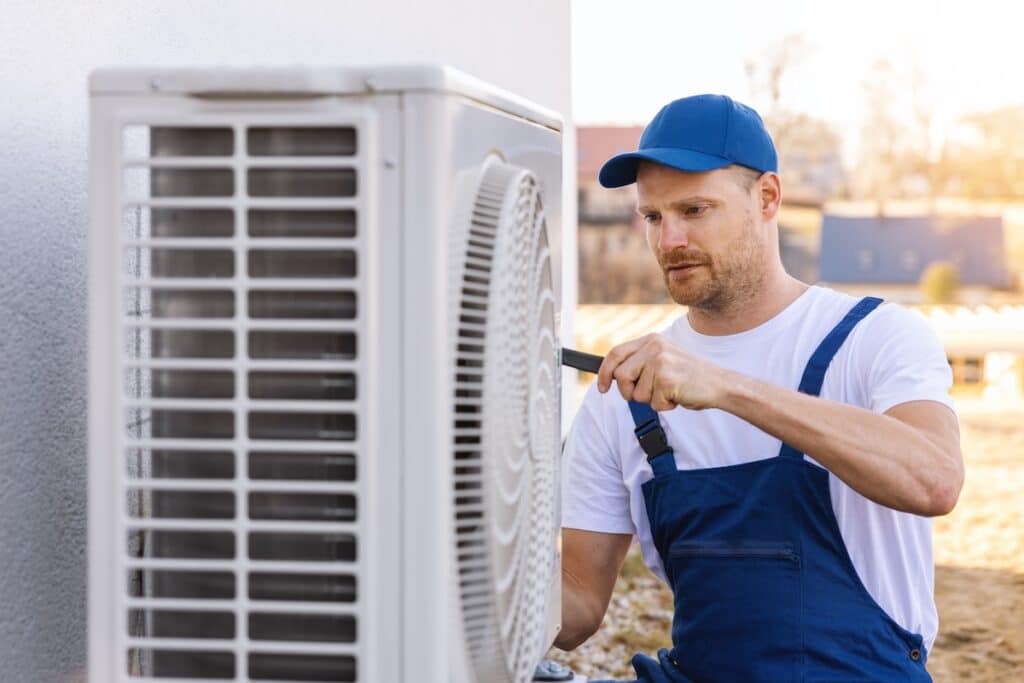
4. Examine the Outdoor Unit

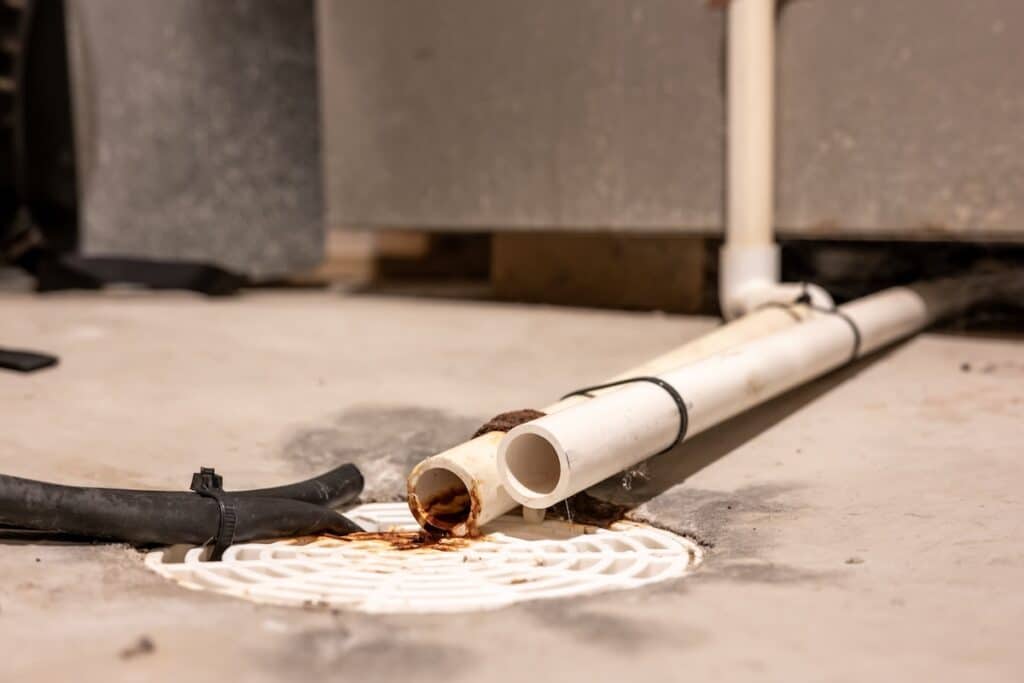
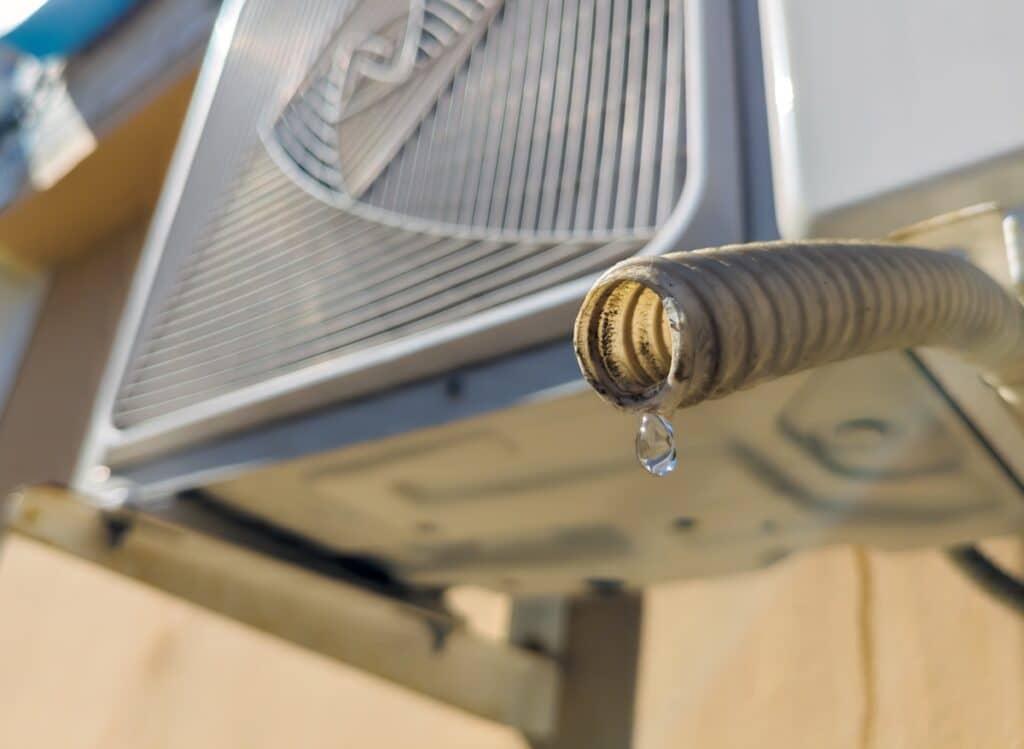
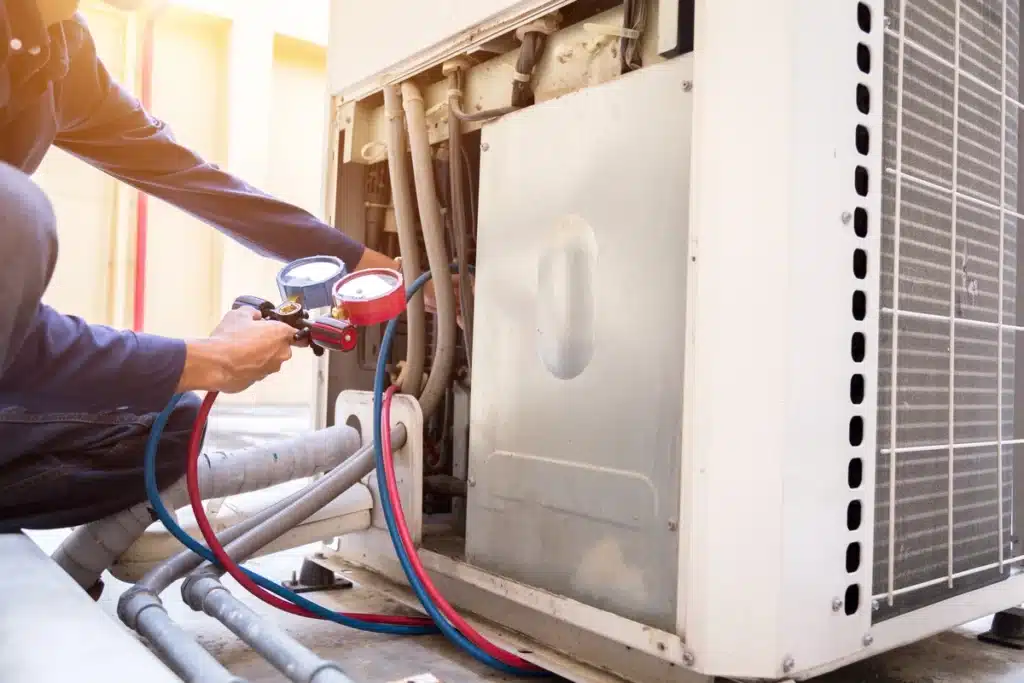
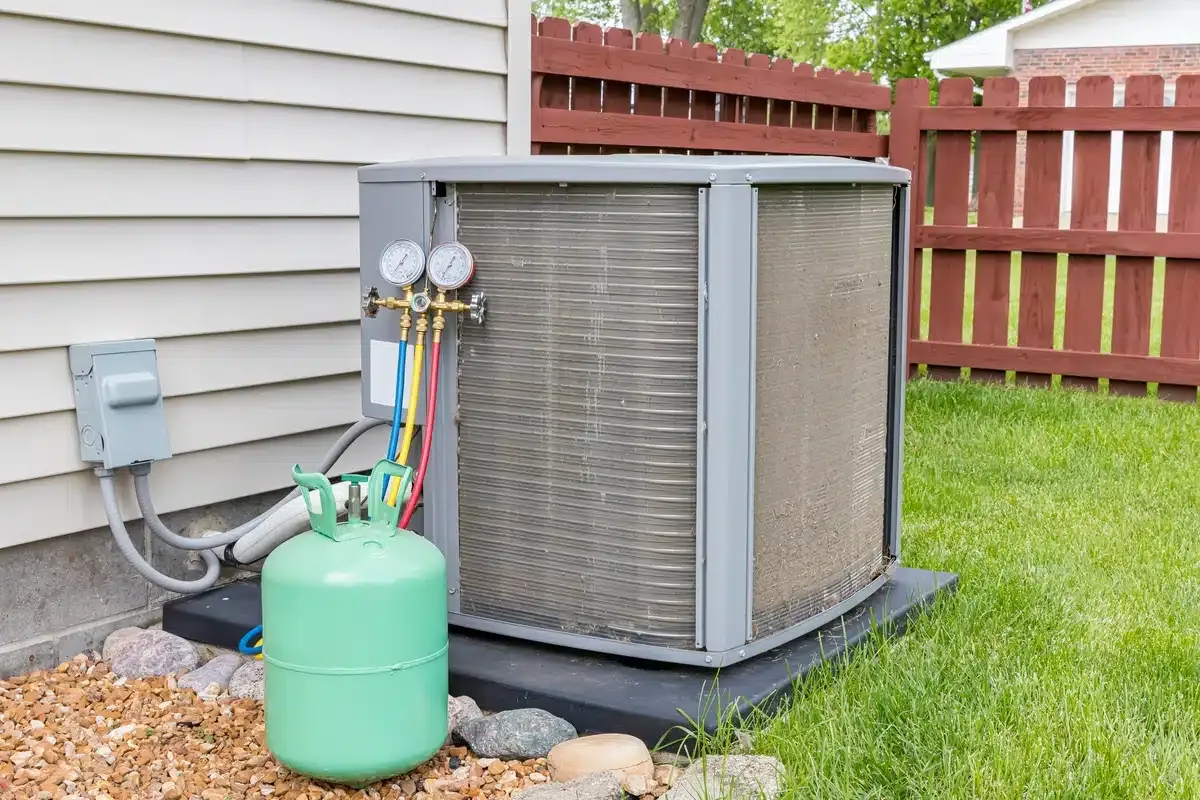
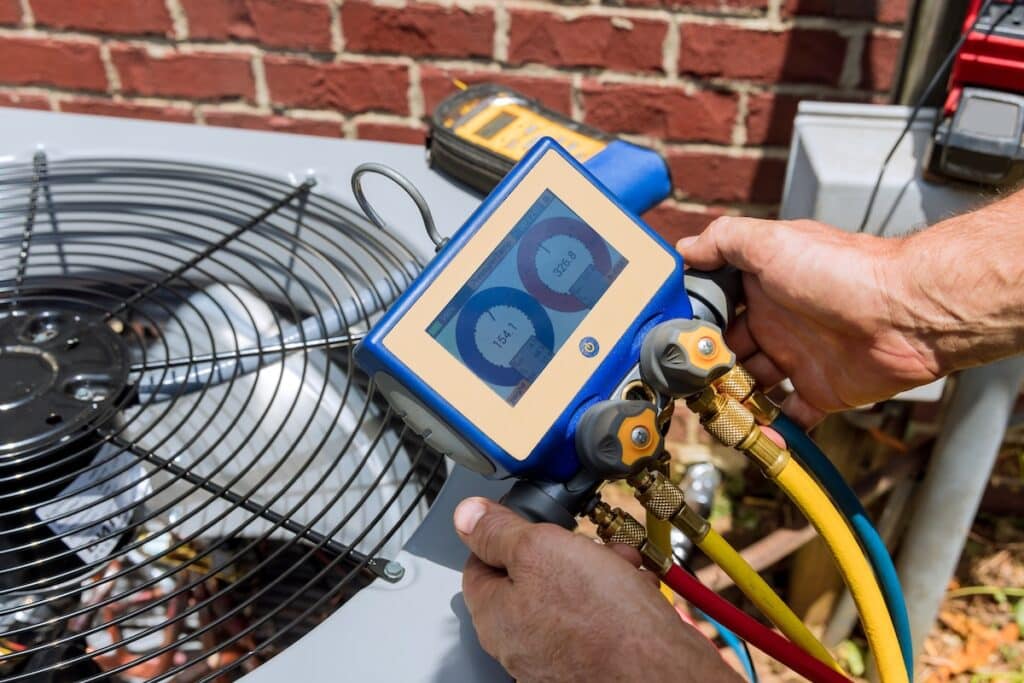
Your outdoor condenser unit is critical to your AC’s functionality, as it releases the heat absorbed from inside your home. If the outdoor unit is obstructed or damaged, your AC may struggle to cool effectively. Begin by visually inspecting the unit. Remove any debris such as leaves, tall grass, sticks, or dirt that may have accumulated around it. These obstructions can block airflow and reduce the unit’s efficiency. Make sure there’s at least 2–3 feet of clear space around the unit for proper airflow. Additionally, check the condenser fins for any visible damage or bending. Bent fins can restrict airflow and should be straightened using a fin comb. Look for signs of refrigerant leaks, such as oily residue or hissing noises, as these issues require immediate professional attention. Keeping the outdoor unit clean and free of debris will help maintain optimal performance.

5. Stay Cool While You Wait

If your AC is still not functioning and you’re waiting for a technician to arrive, there are several ways to stay comfortable in the meantime. First, reduce the heat entering your home by closing curtains, blinds, or shades on windows that receive direct sunlight. This can help lower indoor temperatures. Use ceiling fans or portable fans to circulate the air, creating a cooling effect. Position fans near windows during the evening to draw in cooler air and push out warmer air. Stay hydrated by drinking plenty of water and avoiding dehydrating beverages like caffeine or alcohol. Wear lightweight, breathable clothing made of natural fabrics like cotton to stay comfortable. If the heat becomes too overwhelming, consider visiting a public space like a library, mall, or community center with air conditioning until your system is repaired.

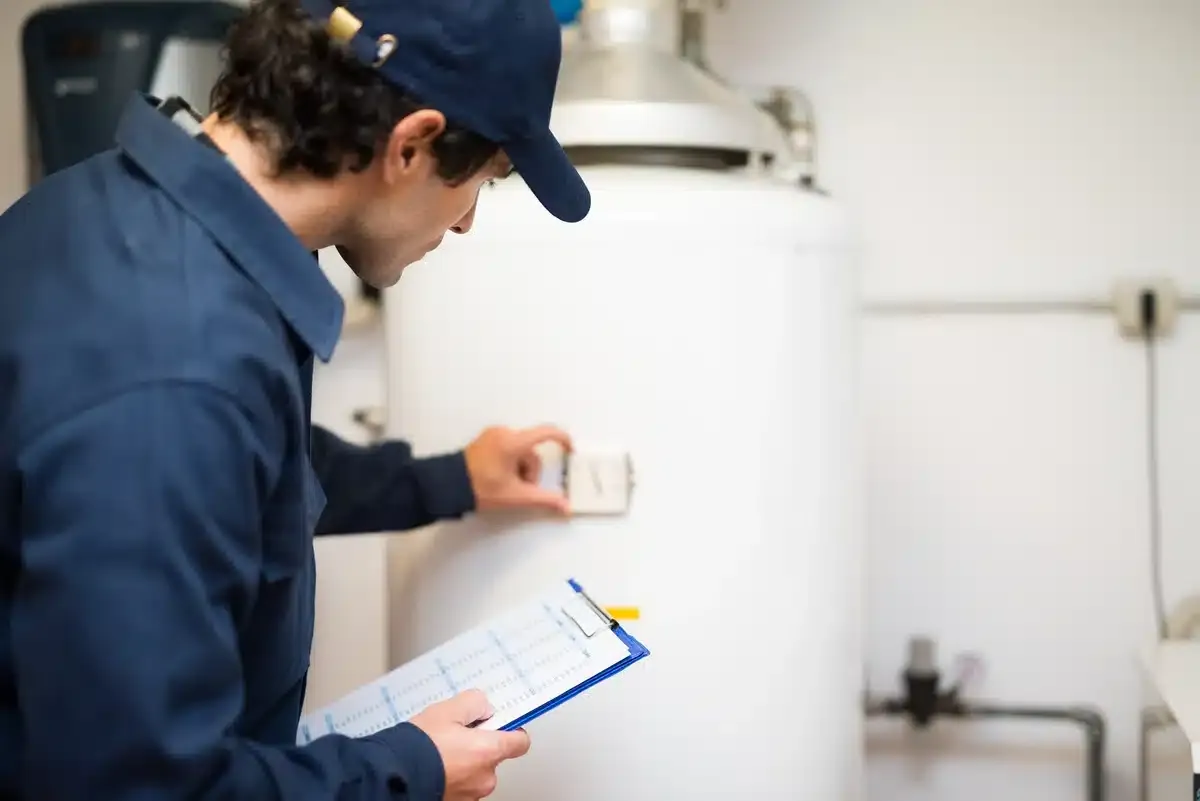
6. Call for Emergency AC Repair

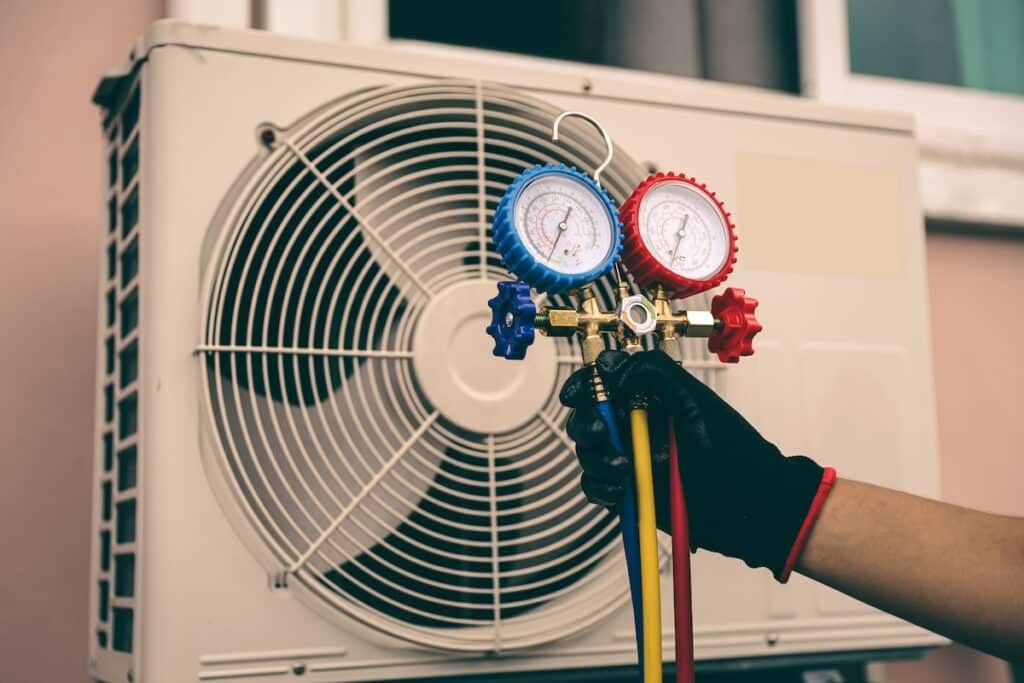
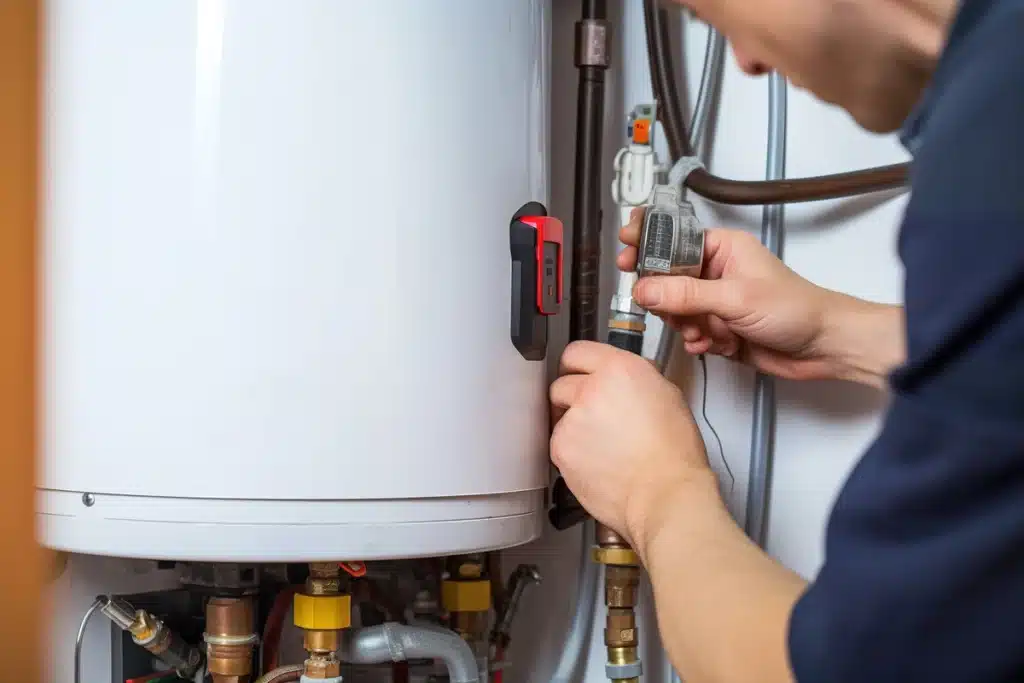
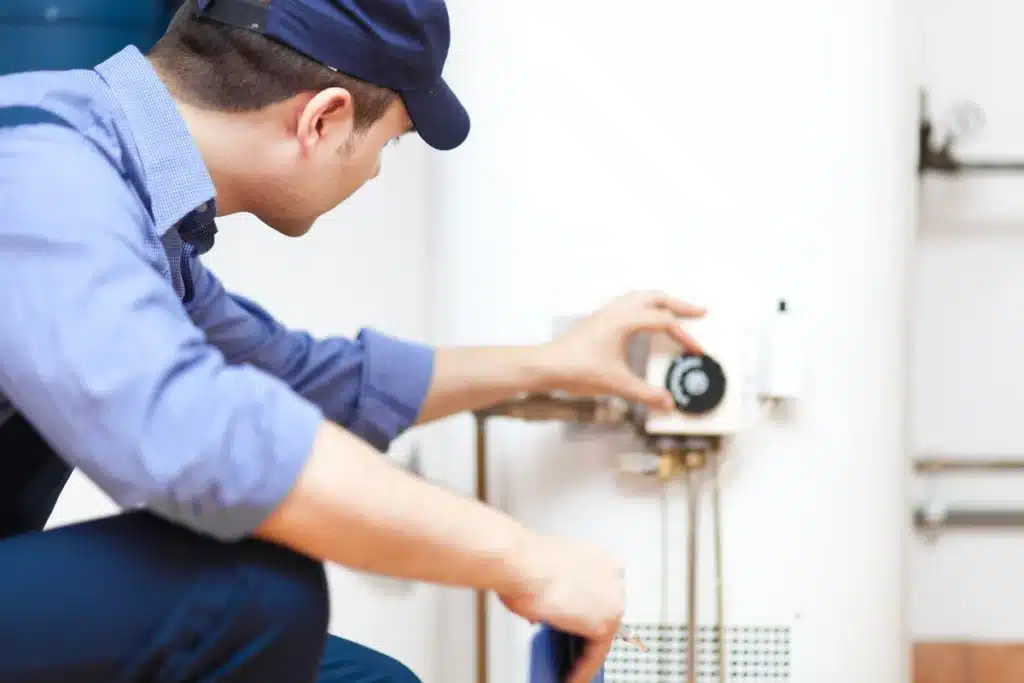
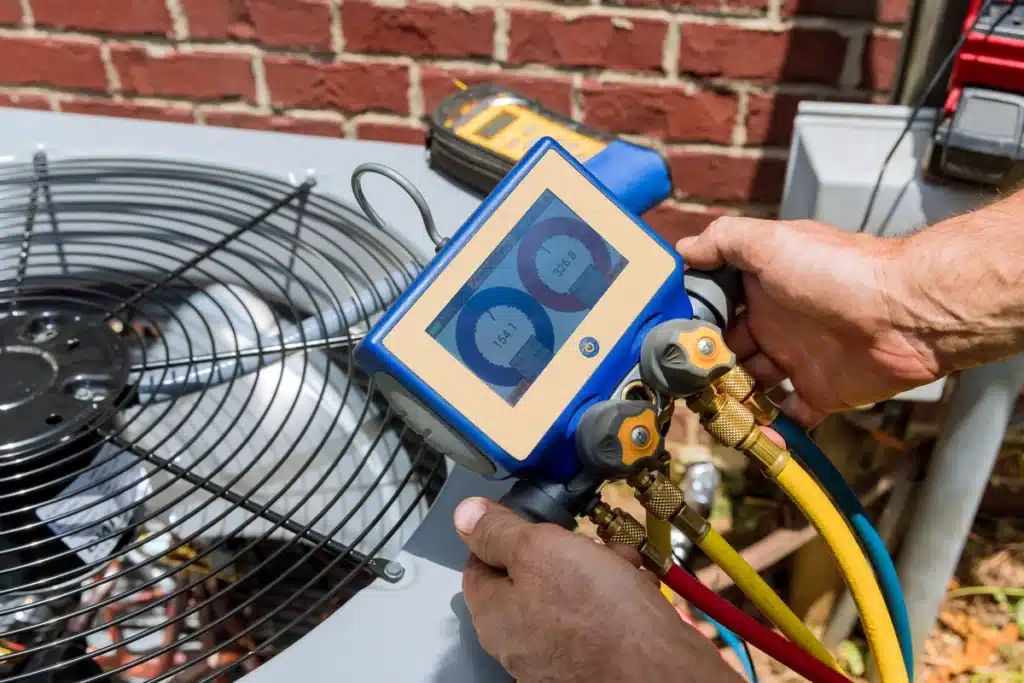
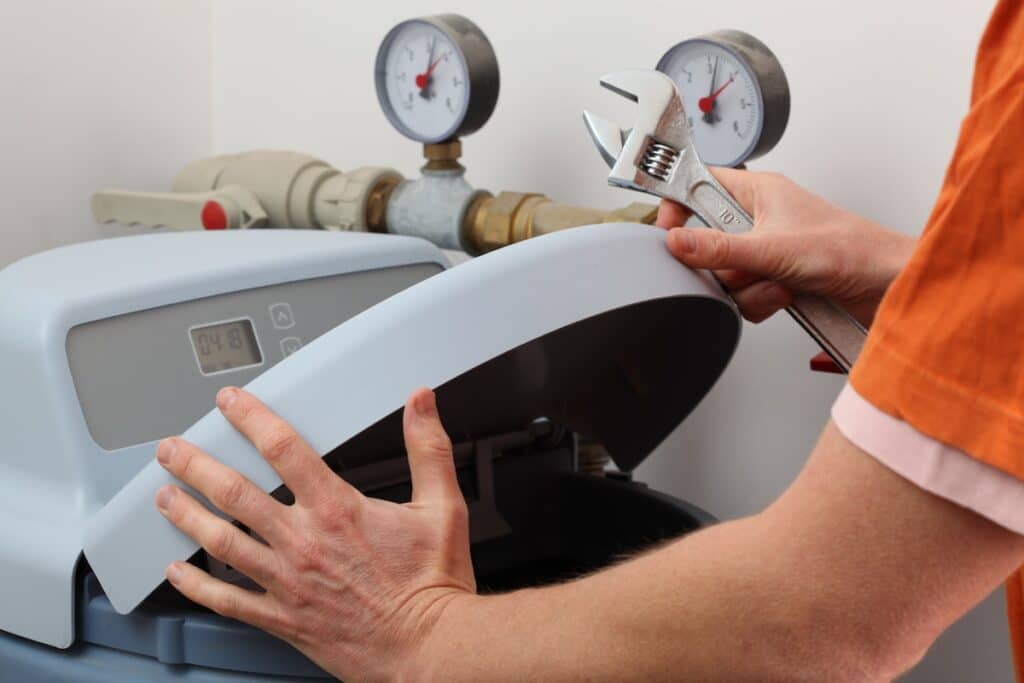
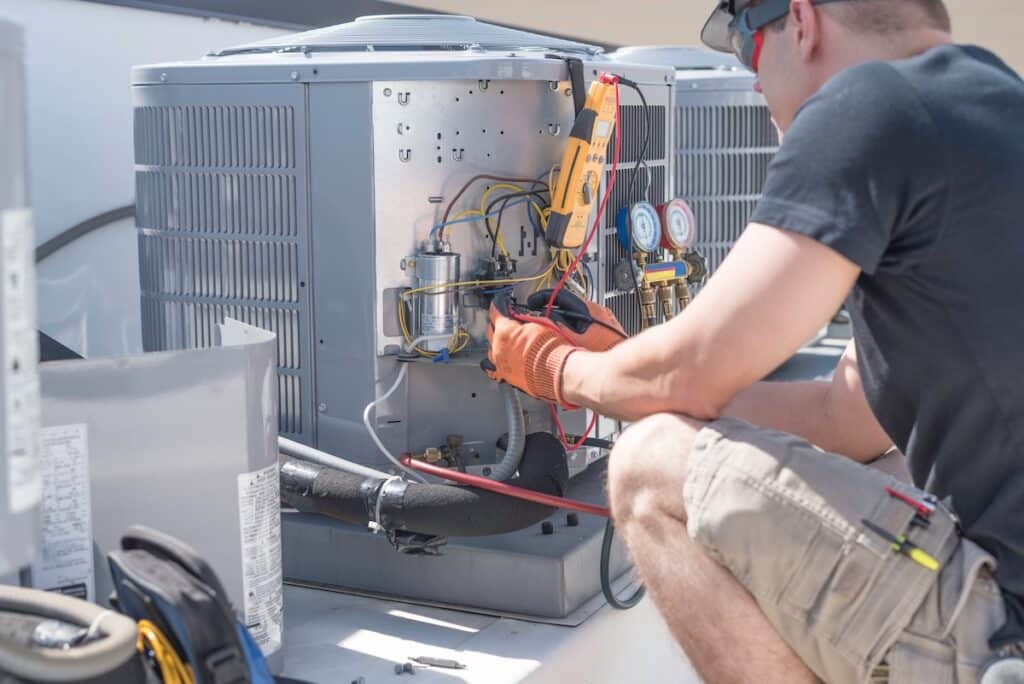
If all troubleshooting steps fail, it’s time to contact a professional AC repair service. When calling for emergency assistance, be prepared to provide as much detail as possible about the issue. Describe what you’ve already tried, any unusual noises or smells the unit has produced, and its recent performance. For example, mention if the AC was blowing warm air before it stopped working or if it shut down abruptly. This information helps technicians diagnose the problem faster and ensures they arrive prepared with the necessary tools and replacement parts. While waiting for the technician, avoid attempting advanced repairs yourself, as this can lead to damage or safety risks. A professional will quickly identify the issue, whether it’s a refrigerant leak, electrical problem, or mechanical failure, and get your system back up and running efficiently.

👨‍🔧 Why Choosing the Right HVAC Contractor Is Crucial

HVAC technician working on controls of air conditioner

Hiring the right professionals for your emergency AC repair is essential. Not all HVAC contractors offer the expertise, quick response times, and reliability you need during an urgent situation.

At Thelen Plumbing, Heating, and Air, we pride ourselves on providing top-notch service when you need it most. Here’s why hundreds of homeowners trust us for their AC repair needs:

24/7 Emergency Service

We’re here for you anytime—day or night—because we know air conditioning problems don’t wait for business hours. Whether it’s a sweltering summer evening or early morning, our team is ready to provide fast, reliable emergency service whenever you need it.

Certified Technicians

Our team consists of highly trained, certified technicians who can handle any air conditioner make or model. With years of experience and ongoing training, you can trust that your AC system is in expert hands, ensuring repairs and maintenance are done right the first time.

Transparent Pricing

Say goodbye to hidden fees and unexpected charges. We believe in complete transparency, offering upfront pricing so you know exactly what to expect. With us, there are no surprises—just honest, straightforward service.

Community-Focused Values

As a locally owned and operated business, we’re proud to serve our neighbors. We are deeply invested in the comfort and satisfaction of our community, and we strive to build lasting relationships by delivering exceptional service and care every time.

❄️ Emergency AC Solutions

At Thelen Plumbing, Heating, and Air, we understand how stressful an AC breakdown can be, especially during the peak of summer. That’s why our team is committed to providing fast, reliable, and professional service when you need it most. With years of experience, 24/7 availability, and a dedication to keeping your home comfortable, you can trust us to handle all your HVAC needs with care and expertise.

Don’t let a broken air conditioner disrupt your day—call Thelen Plumbing, Heating, and Air today for emergency repairs or to schedule preventative maintenance. Let us help you stay cool and stress-free!

How to Clean AC Drain Line? (A Step-by-Step Guide)

Your air conditioning (AC) system works hard to keep your home comfortable, but over time, its drain line can clog with debris, mold, or algae. This may lead to water leaks, reduced efficiency, or even system failure if left untreated. The good news is that cleaning your AC drain line is a straightforward task, and doing it yourself could save you a call to your HVAC technician.

This guide will walk you through everything you need to know how to clean AC drain line effectively. Here’s what we’ll cover:

  • What is an AC drain line, and why does it need cleaning?
  • Step-by-step guide to cleaning your AC drain line
  • Preventive measures to keep your drain line clear

🤔 What is an AC Drain Line, and Why Does It Need Cleaning?

Selective focus on a residential house basement floor drain with furnace and water softener drain lines

Your AC drain line, also known as the condensate drain line, removes excess moisture produced by your air conditioner. When the AC cools your home, it also eliminates humidity from the air, directing the collected water through the drain line and out of your home.

Over time, the drain line can become clogged with dirt, mold, algae, and even insects. These clogs can cause water leaks around your unit, bad odors from stagnant water, poor system performance, and higher utility bills as your AC works harder to compensate.

Signs That Your AC Drain Line is Clogged

  • Water puddles near your indoor AC unit
  • Your AC keeps shutting off unexpectedly
  • Noticeable musty or damp odors
  • Higher-than-normal humidity inside your home
  • Your AC system fails to cool effectively

✅ 6 Steps to Cleaning Your AC Drain Line

Water dripping from the drain pipe of the outdoor unit of the air conditioner,

Cleaning your AC drain line might sound intimidating, but it’s surprisingly manageable. Just follow these steps:

1. Turn off your AC unit

The first and most critical step in maintaining your AC system is ensuring your safety. Before doing any work on your air conditioning unit, turn off the power to avoid the risk of electrical accidents. You can switch off the power at the thermostat by setting it to “off” or go directly to your home’s breaker box to cut off electricity to the unit entirely. This precaution is essential because even seemingly minor electrical currents can cause injury. Additionally, working on your system while it’s still powered on carries the risk of damaging the components. Taking this step ensures a safe environment for you to carry out the maintenance work.

2. Locate the drain line

Once the power is off, the next step is to locate the AC drain line. This is a small but essential part of your air conditioning system, as it removes condensation generated during the cooling process. Typically, the drain line is a PVC pipe situated near the indoor air handler unit. The air handler is often found in places like the basement, attic, utility room, or even a dedicated closet. Look for a T-shaped vent or an access cap along the pipe—this is the point where you’ll perform the cleaning. If you’re unsure where to find the drain line, consult your AC system’s user manual or contact a professional for guidance.

3. Unclog the line manually

After locating the drain line, you’ll need to remove any clogs manually. Take off the cap from the access point at the vent on the pipe. Using a flexible brush, pipe cleaner, or plumbing snake, gently insert the tool into the pipe to dislodge any debris, mold, or other blockages that may be causing the line to back up. It’s important to apply only light pressure when doing this to avoid accidentally damaging the pipe, which could result in the need for costly repairs. Gently work the tool through the pipe until you feel resistance ease, indicating the debris has been loosened.

4. Vacuum out the clog

Once the blockage has been loosened, it’s time to remove it entirely using a wet/dry vacuum. Position the vacuum at the end of the drain line outside your home, where the pipe usually terminates. To create a good seal and ensure strong suction, use duct tape, a cloth, or your hand to secure the connection. Turn on the vacuum and let it run for one to two minutes to extract any remaining debris. You may notice water, dirt, or sludge being sucked into the vacuum—this is a sign that the clog is being cleared successfully. Repeat the process if necessary to ensure the line is completely clean.

5. Flush the line with vinegar

With the bulk of the clog removed, it’s time to clean and disinfect the drain line to prevent future blockages. Mix one cup of distilled white vinegar with warm water to create a simple yet effective cleaning solution. If you prefer, you can use a commercial AC drip pan cleaner designed for this purpose. Using a funnel or small cup, carefully pour the solution into the access point of the drain line. Allow it to sit for about 30 minutes to break down any remaining debris, mold, or algae inside the pipe. This step not only clears out residue but also helps prevent the growth of bacteria and mold that could lead to odors or further clogs.

6. Check for proper drainage

The final step is to ensure that the drain line is functioning as it should. Pour a cup of clean water into the access point and observe whether it flows freely through the pipe. Then, go outside and check that water is exiting from the drain pipe’s outdoor end. If you see a steady stream of water, your cleaning efforts have been successful! If you still notice issues, additional cleaning may be needed, or there might be a more significant problem requiring professional attention. Regularly checking for and addressing clogs in your AC drain line ensures your system operates efficiently and helps prevent costly repairs down the line.

🛠️ Preventive Measures to Keep Your Drain Line Clear

Modern HVAC air conditioner unit on concrete slab outside of house.

Regular maintenance can help prevent clogs in the future. Here’s what you can do:

Flush the Drain Line Routinely

Keep your AC drain line clear by flushing it with distilled white vinegar or a suitable cleaner every three months. This simple step helps prevent clogs caused by mold, algae, and debris buildup, ensuring your air conditioning system runs smoothly. Regular cleaning can also reduce the risk of water overflow and potential damage to your home.

Install an AC Condensate Trap

An AC condensate trap is a critical addition to your system. It prevents insects, dirt, and debris from entering the drain pipe, which can lead to blockages or even damage to your system. Installing a trap can also improve the efficiency of your AC by maintaining proper airflow and drainage.

Check the Line During Seasonal Maintenance

Seasonal maintenance is an essential part of keeping your HVAC system in top condition. Each spring and fall, take time to inspect the AC drain line for clogs, leaks, or signs of wear. Early detection of issues can save you from costly repairs and ensure your system is ready for the changing seasons.

Schedule Annual Professional Maintenance

While regular DIY maintenance is important, scheduling a professional tune-up once a year is crucial. HVAC technicians can thoroughly inspect your system, clean the drain line, and address any hidden issues. This annual check ensures that all components, including the drain line, are working efficiently and effectively, extending the lifespan of your AC system.

⭐️ Clean AC Drain

Keeping your AC drain line clean is essential for maintaining the efficiency and longevity of your system, but sometimes the job requires professional expertise. That’s where our team at Thelen Plumbing, Heating, and Air comes in. With years of experience, top-notch service, and a commitment to customer satisfaction, we’re the trusted partner you can rely on for all your HVAC needs.

Whether it’s routine maintenance, repairs, or expert advice, we’re here to ensure your home stays comfortable year-round. Don’t let AC issues disrupt your comfort—call us today or book an appointment online for fast, reliable service you can count on!

What Is Central Air? How It Works & Why You Need It

Are you looking to improve your home’s comfort and climate control? If so, you’ve likely come across the term “central air.” But what is central air, how does it work, and why should homeowners like yourself consider installing it? Whether you’re building a new home or upgrading your existing cooling system, central air might just be your answer. This article will guide you through:

  • What central air is and how it works
  • The benefits of central air
  • What to consider when installing central air

🤔 What Is Central Air and How Does It Work?

central air unit

Central air is a highly efficient cooling system designed to keep your entire home comfortable by maintaining a consistent temperature throughout. Unlike portable or window units that only cool individual rooms, central air provides a seamless solution for whole-home cooling. It uses a single control system and an interconnected network of ducts to ensure every room stays at your desired temperature.

Here’s how it works:

  1. Air Circulation – Central air systems pull warm air from your home through a network of ducts.
  2. Cooling Process – This warm air passes through an air handler, where it is cooled using a refrigerant system.
  3. Even Distribution – Once cooled, the air is distributed back through ducts to reach every room, maintaining a consistent temperature.

✅ 5 Benefits of Central Air

Here are the top 5 benefits of installing central air in your home:

1. Comfortable Climate Control Throughout the Home

Central air conditioning provides consistent cooling across your entire home, ensuring that every room stays at the optimal comfortable temperature. Unlike window units or portable air conditioners that can only cool a single space, central air works through a comprehensive duct system to eliminate hot spots and chilly pockets. This means no more running from one room to the next in search of a cool retreat or layering up in an unexpectedly cold area. Whether you’re relaxing in the living room, cooking in the kitchen, or unwinding in your bedroom, you can enjoy a perfectly balanced indoor climate that adapts seamlessly to your needs. Even traditionally challenging areas, like basements or attics, can benefit from even cooling, making your entire home a haven from outdoor heat.

2. Quiet Operation

Say goodbye to the constant hum, rattle, or buzz of traditional air conditioners that can disrupt your peace. Central air conditioning systems are designed for quiet operation, with the noisier components like the compressor and fan housed outside or in utility areas, far from your living spaces. Whether you’re binge-watching your favorite series, focusing on work, or getting a good night’s sleep, you won’t be disturbed by intrusive noise. The quiet operation of central air creates a serene indoor atmosphere, making it easier to concentrate, relax, and enjoy your day-to-day activities. For families with young children or light sleepers, the near-silent functionality can be especially beneficial, promoting a tranquil home environment.

3. Improved Air Quality

Central air systems not only cool your home but also play a vital role in improving indoor air quality. These systems are equipped with filtration mechanisms that trap and remove airborne pollutants like dust, pollen, pet dander, and even mold spores, which can irritate allergies or aggravate asthma symptoms. With regular maintenance and filter changes, central air can significantly reduce allergens and airborne particles, creating a cleaner, healthier living space. Advanced systems go a step further by offering humidity control, which prevents excessive moisture that can foster the growth of mold and mildew. Some models even include air purifiers that eliminate harmful bacteria and viruses, providing peace of mind and a safer environment for your family. With central air, you don’t just cool your home—you create a sanctuary of fresh, breathable air.

4. Energy Efficiency

Modern central air conditioning systems are designed with cutting-edge technology to maximize energy efficiency. Unlike multiple window units that often consume excessive energy, central air cools your entire home more effectively while keeping energy use in check. Many models offer programmable thermostats, allowing you to set specific cooling schedules that align with your daily routine. For instance, you can program the system to reduce cooling when the house is empty during the day and ramp it back up before you return home. Additionally, zoning options enable you to cool specific areas of your home at different times, so you’re not wasting energy on spaces you’re not using. Over time, these energy-saving features can lead to significant reductions in your utility bills, making central air a cost-effective solution for long-term comfort and efficiency.

5. Added Value to Your Home

Installing central air conditioning is more than just a comfort upgrade—it’s an investment that enhances your home’s value. Many homebuyers view central air as a must-have feature, especially in regions with warm or humid climates. A home equipped with central air is often perceived as more modern, convenient, and desirable than one without. This added appeal can give your property an edge in competitive real estate markets, potentially increasing its resale value. Beyond marketability, central air makes your home more livable and attractive for day-to-day life, which is especially important if you’re planning to stay in your home long-term. Whether you’re considering selling in the future or simply want to enjoy the benefits now, central air conditioning is a worthwhile investment that delivers both comfort and financial returns.

🤔 Considerations for Installing Central Air

Close Up Of Mature Woman Adjusting Central Heating Temperature At Home On Thermostat

Before committing to central air, here are a few factors to consider:

System Size

Choosing the right-sized system for your home is one of the most important decisions you’ll make when installing central air. A system that’s too small won’t be able to cool your home effectively, leaving you with uneven temperatures and discomfort during hot days. On the other hand, a system that’s too large will cool your home too quickly, causing it to cycle on and off frequently. This not only wastes energy but also puts unnecessary strain on the system, potentially shortening its lifespan. Proper sizing ensures efficient performance, lower energy consumption, and a comfortable indoor environment. Consulting a professional to calculate the correct size based on your home’s square footage, insulation, and climate is highly recommended.

Ductwork

If your home doesn’t already have ductwork, installing it is an essential step for central air. This process can increase upfront costs since it involves planning, layout design, and installation throughout your home. However, the addition of ductwork can often be bundled with other home upgrades, such as improving insulation or adding energy-efficient ventilation. Properly installed and sealed ductwork ensures that cool air is evenly distributed, preventing leaks and minimizing energy loss. If you already have existing ductwork, it’s worth inspecting it for leaks or damage to optimize the system’s performance. Well-maintained ductwork is critical to getting the most out of your central air system.

Energy Efficiency Ratings

When shopping for a central air system, prioritize energy-efficient models with high Seasonal Energy Efficiency Ratio (SEER) ratings. The SEER rating measures how efficiently a system uses energy to cool your home. Higher SEER ratings indicate greater energy efficiency, which can result in significant savings on your utility bills over time. For example, upgrading to a system with a higher SEER rating can cut cooling costs by up to 30% compared to older, less efficient models. Additionally, energy-efficient systems are better for the environment, reducing your carbon footprint while keeping your home comfortable. Look for systems that also carry ENERGY STAR certifications for added assurance of efficiency and reliability.

Maintenance

Like any major home system, central air requires regular maintenance to keep it running smoothly and efficiently. Routine tasks, such as replacing air filters every 1-3 months, are essential for maintaining airflow and preventing strain on the system. Periodically inspecting ductwork for leaks or obstructions ensures that cool air is being delivered efficiently throughout your home. Scheduling annual professional tune-ups is also highly recommended, as technicians can check for issues like refrigerant leaks, worn components, or blockages in the system. Regular maintenance not only extends the lifespan of your system but also ensures it operates at peak efficiency, saving you money on energy costs and costly repairs down the line.

⚡ Central Air Basics

A/C units connected to residential house

Choosing the right central air system is essential for keeping your home comfortable, energy-efficient, and tailored to your needs. At Thelen Plumbing, Heating, and Air, we bring years of expertise, a customer-first approach, and reliable maintenance services to ensure your cooling system works flawlessly for years to come.

Whether you’re installing central air for the first time or upgrading to a more efficient model, our team is here to guide you every step of the way. Ready to experience the difference? Contact Thelen Plumbing, Heating, and Air today for a consultation and take the first step toward a cooler, more comfortable home!

How Do Apartment HVAC Systems Work? (For Renters & Owners)

If you’ve ever wondered why your apartment gets chilly in the middle of summer or why it takes so long to warm up in winter, the answer lies in your HVAC system. Heating, ventilation, and air conditioning (HVAC) systems are the unsung heroes that keep apartment living comfortable year-round. But how do apartment HVAC systems work, and what should homeowners and renters know about them? Understanding the basics of these systems can help you stay informed about maintenance, energy efficiency, and what to do when something goes wrong. Here’s what we’ll cover in this blog:

  • What is an apartment HVAC system, and how does it work?
  • The different types of HVAC systems commonly found in apartments
  • How to troubleshoot common HVAC issues

🤔 What is an Apartment HVAC System, and How Does It Work?

commmercial apartment building hvac on roof

At its core, an HVAC system is responsible for maintaining indoor comfort by regulating temperature, humidity, and air quality. Typical apartment HVAC systems include heating units (like furnaces or boilers), cooling systems (like air conditioners), and ventilation components (like ducts and air filters) that work together to create a comfortable living environment.

How Does an Apartment HVAC System Work?

  • Temperature Control: The thermostat serves as the system’s brain, letting you set your ideal temperature and signaling the HVAC system to adjust heating or cooling as needed.
  • Heating: In cold weather, the system warms air using a furnace (electric or gas-fired) or heat pump and circulates it through ducts to your apartment.
  • Cooling: During warm weather, the air conditioner removes warm air, cools it using a refrigerant-cooled coil, and delivers the cooled air back into your space.
  • Ventilation: Ventilation removes stale air, brings in filtered outdoor air, and ensures fresh air circulates, improving indoor air quality.
  • Air Recycling and Filtration: HVAC systems recycle air and filter out dust, pollen, and debris, promoting a healthier home environment.

💡 5 Tips to Troubleshoot Common HVAC Issues

If your HVAC system isn’t performing well, here’s what you can do before calling a technician:

1. Check the Thermostat

The thermostat is the control center of your HVAC system, so it’s important to ensure it’s functioning properly. Start by confirming that it’s set to the correct mode—cooling during the summer and heating during the winter. Adjust the temperature to your desired comfort level, and wait to see if the system responds appropriately. If the thermostat screen is blank or unresponsive, it might be time to replace the batteries. In some cases, a faulty thermostat may require recalibration or replacement, so don’t overlook this key component.

2. Inspect Air Filters

Air filters play a critical role in maintaining proper airflow and efficiency in your HVAC system. Over time, dust, dirt, and debris can clog the filters, reducing airflow and forcing the system to work harder than necessary. This not only increases energy consumption but also shortens the lifespan of your equipment. Check your filters every 1 to 3 months, and clean or replace them as needed. If you have pets or live in a dusty environment, you may need to do this more frequently to ensure optimal performance and indoor air quality.

3. Look for Obstructions Around Vents

Blocked vents can significantly reduce airflow throughout your home, making it harder for your HVAC system to distribute heated or cooled air effectively. Walk through each room and check that furniture, curtains, rugs, or other objects aren’t covering or blocking the vents. Even partially obstructed vents can disrupt airflow and create uneven temperatures in your home. For best results, keep vents fully open and clear of any obstructions to allow for proper circulation and consistent comfort.

4. Listen for Unusual Sounds

Your HVAC system should operate quietly under normal conditions, so pay attention if you hear any unusual noises. Banging, clanging, or rattling sounds could mean that a component is loose or damaged. Hissing might indicate a refrigerant leak, while squealing could point to a belt or motor issue. These sounds act as warning signs that something may be wrong with your system. Addressing these problems early can prevent further damage and costly repairs, so don’t ignore strange noises.

5. Monitor Energy Bills

An unexpected spike in your energy bills can be a red flag that your HVAC system isn’t running efficiently. If the system is struggling to maintain your desired temperature, it may be overworking due to issues like leaks, dirty filters, or failing components. Compare your current bill with previous ones to identify any unusual increases. If you notice a consistent rise, it’s a good idea to have a professional inspect the system to diagnose and resolve the underlying problem. Regular maintenance can help prevent such issues and keep your energy costs under control.

🤔 Why Regular HVAC Maintenance Matters

Adult technician man standing on a folding aluminum ladder is taking out dirty filters from air conditioner in apartment, doing service and maintenance, copy space

Routine maintenance is essential for keeping your HVAC system running efficiently. Regular checks can:

Lower Energy Bills

Improving the efficiency of your system can lead to significant savings on your energy bills. When your system works optimally, it uses less power to deliver the same results, reducing unnecessary energy consumption and keeping your costs down.

Extend System Lifespan

Addressing wear-and-tear issues early helps prevent small problems from turning into major breakdowns. Regular maintenance ensures your system stays in good condition, prolonging its lifespan and saving you money on costly replacements.

Maintain Healthy Air Quality

Clean ducts and filters are essential for maintaining healthy air quality in your home. Regular cleaning helps remove dust, allergens, and other pollutants, ensuring the air you breathe is fresh and safe for you and your family.

Ensure Safety

Safety is critical, especially for gas-powered units. Regular inspections can catch problems like gas leaks early, reducing risks to your home and ensuring your system operates securely and reliably.

🏠 Apartment HVAC Basics

A/C units connected to apartment building

Understanding how apartment HVAC systems work is essential for ensuring your home stays comfortable throughout the year. At Thelen Plumbing, Heating, and Air, we combine in-depth technical knowledge with unparalleled customer service to provide solutions you can trust.

Whether you need installation, repairs, or maintenance, our certified technicians are ready to help you every step of the way. Don’t leave your comfort to chance—contact Thelen Plumbing, Heating, and Air today and let us take care of all your HVAC needs!

What Is MERV Rating? Understanding Air Filter Efficiency

When it comes to maintaining a clean and healthy home, air quality is a top priority for every homeowner. But how can you be sure that your HVAC system is effectively filtering out dust, allergens, and harmful particles? That’s where the MERV rating comes in.

What is a MERV rating? How does it impact your air filter’s performance? And most importantly, how do you choose the right filter for your home? Don’t worry—we’ll break it all down for you in this detailed guide. Here’s what we’ll cover in this article:

  • What is MERV rating? The basics
  • Factors that affect MERV rating (and why it matters)
  • What MERV rating is right for your home?

🤔 What Is MERV Rating? The Basics

A person changing an clean air filter on a high efficiency furnace

MERV stands for Minimum Efficiency Reporting Value. It’s a standard developed by the American Society of Heating, Refrigerating, and Air-Conditioning Engineers (ASHRAE) that measures how effectively an air filter can capture particles of different sizes.

MERV ratings range from 1 to 20. The higher the number, the more efficient the filter is at trapping smaller particles, such as pet dander, pollen, mold spores, and even bacteria.

  • Low MERV (1–4) filters capture large dust particles but aren’t effective for smaller allergens.
  • Mid-range MERV (5–12) filters are suitable for most residential settings, as they balance filtration efficiency with airflow.
  • High MERV (13–16) filters can capture finer particles and are recommended for homes with allergies or asthma concerns.
  • MERV 17–20 filters are usually reserved for hospitals and clean rooms, where air quality is critical.

✅ 5 Factors That Affect MERV Rating (and Why It Matters)

Replacing the filter in the central ventilation system. Replacing Dirty Air filter for home central air conditioning system. Change filter in rotary heat exchanger recuperator

Not all air filters are created equal. Here are the top factors that influence a filter’s MERV rating and what they mean for your home.

1. Filter Material

The material used in air filters significantly impacts their effectiveness. Higher MERV (Minimum Efficiency Reporting Value) filters are constructed with dense materials, such as electrostatically charged fibers, which are designed to capture smaller particles more efficiently. These advanced materials can trap dust, pollen, and even microscopic allergens that cheaper filters might miss. On the other hand, lower-quality filters often use thin, less effective materials that allow smaller particles to pass through, reducing air quality. When choosing a filter, understanding the material composition can help you determine its filtration performance and long-term value.

2. Particle Size

MERV ratings indicate how well a filter can trap particles of various sizes, ranging from larger particles like dust and dirt to microscopic ones like allergens and bacteria. Filters with lower MERV ratings (around 1–4) are only capable of capturing larger particles, making them less effective for people who suffer from allergies or respiratory conditions. Conversely, filters with higher ratings (above 8) are designed to capture smaller particles such as mold spores, pet dander, and even fine pollen. If maintaining high indoor air quality is important, it’s worth investing in a filter that can effectively target smaller particle sizes.

3. Airflow Compatibility

While high-MERV filters can provide superior filtration, they may also restrict airflow in HVAC systems that aren’t built to accommodate them. Restricted airflow can lead to reduced system efficiency, increased energy costs, and even potential damage to the HVAC system over time. It’s crucial to check your system’s specifications and consult with a professional if necessary before upgrading to a higher-rated filter. Proper airflow compatibility ensures you get the filtration benefits without negatively impacting your HVAC performance or increasing wear and tear.

4. Intended Use

The ideal filter depends on the environment in which it will be used. A home, for example, may not require the same level of filtration as a medical facility or a commercial building. For residential use, a MERV rating between 8 and 12 typically provides an excellent balance of efficiency and airflow, effectively removing common household allergens while maintaining system compatibility. On the other hand, facilities like hospitals or labs may require ultra-high efficiency filters with MERV ratings above 16 to ensure maximum air purity. Consider the specific needs of the space when selecting a filter to ensure it meets your air quality goals.

5. Health Considerations

If your household includes pets, smokers, or individuals with allergies, asthma, or other respiratory conditions, choosing the right air filter is critical. Mid- to high-MERV filters (ratings of 8–13) are often the best choice in such cases, as they can capture allergens like pet hair, dander, smoke particles, and pollen more effectively. These filters create a healthier indoor environment by reducing irritants that can trigger respiratory issues. For those with severe health concerns, investing in a higher-rated filter can provide peace of mind and noticeable improvements in air quality.

🤔 What MERV Rating Is Right for Your Home?

Woman holds ventilation grill with dust filter to clean it. Dirty and dusty white plastic, harmful for health. Cleaning lady with disguised expression, blurred, in protective rubber gloves and uniform

Choosing the right MERV rating depends largely on your specific needs and circumstances. Here are some quick guidelines to help you decide:

MERV 6–8: The Perfect Balance of Cost and Efficiency

Filters with a MERV rating of 6–8 are ideal for most households. They strike a great balance between affordability and effectiveness, making them a popular choice for everyday use. These filters are designed to capture common household particles such as dust, pet hair, and lint, ensuring cleaner air without overburdening your HVAC system. If you’re looking for a budget-friendly option that keeps your home comfortable and your air quality decent, MERV 6–8 is a solid choice.

MERV 9–12: Enhanced Protection for Allergy Sufferers

If allergies are a concern in your home, MERV 9–12 filters offer an excellent upgrade in air filtration. These filters are more efficient at trapping smaller particles, including pollen, mold spores, and other allergens that can trigger discomfort. They are particularly beneficial for households located in areas with high pollen counts or for families with allergy-prone individuals. While slightly more expensive than MERV 6–8 options, their ability to significantly improve indoor air quality makes them worth the investment.

MERV 13–16: Advanced Filtration for Special Needs

For homes with smokers, multiple pets, or family members with severe allergies or respiratory issues, MERV 13–16 filters provide the highest level of air purification. These filters are capable of capturing finer particles like smoke, microscopic allergens, and even bacteria. However, their advanced filtration comes with a trade-off: these filters can reduce airflow through your HVAC system, so it’s crucial to ensure your system is designed to handle higher resistance. While they may be pricier, MERV 13–16 filters are unmatched when it comes to creating the cleanest and healthiest indoor air possible.

👉 MERV Rating Explained

Understanding MERV ratings is essential for choosing the right air filter to improve your home’s air quality and protect your HVAC system. At Thelen Plumbing, Heating, and Air, our team of experienced professionals is here to help you navigate those choices with ease.

Whether you need guidance on selecting the best filter, routine maintenance, or a complete HVAC upgrade, you can trust us to deliver quality service and tailored solutions that prioritize your comfort and health. Ready to take the next step? Contact Thelen Plumbing, Heating, and Air today and let us help you breathe easier!

How to Clean an AC Condenser Without Removing It

Keeping your air conditioner in top shape is vital for maintaining a comfortable and energy-efficient home. One crucial part of AC maintenance is cleaning your condenser. But did you know you can clean it without removing it? With a few tools and some guidance, you can achieve this in just a few steps.

This guide will walk you through everything you need to know about how to clean AC condenser safely and effectively. Here’s what we’ll cover for you today:

  • Signs that your AC condenser needs cleaning
  • 5 easy steps to clean your AC condenser without removing it
  • Pro tips to keep your AC running efficiently

⚠️ Signs That Your AC Condenser Needs Cleaning

air condenser unit

Your AC condenser plays a crucial role in keeping your home cool and comfortable. Over time, it can collect dirt, debris, and other buildup that may affect its performance. Cleaning your condenser regularly not only helps maintain efficiency but also extends the lifespan of your AC system. Before you start cleaning, it’s essential to recognize the signs that your condenser needs attention, such as:

  • Decreased cooling efficiency – Your home isn’t as cool as it should be, even with the AC running.
  • Higher energy bills – Your energy usage spikes due to the system working harder than necessary.
  • Unusual noises – Grinding, rattling, or buzzing sounds from the outdoor unit could indicate dirt buildup.
  • Visible dirt or debris – Dust, leaves, or even grass clippings accumulating on the condenser could point to the need for cleaning.

✅ 5 Easy Steps to Clean Your AC Condenser Without Removing It

ac condenser units

Cleaning your condenser is easier than you might think, and you don’t need to disassemble it entirely to get great results. Follow these steps to get started:

1. Turn Off the Power

The first and most important step before performing any maintenance on your AC unit is to ensure your safety by turning off the power. Locate the circuit breaker that controls the AC system and switch it off completely. This step is non-negotiable, as working on a powered unit can lead to serious electrical hazards. Once you’ve switched off the breaker, double-check to confirm that there is no power running to the unit. A quick test can be done by adjusting the thermostat to ensure the AC does not turn on. Skipping this step increases the risk of electric shock, so always prioritize safety by verifying the power is off before moving forward.

2. Clear the Area Around the Condenser

The condenser, which is the outdoor component of your AC system, requires ample airflow to function efficiently. Over time, debris such as leaves, dirt, grass clippings, and even twigs can accumulate around the condenser, blocking airflow and reducing performance. Start by removing all visible debris around the unit. Use a broom or garden rake to clear the area and trim back any vegetation within a two-foot radius of the condenser. This includes overgrown bushes, weeds, or low-hanging branches. Proper airflow not only helps the condenser run smoothly but also prevents additional debris from being drawn into the system during operation, which could lead to blockages or damage over time.

3. Clean the Condenser Fins

The condenser fins are delicate metal strips that help release heat from the unit. These fins can quickly become clogged with dirt, dust, and grime, reducing the efficiency of your air conditioner. To clean them, use a soft brush or a vacuum cleaner with a brush attachment. Carefully run the brush in the direction the fins are aligned—usually vertical—so as not to bend or damage them. Avoid using sharp or hard tools, as the fins are extremely fragile. If you notice any stuck grime that can’t be removed with the brush, you can use a fin cleaning spray available at hardware stores. Clean fins improve heat dissipation, allowing the AC to cool your home more effectively.

4. Wash the Coils

After cleaning the fins, it’s time to wash the condenser coils, which are essential for transferring heat out of the system. Begin by using a garden hose set to a gentle water spray to rinse away any remaining dirt or buildup on the coils. Avoid high-pressure water, as this can bend or damage the fins surrounding the coils. For a more thorough clean, you can use a coil cleaning spray. These sprays are readily available at home improvement stores and are specially designed to loosen and remove stubborn grime. Follow the manufacturer’s instructions for the coil cleaner to ensure safe and effective use. Once cleaned, let the coils dry naturally before proceeding to the next step.

5. Straighten Bent Fins

Bent fins on the condenser can significantly reduce airflow, forcing your AC unit to work harder and lowering its efficiency. During your cleaning process, inspect the fins carefully for any that appear bent or misaligned. If you find any, use a fin comb, a specialized tool designed to straighten condenser fins. These tools can be purchased at most hardware or HVAC supply stores. To straighten the fins, align the comb with the fins and gently run it across them, applying light pressure to avoid causing damage. Take your time, as the fins are very fragile. Straightening the fins ensures that air moves freely through the system, improving both the cooling performance and energy efficiency of your AC unit.

💡 Pro Tips to Keep Your AC Running Efficiently

ac condenser unit

Your air conditioning system is an important investment, and taking care of it will not only extend its lifespan but also ensure it runs efficiently year-round. Proper maintenance can save you money on energy bills and reduce the need for frequent repairs. To help you get the most out of your AC and minimize the hassle of condenser cleanings, here are some simple yet effective tips:

Check Your Filters Regularly

Dirty air filters can put unnecessary strain on your entire AC system, reducing efficiency and increasing energy costs. A clogged filter also lowers air quality in your home. To prevent these issues, make it a habit to check your filters regularly and replace them every 1-3 months, depending on usage and the type of filter you have. This small step can make a big difference in extending the life of your AC system.

Schedule Yearly Maintenance

Annual maintenance is key to keeping your AC system running smoothly. A professional tune-up can identify potential issues before they become costly repairs. Technicians will inspect, clean, and optimize your system to ensure peak performance. At Thelen Plumbing, Heating, and Air, our experts are here to help you stay ahead of any problems and keep your home comfortable year-round.

Trim Nearby Vegetation

Your outdoor condenser unit needs proper airflow to function efficiently. Overgrown plants, shrubs, or debris around the unit can block airflow and cause your system to work harder than it needs to, leading to unnecessary wear and tear. Keep at least 2 feet of clearance around the condenser by trimming vegetation regularly. This simple step helps your AC work efficiently and last longer.

Install a Cover for Winter

If you live in a cooler climate, your AC condenser is likely not in use during the winter months. Protect it from debris, snow, and ice by installing a cover during the off-season. This ensures the unit stays clean and in good condition, ready to perform when summer rolls around. Just be sure to remove the cover before turning your AC back on in the spring.

👨‍🔧 Clean AC Condenser

Keeping your AC condenser clean is a great way to boost your air conditioner’s performance and extend its lifespan, but some tasks are best left to the professionals. At Thelen Plumbing, Heating, and Air, we pride ourselves on delivering expert AC services that homeowners can trust.

From seasonal tune-ups to repairs and deep cleaning, our experienced team ensures your system runs at its best all year long. Ready to give your air conditioner the care it deserves? Contact us today to schedule your service and experience the Thelen Plumbing, Heating, and Air difference!

a man wearing a mask and gloves holding a air filter a man wearing a mask and gloves holding a air filter

How to Clean AC Filter For Better Efficiency & Air Quality

Your air conditioner is critical for keeping your home comfortable, especially during the summer months. However, even the best AC systems need regular maintenance to stay efficient and provide optimal air quality. One key maintenance task every homeowner should know is how to clean AC filter.

This guide will show you why cleaning your AC filter is essential, how often you should do it, and walk you through the step-by-step process to keep your system running smoothly. Here’s what you’ll learn in this post:

  • Why cleaning your AC filter regularly matters for your comfort and health
  • Step-by-step guide on how to clean your AC filter for better efficiency
  • Pro tips for maintaining your AC system year-round

🤔 Why Cleaning Your AC Filter Matters

clean and dirty air filter

Your air conditioner’s filter plays a crucial role in maintaining both the efficiency of your system and the quality of the air you breathe. Over time, this filter traps dust, debris, pet dander, and other airborne particles, preventing them from recirculating in your home. However, when the filter becomes clogged, it can no longer do its job effectively. This can cause a chain reaction of issues that affect your comfort, health, and wallet, including:

  • Reduced Efficiency: Blocked filters make your AC work harder, leading to higher energy bills.
  • Poor Air Quality: Dirt, allergens, and pollutants can circulate in your home, impacting your health.
  • Shorter Equipment Lifespan: Increased strain on your system could cause parts to wear out faster.
  • Higher Maintenance Costs: A neglected filter can lead to larger, more expensive repairs down the road.

✅ 7 Step Guide to Clean an AC Filter

ac filter change

Cleaning your AC filter doesn’t take much time and can save you from hefty repair bills. Here’s how to do it efficiently:

1. Turn Off the AC Unit

Safety should always be the top priority when working with any electrical appliance, and your AC unit is no exception. Before starting the process of cleaning or replacing your AC filter, make sure to turn off your AC unit completely. This step is crucial to avoid any accidents, such as electric shocks or malfunctions, while handling its internal components. Locate the power switch on your AC unit or turn it off from the circuit breaker if necessary. Taking this precaution ensures that you can work on the filter without any risk of the system kicking on unexpectedly.

2. Locate the Filter

The next step is finding where your AC filter is located, which can vary depending on the type of AC unit you have. In most systems, filters are either in the return air vent or the blower compartment. The return air vent is typically a large grille located on the ceiling, wall, or floor, depending on your home’s layout. If not there, check inside the blower compartment by opening the access panel of your AC unit. This might require a screwdriver or other tools, so be prepared. If you’re unsure where to look, refer to your AC unit’s user manual, which will usually include detailed instructions or diagrams to guide you in locating the filter. Identifying the right spot to access your filter is essential to move forward with the cleaning or replacement process.

3. Remove the Filter

Once you’ve pinpointed the exact location of your filter, it’s time to carefully remove it. Most filters can be slid or pulled out of their slots with ease. Take note of the size and orientation of the filter as you remove it—many filters have an arrow or marking that indicates the direction of airflow. This will help you reinstall it correctly later. Handle the filter gently, as it may be fragile, especially if it’s a disposable type. Watch for any dust or debris that could scatter as you remove it. If your filter is dirty, you may want to have a plastic bag or trash bin nearby to contain the mess. Removing the filter properly sets the stage for inspecting, cleaning, or replacing it seamlessly.

4. Inspect the Filter

After removing the filter, take a closer look to assess its condition. Hold it up to a light source, such as a window or a flashlight, to check for transparency. If light can pass through easily, your filter is still relatively clean and may not need immediate replacement. However, if the filter looks dirty or clogged and no light passes through, it’s a clear indicator that it’s time for a cleaning or replacement. A clogged filter can restrict airflow, reduce your AC’s efficiency, and even force the system to work harder, leading to higher energy costs. Make sure to also check for any visible damage, such as tears or warping, which would also warrant a replacement. A thorough inspection ensures you make the right decision about the next step.

5. Clean the Filter

If you have a reusable filter, cleaning it can be a cost-effective way to extend its lifespan. Start by gently tapping the filter against a hard surface to loosen any loose debris. Next, use a vacuum cleaner with a soft brush attachment to remove dust and dirt from the surface. Once the loose debris has been cleared, rinse the filter under lukewarm water to remove any remaining buildup. For stubborn grime, prepare a cleaning solution with mild detergent and let the filter soak for a few minutes before scrubbing it gently with a soft brush. Avoid using harsh chemicals or excessive force, as this could damage the filter. After cleaning, shake off any excess water and allow the filter to dry completely before reinstalling it. This step is critical, as a damp filter can promote mold and mildew growth. If your filter is disposable, skip the cleaning and replace it with a new one that matches the size and type of the original. Ensure the new filter meets your AC unit’s specifications for optimal performance.

6. Reinsert the Filter

Once your filter is clean and dry, or if you’ve replaced it with a new one, it’s time to reinstall it. Carefully slide the filter back into its slot, ensuring that it is positioned correctly. Most filters have an arrow indicating the direction of airflow—this arrow should align with the direction of airflow in your AC system. Double-check that the filter sits securely in its frame without bending or leaving gaps. A properly installed filter ensures that air flows smoothly through the system without bypassing the filtration process. Take a moment to confirm that everything looks as it did before you removed the filter. Proper reinsertion is key to maintaining your AC’s efficiency and ensuring clean, filtered air throughout your home.

7. Turn the AC Back On

With the filter back in place, the final step is to turn your AC unit back on. Flip the power switch or turn it back on at the circuit breaker, and let the system run for a few minutes. Observe its operation to ensure everything is functioning as expected. With a clean or new filter, you should notice improved airflow and potentially quieter operation as the system won’t have to work as hard to circulate air. A clean filter also enhances energy efficiency and helps maintain better air quality in your home. Regularly performing this maintenance step will keep your AC running smoothly and extend its lifespan, giving you peace of mind and a more comfortable living environment.

💡 Pro Tips for Maintaining Your AC Year-Round

removing an air filter from ac

Cleaning your AC filter is just one part of proper maintenance. Here are some other tips to keep your cooling system in top shape:

Schedule Routine Maintenance

It’s important to have a professional inspect your air conditioning system at least once a year. Routine maintenance can identify potential issues early, improve energy efficiency, and ensure your system runs smoothly throughout the season. Regular check-ups can also extend the lifespan of your AC unit, saving you money in the long run.

Keep Outdoor Units Clear

Make sure the area around your outdoor AC condenser is clean and free from dirt, leaves, and debris. Blockages can restrict airflow, forcing your system to work harder and reducing its efficiency. Regularly clearing the area and trimming nearby plants can help your AC perform at its best.

Inspect Ductwork

Leaky ductwork can lead to reduced efficiency, uneven cooling, and higher energy bills. Inspect your ducts for any visible gaps, cracks, or damage, and seal them promptly. Properly sealed ductwork ensures that cooled air reaches every room as intended, keeping your home comfortable and efficient.

Upgrade to a Smart Thermostat

Switching to a smart thermostat can help you optimize your AC usage, saving energy and extending the life of your system. These devices allow you to set schedules, adjust temperatures remotely, and monitor usage patterns. Investing in a smart thermostat not only improves comfort but also reduces unnecessary energy consumption.

⭐️ Clean AC Filter

Taking care of your AC filter is one of the simplest ways to improve your air conditioner’s efficiency and extend its lifespan. But when it comes to more complex maintenance or repairs, trust the experts at Thelen Plumbing, Heating, and Air. With our certified technicians, fast and reliable service, and unwavering commitment to your comfort, we’re here to ensure your AC runs smoothly all year long.

Ready to schedule your AC maintenance or need help with a repair? Contact Thelen Plumbing, Heating, and Air today and let us take care of the rest!

water heater large drain water heater large drain

How to Flush a Water Heater & Extend Its Lifespan

Keeping your water heater in top shape is critical for maintaining a comfortable home. Whether you’re washing dishes or taking a warm shower, chances are you rely on your water heater daily. But did you know flushing your water heater regularly can prevent issues like poor efficiency, strange noises, or even unexpected breakdowns?

This guide will walk you through how to flush a water heater effectively so you can enjoy hot water when you need it, for years to come. Here’s what we’ll cover:

  • Why flushing your water heater is essential
  • Step-by-step guide to flushing a water heater
  • Water heater maintenance tips to extend its lifespan

🤔 Why Flushing Your Water Heater Is Essential

flushing a water heater

Your water heater works hard every day to provide your home with hot water, but over time, it can accumulate buildup that reduces its efficiency and performance. Minerals like calcium and sediment from your water supply settle at the bottom of the tank, creating a layer of debris that can affect how well your water heater operates. If left unchecked, this buildup can lead to higher energy bills, noisy operation, and even expensive damage that requires repairs or replacement.

Flushing your water heater regularly is a simple maintenance step that can prevent these issues and keep your system running smoothly. Here are some key benefits of flushing your water heater:

  • Improved Efficiency: A clean tank heats water faster, saving energy and reducing your utility bills.
  • Extended Lifespan: Regular maintenance removes corrosive sediments, helping your water heater last longer.
  • Quieter Operation: Flushing eliminates mineral build-ups that can cause noisy rumbling or banging sounds.
  • Cleaner Water: It prevents sediment buildup from entering your water lines, ensuring clean, clear water for your home.

✅ 6 Steps to Flush a Water Heater

water on the wall

Flushing a water heater might sound intimidating, but it’s simpler than you think. Follow these six steps for a successful DIY water heater flush.

1. Turn Off the Water Heater

Safety comes first when performing maintenance on your water heater. Start by turning off the water heater to avoid any potential accidents or damage during the process. If you have a gas water heater, locate the gas supply valve, which is typically found near the bottom of the unit. Turn the valve to the “off” position to stop the flow of gas. For electric water heaters, head to your home’s circuit breaker panel and carefully switch off the breaker connected to the water heater. This step is critical to avoid any electrical hazards or damage to the heating elements during the draining and flushing process. Always double-check to ensure the power or gas supply is fully turned off before proceeding.

2. Shut Off the Water Supply

After ensuring the water heater is safely turned off, the next step is to stop the flow of water into the tank. Locate the cold water supply valve, which is usually positioned at the top of the water heater tank. Turn this valve to the “off” position to prevent any water from entering the tank while you work. This step is essential to keep the tank isolated during the draining process and ensures that no additional water flows in while you are flushing out sediment or debris. Without shutting off the water supply, you may encounter difficulties in efficiently cleaning the tank.

3. Attach a Hose to the Drain Valve

To prepare for draining the water heater tank, you’ll need a garden hose. Locate the drain valve, which is typically found near the bottom of the tank. Take your garden hose and securely attach it to the valve to direct the water safely out of the tank. Make sure the connection is tight to prevent leaks during the draining process. Position the other end of the hose in a suitable drainage location, such as a floor drain, a bathtub, or outdoors. Be mindful that the water being drained is likely very hot, so take precautions to avoid burns or injuries. Wear gloves or use tools to handle the valve if necessary, and ensure the drainage area can handle the hot water to prevent any damage.

4. Drain the Tank

Once the hose is securely attached and positioned, open the drain valve on the water heater to begin draining the tank. This may take some time, depending on the size of your water heater and the amount of water it holds. To improve the drainage process, open a hot water faucet in your home. This creates airflow in the system, allowing the water to flow out of the tank more smoothly and efficiently. As the tank empties, take a moment to observe the water that is draining out. If you notice murky water, discoloration, or a significant amount of sediment, it’s a sign that your tank needs a thorough cleaning. You may need to refill the tank partially with fresh water and repeat the draining process until the water runs clear. This step helps maintain the efficiency and longevity of your water heater.

5. Flush with Clean Water

After the tank is completely drained, it’s time to flush out any remaining sediment or debris. Turn the cold water supply valve back on briefly to allow clean water to flow into the tank. Let the water run through the system for a few minutes, flushing out any last traces of sediment. Be sure to monitor the water exiting through the hose or drain valve, ensuring it runs clear. This step is important for maintaining the performance of your water heater, as accumulated sediment can reduce efficiency and even damage the tank over time. A thorough rinse ensures your water heater is clean and ready for optimal operation.

6. Refill and Power Up

Once you’re satisfied with the flushing process, close the drain valve tightly and disconnect the garden hose. Turn the cold water supply back on, allowing the tank to refill completely. Open a hot water faucet in your home to release any trapped air from the system. You may hear gurgling noises as the air escapes—this is a normal part of the process. Once water flows steadily from the faucet, you’ll know the tank is full and air-free. At this point, you can safely turn the power back on at the circuit breaker for electric water heaters or relight the gas supply for gas models. Give the water heater some time to heat the water to your desired temperature, and you’re all set! Your water heater is now clean, refilled, and ready to provide hot water efficiently.

👨‍🔧 Water Heater Maintenance Tips to Extend Lifespan

turn knob water heater

Regularly flushing your water heater is just one part of ensuring its longevity. Here are a few additional maintenance tips to keep your water heater running like new:

Inspect the Anode Rod

The anode rod plays a crucial role in protecting the inside of your water heater tank from rust and corrosion. It attracts corrosive elements in the water, preventing them from damaging the tank. Make it a habit to check the anode rod annually. If it appears heavily corroded or worn down, replace it promptly to extend the life of your water heater.

Watch for Leaks

Leaks can be a sign of bigger problems waiting to happen. Regularly inspect the area around your water heater for any signs of water leaks or moisture buildup. Pay attention to puddles, damp areas, or rust around the base of the tank. Catching leaks early can save you from costly repairs or water damage.

Set the Right Temperature

To ensure maximum efficiency and safety, set your water heater temperature to 120°F. This temperature is warm enough to meet your household needs without wasting energy or risking scalding injuries. Regularly check the thermostat to ensure it’s set correctly and adjust as needed.

Schedule Annual Tune-Ups

A yearly tune-up by a professional technician is essential to keep your water heater in top condition. During a tune-up, a professional can inspect for any potential issues, flush out sediment buildup, and ensure all components are working correctly. Routine maintenance can help you avoid unexpected breakdowns and extend the overall lifespan of your system.

🛠️ Water Heater Maintenance

Flushing your water heater is an important step in maintaining its efficiency and extending its lifespan, but sometimes it’s best to leave the job to the pros. At Thelen Plumbing, Heating, and Air, we take the guesswork out of water heater maintenance and provide expert service you can rely on. With years of experience, a friendly and skilled team, and preventative maintenance plans to keep your entire

HVAC and plumbing system in top shape, we’re the partner you can trust for all your home’s needs. Ready to ensure your water heater is running at its best? Contact Thelen Plumbing, Heating, and Air today and let us handle the hard work for you!

wires on ac unit wires on ac unit

What’s the Best HVAC System for Your Home? (2025)

Your HVAC system is the unsung hero of your home, working tirelessly to keep you cozy in winter and cool in summer. But choosing the best HVAC system for your home can feel overwhelming. With so many options to consider—energy efficiency, cost, and even the size of your home—it’s tough to know where to start. That’s where we come in! This guide will help simplify your decision-making process. Here’s what we’ll cover:

  • How to choose the best HVAC system for your home
  • Top HVAC systems to consider in 2025
  • Understanding the types of HVAC systems

🤔 How to Choose the Best HVAC System for Your Home

3 hvac system

Choosing the right HVAC system can feel overwhelming, but with the right approach, it doesn’t have to be. Your heating and cooling system plays a crucial role in your overall comfort and energy efficiency, making it an important investment. To make the right decision, it’s essential to consider several factors that align with your home’s specific needs and your long-term goals. Here’s how to simplify the process:

  • Consider your home size: Central air works well for larger homes, while ductless units are ideal for smaller spaces or segmented areas.
  • Evaluate energy efficiency: Choose systems with high SEER ratings for lower utility costs. Heat pumps and smart systems are often the most energy-efficient.
  • Set a realistic budget: Cheaper systems may have higher long-term costs due to energy usage or repairs—think beyond upfront costs.
  • Factor in maintenance: Regular upkeep is essential, and smart systems can alert you when it’s time for maintenance.

🛠️ 5 HVAC Systems to Consider in 2025

checking readings on ac

Here’s our list of the best HVAC systems that are making waves this year, based on performance, efficiency, and reliability:

1. Trane XV20i Variable Speed Air Conditioner

The Trane XV20i is a premium air conditioner designed for those who prioritize energy efficiency, reliability, and high performance. Its variable speed technology adapts seamlessly to your home’s cooling needs, ensuring consistent temperatures without overworking the system. This not only enhances comfort but also reduces energy consumption, making it an eco-friendly choice, especially for larger homes. The XV20i operates at whisper-quiet levels, allowing it to provide superior cooling without disturbing your day-to-day activities or relaxation. Its durable construction and high-quality materials ensure it can withstand the test of time, delivering reliable performance for years to come. Backed by Trane’s reputation for excellence, this model is an excellent long-term investment in both comfort and energy savings.

2. Goodman GSXC18 Air Conditioner

The Goodman GSXC18 is a standout choice for homeowners looking to strike a balance between affordability, energy efficiency, and performance. With its impressive SEER (Seasonal Energy Efficiency Ratio) rating, this unit is designed to significantly lower your energy bills without sacrificing cooling power. The GSXC18 is also equipped with a high-efficiency two-stage scroll compressor, ensuring smooth and consistent operation even during the hottest days of summer. Its affordability makes it particularly attractive to budget-conscious homeowners, and despite its lower price point, it doesn’t compromise on durability or reliability. Built with Goodman’s signature quality, this air conditioner is an excellent choice for families looking for a dependable and cost-effective cooling solution.

3. Mitsubishi Electric Ductless Mini Split

For homes without existing ductwork, the Mitsubishi Electric Ductless Mini Split offers a highly flexible and efficient cooling solution. This system is perfect for spaces with unique layouts, older homes, or situations where installing ductwork isn’t feasible. The ductless mini split provides customized cooling, allowing you to independently control temperatures in specific rooms or zones. This not only maximizes comfort but also helps save energy by cooling only the areas you’re using. The Mitsubishi system is known for its advanced inverter technology, which ensures precise temperature control while minimizing energy use. Additionally, its quiet operation and sleek, unobtrusive design make it a popular choice for homeowners looking for functionality combined with a modern aesthetic. Whether it’s for one room or an entire level, the Mitsubishi Electric Ductless Mini Split delivers reliable performance and energy efficiency.

4. Carrier Infinity 26 Air Conditioner

The Carrier Infinity 26 is a high-end air conditioner that combines cutting-edge technology with exceptional cooling performance. One of its standout features is its smart thermostat, which allows you to control and monitor your system remotely via your smartphone or other devices. This feature adds an extra layer of convenience, enabling you to adjust settings even when you’re not at home. The Infinity 26 is designed for durability, featuring a corrosion-resistant cabinet and advanced components built to handle years of use while maintaining peak efficiency. Its superior SEER rating ensures significant energy savings, while its quiet operation keeps your living space peaceful and comfortable. Ideal for those who value advanced features and long-lasting performance, the Carrier Infinity 26 is a top choice for tech-savvy homeowners seeking reliable cooling.

5. Daikin Fit Heat Pump System

Compact, stylish, and versatile, the Daikin Fit Heat Pump System is perfect for smaller homes or spaces where traditional air conditioners may not fit. This heat pump system is a dual-function unit, providing both heating and cooling capabilities, making it a year-round solution for maintaining indoor comfort. Its sleek, low-profile design allows it to blend seamlessly into your home, while its energy efficiency minimizes utility costs. The Daikin Fit also features advanced inverter technology, which ensures optimal performance by adjusting output to match your home’s needs, reducing energy waste. It’s particularly well-suited for homeowners looking for a space-saving, quiet, and reliable system that offers modern functionality along with energy savings. Whether you need a solution for a small space or want a compact unit that delivers year-round comfort, the Daikin Fit is an excellent option.

👉 Understanding the Types of HVAC Systems

checking on fans on roof

The first step in finding the best HVAC system is understanding what’s out there. Different systems have different strengths, and your home’s size, location, and specific needs will determine which is right for you.

1. Central Air Conditioning and Heating

Central air conditioning and heating systems are an all-in-one solution designed to distribute warm or cool air evenly throughout your home. These systems use a network of ducts to circulate air, making them a popular choice for homeowners looking for consistent climate control. They are particularly effective in larger homes where maintaining an even temperature can be challenging with other systems. Central air systems are known for their efficiency and ability to regulate temperatures across multiple rooms seamlessly. However, homes without existing ductwork will require installation, which can add to the initial setup cost and complexity.

2. Ductless Mini-Split Systems

Ductless mini-split systems are a versatile solution for homes that do not have existing ductwork. These systems feature individual units placed in each room, allowing you to customize the temperature in separate areas. This makes them perfect for homes with unique temperature control needs or spaces where adding ductwork would be impractical. The flexible nature of ductless systems ensures energy efficiency and precise zone-specific climate control, giving homeowners more power over their comfort. While these systems have a higher upfront cost per unit compared to other options, their energy-saving benefits and customizable features make them a worthwhile investment over time.

3. Heat Pumps

Heat pumps are a convenient, energy-efficient solution that can both heat and cool your home, making them an excellent year-round option. These systems come in two main types: air-source heat pumps, which extract heat from the air, and ground-source (or geothermal) heat pumps, which use the earth as a heat source. Heat pumps are especially well-suited for temperate climates with mild winters, as they perform best in moderate weather conditions. Their dual functionality and energy efficiency make them an attractive choice for eco-conscious homeowners. However, in extremely cold climates, heat pumps may struggle to provide adequate heating, which could necessitate an additional heating source during harsh winters.

4. Smart HVAC Systems

Smart HVAC systems represent the future of home climate control, combining cutting-edge technology with unmatched convenience. These systems come equipped with smart thermostats that allow you to control your home’s temperature remotely via an app. Whether you’re at home or on the go, you can adjust settings to maximize comfort and energy efficiency. Smart HVAC systems are ideal for tech-savvy homeowners who value convenience and want to automate their climate control. Additionally, their energy-saving capabilities can lead to significant cost savings over time. However, the advanced technology and convenience come at a higher upfront cost, which may be a consideration for those on a budget.

👨‍🔧 Best HVAC Guide

At Thelen Plumbing, Heating, and Air, we understand that choosing the best HVAC system is a big decision, and we’re here to make it easy for you. With years of experience, a commitment to quality, and a passion for top-notch customer service, our team is ready to help you find the perfect solution for your home.

Whether you’re upgrading for energy efficiency, improved comfort, or advanced technology, you can trust us to guide you every step of the way. Contact Thelen Plumbing, Heating, and Air today to schedule a consultation and let us help you create the ideal climate for your home!

central air for home central air for home

Home AC Refrigerant Types: Which One Is Right for You?

If you’re a homeowner looking to maintain or replace your air conditioning system, you’ve likely come across the term “AC refrigerants.” But with so many home AC refrigerant types available, understanding which one is right for your system can feel overwhelming. Refrigerants play a crucial role—they’re the substances that cool down the air circulating in your home. Picking the wrong type can mean decreased efficiency, increased costs, or even harm to the environment.

In this guide, we’ll break down everything you need to know about home AC refrigerants, covering topics like:

  • What refrigerants do in your AC system
  • The main types of home AC refrigerants
  • How to choose the right refrigerant for your home

🤔 What Do Refrigerants Do in Your AC System?

testing readings

Refrigerants are specialized chemical compounds that are essential for your air conditioning system to function. They work by absorbing and releasing heat, allowing your AC to cool your home efficiently. These substances cycle through your AC system, transitioning between gas and liquid forms as they move between the indoor and outdoor units. This continuous cycle is what keeps your home comfortable, even on the hottest summer days.

Key Points to Remember:

  • Always use the correct refrigerant type for your AC system; using the wrong one can cause inefficiency and potential damage.
  • Regular maintenance is crucial to check for leaks and ensure the refrigerant levels are adequate.
  • If you suspect a refrigerant leak, contact an HVAC professional to handle repairs safely and responsibly.

👉 3 Types of Home AC Refrigerants

propane tank

When it comes to residential air conditioning, there are a few main refrigerant types you’ll hear about. Here’s a closer look at each one so you can understand its benefits and uses.

1. R-22 (Freon)

R-22, commonly known as Freon, dominated the air conditioning industry for decades as the go-to refrigerant due to its efficiency and reliability. It was especially popular in systems installed prior to 2010, where it provided consistent cooling performance even under high-demand conditions. However, as scientific understanding of environmental issues grew, R-22 was identified as a significant contributor to ozone depletion. Under the Montreal Protocol, an international treaty designed to protect the ozone layer, the production and use of R-22 were gradually phased out.

Although older air conditioning systems still rely on R-22, its availability has drastically declined over the years. This limited supply has made sourcing R-22 both difficult and expensive, driving up maintenance and repair costs for older systems. In addition to its ozone-depleting properties, R-22 also has a high global warming potential, making it a major environmental concern. Today, homeowners and businesses using systems with R-22 are encouraged to retrofit their units or upgrade to models using modern, eco-friendly refrigerants. The phase-out of R-22 reflects the industry’s shift toward more sustainable cooling technologies.

2. R-410A (Puron)

R-410A, widely known by its brand name Puron, emerged as the replacement for R-22 and quickly became the standard for air conditioning systems manufactured after 2010. Unlike R-22, R-410A does not contain chlorine, which means it does not cause ozone depletion. This refrigerant also offers superior energy efficiency, allowing air conditioning systems to operate more effectively while consuming less energy, which can lead to cost savings for homeowners over time.

Another advantage of R-410A is its ability to handle higher pressures, enabling modern air conditioning systems to achieve better cooling performance compared to older systems that used R-22. This makes it a popular choice for both residential and commercial applications. However, while R-410A is far less harmful to the environment than R-22, it is not without its drawbacks. It still contributes to global warming, as it has a relatively high global warming potential (GWP) compared to newer alternatives like R-32. Despite this, R-410A remains a reliable and widely adopted refrigerant, bridging the gap between older, environmentally harmful refrigerants and the next generation of sustainable cooling solutions.

3. R-32

R-32 represents the latest advancement in refrigerant technology and is quickly becoming the refrigerant of choice for environmentally conscious cooling systems. With a global warming potential (GWP) that is significantly lower than both R-22 and R-410A, R-32 has a much smaller environmental footprint, making it a top choice for manufacturers and consumers alike. Additionally, R-32 is highly energy-efficient, which not only reduces greenhouse gas emissions but also lowers energy bills for homeowners over the long term.

Many air conditioning manufacturers have begun designing systems specifically for R-32, recognizing its potential to lead the industry into a more sustainable future. Compared to R-410A, R-32 systems use smaller refrigerant quantities to achieve the same level of cooling performance, further enhancing their efficiency and eco-friendliness. R-32 also has better heat transfer capabilities, allowing air conditioning units to cool spaces more quickly and effectively.

One of the key reasons R-32 is gaining widespread adoption is its alignment with global efforts to combat climate change. As countries and industries look for ways to reduce carbon emissions, R-32 provides an ideal solution for those seeking high-performance cooling with minimal environmental impact. While its adoption is still growing, R-32 is set to become the standard in next-generation air conditioning systems, paving the way for more sustainable cooling technologies.

⚖️ How to Choose the Right Refrigerant for Your Home

cold refrigerant

Selecting the right refrigerant for your AC system comes down to a few critical factors. Here’s a checklist to guide your decision.

1. Compatibility with Your Existing Unit

Before purchasing refrigerant, verify your AC system’s compatibility. Older systems often use R-22, while newer models rely solely on R-410A or R-32. Mixing different refrigerants can severely damage your unit, leading to costly repairs or replacements. Always check your system manual or consult a professional to avoid compatibility issues.

2. Environmental Impact

For eco-conscious buyers, refrigerants like R-32 are a better choice. They provide excellent cooling efficiency while minimizing environmental harm due to lower global warming potential (GWP). Many governments are phasing out high-GWP refrigerants, making environmentally friendly options like R-32 not only better for the planet but also compliant with future regulations.

3. Energy Efficiency

Modern refrigerants like R-410A and R-32 are designed for better energy performance. They cool and heat more effectively, reducing strain on your AC system. Over time, this improved efficiency translates to lower electricity bills and extended equipment life, saving you money in the long run.

4. Cost and Availability

Older refrigerants like R-22 are becoming increasingly expensive due to production bans and regulations. While still available in limited quantities, their high cost makes them impractical. Opting for refrigerants such as R-410A or R-32 is usually more economical and ensures easier availability for servicing your unit.

5. Upgrading to a New AC System

If your AC system uses outdated refrigerants like R-22, consider upgrading to a modern unit. Newer systems compatible with R-410A or R-32 offer improved energy efficiency, reduced environmental impact, and better reliability. Although the upfront cost may be higher, upgrading ensures long-term savings and hassle-free performance.

❄️ AC Refrigerant Guide

Choosing the right refrigerant for your home’s air conditioning system doesn’t have to be overwhelming. At Thelen Plumbing, Heating, and Air, we combine years of HVAC expertise with a commitment to eco-friendly, efficient solutions tailored to your needs. Whether you need a system upgrade, a refrigerant replacement, or routine maintenance, our team is here to ensure your home stays cool and comfortable all year round.

Trust Thelen Plumbing, Heating, and Air for reliable, professional service you can count on. Ready to get started? Contact us today to schedule your consultation!

Water Softener Installation (Step-by-Step Guide)

When it comes to maintaining clean and efficient plumbing while prolonging the life of your appliances, installing a water softener is one of the best investments you can make for your home. Hard water brings with it a host of issues, from limescale buildup to reduced water pressure and even higher energy bills. By installing a water softener, you can eliminate these headaches and enjoy softer, more efficient water in your home.

This guide will walk you through everything you need to know about water softener installation. From understanding the process to tackling the installation step by step, we’ve got you covered. What you’ll learn

  • Why you need a water softener
  • Step-by-step water softener installation
  • Pro tips for long-lasting performance

🤔 Why You Need a Water Softener

person putting in water softener

Hard water is water that contains high levels of minerals such as calcium and magnesium. While these minerals are not harmful to your health, they can cause significant issues in your home over time. These problems not only affect the functionality of your appliances and plumbing but can also impact your skin, hair, and overall maintenance efforts.

One of the most common issues caused by hard water is limescale buildup. When hard water flows through your pipes and appliances, it leaves behind mineral deposits, commonly referred to as limescale. Over time, this buildup can reduce the efficiency of appliances such as dishwashers, washing machines, and water heaters, leading to higher energy bills and frequent maintenance needs. Left unchecked, limescale can even cause blockages in pipes, potentially resulting in costly repairs.

Another significant problem is the decreased lifespan of appliances. Hard water forces your household machines to work harder due to mineral deposits clogging and coating internal components. This added strain can lead to premature breakdowns, meaning you’ll need to replace appliances like dishwashers, washing machines, and water heaters much sooner than expected. Hard water doesn’t just cost you in repairs—it shortens the life of the very appliances you rely on daily.

How to Prepare for Water Softener Installation

  • Check Your Water Hardness: Use a test kit to measure water hardness and adjust your softener accordingly.
  • Choose the Right Water Softener: Select a system based on your household size and needs—salt-based for maximum softening, salt-free for eco-friendliness, or dual-tank for continuous use.
  • Pick the Installation Spot: Place the softener near the water main, an electrical outlet, and a drain in a dry, temperature-controlled area.
  • Prepare Tools and Equipment: Gather wrenches, tubing cutters, Teflon tape, PVC piping (if needed), and the necessary fittings.

✅ 7 Step Water Softener Installation

water softener installation

Installing a water softener can seem daunting, but following these steps will simplify the process:

1. Turn Off the Water Supply

Before starting the installation process, it’s crucial to locate your main water supply valve and shut it off completely. This step ensures there is no water flow to the plumbing system while you’re working, which helps prevent potential flooding or leaks during the installation.

2. Drain the Plumbing System

Once the water supply is off, open nearby faucets to drain any remaining water from the pipes. This step is essential as it prevents water from spilling or creating a mess when you begin cutting into the plumbing. Allow the water to run out fully to ensure the pipes are empty before proceeding.

3. Install Bypass Valves

Most water softeners include a bypass valve, a device that allows water to flow around the softener when servicing or maintaining it. Carefully attach the bypass valve to the inlet and outlet ports on the water softener. This will ensure you can easily adjust the water flow in the future without disrupting your household water supply.

4. Connect the Pipes to the Water Softener

To connect the water softener to your plumbing system, begin by measuring and cutting the necessary pipes for the incoming and outgoing water lines. These pipes will link the water supply to the softener and ensure treated water flows to your home. Apply Teflon tape to the threaded ends of the connections to create a tight seal and prevent leaks. Securely connect the pipes to their respective inlet and outlet ports on the water softener.

5. Attach the Drain Hose

The drain hose is an essential component of the water softener, as it carries away wastewater during the regeneration process. Securely connect the drain hose to the designated outlet on the water softener. Run the hose to an appropriate drainage point, such as a floor drain or utility sink, making sure to maintain an air gap at the drainage point. The air gap is critical to prevent backflow, which could contaminate your water supply.

6. Add Salt or Potassium

If your water softener uses a salt-based system, it is now time to fill the brine tank with either salt or potassium chloride. Follow the manufacturer’s instructions for the correct amount and type of material for your specific model. The brine solution is essential for the softening process, as it regenerates the resin beads that remove hardness minerals from the water.

7. Turn the Water Back On

After completing all connections and ensuring everything is secure, slowly turn the main water supply back on. As water flows into the system, check all connections for leaks, tightening them if necessary. Allow the system to fill with water and follow the setup instructions in the water softener’s manual. This may include running an initial regeneration cycle to prepare the unit for regular operation. Once the setup is complete, your water softener will be ready to provide softened water throughout your home.

Pro Tips for Long-Lasting Performance

water softener thelen installation

Long-lasting performance ensures your tools or systems remain efficient and reliable over time. These pro tips will help you maximize durability and get the most out of your investment.

Regular Maintenance

Regular maintenance is essential to ensure your system operates at peak performance. Check and refill the salt levels frequently to prevent mineral buildup, which can reduce efficiency over time. By staying on top of this task, you’ll prolong the life of your system and ensure it continues to function effectively.

Water Testing

Testing your water hardness periodically is crucial for maintaining accurate settings on your system. Over time, water hardness levels can change, and adjustments may be needed to keep things running smoothly. Regular testing ensures your water treatment system is calibrated correctly to meet your household’s needs.

Inspect for Leaks

Routinely inspecting the system for leaks is a simple but vital step. Check all connections and components to catch any potential issues early. Addressing leaks promptly can help you avoid costly repairs down the line and maintain the overall integrity of your water treatment system.

Professional Servicing

For complete peace of mind, consider scheduling an annual servicing with a trusted professional. Regular servicing includes thorough diagnostic checks and maintenance that can identify and resolve issues you might miss. Professional attention helps ensure your system continues to work efficiently and reliably over time.

💧 Water Softener Installation

When it comes to water softener installation and water filtration needs, Thelen Plumbing, Heating, and Air is the team you can trust. With experienced technicians, exceptional customer service, and affordable, high-quality solutions, we make the process seamless and stress-free. Our comprehensive expertise ensures your home’s water system is in the best hands.

Don’t wait to improve your water quality—contact Thelen Plumbing, Heating, and Air today to schedule your installation or learn more about our services!

Best Way to Finance a New HVAC System (2025)

Keeping your home comfortable year-round often means investing in a reliable HVAC system. But with the upfront costs of a new heating and cooling system, it’s no surprise that many homeowners feel overwhelmed when figuring out how to pay for it. Thankfully, there are various options available to make financing an HVAC system more affordable and manageable.

This guide will walk you through everything you need to know about the best way to finance a new HVAC system, including:

  • Understanding why financing may be the best option for your HVAC purchase
  • Exploring 6 practical financing methods
  • Learning how to choose the option that fits your budget

💵 Why Finance Your HVAC System?

woman assessing finances

Purchasing a new HVAC system is not just an expense—it’s an investment in your home’s comfort, energy efficiency, and long-term savings. A reliable HVAC system is essential for maintaining a comfortable living environment year-round, ensuring your home stays cool during scorching summers and warm during freezing winters. Beyond comfort, upgrading to a new system can significantly reduce your energy consumption, lowering utility bills and minimizing your carbon footprint. However, the upfront cost can be a major hurdle, ranging anywhere from $5,000 to $12,000 or more, depending on your home’s size, the type of system you need, and the additional features you may want. This high initial expense often deters homeowners from upgrading, even when their current system is outdated or inefficient. Here’s why financing your HVAC system might be the perfect solution:

  • Break the Cost into Manageable Payments: Financing allows you to spread the expense over time instead of paying it all upfront.
  • Upgrade to a More Energy-Efficient System: With financing, you can afford advanced models that save energy and lower utility bills in the long run.
  • Maintain Your Home’s Comfort Right Away: There’s no need to wait or compromise on quality—start enjoying enhanced comfort immediately.
  • Avoid Depleting Savings: Financing keeps your emergency savings intact while still allowing you to invest in your home.

⭐️ 6 Options to Finance Your New HVAC System

hvac system unit outside residential home

When it comes to financing, it’s all about finding what works best for your financial situation. Below are the most effective ways to finance an HVAC system:

1. Manufacturer Financing Programs

Many HVAC manufacturers provide special financing plans designed specifically for their customers. These programs typically come with competitive interest rates and promotional periods, making it easier for homeowners to afford a new HVAC system. A popular option within these programs is zero-interest financing, which allows customers to avoid paying any interest if the full balance is paid off within a specified timeframe. Another common feature is deferred payment options, which enable customers to delay payments for a set period, easing the immediate financial burden of a major HVAC investment. By offering these flexible terms, manufacturers make it more accessible for customers to upgrade or replace their systems.

2. HVAC Contractor Financing

Many local HVAC contractors offer their own financing options by partnering with financial institutions to provide in-house financing. At Thelen Plumbing, Heating, and Air, for example, we work closely with Synchrony Bank to offer customers simple, stress-free financing solutions. These plans are designed to meet a variety of budgets, with flexible payment terms that make them suitable for homeowners in different financial situations. The application process is straightforward and often comes with quick approvals, sometimes processed on the same day. By choosing contractor financing, homeowners can enjoy the convenience of working with one trusted provider for both the HVAC system and the financing plan, streamlining the entire process.

3. Home Equity Loans and Lines of Credit (HELOC)

For homeowners comfortable leveraging their home equity, home equity loans and HELOCs can be excellent financing options. These options generally come with lower interest rates since they are secured by the value of the home. With a fixed home equity loan, homeowners can borrow a lump sum with a fixed interest rate and set repayment term, providing predictable monthly payments and certainty about the cost over time. Alternatively, a HELOC acts as a revolving line of credit, allowing homeowners to withdraw funds as needed and pay interest only on the amount used. This flexibility makes HELOCs ideal for projects where the exact costs may vary, such as HVAC system upgrades or repairs.

4. Personal Loan

Personal loans are another option for covering the cost of a new HVAC system. These loans are typically unsecured, meaning no collateral is required, and they come with fixed monthly payments, providing clarity and consistency in budgeting. Personal loans are also known for their quick application and funding processes, with approvals and funding often completed within days, making them a practical choice for urgent HVAC needs. Since personal loans are available through a wide range of lenders, homeowners have the flexibility to compare terms and select the loan amount and repayment period that suits their financial situation best.

5. Credit Cards

For smaller HVAC purchases or emergency repairs, credit cards can be a convenient financing option. Many credit cards offer promotional APR periods, allowing customers to finance their purchase at zero or low interest for an introductory timeframe. This can help minimize costs if the balance is paid off before the promotional period ends. Additionally, some credit cards offer reward programs, allowing users to earn cashback or points while paying for their HVAC system. However, it’s important to exercise caution when using credit cards, as they often carry high interest rates after the promotional period ends, potentially leading to higher costs if the balance isn’t paid off promptly.

6. Energy Efficiency Rebates and Incentives

Investing in an energy-efficient HVAC system can not only reduce utility bills but also qualify homeowners for rebates and incentives that help offset installation costs. Federal tax credits are available for qualifying ENERGY STAR® systems, making these energy-efficient upgrades more affordable. Local utility companies often offer additional rebates for high-efficiency HVAC units, incentivizing homeowners to make eco-friendly choices. Some programs also provide special eco-friendly financing options to support the purchase of sustainable home systems. By taking advantage of these rebates and incentives, homeowners can reduce the overall cost of their HVAC upgrade while contributing to environmental sustainability.

⚖️ How to Choose the Right Financing Option for You

person calculating hvac finances

Here are three factors to consider before making a decision:

Monthly Budget

Start by determining how much you can afford to borrow without putting unnecessary strain on your finances. Consider your monthly income, expenses, and any existing debts. Setting a realistic budget ensures you won’t overextend yourself and will help you stay on track with repayments.

Interest Rates and Fees

Take the time to compare interest rates, loan terms, and potential hidden fees. A lower interest rate can save you significant money over time, but also check for processing fees, penalties, or other charges. Additionally, ensure the loan offers repayment flexibility that suits your financial situation.

Loan Timing

If you need funds urgently, prioritize financing options that offer instant or same-day approvals. Many lenders now provide quick online applications with fast turnaround times, so you can access the money you need without unnecessary delays.

🔎 HVAC Financing Guide

At Thelen Plumbing, Heating, and Air, we understand that financing a new HVAC system is a big decision, and we’re here to make the process as smooth and stress-free as possible. With years of experience, a commitment to quality, and a range of flexible financing options, our team is dedicated to finding the best solution for your heating and cooling needs.

When you choose Thelen Plumbing, Heating, and Air, you’re choosing reliability, expertise, and a partner you can trust to keep your home comfortable year-round. Ready to take the next step? Contact us today to explore your financing options and get started on upgrading your HVAC system!

Schedule Service

"*" indicates required fields

This field is for validation purposes and should be left unchanged.