
Author: Kevin

outdoor ac unit filter outdoor ac unit filter

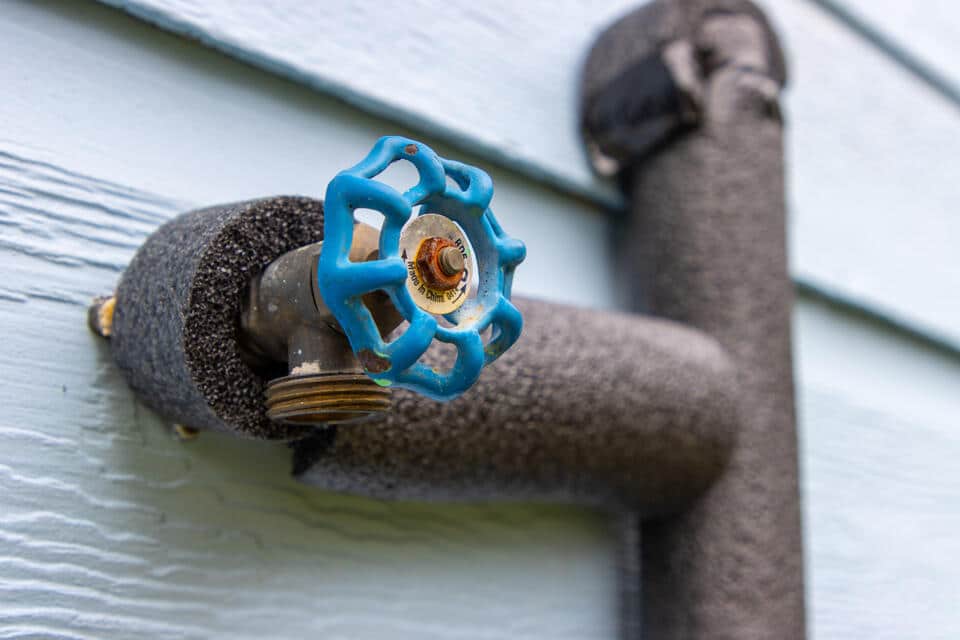
✨ Can A Dirty Air Filter Cause AC Not To Cool?

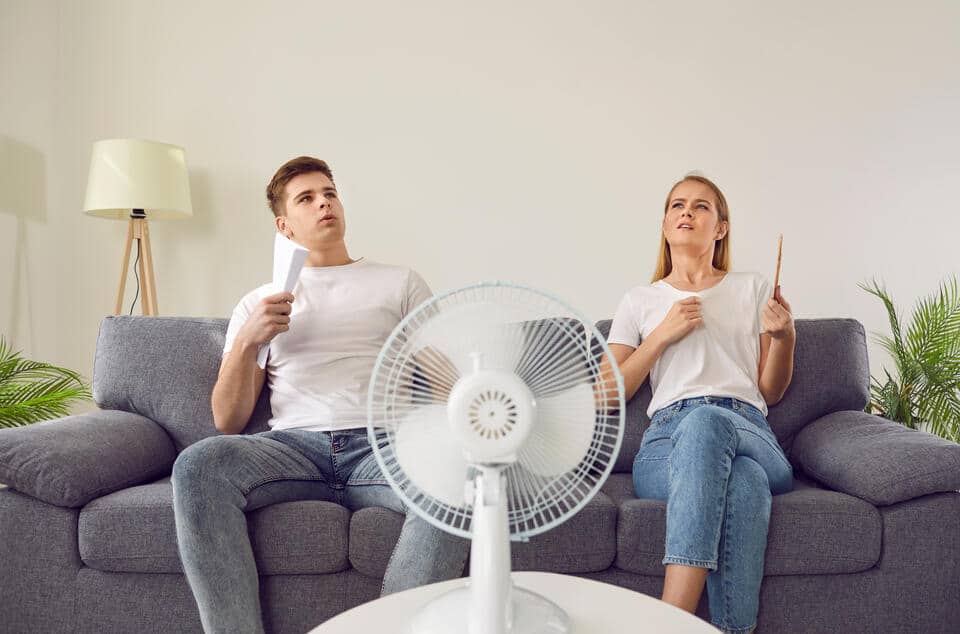
Air conditioning is a lifesaver during hot summer days, but what happens when your AC struggles to cool your home effectively? Often, the issue isn’t with the AC unit itself but something surprisingly simple—your air filter. Can a dirty air filter cause AC not to cool? Absolutely. A clogged air filter might just be the culprit behind your cooling woes. In this blog, we’ll explore:

  • Signs that your air filter may need replacing
  • The steps to replace your AC filter at home
  • How to prevent future issues with regular maintenance

⚠️ Signs Your AC Filter Needs Replacing

check air conditioner filter

Not sure if your air filter is causing the problem? Here are some common signs to watch for: reduced airflow from your vents, unusual smells coming from your HVAC system, increased dust or allergens in your home, higher energy bills, or strange noises when your system is running. If you notice any of these, it might be time to check or replace your air filter to keep your system running smoothly.

  • Weak Airflow: Is there barely any air coming from your vents? This is often due to a clogged filter.
  • Uneven Cooling: Some rooms feel cold while others stay warm. A dirty filter could be disrupting airflow.
  • Spike in Energy Bills: A struggling AC system uses more energy, which shows up in higher cooling costs.
  • Dusty Air or Allergies: A failing filter lets more dust and allergens circulate, causing discomfort for you and your family.

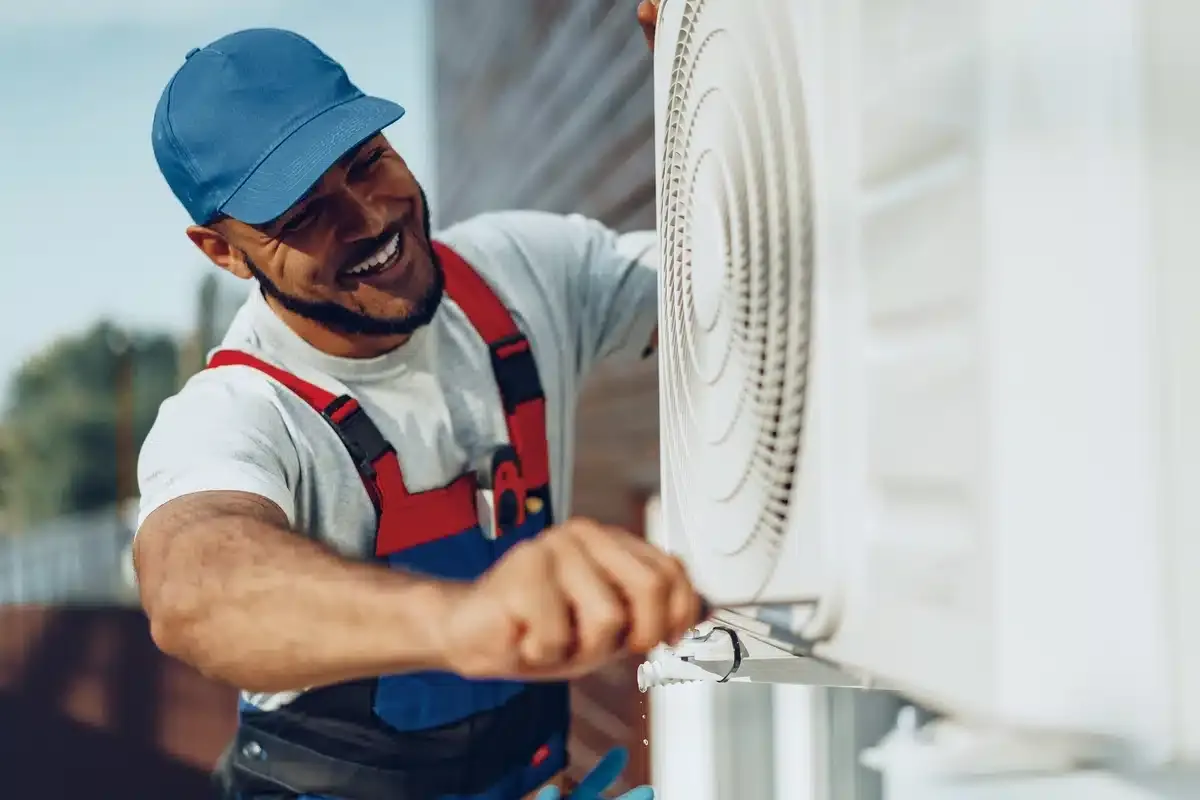
👉 5 Simple Steps to Replace an AC Air Filter

ac unit for home

Changing your air filter is a simple task that doesn’t require professional help—anyone can do it! Here’s a step-by-step guide to help you through the process:
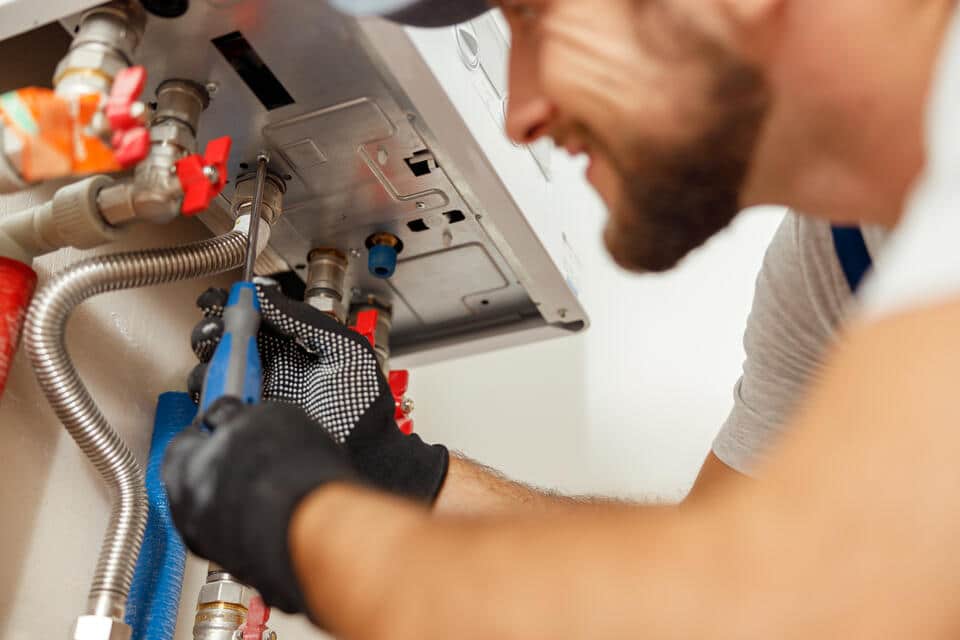
1. Turn Off Your AC

Before you begin, make sure to turn off your air conditioning system. This step is crucial for your safety and ensures that no air is circulating while you’re working. The fan or blower can kick up dust and debris, making the task messier. Plus, it’s always a good idea to prevent any risk of electrical issues while handling your AC components.

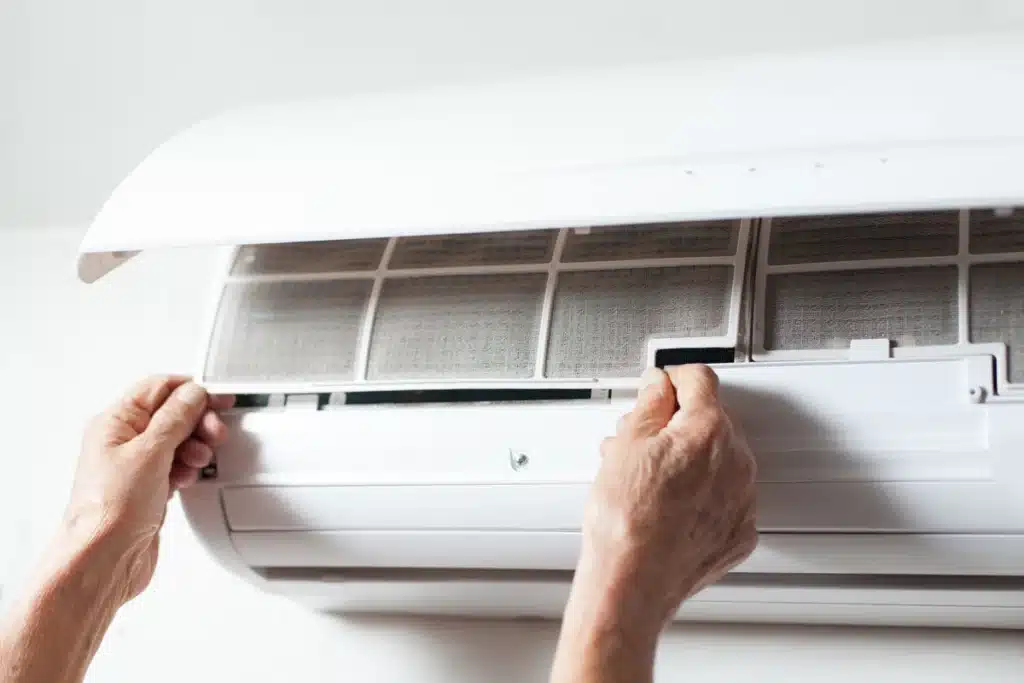
2. Locate the Air Filter

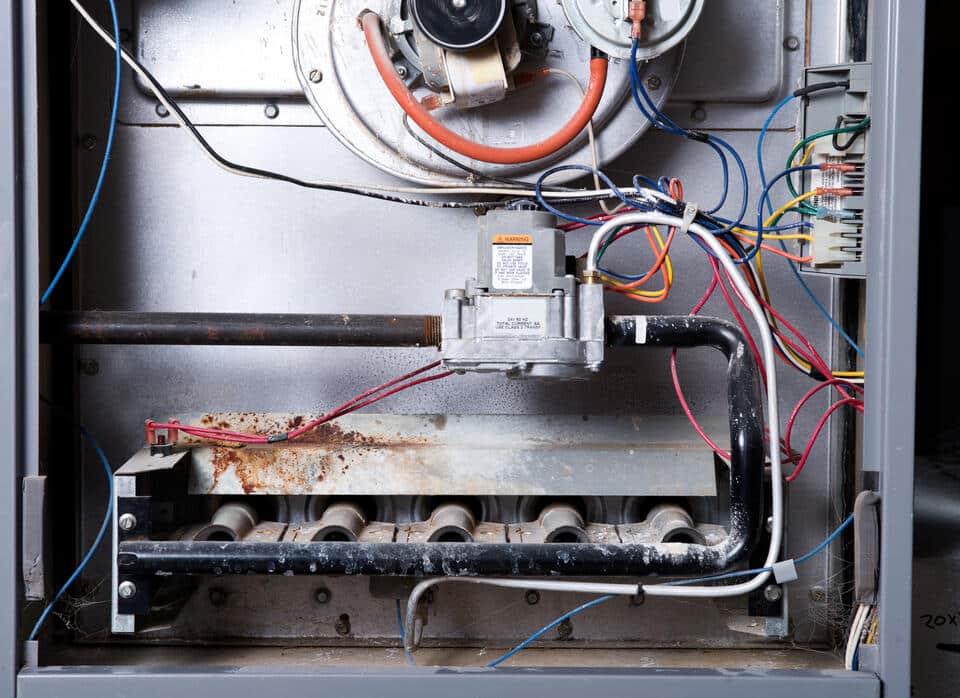
Air filters are usually found in the return air duct or inside the air conditioning unit itself. If you’re not sure where to look, check your system’s user manual or consult the manufacturer’s website for guidance. The return air duct is often located near the ceiling, wall, or floor, depending on your home’s setup. If your system has multiple filters, make sure to locate and replace all of them.

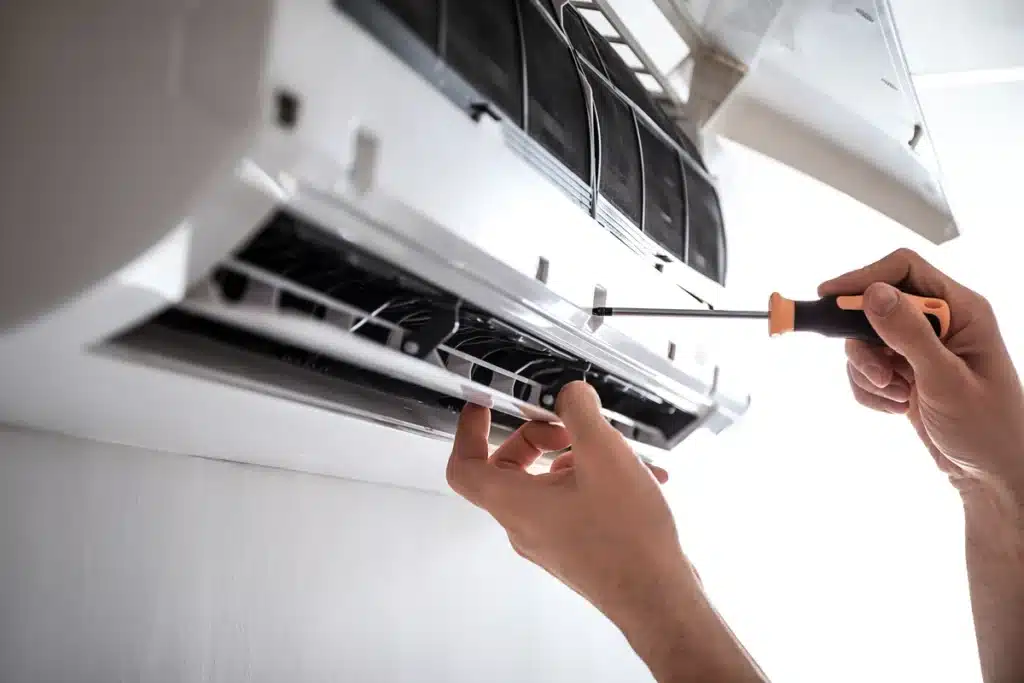
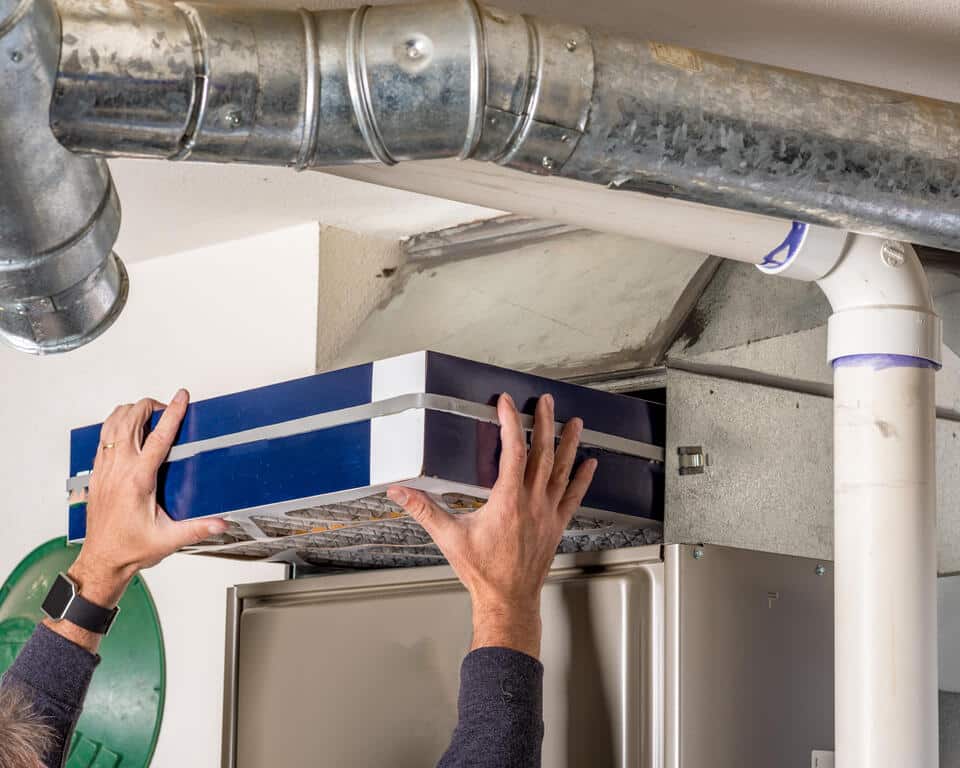
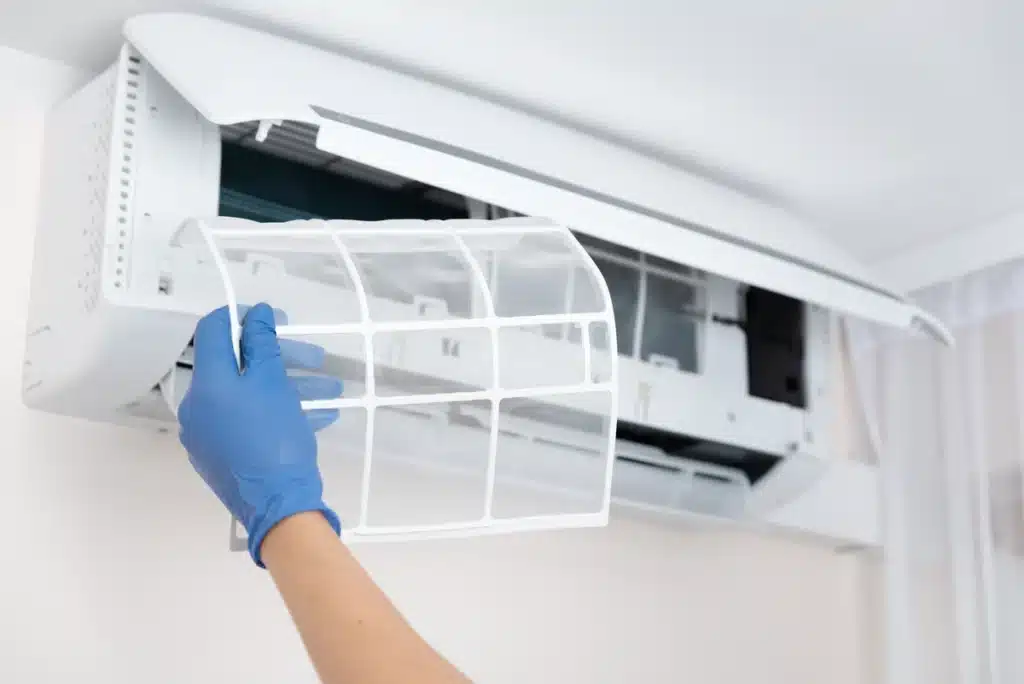
3. Remove the Old Filter

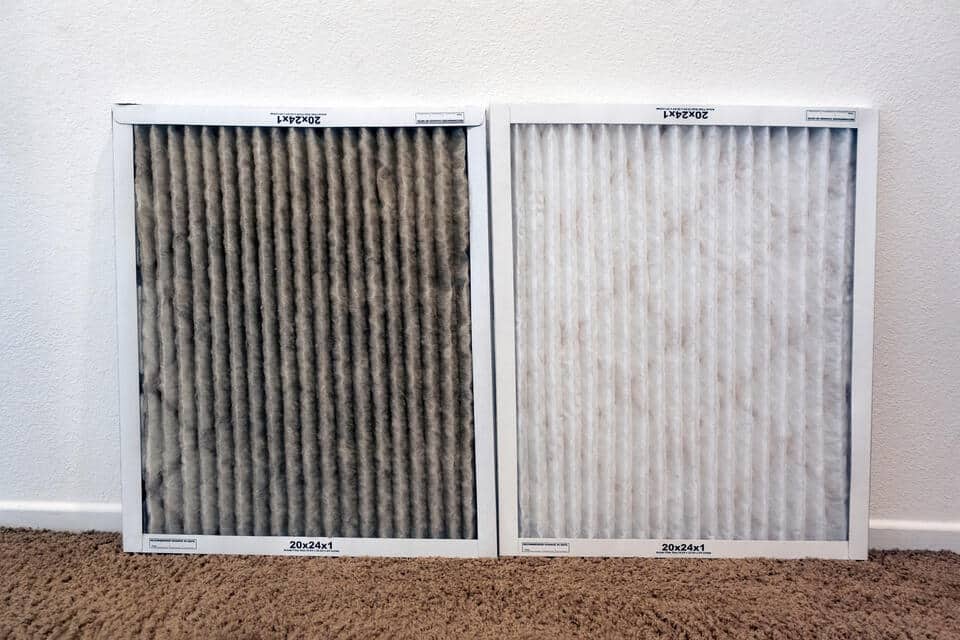
Carefully slide out the old filter. Be gentle to avoid spreading dust and debris into the air or onto nearby surfaces. If the filter looks especially dirty, consider placing it into a trash bag immediately to contain the mess. Take a moment to observe the condition of the filter—it should help you gauge how often you need to replace it in the future based on your household’s air quality and usage.

4. Check the Size and Type

Look for the dimensions printed on the edge of the old filter, as these indicate the size you’ll need for the replacement. Filters come in different sizes and MERV (Minimum Efficiency Reporting Value) ratings, which measure how effectively they trap airborne particles. Higher MERV ratings capture smaller particles but may restrict airflow, so choose a filter that balances filtration with your system’s requirements. If you’re unsure, consult your AC manual or a professional for advice.

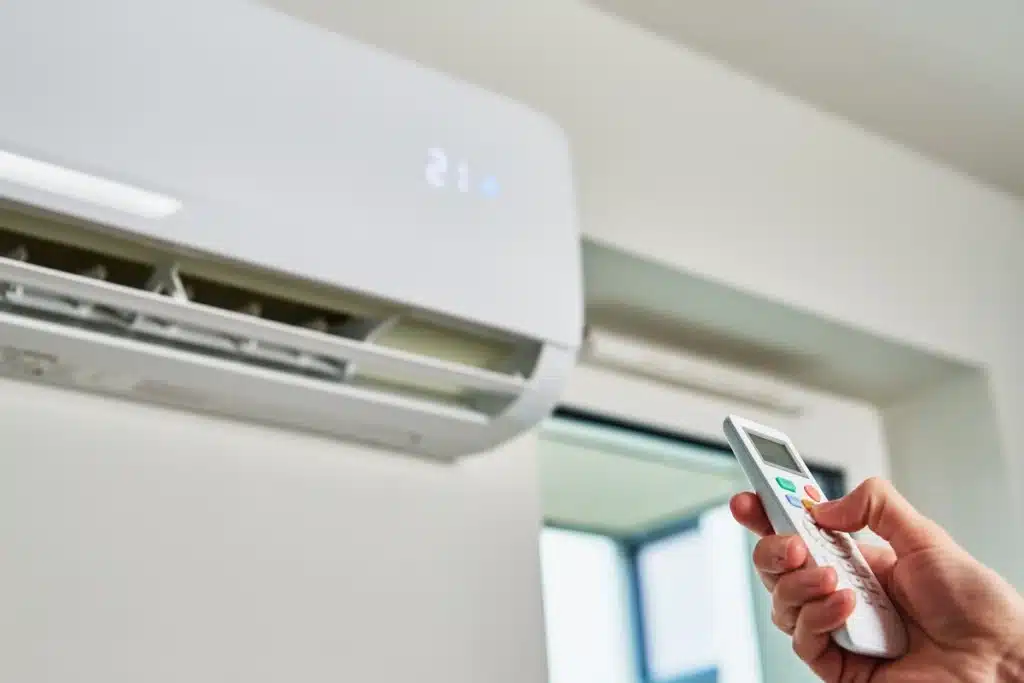
5. Insert the New Filter

Take the new filter and check for arrows indicating the correct airflow direction. These arrows should point in the same direction as the airflow within your AC system, typically toward the unit or blower. Carefully slide the filter into place, ensuring it fits snugly in the slot. Double-check that it’s secure and properly aligned—this will help maintain efficient airflow and filtration. Once the filter is in place, turn your AC back on and enjoy cleaner, healthier air!

🛠️ Preventing Future AC Issues with Regular Maintenance

ac maintenance

Both investing in quality air filters and scheduling regular AC maintenance can help prevent dirty filters from becoming a recurring problem. Here’s how to keep your AC running smoothly year-round:

Check Filters Monthly

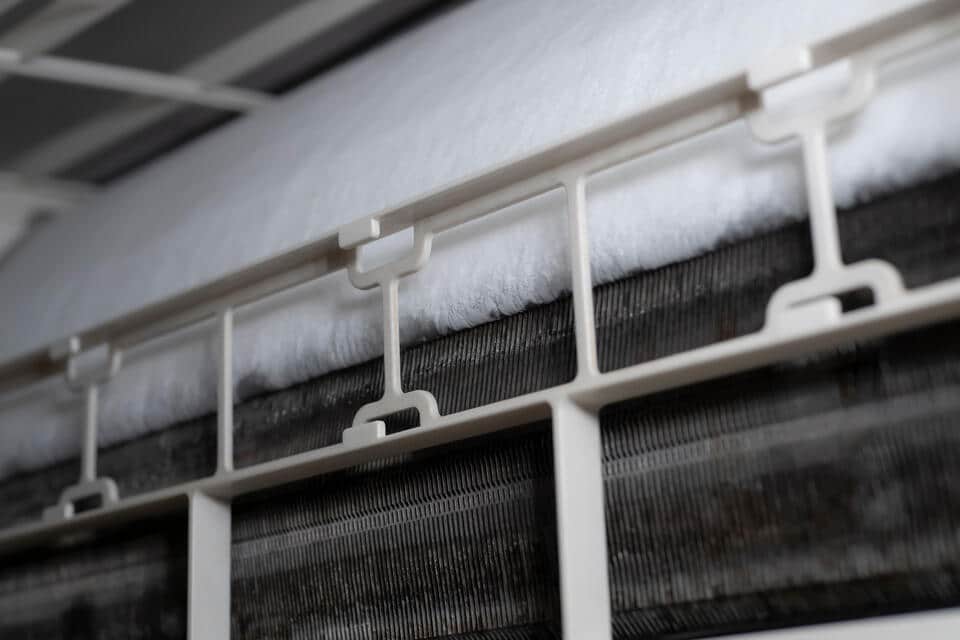
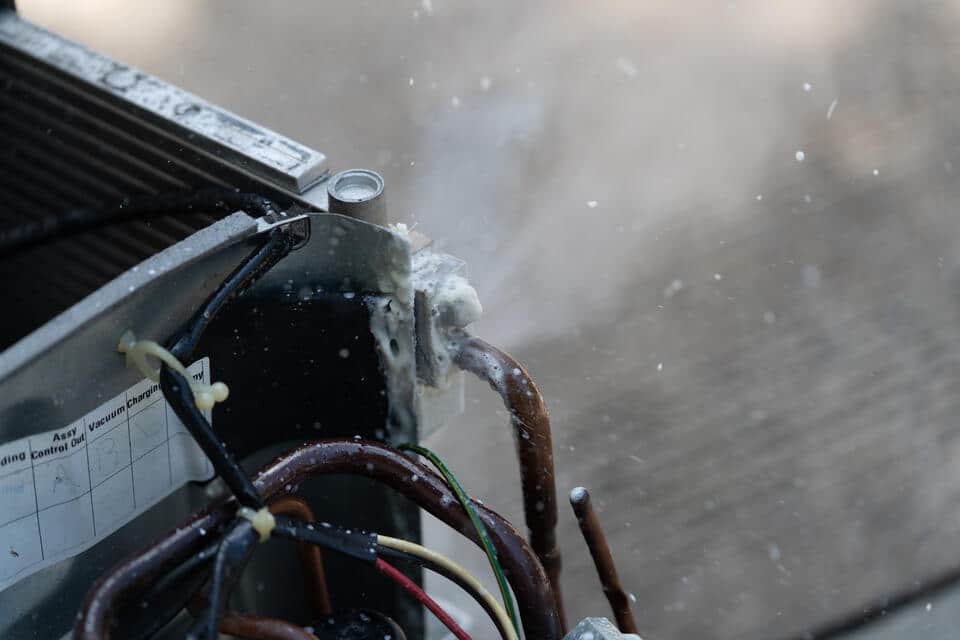
Air filters play a crucial role in keeping your HVAC system running smoothly. During peak usage periods, such as summer or winter, it’s essential to examine your air filter at least once a month. A clogged or dirty filter can reduce airflow, forcing your system to work harder and increasing energy costs. If the filter looks dirty, replace it with a clean one to maintain optimal performance and air quality in your home.
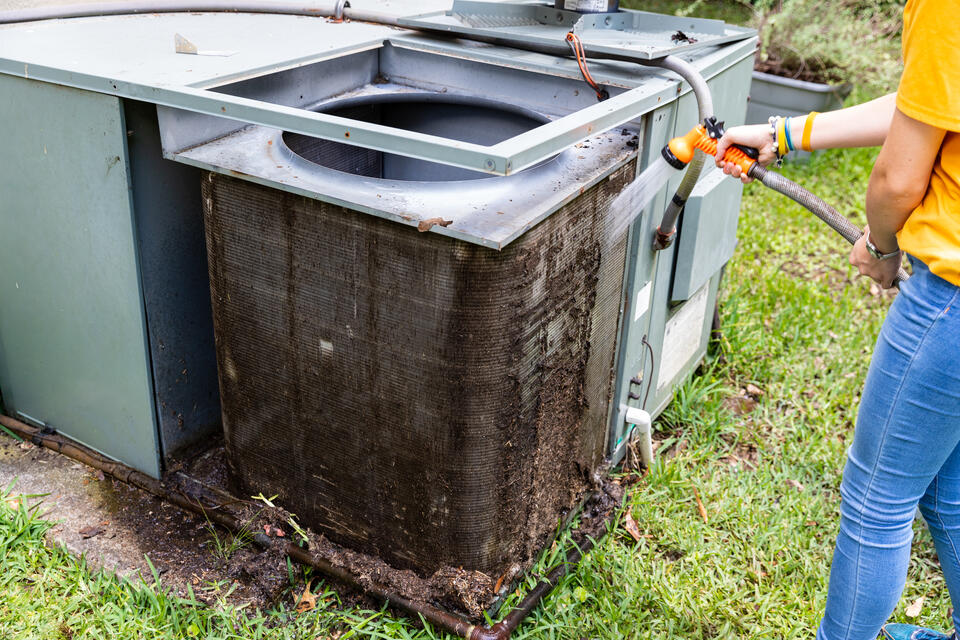
Clean Your Ducts

Over time, air ducts can accumulate dust, debris, and even mold, which can restrict airflow and reduce your HVAC system’s efficiency. Dirty ducts not only make your system work harder but can also impact the air you breathe. Regular duct cleaning can alleviate strain on your system, improve airflow, and enhance indoor air quality. Consider scheduling professional duct cleaning every few years, especially if you notice increased dust or respiratory issues at home.

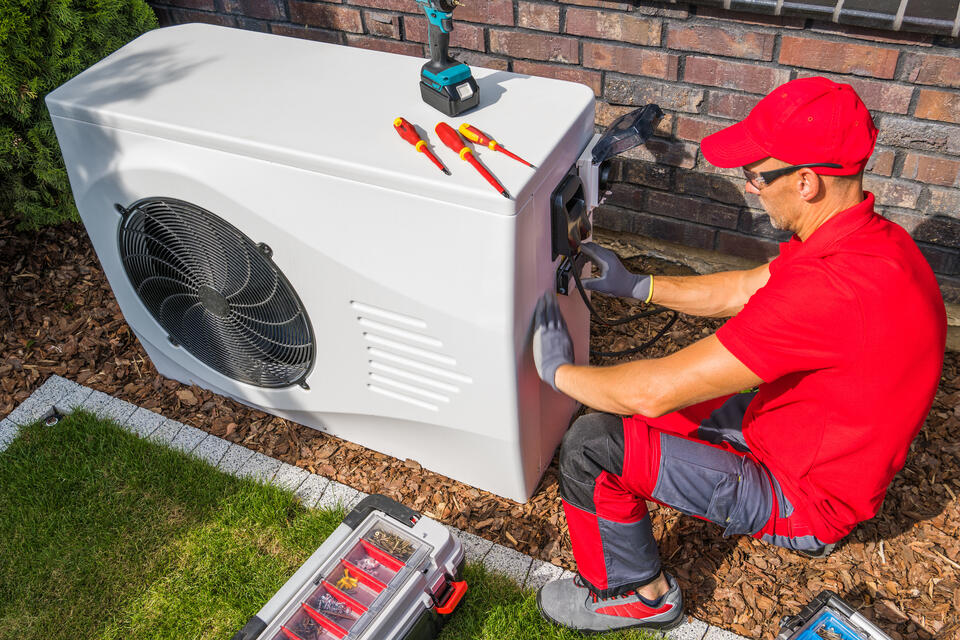
Schedule Annual Professional Maintenance

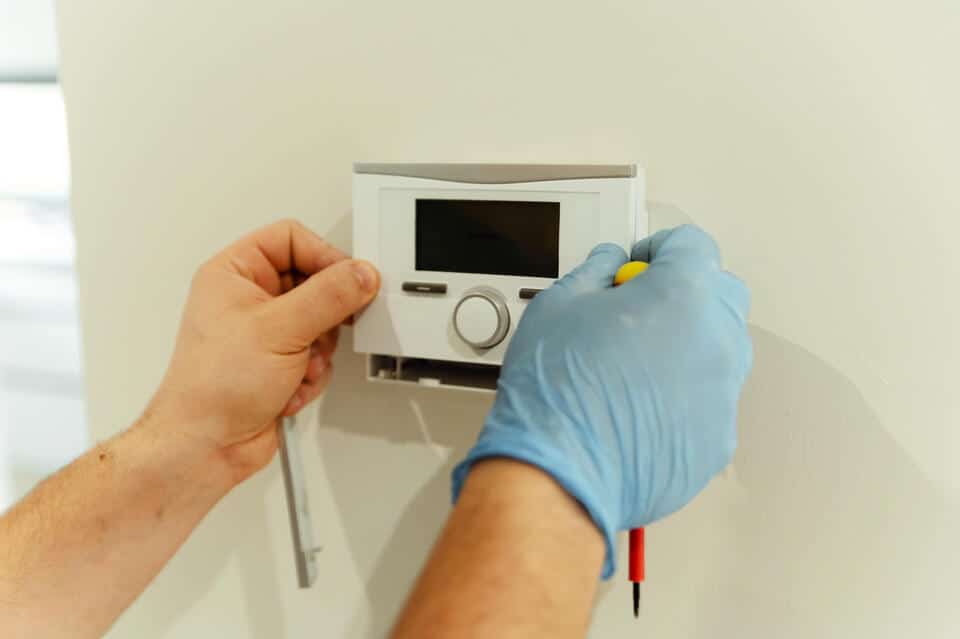
Annual maintenance by an HVAC professional is key to keeping your system in top shape. A trained technician can inspect every component of your HVAC system, from the thermostat to the compressor, ensuring everything operates efficiently. Regular maintenance helps identify and address small issues before they turn into expensive repairs. By scheduling a yearly tune-up, you can extend the life of your system and enjoy consistent, reliable performance throughout the year.

⭐️ Dirty Air Filter

A dirty air filter can significantly impact your AC’s performance, leaving your home feeling less comfortable and your energy bills higher. That’s why regular maintenance and timely filter replacements are so important. At Thelen Plumbing, Heating, and Air, we’re dedicated to keeping your HVAC system running smoothly year-round.

With our reliable service, affordable pricing, and 24/7 emergency availability, you can trust our experienced technicians to handle all your heating and cooling needs. Don’t let a simple issue like a dirty filter disrupt your comfort—contact Thelen Plumbing, Heating, and Air today to schedule your service and experience the difference!

tune up for my ac tune up for my ac

✨ 6 Signs It Is Time For Your AC Tune Up

Is your air conditioning system ready to keep you cool this season? Regular AC tune-ups are key to ensuring your system’s efficiency, lifespan, and overall performance. If you’ve been skipping your annual maintenance, you may be missing important warning signs of issues that could be costing you money or affecting your comfort. 

This guide will help you recognize when it’s time for an AC tune-up and why scheduling one is essential. Here’s what we’ll cover: 

  • Why an AC tune-up is important for your system and home comfort 
  • Signs your AC system needs a tune-up 
  • The benefits of scheduling regular AC maintenance 

🤔 What Is an AC Tune-Up (And Why Is It Important)? 

repair air conditioner

An AC tune-up is a professional maintenance check performed by HVAC specialists to ensure your air conditioning system runs efficiently. It includes a thorough inspection, cleaning, and performance optimization of all essential components like refrigerant levels, filters, coils, and more. 

Think of it like a regular oil change for your car; preventive maintenance catches minor issues before they become costly repairs or, worse, a complete system breakdown. 

Why It Matters 

  • Save Money on Energy Bills – An optimized AC unit uses less energy to cool your home, reducing monthly costs. 
  • Extend Your System’s Lifespan – Regular care ensures that your AC system lasts longer and avoids frequent breakdowns. 
  • Consistent Comfort – Stay cool even during the hottest days, without worrying about sudden AC issues. 

⚠️ 6 Signs It’s Time for an AC Tune-Up 

old ac unit signs

Not sure if your air conditioning system needs attention? Here are some common warning signs that indicate it might be time for maintenance. 

1. Uneven Cooling Throughout Your Home 

If certain rooms in your home are uncomfortably warm while others are too cold, your air conditioner may be struggling to distribute air evenly. This could result from blocked vents, ductwork issues, or an aging system. Uneven cooling isn’t just frustrating—it’s a clear sign your AC needs professional maintenance to restore balance and comfort. 

2. Weak Airflow 

When the air from your vents feels faint or barely noticeable, your system isn’t working as it should. Weak airflow can be caused by clogged air filters, duct leaks, or a malfunctioning motor. These problems not only affect your comfort but also strain your system. A professional tune-up can resolve these issues, improving airflow and efficiency. 

3. Strange Noises or Smells 

Unusual noises like rattling, grinding, or squealing are strong signs something is wrong with your air conditioner. Similarly, unpleasant odors can indicate mold growth, a burned-out component, or debris buildup. Ignoring these signs can lead to further damage, so it’s important to address them promptly. A technician can diagnose and repair the problem during a tune-up. 

4. High Energy Bills 

A sudden spike in your energy bills could mean your AC is running inefficiently due to wear and tear. This not only increases costs but also puts stress on your system, potentially shortening its lifespan. A tune-up can improve efficiency, save you money, and ensure your system operates effectively. 

5. Frequent Cycles 

If your air conditioner turns on and off frequently in short bursts without properly cooling your home, it’s experiencing short cycling. This could be caused by an improperly sized system, a faulty thermostat, or mechanical issues. Short cycling is inefficient and can lead to higher energy bills. A tune-up can identify and fix the problem. 

6. Old System Without Recent Maintenance 

If your AC is over 10 years old and hasn’t had a tune-up recently, it’s time to give it some attention. Older systems are more prone to wear and tear, making regular maintenance essential. A tune-up can catch small issues early, prevent costly repairs, and keep your system running efficiently for as long as possible.

⭐️ The Benefits of Scheduling Regular AC Maintenance 

when to tune up ac unit

Regular AC maintenance keeps your system running efficiently, reduces the risk of costly repairs, and extends its lifespan. It also ensures better air quality and consistent cooling for your home.

Energy Efficiency 

When your AC unit is clogged with dust, dirt, or grime, it has to work much harder to cool your home effectively. This extra strain not only increases energy usage but also drives up your utility bills. Routine tune-ups involve cleaning and optimizing the system, ensuring it operates at peak efficiency. By keeping your AC in top shape, you can enjoy a cooler home while saving money on energy costs throughout the year. 

Fewer Repairs 

Small issues like loose belts, clogged drains, or low refrigerant levels may seem minor at first, but they can quickly spiral into major problems if left unchecked. Regular maintenance allows technicians to identify and fix these issues before they cause significant damage. This proactive approach helps you avoid unexpected breakdowns and the stress of costly repairs, all while extending the overall lifespan of your AC system. 

Improved Indoor Air Quality 

Your AC system does more than just cool your home; it also plays a significant role in maintaining indoor air quality. Over time, filters and ducts can accumulate dust, dirt, mold, and allergens, which then circulate throughout your home every time the system runs. Regular maintenance ensures that these components are cleaned or replaced, improving air quality and creating a healthier living environment for you and your family, especially those with allergies or respiratory conditions. 

Peace of Mind 

Few things are more stressful than dealing with an AC system that breaks down during the hottest days of summer. Routine tune-ups provide you with the peace of mind that comes from knowing your system is ready to handle extreme temperatures. By staying ahead of potential problems, you can relax and enjoy the comfort of your home without worrying about surprise breakdowns or emergency repairs. A well-maintained AC system not only performs better but also gives you confidence in its reliability when you need it most.

⚠️ AC Tune-Up Signs

When it comes to keeping your home cool and comfortable, Thelen Plumbing, Heating, and Air is the team you can trust. With expert technicians, transparent pricing, fast response times, and comprehensive services, we’re dedicated to delivering the best HVAC care in the Twin Cities.

Don’t wait until small issues become big problems—schedule your AC tune-up today and experience the reliable, high-quality service that hundreds of homeowners already count on. Contact us now to book your appointment!

How Much Does AC Maintenance Cost? (2025)

Regular AC maintenance is critical for keeping your home cool, energy-efficient, and safe, especially during those hot summer months. But how much should you expect to pay for these services in 2025? If you’re trying to budget and keep your AC running smoothly, this guide is for you:

  • Understanding AC Maintenance Costs
  • Cost Factors for AC Maintenance
  • Choosing the Right AC Maintenance Plan

🤔 The Importance of AC Maintenance

ac maintenance cost-tech servicing AC unit outside home

Proper AC maintenance is essential for keeping your home comfortable and your system running efficiently. Routine maintenance helps ensure your air conditioning system operates at peak efficiency, reducing energy consumption and lowering your utility bills. Clean filters, coils, and parts mean your system doesn’t have to work as hard to cool your home. Regular care also prevents wear and tear on the system’s components, helping your AC last longer. Skipping maintenance can lead to costly repairs or an early need for a full replacement. Additionally, clean filters and ducts from regular servicing improve the air quality inside your home, reducing allergens, dust, and pollutants that can negatively affect your health. Identifying and addressing small issues during routine maintenance can prevent them from becoming major problems, saving you money in the long run. Finally, regular tune-ups help prevent uneven cooling or disruptions, ensuring your home remains comfortable during hot weather. Taking these steps not only protects your investment but ensures that your home remains safe, efficient, and comfortable all year long.

Understanding AC Maintenance Costs

The cost of AC maintenance depends largely on the type of service required. Here’s a breakdown of the average price range for common services:

  • General Tune-Up: $70–$200. A standard tune-up often includes cleaning the coils, checking refrigerant levels, inspecting major components, and ensuring everything runs efficiently.
  • Filter Replacement: $10–$50. High-quality filters may come at a higher cost, but they can drastically improve efficiency and air quality.
  • System Inspection: $80–$120. This includes a full inspection to identify potential issues before they escalate.
  • Duct Cleaning: $200–$1,200. Cleaning your air ducts not only extends the life of your system but also enhances indoor air quality.
  • Refrigerant Recharge: $150–$500. If your system is low on refrigerant, recharging it ensures optimal cooling performance.

Prices can vary based on factors like system age, complexity, and service frequency, so it’s always a good idea to get quotes from reputable contractors.

💸 5 Cost Factors for AC Maintenance

ac maintenance cost-tech replacing screens on standing split air conditioner unit

Several factors can influence how much you’ll pay for AC maintenance. Understanding these variables can help you budget more effectively and ensure your system runs efficiently.

1. System Type

The type of air conditioning system you have significantly affects maintenance costs:

  • Central Air Systems: Central air systems are widely used in homes and are more complex, often involving ductwork that also requires occasional cleaning or inspection. Maintenance typically costs between $100–$250, depending on the system’s size and condition. Larger systems or those with advanced features like smart thermostats may increase service costs.
  • Ductless Mini-Splits: These systems are smaller and more efficient but still need regular maintenance like filter cleaning and refrigerant checks. Costs typically range from $70–$200, with variation depending on the number of indoor units and their accessibility.
  • Window Units: Window air conditioners are the simplest to maintain, often requiring just a filter replacement or basic cleaning. Maintenance costs are usually under $50, though larger or higher-efficiency window units may require more attention.

2. System Age

The age of your AC unit plays a major role in determining maintenance expenses.

Older Systems: Older units often have outdated components that are harder to source, driving up repair costs. They may also require more frequent servicing as parts wear down over time. For example, an older compressor or fan motor might need frequent adjustments or replacement, adding to overall costs.

Newer Systems: While newer systems are generally more reliable and efficient, they may still require routine check-ups to maintain their warranty and optimize performance. In some cases, advanced technology in newer units might require specialized technicians, slightly increasing the service fee.

3. Service Frequency

How often you schedule maintenance can significantly impact costs.

Regular Maintenance: Scheduling annual or bi-annual tune-ups can prevent expensive repairs and help your system last longer. Many HVAC companies offer maintenance plans that bundle regular check-ups at discounted rates, often saving you money in the long run. These plans might include services like refrigerant level checks, coil cleaning, and thermostat calibration.

Irregular Maintenance: Sporadic or reactive servicing, on the other hand, can lead to higher costs due to emergency call-out fees or accumulated wear and tear. Neglecting regular maintenance can result in minor issues escalating into major repairs.

4. Location

Your geographic location has a direct impact on maintenance costs.

Urban Areas: In cities, labor rates are often higher due to increased demand and cost of living. Scheduling during peak seasons, such as summer, may also raise prices.

Rural Areas: In rural regions, service costs may be lower, but fewer HVAC contractors could mean longer wait times for appointments. Additionally, if your location is remote, technicians may charge extra for travel expenses.

Climate Considerations: Locations with extreme climates—hot summers or cold winters—may require more frequent maintenance, increasing the overall cost to keep your AC running efficiently.

5. Technician Expertise

The skill level and certification of the technician you hire can affect maintenance costs.

Certified Professionals: Hiring licensed and certified HVAC professionals ensures the job is done right the first time, reducing the risk of further issues. However, their expertise often comes at a higher price. These technicians are trained to handle a variety of systems and can provide valuable insights on improving your AC’s efficiency.

Inexperienced Technicians: While hiring less experienced or uncertified technicians may save you a few dollars upfront, it carries the risk of incomplete or subpar work, potentially leading to costly repairs down the line. Always verify a technician’s credentials before hiring them.

By taking these factors into account, you can better prepare for the costs associated with maintaining your air conditioning system, ensuring its longevity and efficiency.

💡 Choosing the Right AC Maintenance Plan

ac maintenance cost-person hosing off coils of central AC unit outside

Regular AC maintenance is essential to keep your system running efficiently and avoid unexpected breakdowns. That’s why Thelen Plumbing, Heating, and Air offers the Happy Home Plan, a customizable maintenance program designed to fit your needs and budget.

Why Choose the Happy Home Plan?

  • Convenience: Enjoy hassle-free scheduling with automatic reminders for tune-ups and maintenance visits, so you never miss an important service.
  • Cost Savings: Avoid costly repairs with preventative care and save more by bundling services into one affordable monthly plan.
  • Priority Service: Members get front-of-the-line access during busy seasons, ensuring fast and efficient support when you need it most.
  • Exclusive Discounts: Take advantage of special member-only pricing on repairs, system replacements, and upgrades.

With plans starting at just $19.95 per month, the Happy Home Plan ensures your AC operates smoothly all year round while giving you peace of mind. Trust Thelen Plumbing, Heating, and Air to keep your home comfortable and energy-efficient.

🙌 Stay Comfortable Year-Round with Thelen Plumbing, Heating, and Air’s Trusted HVAC Services

At Thelen Plumbing, Heating, and Air, we understand how important it is to keep your home comfortable and your HVAC system running smoothly without unexpected costs. Our experienced team is dedicated to providing reliable, professional service you can count on every step of the way. With our commitment to transparency, customer satisfaction, and expert knowledge, we’ve earned the trust of countless homeowners. Whether it’s routine maintenance, repairs, or upgrades, we always put your needs first. Don’t wait—invest in your comfort today! Contact us to learn more about our Happy Home Plan or schedule your next AC tune-up.

Pipe Insulation (Types, Materials & More)

Properly insulating your pipes is one of the smartest investments you can make as a homeowner. Whether you’re looking to reduce energy bills, prevent frozen pipes during the winter, or simply make your home more energy-efficient, pipe insulation is a must. This guide will walk you through everything you need to know about pipe insulation, including:

  • How to choose the right pipe insulation
  • A breakdown of key insulation types for your home
  • Maintenance tips to maximize your insulation’s lifespan

✅ How to Choose the Right Pipe Insulation

pipe insulation-insulation around copper pipes inside a home

Choosing the right pipe insulation depends on several factors. First, consider the purpose of the insulation. Are you trying to save energy, prevent pipes from freezing, or reduce noise? Your specific goal will influence the type of insulation that’s best for your needs.

Next, think about the material and temperature of the pipes. For high-temperature pipes, such as steam pipes, fiberglass insulation is a great option. On the other hand, foam or rubber insulation works better for cold-water pipes. The location of the pipes is also important. Pipes in exposed areas like basements or attics may require more durable insulation to withstand extreme temperatures.

If your pipes are outdoors or in damp environments, it’s essential to choose moisture-resistant materials like elastomeric (rubber) insulation. Additionally, consider how easy the insulation will be to install. Foam insulation sleeves are a user-friendly option for DIY projects, while fiberglass or spray foam may need professional installation.

With these factors in mind, you can make an informed decision about pipe insulation. Next, we’ll explore the specific types of insulation available for common residential needs.

The Benefits of Pipe Insulation

Pipe insulation brings several practical benefits that every homeowner can appreciate:

  • Energy Savings: Insulating pipes reduces heat loss for hot water pipes and heat gain for cold water pipes. This means your water heater and cooling systems don’t have to work as hard, which lowers your utility bills.
  • Protect Against Freezing: During cold winters, uninsulated pipes are at risk of freezing and even bursting. Insulation provides that critical layer of protection.
  • Minimize Noise: Insulation can dampen the sound of water traveling through pipes, making your home quieter.
  • Prevent Condensation: For cold pipes, insulation reduces the build-up of condensation, preventing water damage to ceilings, walls, and floors.
  • Extend Pipe Lifespan: By regulating temperature and reducing condensation, insulation helps prevent long-term wear and corrosion.

Now that you know the benefits, let’s move on to the materials you can use.

👉 5 Popular Types of Pipe Insulation for Your Home

pipe insulation-tech wrapping large pipes in insulation materials between rafters

Proper pipe insulation is essential for maintaining energy efficiency, preventing freezing in colder months, and reducing overall utility costs. Choosing the right type of insulation can protect your home and save money in the long run.

1. Foam Pipe Insulation

Foam pipe insulation is cost-effective and lightweight, making it a great option for homeowners on a budget. It features a pre-slit design that easily slides over pipes, requiring no special tools for installation. By reducing condensation, it prevents moisture buildup that could otherwise lead to pipe corrosion or mold growth. Additionally, it helps minimize energy loss by maintaining water temperature in pipes, ultimately reducing heating and cooling costs.

Best For: Residential hot and cold water pipes

Pro Tip: Use foam insulation in basements, attics, or crawl spaces where temperature fluctuations are common. Pair it with pipe wrap tape for a snug, secure fit that maximizes its effectiveness.

2. Rubber Pipe Insulation

Moisture- and UV-resistant, rubber pipe insulation is perfect for outdoor pipes or areas prone to dampness. It can withstand a wide temperature range, from extreme cold to high heat, without compromising its insulating properties. Flexible and durable, it adjusts to the expansion and contraction of pipes, preventing cracks or splits in the insulation.

Best For: Pipes that expand or contract due to temperature changes

Pro Tip: Perfect for refrigerant lines in HVAC systems or outdoor plumbing that’s exposed to the elements. For added durability, combine rubber insulation with weather-resistant coatings to extend its lifespan.

3. Fiberglass Pipe Insulation

Fiberglass pipe insulation offers high heat resistance, making it ideal for use on steam pipes, boiler systems, or other high-temperature applications. It performs effectively on both hot and cold pipes, ensuring energy efficiency across a wide range of settings. Additionally, its rigid structure makes it well-suited for large-diameter pipes typically found in industrial or commercial buildings.

Best For: Extreme temperatures, such as steam pipes or industrial applications

Pro Tip: Always use a protective jacket or vapor barrier over fiberglass insulation to prevent fibers from shedding and to protect against moisture infiltration. Protective jackets also improve its durability in environments with heavy foot traffic or equipment.

4. Foil and Foam Insulation

Foil and foam insulation reflects heat while insulating, making it highly effective for maintaining temperature control in pipes carrying hot or cold fluids. It is lightweight and easy to handle, allowing for quick and straightforward installation, even for DIY projects. Additionally, it is extremely effective in reducing radiant heat loss, making it perfect for HVAC ductwork and hot water pipes.

Best For: HVAC systems and radiant heat pipes

Pro Tip: Opt for foil-backed insulation in confined or awkward spaces, such as crawl spaces or behind walls. The reflective surface also doubles as a radiant barrier, enhancing overall energy efficiency in your heating and cooling system. For even better results, seal the seams of the foil with heat-resistant tape.

5. Polyurethane Spray Foam Insulation

Polyurethane spray foam is perfect for sealing gaps or irregularly shaped pipes, as it adheres directly to the surface and offers excellent insulation. It provides an airtight seal and minimizes energy loss, making it highly effective for both hot and cold pipes. However, it typically requires professional application for the best results.

Best For: Sealing gaps, irregular pipe shapes, or hard-to-reach areas

Pro Tip: Use spray foam insulation for pipes in areas prone to drafts or where conventional insulation may not fit properly. Professional application ensures full coverage and long-lasting performance.

💡 Maintenance Tips for Longevity

pipe insulation-insulation around exterior pipes on home siding

Proper maintenance is key to ensuring your pipe insulation remains effective and lasts for years to come. With regular care, you can prevent costly replacements and maximize your energy savings. Here are some detailed tips to help you maintain your pipe insulation and keep it in top condition:

  • Inspect Regularly: Check your insulation at least twice a year for signs of wear and tear. Look for cracks, tears, loose wrapping, or areas where the insulation has become detached. Early detection of damage can prevent further deterioration and help maintain its efficiency.
  • Replace Damaged Sections Promptly: If you notice any damaged insulation, replace it as soon as possible. Neglecting damaged areas can lead to heat loss, reduced energy efficiency, or even frozen pipes in colder weather. Make sure to use the same type of insulation to maintain consistency.
  • Keep It Dry: Moisture is one of the biggest threats to pipe insulation, especially for cold pipes where condensation can form. Prolonged exposure to water can degrade the insulation material and make it less effective. Wipe down any damp areas immediately and consider installing a vapor barrier for added protection.
  • Protect Outdoor Pipes: For insulation exposed to the elements, consider extra protective coverings like weatherproof jackets or UV-resistant coatings. These additions shield against extreme temperatures, precipitation, and harmful UV rays that can weaken insulation over time.
  • Clean the Insulation: Dust and debris can accumulate on insulation, particularly in basements, attics, or crawl spaces. Gently clean the insulation with a soft cloth or vacuum to prevent buildup that could affect its performance.
  • Monitor Temperature Changes: If you notice inconsistent water temperatures or higher-than-usual energy bills, this could indicate issues with your pipe insulation. Investigate and address the problem promptly to avoid further complications.
  • Seek Professional Assistance: For complex installations or extensive damage, consult a professional. They can inspect your insulation thoroughly and provide expert recommendations to extend its lifespan.

By following these maintenance practices, you’ll not only ensure your pipe insulation stays in excellent condition but also save money on energy costs and avoid potential disruptions. Regular care goes a long way in protecting your investment and keeping your plumbing system running smoothly.

🙌 Save Energy and Protect Your HVAC with Expert Pipe Insulation from Thelen Plumbing, Heating, and Air!

At Thelen Plumbing, Heating, and Air, we understand that proper pipe insulation is key to maintaining energy efficiency and protecting your home or business. Our experienced team is dedicated to providing high-quality solutions tailored to your specific needs, whether it’s selecting the right insulation material or ensuring professional installation. With a commitment to excellence and years of trusted expertise, we’re here to help you save on energy costs and extend the life of your HVAC system. Don’t leave your pipe insulation to chance—trust the experts at Thelen Plumbing, Heating, and Air. Contact us today to schedule a consultation and take the first step toward a more efficient and reliable system!

Low Refrigerant in AC Unit: What Does It Mean?

Keeping your home cool during the summer months requires an efficient AC system. But if your air conditioning isn’t doing its job, “low refrigerant” might be to blame. Refrigerant is vital for heat exchange in your AC system, and when levels drop, it can lead to a host of issues. This blog covers everything you need to know about low refrigerant, including:

  • How refrigerant works in your AC
  • The impact low refrigerant can have
  • Things You Should Know About Low Refrigerant in Your AC Unit
  • Fixing low refrigerant (and why it requires a pro)

🤔 How Refrigerant Works in Your AC

low refrigerant-ice build up on ac coils

Refrigerant is the magic ingredient that helps your AC cool your home. It cycles through the coils in your AC system, absorbing heat from inside your house and releasing it outside. Without the correct amount of refrigerant, your AC can’t effectively cool your space. Think of it as the lifeblood of your cooling system.

Refrigerant is also a closed-loop system. If you’re low on refrigerant, it’s likely because there’s a leak somewhere in your system. That’s why it’s crucial to address this issue quickly.

Signs That Your AC is Low on Refrigerant

How can you tell if low refrigerant is the culprit behind your cooling frustrations? Here are some common signs:

  • Warm Air From Vents: Instead of cool air, your AC is blowing warm or lukewarm air.
  • Long Cooling Cycles: Your system runs much longer than usual but still fails to cool effectively.
  • Rising Energy Bills: A struggling AC system consumes more energy, leading to skyrocketing electricity bills.
  • Ice on Coils: Low refrigerant can cause the evaporator coils to freeze. You might see ice buildup on your AC unit.
  • Hissing or Bubbling Noise: A refrigerant leak often creates distinctive noises in the system.

If you notice any of these symptoms, it’s a sign that your AC may need professional attention.

👉 The Impact of Low Refrigerant on Your AC System

low refrigerant-man and woman sitting on couch overheating because ac is not working properly

Low refrigerant isn’t just an inconvenience—it can have serious consequences for your AC system. When there isn’t enough refrigerant, your AC has to work much harder to cool your home, which reduces its overall efficiency. This extra strain can also lead to wear and tear on the system, ultimately shortening its lifespan and requiring a replacement sooner than expected.

In addition, low refrigerant can cause frozen coils, which may damage other components of your system if not addressed quickly. This type of damage can escalate and result in higher repair costs down the line. Ignoring the issue only makes it more expensive to fix later.

Addressing low refrigerant early not only saves you money but also ensures your home stays comfortable and your AC runs smoothly for years to come.

💡 4 Things You Should Know About Low Refrigerant in Your AC Unit

Low refrigerant in your AC unit can lead to reduced cooling efficiency, higher energy bills, and potential damage to your system. Understanding the signs and impact of low refrigerant helps you address issues before they become costly repairs.

1. It’s Not Like Refueling a Car

Refrigerant doesn’t function like gasoline in a car that gets consumed as you drive. In a properly functioning AC system, refrigerant cycles continuously and doesn’t deplete over time under normal conditions. If your AC unit has low refrigerant levels, it’s a red flag indicating a potential leak somewhere in the system. Leaks not only reduce cooling efficiency but can also cause environmental harm, as refrigerants are regulated due to their impact on the ozone layer. Identifying and fixing the leak is crucial to maintaining your system’s performance and preventing further damage.

2. Topping Off Isn’t Enough

While it might seem like a quick fix to simply add more refrigerant, this approach only masks the underlying issue. If there’s a leak in the system, the newly added refrigerant will eventually escape as well, putting you right back where you started. Worse, running your system with low refrigerant can strain the compressor, one of the most expensive components to replace. Properly repairing the leak and ensuring the system is sealed is the only way to restore full functionality and avoid costly breakdowns in the future.

3. DIY Repairs Are Risky

Trying to handle refrigerant issues on your own can be dangerous and is often illegal without the proper licenses. Refrigerants are highly pressurized and require specialized tools to handle safely. Additionally, refrigerant leaks are subject to strict environmental regulations, and improper handling can lead to fines or penalties. Certified HVAC technicians are trained to locate and fix leaks, recharge refrigerant properly, and ensure the system complies with all safety and environmental standards. Attempting a DIY fix could not only damage your AC but also put your safety and wallet at risk.

4. It Affects More Than Cooling

Low refrigerant doesn’t just mean your home won’t cool as effectively—it has a domino effect on the overall performance of your AC unit. When refrigerant levels are low, your system has to work much harder to cool your space, which leads to higher energy bills. Over time, this increased strain can cause major components, like the compressor, to wear out prematurely. If left unresolved, low refrigerant could result in a total system failure, requiring a full AC replacement. Addressing refrigerant issues promptly ensures your system remains energy-efficient, reliable, and long-lasting.

👨‍🔧 Fixing Low Refrigerant in Your AC (Why You Need a Pro)

low refrigerant-ac refrigerant leaking from unit

If your AC is low on refrigerant, it’s not a problem you should handle on your own. Refrigerant issues require specialized knowledge and equipment, which is why calling a licensed HVAC professional is essential. Here’s a closer look at how they can help:

Leak Detection:

Low refrigerant levels are often caused by leaks in your AC system, and finding these leaks requires more than a quick glance. An HVAC technician has the tools and expertise to locate even the smallest leaks in your system. Once they identify the problem, they can properly seal the leak to prevent further refrigerant loss. Ignoring leaks not only reduces your system’s efficiency but also risks damaging your AC unit over time.

Proper Recharge:

Adding refrigerant isn’t as simple as topping off a gas tank. Each AC unit requires a specific type and amount of refrigerant to operate efficiently. Too much or too little can damage the system and reduce its cooling capability. Licensed professionals measure the refrigerant precisely to ensure your system runs smoothly and complies with environmental regulations regarding refrigerant handling.

Preventive Maintenance:

When an HVAC technician addresses low refrigerant, they don’t just stop at fixing the immediate issue. During the service, they inspect other components of your AC system, such as the compressor, coils, and fan, to ensure everything is functioning properly. This preventive maintenance can help catch potential problems early, saving you from costly repairs down the road.

🙌 Stay Comfortable with Expert HVAC Services

At Thelen Plumbing, Heating, and Air, we understand how important it is to keep your home comfortable and your AC running efficiently. Our team of licensed HVAC professionals is dedicated to providing top-quality service, with expertise you can trust to handle even the most complex refrigerant issues. We pride ourselves on our commitment to customer satisfaction, thorough diagnostics, and precise repairs. Don’t wait until minor problems turn into costly repairs—reach out to Thelen Plumbing, Heating, and Air for fast, reliable solutions. Contact us today to schedule your appointment and experience the difference of working with a team that puts your comfort first!

5 Signs Of Your Hot Water Heater Leaking

A leaking hot water heater can be more than just a nuisance—it can lead to significant damage, high repair costs, and even hazards in your home. Recognizing the signs of a leaking hot water heater early is crucial in preventing these issues and maintaining an efficient plumbing system. Here’s what we’ll cover in this guide to help you identify and address a hot water heater leaking issue:

  • Why a leaking hot water heater matters
  • 5 signs your hot water heater is leaking
  • Common causes of a leak

🤔 Why a Leaking Hot Water Heater Matters

hot water heater leaking-leak coming from the bottom of a water heater

A leaking hot water heater might seem like a minor issue at first, but it can quickly escalate into a serious problem if left unchecked. Water leaks can cause structural damage to your home, including weakened floors, walls, and foundations due to prolonged moisture exposure. Additionally, leaks can create the perfect environment for mold and mildew growth, which poses health risks for you and your family. Beyond the physical damage, a leaking water heater can also drastically increase your water and energy bills, as the system struggles to maintain its efficiency. Identifying and addressing a leak promptly helps protect your home, save money, and ensure the continued safety and performance of your plumbing system.

⚠️ 5 Signs Your Hot Water Heater Is Leaking

hot water heater leaking-man closing valve on water heater with screw driver

Addressing a leaking water heater promptly is essential to avoid costly repairs, prevent water damage to your home, and ensure you have a reliable supply of hot water. Identifying the signs early can save you both time and money while protecting your property.

1. Puddles or Moisture Around the Heater

One of the most obvious signs of a leaking hot water heater is visible puddles or damp spots around the base of the tank. Even a small drip can quickly escalate into a larger issue.

What to Look For:

  • Standing water or wet spots underneath or near your water heater
  • Dampness on the floor or walls surrounding the unit
  • Condensation forming on the exterior of the tank

What It Means:

Puddles around your heater may be caused by loose valves, cracks in the tank, or corroded fittings. It’s critical to address this immediately to avoid water damage, mold growth, or structural issues in your home.

If you spot any of these signs, switch off the water supply to your heater and contact a professional for inspection.

2. Unusual Sounds Coming from the Heater

Rattling, popping, or hissing noises coming from your water heater? These sounds are more than just annoying—they may indicate a problem that could lead to leaks.

Common Causes:

  • Sediment Buildup: Mineral deposits can accumulate at the bottom of your water heater tank, causing it to overheat and crack.
  • Pressure Issues: Excess pressure inside your tank can lead to strange noises and potential leaks.

If you hear these noises, it might be time for a thorough maintenance check or even a tank replacement.

3. A Drop in Hot Water Supply

If you’re suddenly running out of hot water much faster than usual, your water heater’s efficiency might be compromised due to a leak.

Why This Happens:

  • Water escaping through leaks reduces the amount of hot water available in the tank for your use.
  • The system has to work harder to maintain water temperatures, leading to inefficiency.

Keep an eye on how long your supply of hot water lasts. This change could signal a leak or other issue affecting your water heater’s ability to meet your household demands.

4. Rusty or Discolored Water

When you turn on the tap, is the water coming out cloudy, rusty, or discolored? This can be a strong indication of internal corrosion within your water heater.

Key Indicators:

  • Murky or reddish water from hot water taps
  • Metallic taste in your water
  • Visible sediment particles in the water stream

Rust often points to tank corrosion, which can cause leaks if not addressed. Regular maintenance and timely inspections are essential to catch this early.

5. Spikes in Your Water Bill

A sudden and unexplained increase in your water bill can signify a hidden leak in your hot water heater.

What to Monitor:

  • Compare your monthly water bills; look for unusual fluctuations.
  • Check for additional symptoms outlined above, such as dampness around the heater or noises from the tank.

Unchecked leaks can waste gallons of water over time, increasing your utility bills. If your bills are rising and you can’t pinpoint the cause, your hot water heater might be the culprit.

👉 Common Causes of a Hot Water Heater Leak

hot water heater leaking-close up of man showing torn rubber gasket for water heater

If you’ve noticed any signs of a water heater leak, it’s important to understand what might be causing the problem. Here are five common sources of hot water heater leaks, explained in more detail:

Corroded Tank

Over time, sediment and minerals from your water supply can settle at the bottom of the tank. This buildup can lead to rust and corrosion, gradually eating away at the tank’s material. If the corrosion becomes severe enough, it can create holes or weak spots, causing leaks. Regular flushing of the tank can help reduce sediment, but once corrosion starts, it may be time to replace the unit.

Loose Drain Valve

The drain valve, located near the bottom of the tank, is used for flushing or emptying the water heater. If this valve isn’t properly tightened or has become loose over time, it can allow water to leak out. Fortunately, this is one of the easier problems to fix. A quick tightening of the valve with a wrench can often solve the issue. However, if the valve itself is damaged, you may need to replace it.

Faulty Pressure Relief Valve

The pressure relief valve is a crucial safety feature that releases excess pressure from the tank to prevent it from exploding. If this valve is faulty or there’s excessive pressure buildup in the tank, it may leak water as a safety mechanism. This could indicate a problem with the valve itself or an issue with the internal pressure of the water heater, which may require professional attention to fix.

Cracked Tank

Water heaters are designed to withstand regular temperature changes, but over time, the constant expansion and contraction of the tank can weaken it. This stress can lead to small cracks or fractures, especially if the unit is older. Cracks are often difficult to repair, and in most cases, a cracked tank will need to be replaced to prevent further leaks and damage.

Old Age

Water heaters typically last between 8-12 years, depending on usage, maintenance, and water quality. As they age, components start to wear down, seals may fail, and the risk of leaks increases significantly. If your water heater is approaching the end of its lifespan and you’re experiencing leaks, it’s likely time to replace the unit with a newer, more efficient model.

🙌 Reliable HVAC Repairs and Hot Water Heater Solutions with Thelen Plumbing, Heating, and Air

When it comes to addressing hot water heater leaks or any other HVAC concerns, Thelen Plumbing, Heating, and Air is the team you can count on. With years of experience and a commitment to quality, our skilled professionals ensure your system is repaired or replaced efficiently and reliably. We pride ourselves on providing exceptional service, quick response times, and solutions tailored to your needs. Don’t wait for small issues to turn into big problems—trust Thelen Plumbing, Heating, and Air to keep your home comfortable and running smoothly. Contact us today to schedule your service appointment or to learn more about how we can help!

How Does A Radiator Heater Work?

Radiator heaters are a reliable solution for heating your home, offering both efficiency and comfort. But how do they work, and why might they be the best choice for your home? This guide explains everything you need to know about radiator heaters, from how they function to the key benefits they offer. Whether you’re curious about their mechanics, considering installing one in your home, or simply want to understand what makes them so reliable, this article is perfect for you. We’ll cover the following topics:

  • What is a radiator heater?
  • How does a radiator heater work?
  • 5 Things You Should Know About a Radiator Heater
  • Why consider a radiator heater for your home?

🤔 What is a Radiator Heater?

radiator heater-kids feet resting on warm radiator in a home

A radiator heater is a household appliance designed to heat a room or space by emanating heat from a heated surface. Unlike some other heating systems, radiator heaters distribute heat slowly and evenly, making them highly efficient and long-lasting. They are particularly popular in homes looking for reliable, low-maintenance heating solutions.

Radiator heaters typically rely on either electricity or hot water/steam to generate heat. The heat is then radiated outward, warming the air and surfaces around the unit without the rapid temperature fluctuations that some other systems cause.

How Does a Radiator Heater Work?

Radiator heaters operate using the principle of thermal radiation to provide steady, efficient warmth. While the specifics can vary by type, the process is simple and effective:

Heat Source

  • Electric radiator heaters use internal heating elements to warm oil or other components inside the unit, creating a self-contained heat source that doesn’t require plumbing or central heating.
  • Water-based or steam radiator heaters are linked to a home’s central heating system, where hot water or steam is circulated through pipes to heat the radiator. These systems are often used in older buildings or homes with boiler setups.

Heat Transfer

The heat generated by the liquid or internal components is transferred to the radiator’s metal surface. The metal, chosen for its heat conductivity, becomes warm and begins radiating energy outward into the room. This efficient transfer ensures that minimal energy is wasted.

Radiant Heat Distribution

Radiator heaters emit warmth in two ways:

  • Direct radiation: They directly heat objects and people in their line of sight, making the warmth feel immediate.
  • Convection: They warm the surrounding air, which circulates naturally to create an even temperature throughout the room. This dual approach ensures consistent comfort without uneven hot or cold spots.

The end result is a cozy, gradual warmth that feels natural and doesn’t dry out the air—a key advantage over forced-air systems, which can leave rooms feeling stuffy or arid

💡 6 Things You Should Know About a Radiator Heater

radiator heater-overhead view of a radiator in a home

If you’re thinking about adding a radiator heater to your home, here are five key facts to help you understand why they could be a great choice:

1. Types of Radiator Heaters

Radiator heaters come in a few variations, each with its own set of benefits suited to different needs:

Hot Water Radiators

These are part of a central heating system. A boiler heats water, which is then circulated through pipes into the individual radiators in the home. Ideal for those with existing central heating infrastructure.

Steam Radiators

Similar to hot water radiators but use steam rather than hot water. Steam systems generate ample heat but may require more maintenance due to the higher temperatures.

Electric Radiators

Electric-powered heaters like oil-filled radiators are standalone appliances. They are portable, energy-efficient, and great for individual room heating.

2. They Excel at Maintaining Heat

Radiator heaters are known for their ability to retain and distribute heat efficiently. Unlike space heaters that cool down almost immediately after being turned off, radiator heaters—especially oil-filled models—continue to emit warmth for some time due to the heat stored in the oil or metal. This makes them ideal for maintaining a cozy temperature without needing to run constantly, saving energy while keeping your space comfortable.

3. They’re Low-Noise and Non-Disruptive

One of the standout features of radiator heaters is how quietly they operate. Unlike forced-air systems or fan-based heaters that create a constant hum, radiator heaters use natural convection to distribute heat, which means no loud motors or fans. This makes them perfect for bedrooms, nurseries, home offices, or any space where you need peace and quiet. You can work, relax, or sleep without the heater becoming a distraction.

4. Energy Efficiency

Radiator heaters are designed to be highly energy-efficient. Once they warm up, they require less energy to maintain heat compared to other portable heaters. Many models come with adjustable thermostats and energy-saving modes, allowing you to customize heat levels to your needs without skyrocketing your utility bills. Their ability to retain heat even after being turned off means you’ll use less electricity in the long run, making them both cost-effective and eco-friendly.

5. Safe for Homes with Kids or Pets

Safety is a priority in modern radiator heater designs, making them a great choice for households with children or pets. Many models feature cool-touch exteriors, so even if curious hands or paws come into contact with the heater, the risk of burns is significantly reduced. Additionally, built-in safety mechanisms like overheat protection and automatic shutoff ensure the heater turns off if it gets too hot or accidentally tips over, providing extra peace of mind.

6. Great for Homes with Allergy Concerns

Radiator heaters are an excellent option for individuals with allergies or respiratory sensitivities. Unlike forced-air systems that can circulate dust, pet dander, and other allergens, radiator heaters emit clean, undisturbed heat. They don’t rely on blowing air to distribute warmth, which means they won’t stir up particles in the room. This creates a healthier environment, especially for people with asthma or allergies, while still keeping your home warm and comfortable.

✅ Why Consider a Radiator Heater for Your Home?

radiator heater-woman enjoying the heat from a radiator near a window

Radiator heaters offer a range of benefits that make them a worthwhile investment for homeowners:

Consistent Warmth

Radiator heaters provide even heat distribution, ensuring that every corner of your room feels warm and comfortable. Unlike some heating systems that create hot or cold spots, radiator heaters maintain a steady temperature, making your home cozy during the colder months. This consistent warmth creates a welcoming environment and ensures no part of your home is left chilly.

Quiet Operation

Radiator heaters operate with minimal noise, making them ideal for spaces where peace and quiet are a priority, such as bedrooms, home offices, or living rooms. Unlike forced-air systems that can produce loud whooshing sounds, radiator heaters heat silently, allowing you to focus on work, enjoy uninterrupted sleep, or relax without distractions.

Low-Maintenance

These heaters are designed for durability and require very little upkeep compared to other heating systems. With no fans, filters, or moving parts, radiator heaters are less prone to wear and tear. Routine cleaning and occasional checks are usually all that’s needed to keep them functioning efficiently for years, saving you time and money on maintenance.

Radiator heaters are a trusted, long-lasting solution for home heating, combining comfort, convenience, and reliability in one. Whether you’re looking for consistent warmth, a quiet operation, or a low-maintenance option, radiator heaters provide an efficient and dependable way to heat your home.

🙌 Expert Heating Solutions for a Cozy Home

At Thelen Plumbing, Heating, and Air, we understand the importance of reliable, efficient heating solutions for your home. Our experienced team is dedicated to providing personalized service and expert advice to help you choose the perfect radiator heater for your needs. With a focus on quality craftsmanship and customer satisfaction, we ensure that your HVAC system is installed and maintained to the highest standards. Trust Thelen Plumbing, Heating, and Air to deliver warmth, comfort, and peace of mind for years to come. Contact us today to schedule a consultation and take the first step toward a cozier home!

What Is A Boiler & How Does It Work?

If you’ve heard the term “boiler” but aren’t sure what it is or how it works, you’re not alone. Boilers are a crucial component in many homes, providing heat and hot water. But what exactly are they, and how can you ensure yours is working efficiently? This blog will guide you through everything you need to know, including:

  • What Is a Boiler?
  • How Does a Boiler Work?
  • 3 Types of Boilers
  • Things You Should Know About Your Home’s Boiler
  • Signs Your Boiler May Need Maintenance or Replacement

🤔 What Is a Boiler?

what is a boiler-hot water from a tap in a home because of boiler system

A boiler is a closed, energy-efficient system designed to heat water or produce steam for heating your home. The hot water or steam circulates through pipes to radiators, baseboard heaters, or underfloor systems to keep your home warm and comfortable. Boilers also work double duty by supplying hot water for your faucets and appliances.

Unlike furnaces, which heat air, boilers use water, making them an excellent option for homes in colder climates that require consistent, cozy heat.

Why Do Homeowners Choose Boilers?

  • Energy Efficiency: Boilers use less energy to generate heat than forced-air systems.
  • Even Heating: Radiant heat creates a more consistent and draft-free environment.
  • Quiet Operation: Boilers run much quieter than traditional HVAC systems.

If you live in the Twin Cities or Northwest Metro area, ensuring the functionality of your boiler is essential for those cold Minnesota winters.

👉 How Does a Boiler Work?

Boilers are relatively straightforward systems but involve precise engineering. Here’s a more detailed breakdown of how they operate:

Heating the Water

The boiler works by burning fuel, such as natural gas, oil, or propane, or by using electricity to generate heat. This heat is then transferred to water stored in the boiler’s system. In fuel-based systems, the combustion process takes place in a burner, where fuel is mixed with air and ignited to produce a flame. This flame heats up a heat exchanger, which in turn warms the water. In electric boilers, heating elements directly heat the water without the need for combustion. The process is carefully designed to ensure efficiency and safety, with temperature controls in place to prevent overheating.

Circulation

After the water is heated, it doesn’t just sit in place. The hot water or steam is moved through a network of pipes to deliver heat where it’s needed. In traditional systems, hot water flows to radiators or baseboard heaters, while in modern setups, it can also circulate through underfloor heating coils for even heat distribution. In steam systems, the water is converted to steam, which rises through the pipes to the heating elements. Once the heat is delivered, the cooled water or condensed steam travels back to the boiler to be reheated, maintaining a continuous loop. Pumps in the system ensure efficient and consistent circulation.

Heat Transfer

The real magic of a boiler happens when the heated water or steam reaches its destination. Radiators, underfloor heating coils, or other heating elements take the heat from the water or steam and transfer it into the surrounding air, warming up the room. Radiators work by emitting heat through convection and radiation, while underfloor systems transfer heat through conduction, warming the floor and the air above it. This process ensures that your home stays warm and comfortable. Once the heat is transferred, the water cools and flows back to the boiler to start the process again.

Thermostat Regulation

A thermostat acts as the brain of the heating system, ensuring that your home’s temperature stays consistent and comfortable. When the indoor temperature drops below the set level, the thermostat signals the boiler to turn on and start heating water. Once the desired temperature is reached, the thermostat instructs the boiler to shut off, saving energy and preventing overheating. Modern thermostats often include smart features, allowing you to program heating schedules or control the system remotely through a smartphone.

Advanced Features

Modern boilers often come with additional features to improve efficiency and functionality. For example, energy recovery systems capture and reuse heat that would otherwise be lost during the combustion process, reducing fuel consumption. Some boilers also have modulating burners, which adjust the flame size based on the heating demand, ensuring optimal energy use. Advanced diagnostics and safety features monitor the system in real-time, alerting you to any potential issues before they become major problems.

🔥 3 Types of Boilers

what is a boiler-white boiler in house basement

Not all boilers are the same, and selecting the right one for your home can make a big difference in efficiency, comfort, and energy savings. The best choice depends on your available space, energy needs, and budget. Here’s a closer look at the three main types of boilers to help you make an informed decision:

1. Traditional Boilers

Traditional boilers, also known as conventional or regular boilers, are designed to store hot water in a separate tank or cylinder. This ensures a steady supply of hot water is available for both central heating and household needs, like multiple faucets, showers, or baths being used simultaneously. They are an excellent option for larger homes or families with high water consumption and multiple bathrooms. However, they require more space for the tank and may not be the most energy-efficient solution for smaller households.

Best for: Homes with multiple bathrooms and high water demand.

Considerations: Requires space for a water tank and regular maintenance to ensure optimal performance.

2. Combi Boilers

Combi boilers, short for combination boilers, are a modern and compact solution that combines water heating and central heating in a single unit. Unlike traditional boilers, combi boilers provide hot water on demand without the need for a separate storage tank. This makes them ideal for smaller homes or apartments where space is limited. Additionally, they are highly energy-efficient since they heat water only when needed. However, they may struggle to meet the demands of larger households with multiple bathrooms.

Best for: Smaller homes or apartments with limited space and moderate water needs.

Considerations: May not be suitable for homes with high simultaneous water usage.

3. High-Efficiency Boilers

High-efficiency boilers, also known as condensing boilers, are designed to maximize energy efficiency by capturing and reusing heat from exhaust gases that would normally escape through the flue. This advanced technology significantly reduces energy consumption and lowers utility bills while also being more environmentally friendly. High-efficiency boilers come in various sizes and can work in both smaller and larger homes, depending on your heating requirements. While the upfront cost may be higher, the long-term savings and reduced carbon footprint make them a smart investment.

Best for: Homeowners looking to reduce energy costs and environmental impact.

Considerations: Higher initial cost, but savings on energy bills over time.

Pro Tip

Not sure which boiler is the best fit for your home? Consult a professional, like our team at Thelen Plumbing, Heating, and Air, to assess your heating demands, available space, and budget. Choosing the right boiler now can save you money and improve comfort for years to come!

💡 Things You Should Know About Your Home’s Boiler

Understanding your home’s boiler is essential for maintaining efficient heating and preventing costly repairs. Knowing how it works can help you spot potential issues early and ensure your home stays warm year-round.

Annual Maintenance Is Crucial

Your boiler is a hardworking appliance that powers your home’s heating system, and regular servicing helps it run efficiently and safely. Annual maintenance can catch minor issues before they turn into costly repairs or system failures. It’s also often required to keep warranties valid.

Pay Attention to Warning Signs

Your boiler may be trying to tell you something if it’s making banging or whistling noises, producing uneven heating, or causing your energy bills to spike. These signs could point to underlying problems like leaks or faulty components, and addressing them early can save money and prevent bigger issues.

Bleed Your Radiators Regularly

Trapped air in your radiators can reduce heating efficiency, leaving your home feeling colder than it should. Bleeding your radiators releases this air, allowing heat to flow evenly and ensuring your system works effectively throughout the winter months.

Efficiency Matters

Older boilers are often less efficient, consuming more energy and inflating your utility bills. Upgrading to a high-efficiency boiler can significantly reduce heating costs, improve performance, and lower your carbon footprint, making it a smart long-term investment.

Know When It’s Time to Replace

Boilers typically last 15-20 years, but frequent breakdowns and inefficient performance might indicate it’s time for a replacement. A new boiler can offer better reliability, advanced features, and energy savings, ensuring your home stays warm and your system runs smoothly.

⚠️ Signs Your Boiler May Need Maintenance or Replacement

what is a boiler-tech working on a home boiler system

A boiler breakdown in the dead of winter is something no homeowner wants to experience. Watch for these red flags:

  • Strange Sounds: Whistling, banging, or gurgling noises could mean internal issues like a build-up of limescale, air in the system, or failing parts that need immediate attention.
  • Fluctuating Temperatures: If your home isn’t consistently warm or some rooms feel colder than others, it may indicate a malfunctioning thermostat, pressure issues, or an aging boiler struggling to perform.
  • Higher Energy Bills: A sudden spike in energy costs could point to your boiler working harder than it should due to inefficiency or worn-out components, wasting energy in the process.
  • Leaks or Rust: Visible damage, such as water pooling around the boiler or rust on the exterior, could signal internal corrosion or broken seals, which can lead to further damage if left unaddressed.

If you’re noticing these signs, trust Thelen Plumbing, Heating, and Air to diagnose the issue and provide cost-effective solutions. From small repairs to full installations, our expert team has you covered.

🙌 Rely on Thelen Plumbing, Heating, and Air for All Your Boiler Needs

At Thelen Plumbing, Heating, and Air, we understand how important a reliable boiler is for your home or business. Our team has the expertise and experience to handle all your boiler and HVAC needs, from installation to repairs and maintenance. We pride ourselves on delivering quality service you can trust, ensuring your system runs efficiently year-round. When you choose Thelen Plumbing, Heating, and Air, you’re choosing a team committed to your comfort and satisfaction. Contact us today to schedule a consultation and let us help you find the perfect solution for your HVAC needs!

How To Perform Indoor Air Quality Testing?

Breathing clean air in your home is essential to maintaining your family’s health. But how do you know if the air you’re breathing inside is safe? Indoor air quality testing can help you identify pollutants, allergens, or other contaminants that may be affecting your health and comfort. This guide will cover everything you need to know, including:

  • Why indoor air quality testing is so important
  • A step-by-step guide to performing indoor air quality testing
  • Options for improving your home’s air quality

🤔 Why Indoor Air Quality Testing Matters

indoor air quality testing-mold build up on window sill

The average person spends about 90% of their time indoors, where pollutant levels can be 2-5 times worse than outdoor air, according to the EPA. Contaminants such as mold, dust, pet dander, volatile organic compounds (VOCs), and even carbon monoxide can silently degrade the air you breathe. Poor indoor air quality is linked to allergies, asthma, fatigue, and respiratory illnesses. Testing your indoor air isn’t just about comfort—it’s about protecting your health.

Factors That Impact Indoor Air Quality

Indoor air quality is influenced by a variety of factors that can affect the health and comfort of your home. Dust and allergens, such as pollen, pet dander, and dust mites, are common culprits that can trigger respiratory issues. Mold and mildew thrive in environments with high humidity or water leaks, posing serious health risks if left untreated. Chemical pollutants, including volatile organic compounds (VOCs), are often released from everyday items like cleaning products, furniture, and paint, contributing to poor air quality. Carbon monoxide, a potentially deadly gas, can be emitted by fuel-burning appliances if not properly ventilated, while radon, an odorless radioactive gas, is a hidden danger often found in basements or older homes. Additionally, tobacco smoke and lingering odors can further degrade air quality, making it essential to identify and address these issues based on your home’s location, construction, and lifestyle activities.

👉 6 Steps to Perform Indoor Air Quality Testing

indoor air quality testing-air filters side by side, one dirty one clean

Improving the air quality in your home starts with understanding its current state. Testing indoor air quality can help you identify pollutants and take steps to create a healthier environment for your household. Here’s a detailed guide on how to test your air quality accurately and what to look out for.

1. Identify Signs of Poor Air Quality

Before diving into the testing process, take a moment to assess your home for signs of poor air quality. Recognizing these indicators can help you pinpoint areas of concern:

  • Frequent allergies or respiratory issues: If household members have been experiencing sneezing, coughing, or other respiratory problems, it could be due to airborne irritants like dust, mold, or pet dander.
  • Visible dust buildup or mold growth: Excessive dust accumulation on surfaces or mold spots on walls may suggest potential pollutants circulating in the air. Mold is particularly concerning as it can trigger allergies and worsen asthma.
  • Persistent odors: Strong or musty smells that linger even after cleaning could indicate the presence of volatile organic compounds (VOCs) or hidden mold.
  • Condensation on windows or walls: High humidity levels can lead to condensation, creating a breeding ground for mold and mildew. Addressing improper ventilation and excess moisture is crucial.

By identifying these warning signs, you’ll have a better idea of where to focus your air quality testing efforts.

2. Invest in an Air Quality Monitor

An air quality monitor is one of the most effective tools for getting real-time insights into your indoor environment. When choosing a monitor, look for devices that can measure key pollutants and parameters, such as:

  • Volatile Organic Compounds (VOCs): These chemicals are often released by cleaning supplies, paints, and furniture, and prolonged exposure can be harmful.
  • Particulate Matter (PM): Fine particles like PM2.5 can penetrate deep into the lungs and affect respiratory health.
  • Humidity levels: Excessive humidity encourages mold growth, while low humidity can cause dryness and discomfort.
  • Carbon Monoxide (CO): This odorless, colorless gas can be deadly in high concentrations, making it critical to monitor.

Some advanced monitors also provide historical data and smartphone connectivity, allowing you to track trends over time. A reliable air quality monitor is an essential investment for any homeowner concerned about their indoor environment.

3. Perform Spot Testing Throughout Your Home

Indoor air quality can vary greatly between rooms, so it’s important to test multiple areas of your home. Place your air quality monitor in the following locations:

  • Bedrooms: Ensure the air is safe and clean where you and your family spend the most time sleeping.
  • Living rooms: As a high-traffic area, living rooms may accumulate dust, VOCs, or pollutants from furniture and electronics.
  • Basements: Basements are prone to dampness and mold, which can degrade air quality and pose health risks.
  • Kitchens: Cooking, especially on gas stoves, releases PM and CO. Place the monitor near the stove to check for pollutants.
  • Any areas with noticeable issues: Rooms with musty odors or visible mold should be prioritized during testing.

Allow the monitor to run for at least 24 hours in each room to gather accurate and comprehensive data. Keep track of any areas where pollutant levels are higher than normal.

4. Use DIY Test Kits if Necessary

If your air quality monitor reveals specific concerns, or if you want to test for additional pollutants, DIY test kits can be a helpful option. These kits are designed to target specific contaminants, such as:

  • Radon: Radon is a naturally occurring radioactive gas that can seep into homes through the foundation. Long-term exposure increases the risk of lung cancer, making radon testing essential, especially in high-risk areas.
  • Mold: Mold test kits can help confirm the presence of hidden mold that may not be visible on surfaces.
  • VOCs: Some kits can detect harmful VOCs released by cleaning products, furniture, or building materials.

Most DIY test kits require you to collect a sample and mail it to a lab for analysis. While simple to use, they can be a bit slower than real-time monitoring but are highly accurate for specific pollutants.

5. Review the Results

Once you’ve gathered data from your air quality monitor or received your DIY test kit results, it’s time to analyze the findings. Compare the readings to recommended safety standards to identify any concerning levels:

  • Carbon Monoxide (CO): Indoor levels should be less than 9 ppm (parts per million). Higher levels can cause headaches, dizziness, or even fatal poisoning.
  • Particulate Matter (PM2.5): Ideal levels should remain below 12 micrograms per cubic meter for healthy indoor air.
  • Volatile Organic Compounds (VOCs): Aim for low or undetectable VOC levels to minimize risks of irritation or long-term health effects.
  • Humidity: Keep indoor humidity between 30% and 50% to avoid dryness and reduce the risk of mold growth.

Carefully review the data for any pollutants that exceed safety thresholds, and determine which areas of the home require immediate attention.

6. Seek Professional Help if Needed

If your results reveal serious issues—such as high radon levels, severe mold infestations, or dangerously elevated CO readings—it’s best to bring in professionals. Certified air quality experts can perform comprehensive testing and recommend solutions such as installing air purifiers or ventilation systems, sealing foundation cracks to prevent radon infiltration, remediating mold and addressing moisture problems, or servicing and replacing faulty appliances that may emit harmful gases. Professional help can ensure long-lasting improvements to your indoor air quality, providing peace of mind and a healthier living environment.

👍 How to Improve Indoor Air Quality

indoor air quality testing-hepa filter testing

If your test results show poor air quality, it’s time to take action. Here are some effective ways to clean and improve the air inside your home:

Optimize Ventilation

Good ventilation is key to reducing indoor pollutants. Open windows regularly to let fresh air in and stale air out. When cooking or showering, use exhaust fans to remove moisture, odors, and harmful particles that can linger in the air.

Invest in Air Purifiers

Air purifiers equipped with HEPA filters can capture allergens, dust, and fine particulates that regular cleaning might miss. Place them in high-traffic areas or wherever air quality is a concern for maximum impact.

Control Humidity

Excess moisture creates a perfect environment for mold and mildew. Use a dehumidifier to maintain relative humidity levels between 30–50%, preventing mold growth and improving your overall air quality.

Upgrade Your HVAC System

Your HVAC system plays a big role in air quality. Use filters rated MERV 8 or higher to trap finer particles, and schedule regular maintenance to keep the system running efficiently. Upgrading to a high-efficiency system can further improve air quality and reduce energy costs.

🙌 Breathe Easy with Thelen Plumbing, Heating, and Air

At Thelen Plumbing, Heating, and Air, we understand how vital clean, healthy air is for your home and family. With our expertise in high-efficiency HVAC systems and comprehensive maintenance services, we are committed to improving your indoor air quality and giving you peace of mind. Our professional team brings years of experience, reliable solutions, and a dedication to customer satisfaction. Don’t leave the air you breathe to chance—trust the experts who care. Contact Thelen Plumbing, Heating, and Air today to schedule an HVAC consultation and take the first step toward a healthier home!

How To Install Whole House Water Filter System? (2025)

Maintaining clean and safe water in your home is essential for a healthy lifestyle, and one of the best solutions is installing a whole house water filter. This system ensures that every tap in your house delivers filtered water, protecting your family from harmful contaminants. If you’re planning to install a whole house water filter system, this detailed guide will walk you through the process.

  • Understanding a whole house water filter and its importance
  • Benefits of a whole house water filter
  • Key steps to installing a whole house water filtration system

🚰 What Is a Whole House Water Filter?

whole house water filter-woman filling a glass of water from tap

A whole house water filter is a comprehensive filtration system that purifies all the water entering your home. Unlike portable or single-point filters like countertop or under-sink devices, this system is installed at the main water line, ensuring that every drop of water—whether it’s for drinking, cooking, bathing, or laundry—is free from harmful contaminants. This makes it an effective solution for households looking to improve water quality on a larger scale. Whether it’s the water coming out of your shower, kitchen faucet, or even into your washing machine, a whole house water filter ensures a consistent supply of clean, filtered water throughout your home.

Why Install a Whole House Water Filter?

  • Cleaner Drinking Water: Whole house water filters remove contaminants like chlorine and lead, ensuring safe, high-quality water from every tap for drinking, cooking, and more.
  • Longer-Lasting Appliances: By reducing mineral build-up, these filters protect plumbing and appliances, extending their lifespan and improving efficiency.
  • Healthier Air Quality: Filtering out chlorine prevents harmful fumes from evaporating into your home, improving air quality and creating a safer environment.

✅ Benefits of a Whole House Water Filter System

By now, you’ve seen how straightforward installing a water filter can be. But what are the benefits once the filter is in place?

Healthier living means having access to cleaner, contaminant-free water throughout your home, which can improve your overall well-being and protect you from harmful substances often found in tap water. Time and cost savings come from eliminating the need to buy bottled water and reducing maintenance costs on appliances, as filtered water prevents damage caused by hard water build-up. It’s also an eco-friendly solution, as it significantly reduces your reliance on single-use plastics, helping you contribute to a greener planet.

With these advantages, a whole house water filter isn’t just an investment—it’s an essential upgrade for your home.

How to Get Started

Now that you understand the benefits of a whole house water filter, it’s time to take the next step. Consider factors like the size of your household, the type of contaminants in your local water supply, and your budget when choosing a system. Professional installation is often recommended to ensure that the filter is correctly connected to your main water line. With the right system in place, you can enjoy the long-term benefits of cleaner, safer water for your entire home.

👉 Preparing For Installation

Proper preparation is key to ensuring your whole house water filtration system works efficiently. This includes selecting the right system for your water needs and identifying the best location to optimize performance, maintenance, and accessibility.

Choose the Right Filter for Your Home

Water quality varies, so it’s essential to choose a filter that tackles the specific contaminants in your supply. For example:

  • Carbon Filters remove chlorine, bad odors, and harmful VOCs, improving taste and smell.
  • Sediment Filters trap physical particles like sand, dirt, or rust, protecting your plumbing and appliances.
  • UV Filters effectively eliminate bacteria, viruses, and other microorganisms for safer water.

To make the right choice, start by testing your water with a kit or reviewing your local water report. This ensures your filter directly addresses your home’s unique water issues.

Select the Proper Installation Location

The location of your filter matters for both effectiveness and convenience. Choose a spot near the main water line, often found in the basement, garage, or utility room, where it can treat all water before it reaches your taps. Ensure there’s ample space for installation and easy access for filter changes and maintenance. A cramped or inaccessible area can make upkeep more challenging and time-consuming. By carefully planning these steps, you’ll set your filtration system up for long-term success.

🛠️ 8 Steps to Install a Whole House Water Filtration System

whole house water filter-tech installing under sink water filter

Installing a whole house water filtration system might initially seem challenging, but with proper preparation and the right tools, it’s a manageable DIY project. This guide will walk you through each step to ensure a smooth installation process, providing clean, filtered water throughout your home.

1. Gather Your Tools and Materials

Before starting, it’s important to have all the necessary tools and materials on hand to avoid interruptions during the installation process. Here’s what you’ll need:

  • Pipe cutter or hacksaw: For cutting into the main water line cleanly and accurately.
  • Wrench set and pliers: To tighten and secure fittings and connections.
  • Pipe fittings and adapters: These ensure compatibility between the filtration system and your existing plumbing.
  • Teflon tape: Essential for sealing threaded connections to prevent leaks.
  • Mounting brackets: If the filter system requires wall or pipe mounting, brackets will help keep it stable and secure.
  • Bucket or pan: To catch any residual water when you cut into the pipeline.

Having these tools ready will save you time and frustration, ensuring a smoother installation process.

2. Turn Off the Main Water Supply

Before cutting into your home’s water supply, it’s crucial to shut off the water to avoid flooding or spills. Locate your home’s main water shut-off valve, typically found near the water meter or where the water line enters the house. Turn the valve to the “off” position, ensuring no water flows through the pipes. Next, open several faucets around the house, both hot and cold, to drain any remaining water from the system. This step reduces pressure in the pipes and minimizes mess when you cut into the main water line.

3. Cut Into the Main Water Line

Carefully choose the location where the water filter will be installed. This is usually near the point where the main water line enters your home, ensuring all water entering the house gets filtered.

  • Mark the pipe: Use a marker or tape to indicate exactly where you’ll make the cut. Double-check the location to ensure it aligns with the filter’s specifications.
  • Use a pipe cutter: A pipe cutter or hacksaw is ideal for making clean, precise cuts. Be sure to position a bucket or pan beneath the pipe to catch any residual water that might drain out.

4. Install Shut-Off Valves

Adding shut-off valves on both sides of the filtration system is a critical step for easy control and maintenance. These valves allow you to isolate the filter without shutting off the entire house’s water supply. Install one valve on the incoming side of the filter, before the water enters the system, and another valve on the outgoing side, after the water exits the system. Shut-off valves make future maintenance, such as changing filters or troubleshooting leaks, quick and hassle-free.

5. Attach the Water Filter

With the pipe prepared and valves in place, it’s time to attach the filtration system. Follow these steps:

  • Fit the system: Connect the filter to your main water line using the provided fittings. Double-check that the “in” and “out” ports are aligned correctly with your water flow direction.
  • Seal the connections: Wrap Teflon tape around all threaded connections to prevent leaks. Use a wrench to carefully tighten the fittings, but avoid overtightening, which could damage the threads.
  • If your filter system includes multiple stages, ensure all components are securely attached and aligned per the manufacturer’s instructions.

6. Secure the System

To keep the filtration system stable and prevent unnecessary strain on the pipes, secure it with mounting brackets if required.

  • Position the brackets on a sturdy surface, such as a wall or a nearby support structure.
  • Use screws to attach the brackets and ensure the filter unit is firmly held in place.

A properly secured system minimizes vibrations, reduces wear and tear, and ensures long-lasting performance.

7. Test the System

Once the system is installed, it’s crucial to test for leaks and ensure everything is functioning properly before regular use.

  • Turn the water back on slowly: Gradually open the main water valve to reintroduce water into the system. This prevents a sudden rush of pressure that could cause leaks.
  • Check for leaks: Inspect all connections, shut-off valves, and the filter housing for any signs of dripping or moisture. Tighten fittings if necessary.
  • Flush the filter: Follow the manufacturer’s instructions to flush the system, which typically involves running water through the filter for several minutes. This step removes any debris or carbon dust from the new filter and ensures the water is safe to use.

8. Maintain the System Regularly

whole house water filter- installed near other home piping

Installing a whole house water filter is just the first step. To keep it running efficiently and ensure clean water, regular maintenance is essential. Here’s what to keep in mind:

  • Replace filters: Over time, filters become less effective as they collect impurities. Replace cartridges as recommended by the manufacturer, typically every 3-6 months, or sooner if your water quality demands it.
  • Inspect connections: Periodically check for leaks, loose fittings, or wear and tear. Tighten or replace components as needed.
  • Upgrade the system: As your water needs change or the system ages, consider upgrading to more advanced filters or adding extra stages for improved filtration.

For added peace of mind, you can contact a professional like Thelen Plumbing, Heating, and Air to handle maintenance or troubleshoot any issues. Their expertise can help ensure your filtration system continues to deliver clean, safe water for years to come.

🙌 Your Trusted Partner for Water Quality & HVAC Solutions

At Thelen Plumbing, Heating, and Air, we’re committed to delivering exceptional service and reliable solutions for your home’s water quality and HVAC needs. Our team of experienced professionals ensures every installation, repair, and maintenance job is done right the first time, giving you peace of mind. With a reputation built on trust, transparency, and customer satisfaction, we’re the partner you can count on to protect your home and family. Whether you’re upgrading to a whole house water filter or addressing other HVAC concerns, we’re here to help. Contact us today for a consultation, and take the first step toward a healthier, more comfortable home!

Heating System Repair Guide (When To Replace)

When your home’s heating system acts up, it’s tempting to ignore the problem or hope it resolves itself. However, neglecting issues can escalate minor inefficiencies into costly emergencies. Whether you’re dealing with rising heating bills, uneven warmth, or strange furnace noises, knowing when to repair or replace your heating system is critical to maintaining both comfort and efficiency. This guide will help you understand your heating system better, so you can make informed decisions about repairs and replacements, including:

  • What is a home heating system?
  • When it’s time to replace your heating system
  • Heating system repair in 6 steps

🤔 What is a Home Heating System?

heating system repair-repair tech with tool belt doing repairs on a radiator

A home heating system is a vital component of any household, providing warmth and comfort during colder seasons. It typically consists of a furnace, boiler, or heat pump, along with ducts or radiators that distribute heat throughout the home. The heating system works by generating and circulating warm air or water to maintain a desired temperature.

Why a Well Functioning Heating System is Essential for Minnesotans

For residents of Minnesota, where winter temperatures can plummet to bone-chilling levels, a well-functioning heating system is indispensable. Here are some reasons why:

Extreme Cold Weather: With frigid winters and sub-zero temperatures, a reliable heating system is essential for keeping homes safe and comfortable, preventing issues like frozen pipes and ensuring the well-being of occupants.

Health and Safety: Adequate heating is crucial for maintaining a healthy indoor environment, preventing the risks of hypothermia and related health conditions. It also helps to minimize exposure to cold-related illnesses and allergies.

Energy Efficiency: A well-maintained heating system operates efficiently, optimizing energy consumption and reducing utility costs. This is especially important during long winter months when heating systems are in constant use and energy bills can escalate.

Home Preservation: Proper heating helps protect homes from the damages caused by extreme cold, such as frozen pipes, cracks in the foundation, and other structural issues. It also helps prevent the growth of mold and mildew, ensuring a safe and comfortable living environment.

Comfort and Well-being: A warm and cozy home is not only essential for physical well-being but also contributes to mental and emotional well-being. A well-functioning heating system creates a comfortable sanctuary where families can relax, unwind, and thrive.

By understanding the importance of a well-functioning heating system, Minnesota residents can ensure their homes remain cozy, safe, and energy-efficient throughout the challenging winter season.

Signs Your Heating System May Need Repairs

Your furnace works hard to keep your home warm and cozy, and like any hardworking appliance, it requires frequent attention. Here are some common signs that furnace repair services are needed on your unit:

  • Uneven Heating: If one room is toasty warm while another feels like the inside of your fridge, your system could have issues with airflow or ductwork.
  • Rising Energy Bills: A sudden spike in your heating costs is often a sign that your system is working harder than it should due to inefficiency or worn-out components.
  • Strange Noises: Clanging, banging, or screeching sounds are not normal. They could indicate loose parts, motor issues, or failing components.
  • Frequent Cycling: Systems that constantly turn on and off may have thermostat issues or airflow problems that need immediate attention.
  • Age of the System: HVAC systems typically last 15–20 years. If your system is older and constantly needs repairs, it may be time to evaluate its overall condition.

👨‍🔧 When It’s Time to Replace Your Heating System

heating system repair-repair tech doing maintenance on a thermostat

While repairs can fix many heating issues, certain cases make replacing your system a smarter long-term choice:

High Cost of Repairs: If a repair costs over 50% of a new system, investing in an HVAC replacement saves money in the long run. A new system also comes with warranties and improved efficiency, offering better value.

Repeated Breakdowns: Frequent furnace repairs don’t just drain your wallet—they leave you without heat when you need it most. A replacement ensures consistent performance and peace of mind during colder months.

Outdated Technology: Older systems lack modern energy-saving features, costing you more on utility bills. Upgrading to a newer model means better efficiency, smart features, and long-term savings.

Extensive Metal Corrosion or Cracks: Cracks, rust, or corrosion on critical components like the heat exchanger pose significant safety risks, such as carbon monoxide leaks. Replacing the system ensures a safe and reliable heating source for your home.

🛠️ 5 Steps to Repair Your Heating System

heating system repair-close up of repair tech doing maintenance on heating system

If your heating system isn’t working as it should, don’t panic. Before calling for professional help, try these steps to troubleshoot and fix common issues. These simple checks may save you time and money!

1. Check Your Thermostat

Start by ensuring your thermostat is set correctly. Make sure it’s set to “heat” mode and the fan is set to “auto.” If your thermostat uses batteries, try replacing them—even a low battery can cause the system to become unresponsive. Check the temperature setting as well, ensuring it’s set higher than the current room temperature. If your thermostat is programmable or smart, confirm that the programming schedules align with your intended heating time. A malfunctioning or improperly set thermostat is often the root cause of heating problems.

2. Inspect Your Filters

Dirty or clogged air filters can significantly impact your heating system’s performance. When filters are full of dust and debris, airflow becomes restricted, causing the system to work harder and potentially overheat. Over time, this can lead to inefficiency, higher energy bills, and even damage to your system. Check your filters and replace them if they appear dirty or clogged. As a rule of thumb, filters should be replaced every 1–3 months, especially during heavy usage seasons. Opt for high-quality filters that match your system’s requirements to maintain optimal airflow.

3. Verify Power Connections

Your heating system won’t work if it’s not receiving power. Begin by checking your circuit breaker panel for any tripped breakers—reset them if necessary. Inspect the furnace’s shut-off safety switch, which is usually located near the unit, to ensure it’s in the “on” position. If your heating system has a power cord, confirm that it’s securely plugged in. Additionally, check for visible signs of electrical damage, such as frayed wires or burnt smells. If you suspect an electrical issue, it’s best to leave this to a licensed professional to avoid safety risks.

4. Check Air Vents and Registers

Blocked vents and registers can severely affect your heating system’s efficiency. Walk around your home and inspect all air vents to ensure they are open and unobstructed. Furniture, curtains, or decorations placed too close to vents can block airflow and prevent warm air from circulating effectively. Even partially blocked vents can cause uneven heating, leaving some rooms cold while others overheat. For optimal performance, make sure vents and registers are clean and clear of dust or debris as well.

5. Call a Professional

If you’ve completed these steps and your heating system is still not working, it’s time to call in the experts. Licensed professionals can diagnose and fix complex issues that may be beyond a homeowner’s ability, such as faulty components, electrical problems, or refrigerant leaks (in the case of heat pumps). Don’t wait too long, as delaying repairs can lead to more extensive and costly damage. Thelen Plumbing, Heating, and Air offers 24/7 emergency heating repair services to ensure your home stays warm and safe, even in the coldest weather. Our team of experienced technicians is ready to help you restore comfort to your home quickly and efficiently.

🙌 Trust Thelen Plumbing, Heating, and Air for Reliable Heating System Repair

When it comes to heating system repair, you need a team you can trust to ensure your home stays warm and comfortable. At Thelen Plumbing, Heating, and Air, we are dedicated to providing top-notch service and expertise to address all your heating system needs. Our team of highly skilled technicians is available 24/7 to diagnose and resolve any issues you may encounter with your heating system. With our years of experience and commitment to customer satisfaction, you can have peace of mind knowing that your home is in the hands of professionals who will go above and beyond to deliver exceptional results. Contact Thelen Plumbing, Heating, and Air today for all your home improvement needs and experience the difference of working with a reliable and reputable team.

Furnace Replacement Guide (6 Easy Steps)

Replacing your furnace can feel like a daunting task—one that many homeowners dread. But a properly functioning furnace is essential to maintaining a comfortable and safe home, especially during those brutal winters. Whether your current unit is outdated, inefficient, or simply past its life span, this guide will walk you through everything you need to know about furnace replacement, including:

  • How to choose the right replacement
  • Steps to replace your furnace
  • Why professional furnace installation matters

🤔 Choosing the Right Furnace for Your Home

furnace replacement-close up of old furnace parts

Investing in a new furnace is a significant decision, and there are several factors to consider when choosing your replacement. Energy efficiency is one of the most important aspects. Look for furnaces with a high Annual Fuel Utilization Efficiency (AFUE) rating, as this can help you save on operating costs over time.

Choosing the correct size for your furnace is also crucial. A furnace that’s too small won’t heat your home effectively, while an oversized one can waste energy. Professionals like Thelen Plumbing, Heating, and Air can assess your home and recommend the right size to ensure optimal performance and efficiency.

Another key factor is the type of fuel your furnace uses. You’ll need to decide whether you want a gas, electric, or oil furnace based on your home’s infrastructure and budget. Gas furnaces are often the most cost-effective choice, particularly in colder climates, due to their fuel efficiency.

Finally, consider the advanced features that modern furnaces offer. Features like variable-speed blowers, smart thermostats, and zone heating can significantly enhance your comfort and make your heating system more versatile and convenient.

How Do You Know It’s Time to Replace Your Furnace?

There are signs that your furnace might be on the brink of replacement. Look out for these indicators:

  • Rising Energy Bills: If your heating costs are climbing despite regular use, your system could be working inefficiently.
  • Frequent Repairs: If you’re frequently calling for repairs, it might make more financial sense to replace the unit altogether.
  • Unusual Noises or Smells: Strange buzzing, rattling, or foul odors? These could point to serious furnace malfunctions.
  • Age of Your Furnace: Furnaces typically last 15-20 years. If yours has already celebrated its 15th birthday, it may be time for a replacement.

🛠️ 6 Steps to Replace Your Furnace

furnace replacement-old furnace on curb for trash pick up

Replacing a furnace can be a big job, but understanding the process can make it less overwhelming and help you feel prepared during the installation. While it’s not a DIY project, here’s what to expect step-by-step.

1. Evaluate Your Current Furnace

The first step is for a professional HVAC technician to assess your existing furnace system. They will inspect for issues such as inefficiency, wear and tear, or outdated components. This evaluation helps determine whether a replacement is necessary and what specific upgrades may be required. The technician will also gather critical details such as the size of the unit, ductwork compatibility, and installation requirements. This information ensures the new furnace will seamlessly integrate with your existing heating system and meet your home’s heating needs.

2. Select Your New Furnace

Choosing the right furnace is crucial to maintaining a comfortable and energy-efficient home. A professional can guide you through options that fit your home’s size, climate, and energy needs, while keeping your budget in mind. Modern furnaces come in a variety of energy-efficient models, some offering advanced features like variable-speed fans or smart thermostats. A trusted expert, such as Thelen Plumbing, Heating, and Air, can recommend furnace models that maximize efficiency and lower energy costs while ensuring the unit is the right size and type for your home’s unique layout and design.

3. Remove the Old Unit

Once the replacement unit is selected, the old furnace must be carefully disconnected and removed. This involves shutting off power and fuel supplies to the unit, dismantling it, and safely disposing of it according to local regulations. During this process, technicians take extra care to avoid causing damage to your home, such as scuffing floors or mishandling ductwork. Proper removal is essential to prepare the space for seamless installation of the new furnace.

4. Prepare the Space

Before installing the new furnace, the area must be cleared and prepped. This includes cleaning the space where the furnace will sit, removing debris, and inspecting components like ductwork, ventilation, and gas lines for any potential issues. If necessary, minor repairs or upgrades may be made to ensure these components are in excellent condition for the new system. Proper preparation ensures your furnace will function efficiently and safely with no interruptions.

5. Install the New Furnace

The new furnace is then installed in the prepared space. This involves connecting it to your existing ductwork, gas lines, and electrical systems. The technician will ensure all connections are airtight, secure, and compliant with local building codes. Special attention is given to calibrating the furnace properly, so it provides consistent heat while operating as efficiently as possible. A well-installed furnace not only maximizes performance but also extends the lifespan of the unit.

6. Test for Functionality

Once your furnace is in place, the technician will conduct a series of tests to ensure everything is functioning correctly. These tests include checking the airflow, verifying thermostat compatibility, and ensuring there are no safety concerns such as gas leaks or electrical issues. The system will be run through its heating cycles to confirm it operates efficiently and delivers consistent warmth. By the time the technician leaves, you’ll have a fully functioning furnace, peace of mind, and a warm, cozy home ready for all seasons.

✅ Benefits of Professional Furnace Installation

furnace replacement-person replacing furnace filter

DIY furnace installation might seem like a cost-saving option at first, but there are critical reasons to leave it to the professionals:

Safety Compliance

Furnaces rely on complex systems using gas, electrical wiring, or oil, all of which can pose serious safety risks if not handled correctly. Improper installation could lead to gas leaks, electrical fires, or even carbon monoxide poisoning, putting your home and family at risk. Professional technicians are trained to adhere to strict safety regulations and industry standards, ensuring your system operates safely and reliably.

Warranty Protections

Most furnace manufacturers require installation to be completed by a certified professional to keep the warranty valid. If you attempt a DIY installation and something goes wrong, you could lose the warranty benefits, leaving you with costly repairs or replacements. By hiring a professional, you can ensure your warranty remains intact, providing peace of mind and long-term protection for your investment.

Optimized Efficiency

Proper installation is key to your furnace’s performance and energy efficiency. A professional technician will ensure that your system is correctly sized for your home, calibrated for optimal operation, and installed according to manufacturer specifications. This means your furnace will use less energy, save you money on utility bills, and provide consistent, reliable heating throughout the winter.

Hiring a trusted contractor like Thelen Plumbing, Heating, and Air ensures your furnace is installed safely, efficiently, and in compliance with warranty requirements. Don’t take unnecessary risks—get the job done right the first time and enjoy lasting comfort in your home.

🙌 Say Goodbye to Heating Woes—Book Your Furnace Replacement Today!

When it comes to furnace replacement, Thelen Plumbing, Heating, and Air is the team you can trust. Our commitment to expert craftsmanship, affordable services, fast turnaround times, and a customer-centric approach sets us apart from the rest. With a strong reputation in the community and a dedication to bringing warmth and comfort to your home, we are the go-to choice for homeowners in Minnesota. Don’t let heating woes dampen your winter days—book your furnace replacement with Thelen Plumbing, Heating, and Air today and experience the difference we can make in your home. Contact us now for a free consultation and let us bring warmth and peace of mind to your home.

Schedule Service

"*" indicates required fields

This field is for validation purposes and should be left unchanged.