
Author: Kevin

How Much Does Gas Furnace Replacement Cost?

Replacing a gas furnace is an essential home improvement project that impacts both your comfort and energy savings. But how much does it actually cost? This guide breaks down everything homeowners need to know about gas furnace replacement costs, including:

  • Understanding gas furnaces
  • 5 cost factors for gas furnace replacement
  • Average costs to replace a gas furnace

🤔 Understanding Gas Furnaces

gas furnace replacement cost-tech replacing gas furnace

Gas furnaces are the most common type of heating system found in homes, utilizing natural gas as a fuel source to generate heat. Understanding the key components and functionality of a gas furnace can help homeowners make informed decisions about replacement and maintenance. Here are the essential aspects to consider:

Burners and Combustion Chamber: Gas burners are responsible for igniting the fuel and producing heat. The combustion chamber houses the burners and ensures that the combustion process is contained safely.

Heat Exchanger: The heat exchanger transfers heat from the combustion process to the circulating air. It prevents the combustion byproducts, like carbon monoxide, from mixing with the heated air.

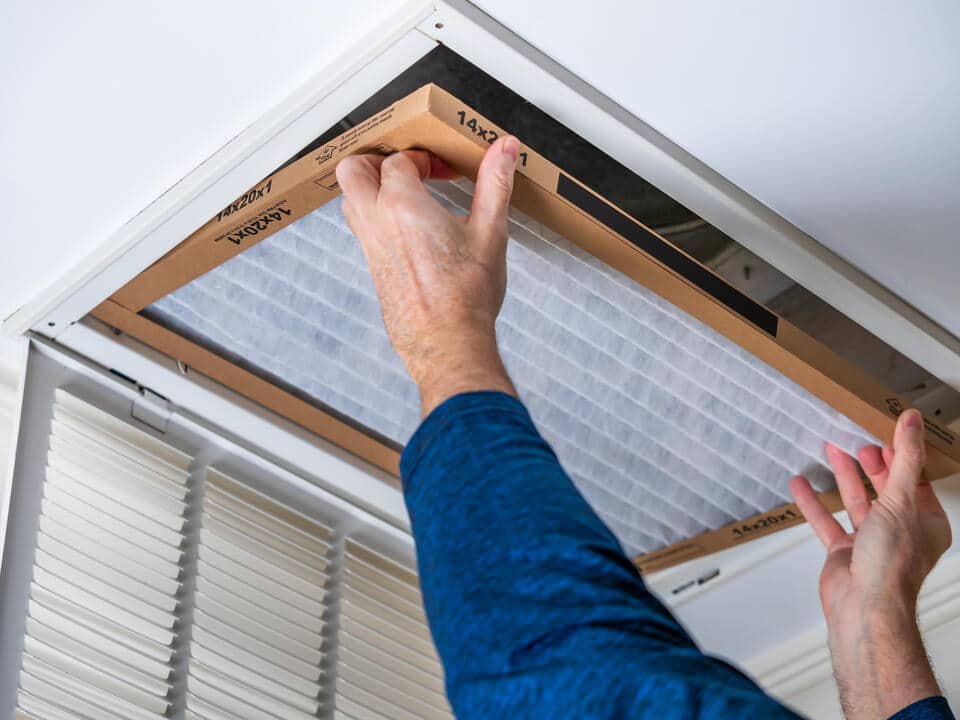
Blower Motor and Fan: The blower motor powers the fan that distributes the heated air throughout the home’s ductwork, ensuring consistent warmth in every room.

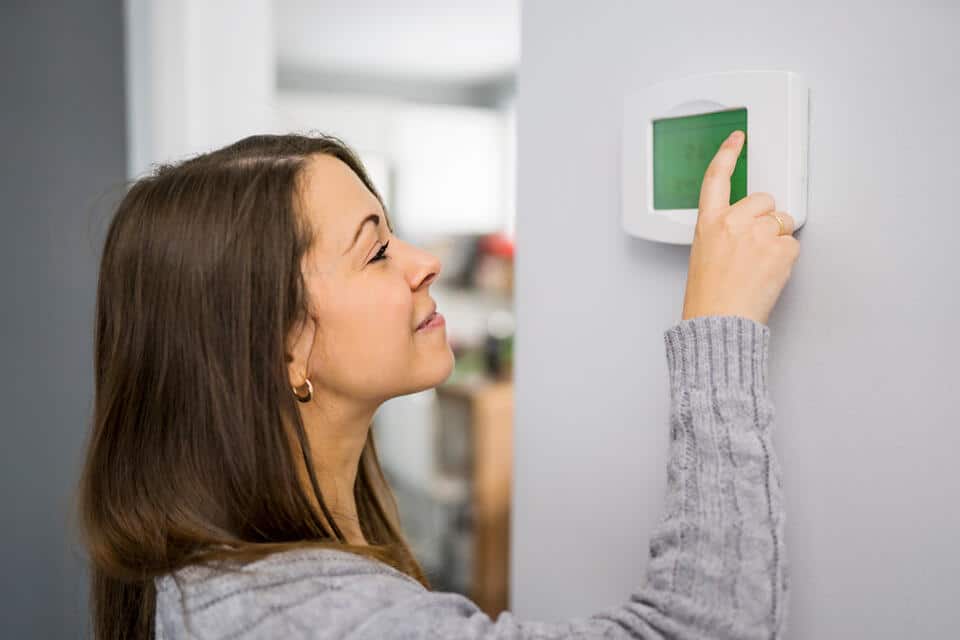
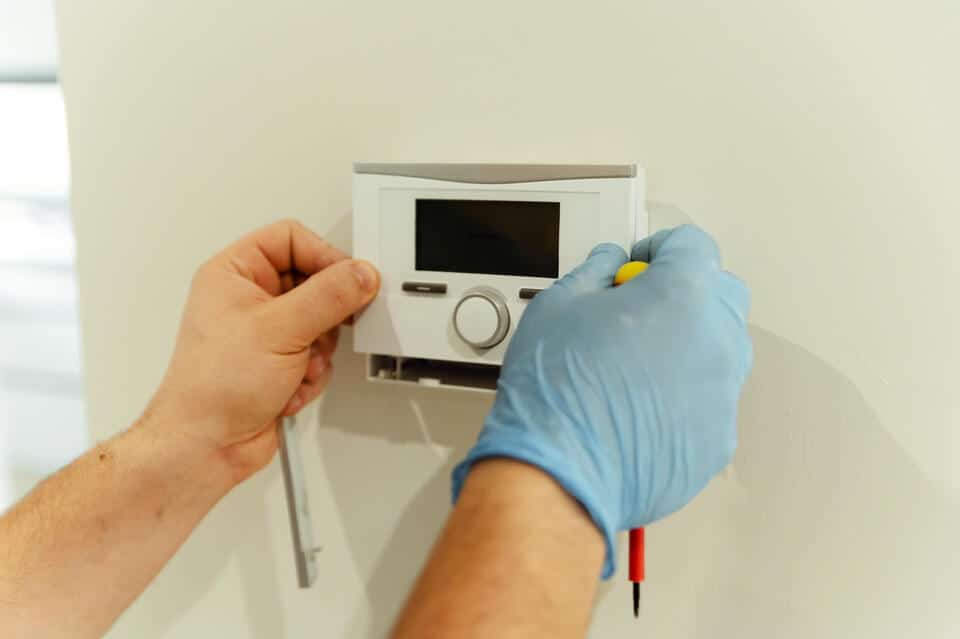
Thermostat: The thermostat acts as the control center for the furnace, allowing homeowners to adjust the desired temperature and regulate the heating cycle.

Efficiency Ratings: Gas furnaces have efficiency ratings expressed as Annual Fuel Utilization Efficiency (AFUE). Higher AFUE ratings indicate greater energy efficiency, with some models exceeding 98% efficiency.

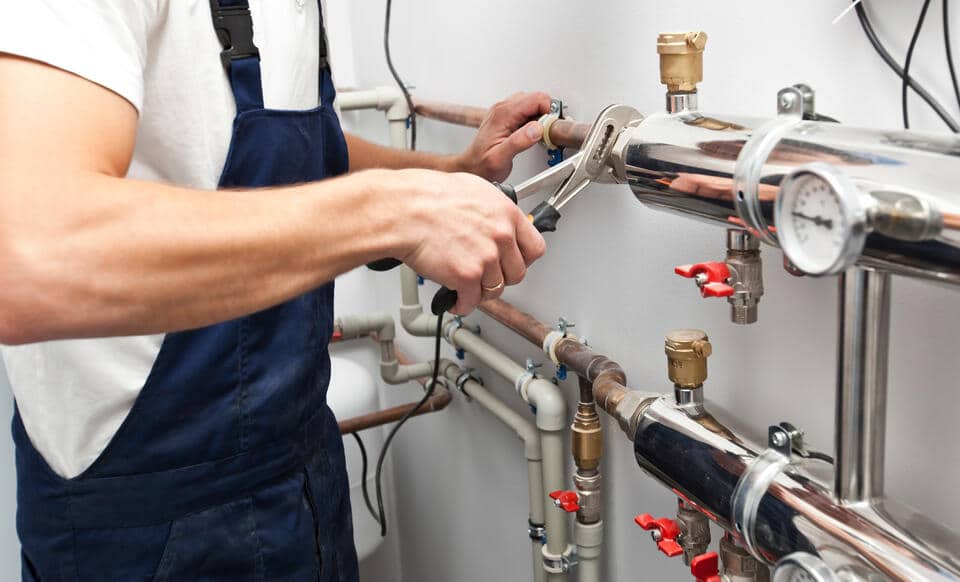
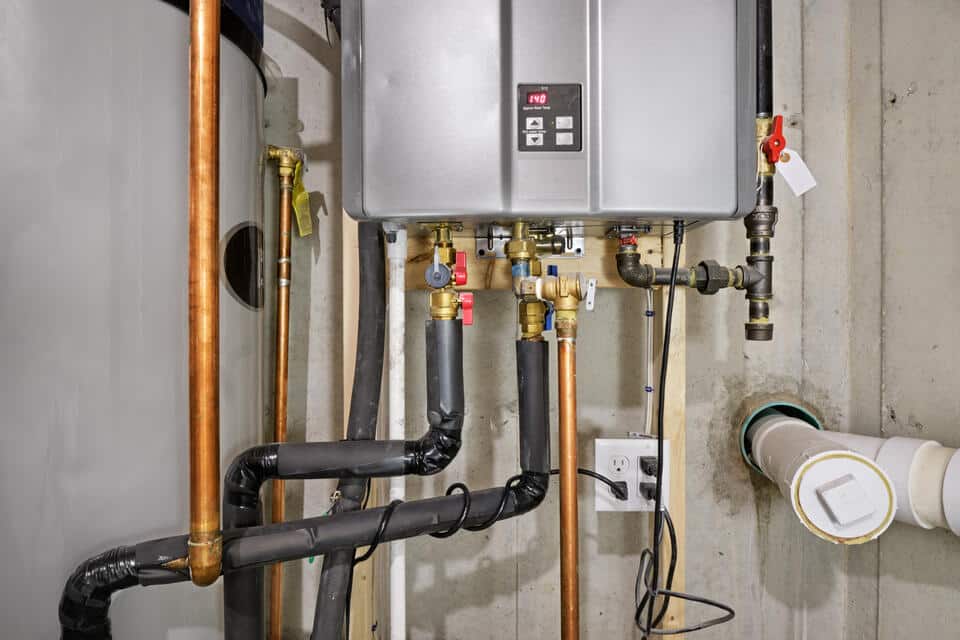
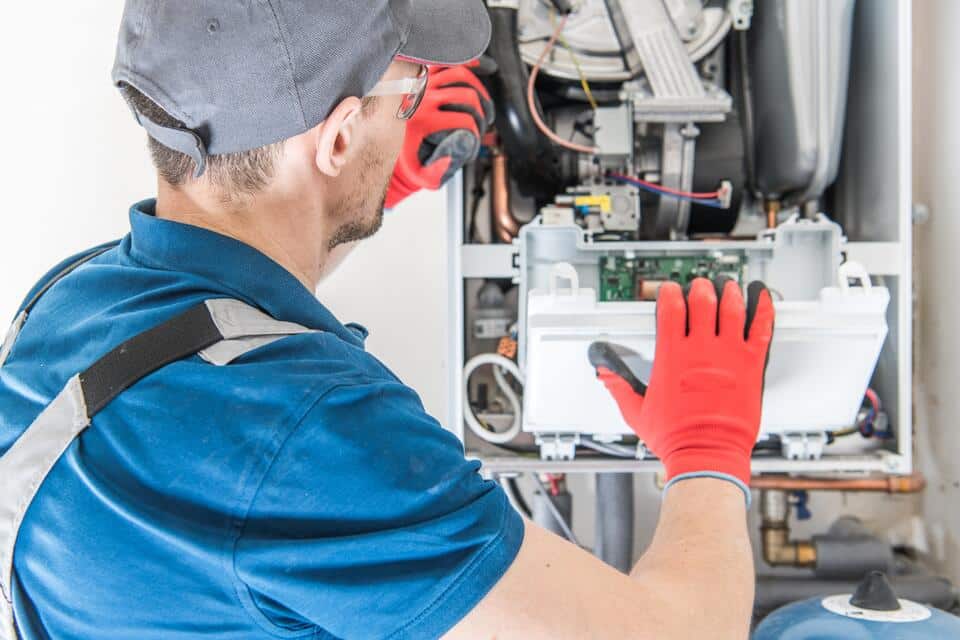
Understanding these components and efficiency ratings can help homeowners make informed decisions when it comes to gas furnace replacement and selecting the right unit for their specific needs. Consulting with a professional HVAC technician is highly recommended to ensure proper installation and optimal performance.

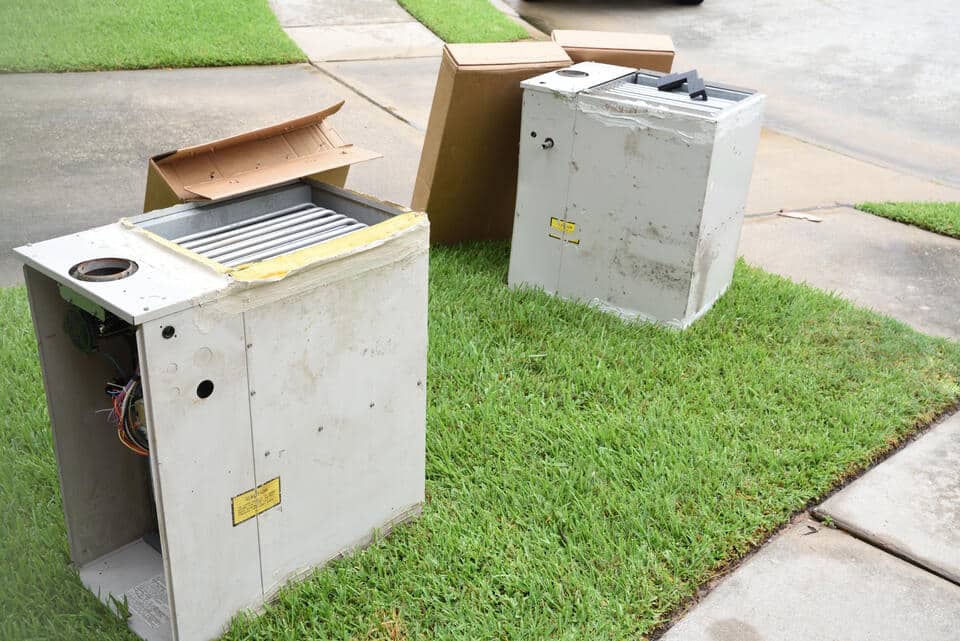
Signs You Need to Replace Your Gas Furnace

How do you know it’s time to replace your gas furnace? Here are the top indicators homeowners should look out for:

  • Age of the Furnace: Most gas furnaces last between 15–20 years. If yours is older, it may be time to upgrade to a more efficient model.
  • Frequent Repairs: Constantly fixing your furnace can add up, making replacement the more economical choice.
  • Rising Energy Bills: A sudden increase in heating costs often indicates reduced efficiency.
  • Uneven Heating: If rooms in your house heat unevenly, your furnace may no longer distribute heat effectively.

If you’ve noticed one or more of these signs, it’s time to have your system inspected by a professional.

💵 5 Cost Factors for a Gas Furnace Replacement

gas furnace replacement cost-plumber performing maintenance on furnace

Understanding the cost factors of a gas furnace replacement helps you plan your budget and avoid unexpected expenses. It ensures you make informed decisions about energy efficiency, installation, and long-term savings.

1. Furnace Efficiency Rating (AFUE):

The efficiency of a furnace is measured by its AFUE (Annual Fuel Utilization Efficiency), which indicates how effectively it converts fuel into heat. The higher the AFUE, the more efficient the furnace. Efficiency plays a significant role in the cost of a gas furnace replacement.

Standard Efficiency (80–89% AFUE): These furnaces are more affordable upfront, typically costing anywhere between $1,500 and $3,000 for the unit. However, they use more fuel to produce the same amount of heat, leading to higher monthly energy bills. They are often chosen for homes in milder climates where extreme efficiency isn’t as critical.

High Efficiency (90–98% AFUE): High-efficiency furnaces range from $3,000 to $7,000, depending on the brand and model. Although the initial expense is higher, these furnaces can save you hundreds of dollars annually on heating costs, making them a worthwhile long-term investment for homes in colder regions. The energy savings often outweigh the upfront costs over the furnace’s lifespan.

2. Efficiency Ratings in Detail:

Understanding efficiency categories helps determine the overall cost of a gas furnace replacement:

Standard Efficiency (80–89% AFUE): In addition to being cheaper upfront, these furnaces often have fewer advanced components, which can lower repair and maintenance costs over time. However, they are less efficient at minimizing fuel waste, leading to higher operating costs in the long run.

High Efficiency (90–98% AFUE): These furnaces often come with advanced features like two-stage heating and variable-speed blowers, which enhance comfort while reducing fuel consumption. They may also qualify for government rebates and tax incentives in some areas, slightly offsetting the initial cost.

3. Size of Your Furnace (BTUs):

The size of your furnace, measured in BTUs (British Thermal Units), directly affects the cost of replacement. Gas furnaces typically range from 40,000 to 140,000 BTUs.

Small Furnaces (40,000–60,000 BTUs): Ideal for smaller homes or apartments, these units are more affordable, with prices ranging from $1,500 to $3,000. However, undersizing a furnace to cut costs can lead to uneven heating, higher energy usage, and faster wear and tear.

Larger Furnaces (80,000–140,000 BTUs): Larger homes require higher-BTU furnaces, which can cost $3,000 to $6,000 or more. While they meet larger heating demands, oversizing a furnace can increase operating costs and cause short cycling, reducing efficiency. A professional load calculation ensures you choose the right size for your home.

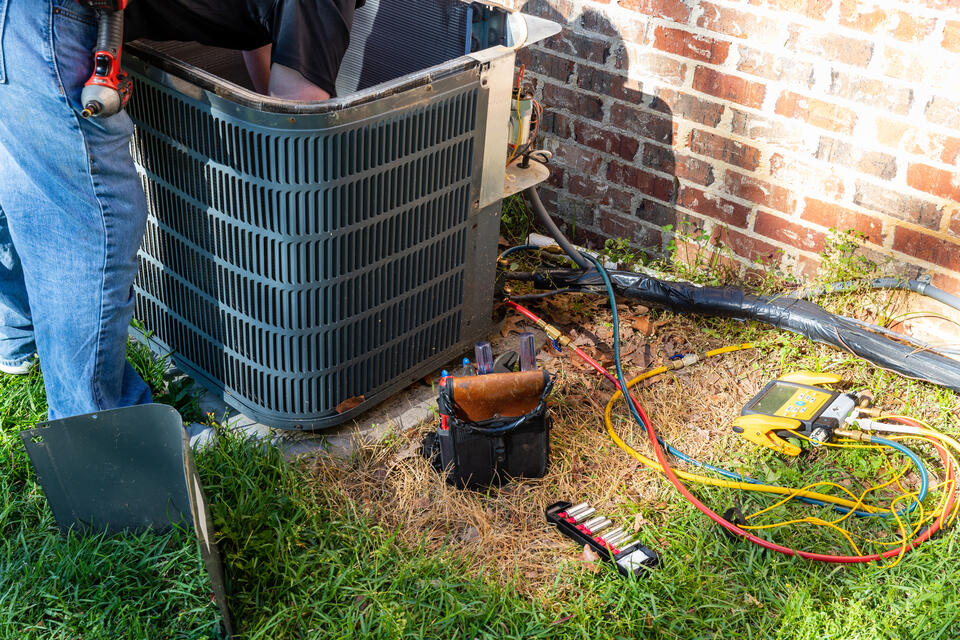
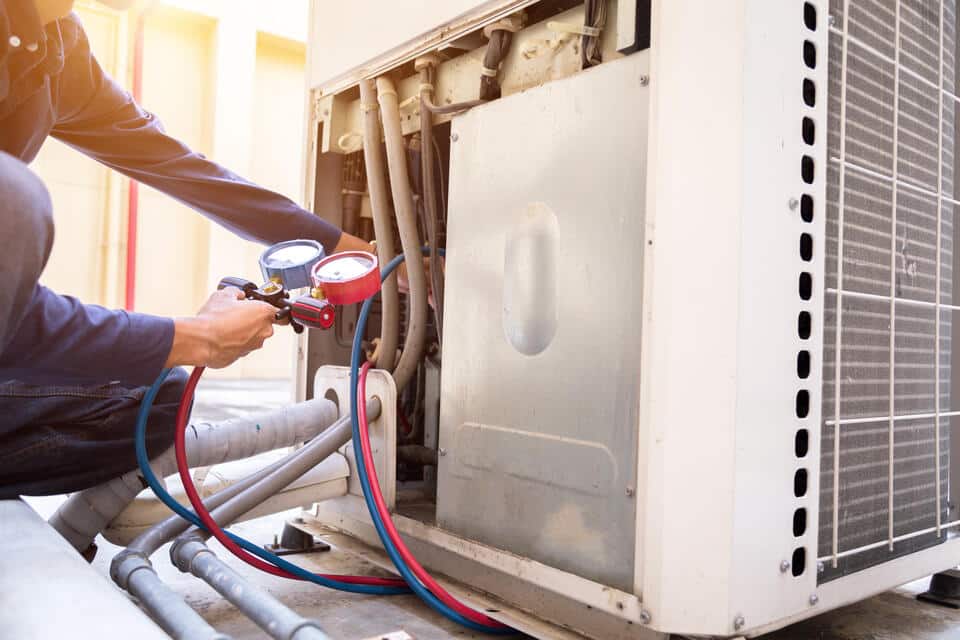
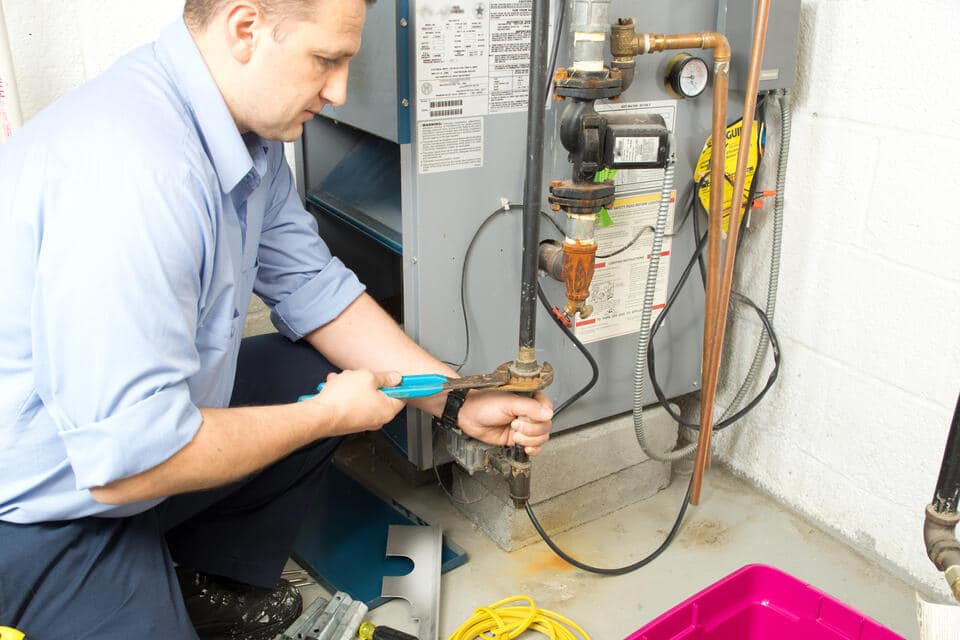
4. Installation Labor and Complexity:

The complexity of your furnace installation significantly impacts the final cost.

Standard Installations: If your home has a modern HVAC system with minimal adjustments required, installation typically costs between $1,500 and $3,000. This includes basic labor fees and minor modifications.

Complex Installations: Older homes with outdated ductwork or unconventional layouts can drive up labor costs to $3,000–$5,000 or more. Relocating the furnace, upgrading ventilation, or working in tight spaces adds complexity and time to the job. Labor-intensive installations often result in higher professional fees but are crucial for ensuring a safe and efficient system.

5. Additional Upgrades and Accessories:

Upgrades and accessories can enhance the functionality and energy efficiency of your new furnace but will also increase the overall cost:

Smart Thermostats: These devices cost an additional $200–$400 and allow you to control your furnace remotely, optimize heating schedules, and improve energy efficiency. They are a great way to maximize the performance of high-efficiency furnaces.

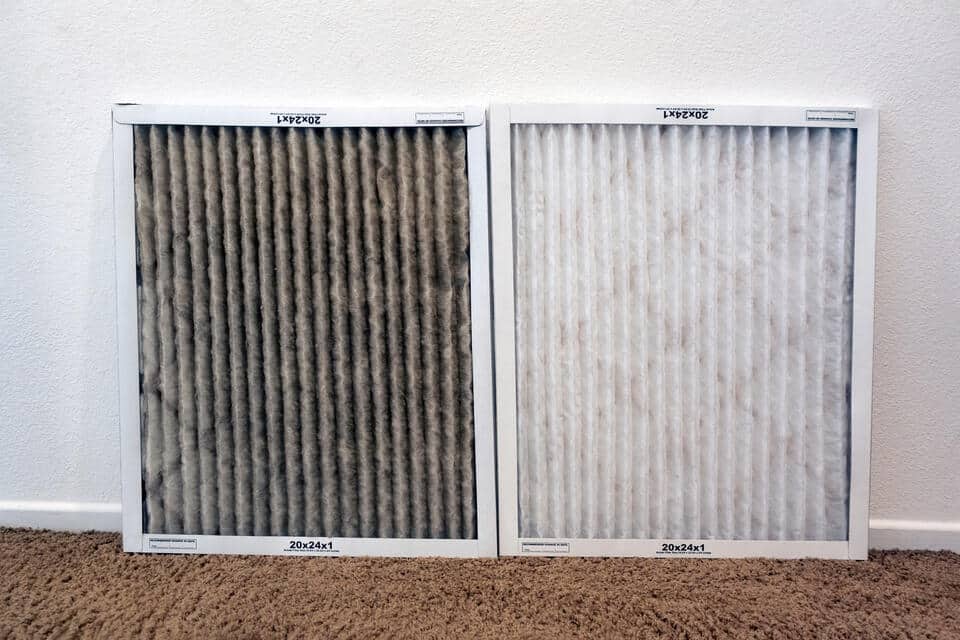
Ductwork Repairs: If your existing ductwork has leaks, poor insulation, or blockages, repairs can range from $500 to $3,000. Proper ductwork is essential for efficient heat distribution and can prevent energy waste.

Zoning Systems: Adding a zoning system costs between $1,500 and $2,500 and allows you to control the temperature in different areas of your home independently. This upgrade is especially beneficial for larger homes or households with varying heating preferences.

6. Location and Professional Services:

The cost of furnace replacement varies by region due to differences in labor rates, permit fees, and material costs.

Urban Areas: In cities, labor costs tend to be higher due to demand and cost of living, raising installation fees by several hundred dollars.

Rural Areas: Installation costs may be lower in rural areas, but availability of experienced professionals may be limited, leading to fewer options and potentially longer wait times.

Hiring Professionals: While hiring experienced technicians may cost more upfront, it ensures reliable installation and long-term performance. Professional installations typically range from $1,500 to $5,000, depending on the complexity of the job and local rates.

By considering these factors, you can better understand the costs associated with replacing a gas furnace and make an informed decision based on your home’s needs and budget.

👀 Average Gas Furnace Replacement Costs

gas furnace replacement cost-old gas furnace on curb for trash pickup

The cost to replace a gas furnace can vary widely, depending on several factors like the type of furnace, installation difficulty, and energy efficiency. On average, homeowners can expect to pay between $2,000 and $7,000, though high-efficiency furnaces and complex installations can cost up to $10,000 or more. Understanding the cost breakdown will help you prepare for this investment and ensure you’re making the right decision for your home.

Cost Range Breakdown:

Lower Range ($2,000 – $4,000):

This range typically includes basic gas furnaces with lower efficiency ratings, usually around 80% AFUE (Annual Fuel Utilization Efficiency). These units are straightforward, focusing on functionality rather than advanced features. The installation process is usually simple and may not require significant modifications to your existing HVAC system. However, while these furnaces are cost-effective upfront, their lower efficiency may lead to higher energy bills in the long run. They’re best suited for smaller homes or milder climates where heating demands are less intense.

Mid-Range ($4,000 – $7,000):

Most homeowners find themselves in this category when replacing their gas furnace. This range covers energy-efficient models, typically with an AFUE rating of 90% or higher. These furnaces provide better energy savings and may include features like variable-speed blowers, improved airflow, and quieter operation. Installation in this price range may involve moderate upgrades, such as updating your ductwork or thermostat to optimize performance. While the upfront cost is higher than basic models, the improved efficiency can lead to noticeable savings on your heating bills over time. It’s an excellent balance between upfront investment and long-term benefits.

Higher Range ($7,000 – $10,000+):

At this level, you’re investing in top-of-the-line, high-efficiency furnaces with AFUE ratings of 95% or above. These systems often have advanced features like smart controls, zoned heating, and two-stage or modulating burners that provide precise temperature control and maximum comfort. However, the cost isn’t just for the furnace itself—challenging installations, such as in older homes or those requiring significant structural modifications, can drive up the price. Homes in colder climates or those looking to significantly reduce their carbon footprint will benefit most from these premium systems.

🙌 Expert Gas Furnace Replacement Services with Thelen Plumbing, Heating, and Air

At Thelen Plumbing, Heating, and Air, we understand that replacing your gas furnace is a significant decision that requires careful consideration. With our team of experienced professionals, you can trust us to deliver exceptional service and expertise in all aspects of your home improvement needs. From assessing your specific requirements to providing transparent quotes and guiding you through the process, we prioritize your satisfaction and strive to exceed your expectations. We are committed to ensuring a smooth and efficient furnace replacement experience, offering peace of mind and the assurance of quality workmanship. Don’t wait any longer to upgrade your heating system – contact our team at Thelen Plumbing, Heating, and Air today for a consultation and let us help you create a warm and comfortable home environment for years to come.

6 Reasons Pipes Making Noise When Water Is Turned On

Pipes that squeal, bang, or rattle when you turn on the water can be frustrating and sometimes even alarming. The good news? Noisy pipes are usually symptoms of common plumbing issues. Identifying these problems early can save you from costly repairs later. This guide will walk you through the potential causes of noisy pipes and explain how to resolve them effectively, including:

  • The importance of properly functioning home plumbing
  • 6 reasons pipes making noise when water is turned on

❗️ The Importance of Properly Functioning Home Plumbing

pipes making noise when water is turned on-tech doing maintenance on home piping system

Having a properly functioning plumbing system is crucial for the overall well-being and convenience of your home. It ensures that you have a steady supply of clean water and efficient drainage, allowing you to carry out daily tasks without interruption. Additionally, a well-maintained plumbing system can help prevent potential water damage, costly repairs, and health hazards caused by plumbing issues.

Signs You May Need to Get Your Pipes Checked Out

It’s essential to be aware of the signs that indicate potential problems with your pipes. If you notice any of the following, it may be time to get your plumbing system inspected by a professional:

Persistent Leaks: Leaking pipes can lead to water damage, mold growth, and structural issues. If you consistently notice water stains, dampness, or unexplained puddles in your home, it’s crucial to address the issue promptly.

Low Water Pressure: Decreased water pressure can indicate a blockage or leak in your pipes. If you’re experiencing weak water flow from your faucets or showerheads, it’s wise to have your plumbing system inspected to identify and resolve the underlying cause.

Unpleasant Odors: Foul smells coming from your drains or pipes may indicate sewer line issues or trapped debris. Ignoring these odors can lead to more significant problems, such as sewage backups or clogged drains.

Slow Draining: If your sinks, tubs, or toilets are slow to drain, it could be a sign of a clog or blockage in the pipes. Prompt attention can prevent further complications and ensure smooth drainage.

Strange Noises: Unusual sounds, such as gurgling, rattling, or banging noises, can indicate problems within your plumbing system. These noises may be caused by issues like air in the pipes, loose fittings, or water hammer.

By recognizing these signs and taking action promptly, you can avoid potential plumbing emergencies and keep your home’s plumbing system functioning optimally. Regular maintenance and inspections by qualified professionals can help identify and address any underlying issues, ensuring the longevity and efficiency of your plumbing system.

👉 6 Reasons Pipes Making Noise When Water Is Turned On

pipes making noise when water is turned on-homeowner turning shower water on

When you hear your pipes making noise, it’s often due to pressure, flow disruptions, or wear and tear in your plumbing system. Below, we’ll break down the most common reasons for noisy pipes and what you can do about them.

1. Water Hammer

Water hammer occurs when the flow of water suddenly stops or changes direction. This causes a sudden pressure surge, resulting in loud banging sounds in your pipes. It often happens after shutting off a faucet or water-using appliance.

Why It Happens

Water hammer typically occurs due to a lack of air cushions or failed water hammer arrestors, which are designed to absorb the shock of rapidly moving water.

How to Fix It

Start by checking if your system has a water hammer arrestor. If it doesn’t, installing one can help reduce the noise caused by water hammering. Next, turn off the main water supply and drain your pipes completely. This will help restore the air cushions in the pipes, which can further minimize the noise.

2. High Water Pressure

Excessive water pressure can cause your pipes to vibrate, resulting in a humming or whistling noise whenever water is running.

Why It Happens

Many homes have control valves or pressure regulators that may be improperly adjusted or malfunctioning, leading to high water pressure.

How to Fix It

Start by using a water pressure gauge to test your home’s water pressure. The ideal pressure typically falls between 40 and 60 psi. If the pressure is too high or too low, you may need to install or adjust a pressure regulator to bring it within the recommended range. For a more comprehensive and long-term solution, it’s best to call in the experts to evaluate your plumbing system and address any underlying problems.

3. Loose or Unsecured Pipes

If your pipes aren’t securely anchored, they can move, knock against surfaces, or rattle when water flows through them.

How to Fix It

Start by inspecting exposed pipes under sinks, in basements, or crawl spaces to ensure they are securely fastened. If you find any loose pipes, use pipe clamps or foam insulation to stabilize them. This will help prevent further movement and reduce the risk of damage.

4. Worn-out or Faulty Valves

Faulty valves, such as washers and cartridges in faucets, can create squealing or whistling noises when water flows through them.

Reasons to Address It Now

Leaving faulty valves unchecked could lead to leaks, higher water bills, and further wear on your plumbing system.

Fixing the Problem

Start by identifying which fixture is causing the noise. Once identified, check for worn-out washers or cartridges and replace them as needed. For more complex repairs or replacements, it’s best to enlist the help of professional plumbing services to ensure the issue is properly resolved.

5. Air in the Pipes

Air trapped in your plumbing system can disrupt water flow, causing a sputtering or gurgling noise when you turn on the faucet.

How to Fix It

Start by draining your plumbing system completely. Turn off the water supply and open all the faucets to allow the air to escape. Once this is done, refill the system slowly to ensure any remaining air pockets are eliminated.

6. Sediment Buildup

pipes making noise when water is turned on-house pipes with sediment buildup causing water pressure issues

Over time, minerals in your water can accumulate in pipes, water heaters, and valves. This can constrict water flow and result in gravelly or rattling sounds.

How to Fix It

Flush your water heater to remove sediment and consider installing a water softener to reduce mineral buildup over time. Additionally, schedule professional maintenance with Thelen Plumbing, Heating, and Air to ensure everything runs smoothly.

🙌 Call in the Experts at Thelen Plumbing, Heating, and Air

To tackle noisy pipes and other plumbing issues in your home, Thelen Plumbing, Heating, and Air is the trusted name you can rely on. Our team of experts brings years of experience to diagnose and resolve plumbing problems with efficiency and precision. We deliver affordable plumbing services without compromising on quality, ensuring you get the best value for your investment. With 24/7 emergency repair services, you can have peace of mind knowing we’re always available for urgent plumbing needs. From pipe repairs to full home solutions, including heating and cooling, our team has the expertise to handle it all. Contact us today and experience the Thelen Plumbing, Heating, and Air difference.

Electric Tankless Water Heater (Installation, Maintenance…)

If you’re looking to upgrade your home water heater, you’ve likely come across the term “electric tankless water heater.” It’s a modern solution for homeowners seeking energy efficiency and reliable hot water. But how does it work? Is it the right choice for your home? And what does installing and maintaining one look like? This guide will walk you through everything you need to know about electric tankless water heaters, including:

  • What is an electric tankless water heater?
  • How to install an electric tankless water heater
  • Maintenance and care tips for efficiency
  • Is an electric tankless water heater worth it?

🤔 What is an Electric Tankless Water Heater?

electric tankless water heater-close up of pipes and levers on a basement unit

Unlike traditional water heaters that store hot water in a large tank, electric tankless water heaters provide hot water on demand. This means they heat water as you use it rather than keeping a tank of water constantly heated.

The system works by sending cold water through an electric heating element when you turn on your faucet, giving you unlimited hot water without the wait—or wasted energy.

These systems are compact, energy-efficient, and perfect for modern homeowners looking for smart upgrades.

Benefits of an Electric Tankless Water Heater

Why are so many homeowners making the switch? Here are the standout benefits:

  • Endless Hot Water: Forget running out of hot water during long showers or when the whole family is using it back-to-back. Electric tankless systems heat water on demand, so you’ll always have a steady, reliable supply—perfect for busy households or when hosting guests.
  • Energy Efficiency: Unlike traditional water heaters that keep a full tank of water warm around the clock (even when you’re sleeping or away), tankless systems only activate when hot water is needed. This on-demand approach minimizes energy waste and can significantly lower your utility bills over time.
  • Space-Saving Design: Traditional water heaters can take up a large chunk of your basement, garage, or utility room. Electric tankless water heaters, however, are compact and wall-mounted, freeing up valuable floor space for storage or other uses.
  • Durability: With regular maintenance, electric tankless water heaters can outlast traditional units, which typically need replacing every 8-12 years. Many tankless models can last up to 20 years or more, offering a reliable long-term solution for your home.
  • Eco-Friendly: By consuming less energy and avoiding the standby heat loss of tank-based systems, electric tankless water heaters reduce your carbon footprint. Their efficiency and longevity also mean fewer resources are used over time, making them a greener choice.
  • Reduced Risk of Water Damage: Traditional water heaters risk catastrophic leaks or ruptures if the tank fails, potentially causing thousands in water damage. With no tank to worry about, tankless systems eliminate this risk, giving you peace of mind.

🛠️ Install an Electric Tankless Water Heater in 7 Steps

electric tankless water heater-white unit in basement or garage in a home

Installing an electric tankless water heater might feel overwhelming at first, but by following the right steps, it becomes a straightforward and manageable process. This guide will walk you through the detailed steps to ensure safe and effective installation.

1. Gather Your Tools and Materials

Before diving into the installation, it’s important to prepare everything you’ll need for the process. Start by acquiring the electric tankless water heater unit itself and ensuring you have the proper mounting hardware that typically comes with the unit. You’ll also need shutoff valves for controlling water flow, along with appropriate pipe fittings and plumber’s tape to ensure a tight and leak-free connection. For the electrical work, gather wiring tools such as wire cutters, connectors, and electrical tape. You’ll also need a circuit breaker that matches the specifications provided in the heater’s manual. By having all these materials ready, you can avoid unnecessary interruptions during the installation process.

2. Choose an Installation Location

The location of your electric tankless water heater is crucial for both functionality and safety. Look for a spot that is close to your water sources, as this minimizes the amount of piping needed and reduces heat loss during water flow. The location should also be near your home’s electrical panel to simplify the wiring process. Make sure the area is well-ventilated, as this will help maintain the efficiency of the unit and prevent overheating. Additionally, avoid installing the unit near flammable or heat-sensitive materials. By carefully choosing a suitable location, you can ensure the heater operates efficiently and safely.

3. Turn Off Your Water and Electric Supply

Before starting any work, it’s essential to ensure the main supply lines for both water and electricity are completely shut off. Locate your home’s main water valve and turn it off to stop water flow during installation. Similarly, switch off the electricity at the main breaker to eliminate the risk of electric shock. Taking this step is non-negotiable for safety purposes and helps you avoid unnecessary accidents while installing the unit.

4. Mount the Tankless Water Heater

Once your location is chosen and prepared, it’s time to mount the tankless water heater. Carefully position the unit on the chosen wall and ensure it is level. Use the mounting hardware provided with the unit to securely attach it to the wall. Make sure the installation is stable and that the heater is not wobbling or leaning, as this could lead to operational issues or damage over time. Take your time with this step to ensure the unit is firmly in place and ready for the next stages of installation.

5. Connect the Water Lines

With the heater mounted, you can now connect the water lines. Attach the cold water input line to the appropriate inlet on the heater, and connect the hot water output line to the outlet. It’s important to use shutoff valves on both lines to allow for easy maintenance in the future. Secure the connections using pipe fittings and plumber’s tape to prevent any leaks. Double-check each connection to ensure they are tight and secure. Properly installed water lines are essential for the heater to function effectively without any risk of leaks or water damage.

6. Wire the Heater

The next step involves connecting the heater to your home’s electrical system. Start by following the instructions provided in the manual to wire the unit correctly. Connect the wiring from the heater to the dedicated circuit breaker that you’ve installed in your home’s electrical panel. Ensure that the circuit breaker matches the specifications and amperage requirements stated in the manual, as using the wrong size can lead to electrical hazards or damage to the unit. Take extra care to secure all connections and use electrical tape to prevent exposed wires. If you’re unsure about any part of this step, consult a licensed electrician to guarantee safe installation.

7. Test the System

Once all the connections are complete, it’s time to test the system to ensure everything is working properly. Start by turning the water supply back on and checking for any leaks around the connections. If you notice any leaks, tighten the connections or reapply plumber’s tape as needed. Next, switch the electricity back on at the main breaker and power up the tankless water heater. Run water through the system to ensure it heats consistently and without any interruptions. Pay attention to the water temperature and pressure to confirm the unit is operating as expected.

💡 Maintenance and Care Tips for Efficiency

electric tankless water heater-man doing maintenance on a stainless steel unit

Proper maintenance is essential to ensure your electric tankless water heater runs efficiently and lasts for years. Here’s how to keep it in top condition:

Regular Descaling: Hard water can lead to mineral buildup inside your heater, reducing its heating efficiency and clogging the system. Use a descaling solution or vinegar at least once a year to prevent blockages and keep the system running smoothly.

Check Filters: If your unit has built-in debris filters, these can become clogged over time, restricting water flow. Regularly clean or replace the filters to maintain optimal performance and avoid unnecessary strain on the system.

Monitor for Leaks: Even small leaks at the connections can affect water pressure, reduce heating efficiency, or cause damage over time. Inspect all joints and connections regularly to catch and repair leaks early.

Schedule an Annual Inspection: A professional inspection ensures your unit remains in good working order. Technicians can identify potential issues, perform necessary maintenance, and ensure your heater operates safely and efficiently.

Flush the System: Sediment can collect in the heating element over time, especially in areas with hard water. Flushing the unit regularly removes this buildup, helping to maintain proper water flow and prevent damage to components.

👉 Is an Electric Tankless Water Heater Worth It?

Investing in an electric tankless water heater can bring significant long-term value to your home. These systems provide energy savings by heating water on demand instead of maintaining a large tank of heated water, making them more efficient and eco-friendly. Plus, you’ll enjoy the convenience of endless hot water, which is perfect for larger households or back-to-back shower schedules.

On the downside, the upfront costs of purchasing and installing a tankless water heater can be higher than traditional systems. However, the energy savings and durability often outweigh these initial expenses over time.

Whether it’s the right choice depends on your specific needs. Consider factors like your household’s water usage, the size of your home, and your budget. For smaller homes or energy-conscious households looking to upgrade, an electric tankless water heater can be a worthwhile investment that adds both convenience and value.

🙌 Upgrade to an Electric Tankless Water Heater with Thelen Plumbing, Heating, and Air

Investing in an electric tankless water heater can offer numerous long-term benefits, including energy savings, convenience, and eco-friendliness. If you’re considering upgrading your home’s water heating system, Thelen Plumbing, Heating, and Air is the trusted team you can rely on for your home improvement needs. With our expertise and commitment to quality service, we ensure seamless installation and provide ongoing maintenance and support. Experience the difference of working with a team that prioritizes customer satisfaction and delivers exceptional results. Contact us today for a consultation and take the first step towards maximizing your home’s energy efficiency and comfort. Don’t miss out on the opportunity to enjoy endless hot water and lower utility bills!

6 Reasons Why Your AC Not Turning On

Having your air conditioner fail when you need it most can be frustrating and stressful—especially on a hot summer day. Whether it’s a simple fix or an issue requiring professional expertise, identifying the problem is key to staying cool and comfortable. Here, we explore some of the most common reasons that make you question, “Why is my AC not turning on?” and what you can do to resolve the issue. We’ll also share expert advice on when it’s time to call in professionals like those at Thelen Plumbing, Heating, and Air.

  • The importance of a functioning air conditioner system
  • 6 common issues when your AC won’t start
  • Quick troubleshooting steps

❄️ The Importance of a Functioning Air Conditioner System

ac not turning on-woman checking thermostat in house, obviously too warm

A properly functioning air conditioning system is essential for maintaining a comfortable and healthy indoor environment, especially during scorching summers. The benefits of a functional AC system extend beyond simply providing cool air; it plays a crucial role in ensuring optimal air quality, humidity control, and overall well-being. Here are a few reasons highlighting the importance of a well-maintained AC system:

Comfort and Productivity:

A functioning air conditioner creates a comfortable indoor climate, allowing you to escape the heat and humidity outside. It helps regulate the temperature, creating an environment conducive to productivity, focus, and relaxation. Whether it’s at home or in the workplace, a comfortable environment promotes better concentration, sleep, and overall well-being.

Health and Indoor Air Quality:

A properly maintained AC system improves indoor air quality by filtering out pollutants, allergens, and contaminants. It helps remove dust, pollen, mold spores, and other airborne particles, reducing the risk of allergies, respiratory issues, and asthma attacks. Regular maintenance ensures that the filters are clean and the system is free from microbial growth, creating a healthier and safer environment for everyone.

Energy Efficiency and Cost Savings:

A well-maintained AC system operates more efficiently, consuming less energy to cool the space. Regular tune-ups, cleaning, and proper upkeep ensure that the system runs smoothly, minimizing energy wastage and preventing unnecessary strain on the system. This translates into cost savings on energy bills and a reduced carbon footprint, benefitting both your wallet and the environment.

Signs Your AC May Need a Tune-Up or Repairs:

While a functioning AC system is essential, it’s crucial to be aware of signs that indicate your system may require a tune-up or repairs. Keep an eye out for the following signs:

  • Insufficient Cooling: If your AC isn’t cooling the space as effectively as it used to, it may be a sign of an underlying issue, such as refrigerant leaks or compressor problems.
  • Strange Noises: Unusual sounds like rattling, grinding, or banging coming from your AC unit could indicate worn-out components or loose parts.
  • Frequent Cycling: If your AC turns on and off frequently, it may indicate issues with the thermostat, airflow, or compressor.
  • Poor Airflow: Insufficient airflow could point to clogged air filters, duct blockages, or fan motor malfunctions.
  • Unpleasant Odors: Foul or musty odors coming from your AC system may suggest mold or bacterial growth within the system, warranting immediate attention.

Regular maintenance and prompt repairs can prolong the lifespan of your AC system, maximize its efficiency, and prevent potential breakdowns during critical times. If you notice any of these signs, it’s advisable to schedule a professional tune-up or repair service to ensure your AC system continues to operate at its best.

👉 6 Common Issues When Your AC Won’t Start

ac not turning on-outdoor ac unit near house and shrubbery

Understanding why your AC isn’t working can save you time, money, and discomfort during hot weather. Identifying common problems early can help you troubleshoot or decide when to call in a professional.

1. Power Supply Problems

If your AC won’t turn on, it may not be receiving power. Check for:

Tripped Circuit Breaker: Power surges can cause the circuit breaker to trip, cutting power to your AC. Resetting the breaker might solve the issue, but if it trips repeatedly, you may have a bigger electrical problem that needs professional attention.

Loose or Damaged Wires: Over time, wires in your AC system can become frayed, disconnected, or damaged. Inspect the wiring around your unit for visible issues, but avoid handling them yourself—call an electrician if needed.

2. Thermostat Issues

Your thermostat controls when your AC turns on, so any problems here can prevent operation, like:

Dead Batteries: Many thermostats run on batteries, and weak or dead ones can stop communication with your AC. Replacing batteries is a quick and easy fix.

Incorrect Settings: Double-check that your thermostat is set to “Cool” mode and that the temperature is lower than the current room temperature.

Malfunctioning Thermostat: If it still doesn’t work, the thermostat may need recalibration, a software update, or a full replacement.

3. Blown Fuse or Faulty Capacitor

Electrical components like fuses and capacitors are essential for your AC’s functionality. Check for:

Blown Fuse: If the fuse in the system’s disconnect box blows, your AC won’t receive power. Replacing the fuse is straightforward, but recurring issues might indicate larger electrical problems.

Faulty Capacitor: The capacitor is responsible for starting the AC’s motor. When it fails, your AC might make a humming sound but won’t turn on. Replacing a capacitor requires professional expertise.

4. Clogged Air Filters

Dirty air filters can block airflow and cause your system to overheat or shut down. Over time, clogged filters reduce efficiency and may even stop the AC from starting altogether. Regularly replacing or cleaning filters (every 1-3 months) ensures proper airflow and prevents overheating.

5. Drain Line Backup

Drain lines remove condensation from your AC, but clogs can disrupt this process. Over time, dirt, mold, and debris can block the drain line, causing water to back up. This can trigger a safety switch, shutting off the system to prevent water damage. Cleaning the drain line with a small tool or vinegar solution can resolve the issue.

6. Refrigerant Leaks

Refrigerant is essential for cooling, and leaks can prevent your AC from functioning properly. Low refrigerant levels often lead to poor cooling, ice buildup on the unit, or strange hissing noises. Since refrigerant is hazardous, handling leaks should be left to a licensed HVAC technician. They can identify the source of the leak, repair it, and recharge the system with the correct amount of refrigerant.

🛠️ Quick Troubleshooting Steps

ac not turning on-tech checking out the outdoor hvac system

If your AC system isn’t working, don’t worry—try these simple steps before calling a professional. Often, the fix is quicker and easier than you might think.

  • Check the Power Supply: Ensure the unit is plugged in securely and inspect the circuit breaker for any tripped switches. Power interruptions are a common cause of AC issues.
  • Inspect the Thermostat: Double-check that the thermostat is on, properly set to cooling mode, and has functional batteries. Sometimes, a quick battery replacement or adjusting the settings is all it takes.
  • Look at Air Filters: Dirty filters can restrict airflow, reducing the system’s efficiency. Remove the filter to clean it if reusable, or replace it with a new one to improve cooling performance.
  • Reset the System: Powering the system off and back on can often resolve minor glitches. Give it a few minutes after turning it off before restarting.
  • Clear Drain Lines: Clogged drain lines can cause water buildup and shut down your system. Use a vacuum or plumber’s snake to remove blockages and allow proper drainage.
  • Check Outdoor Unit: Debris such as leaves, dirt, or branches can block airflow. Clear the area around the outdoor unit and clean fans and coils to help your AC run efficiently.

When to Call in the Experts

If these troubleshooting steps don’t solve the issue, it’s time to bring in a professional. Problems like faulty wiring, refrigerant leaks, or broken components require expert knowledge to address safely and effectively.

At Thelen Plumbing, Heating, and Air, our team of experienced technicians can quickly diagnose and fix complex AC problems. Whether it’s an emergency or a routine repair, we’re here 24/7 to keep your home cool and comfortable with professional, affordable solutions.

🙌 Reliable AC Repair Services with Thelen Plumbing, Heating, and Air

When your AC refuses to turn on, it can be a frustrating and uncomfortable situation. However, with the expertise and professionalism of our team at Thelen Plumbing, Heating, and Air, you can trust that your home cooling concerns will be resolved promptly and effectively. Our experienced technicians have the knowledge and skills to diagnose and fix a wide range of AC issues, ensuring that your home remains comfortable and cool throughout the year. With our 24/7 emergency repair services, you can rely on us to be there for you whenever you need us, even during those sweltering summer nights. Choose Thelen Plumbing, Heating, and Air for reliable home comfort and let us help you keep your AC running smoothly. Don’t suffer in the heat any longer – contact us today for all your cooling needs!

What Is HVAC Refrigerant & How Does It Work?

Ever wondered what keeps your home cool in the summer and warm in the winter? The secret lies in HVAC refrigerant. Understanding how this key component operates is essential to ensuring your HVAC system runs efficiently. Whether you’re looking to save on energy bills or troubleshoot issues, this guide will explain everything you need to know about HVAC refrigerant, including:

  • What is HVAC refrigerant?
  • Common types of refrigerants used today
  • 5 benefits of HVAC refrigerant

🤔 What Is HVAC Refrigerant?

hvac refrigerant-woman in gray sweater adjusting the thermostat

HVAC refrigerant is a chemical compound responsible for transferring heat in heating, ventilation, and air conditioning (HVAC) systems. By absorbing and releasing heat, refrigerants help maintain the ideal temperature in your home throughout the year.

Think of it as the lifeblood of your air conditioning or heating system—it circulates between components, facilitating the cooling or warming process.

How Does HVAC Refrigerant Work?

The process of temperature control using HVAC refrigerant relies on its ability to change states between gas and liquid. Here’s a simplified breakdown of the process:

Absorbing Heat: The refrigerant begins as a low-pressure gas. When warm air from your home passes over the evaporator coil in the HVAC system, the refrigerant absorbs the heat, cooling the air. This turns the refrigerant from a gas into a liquid.

Releasing Heat: Next, the refrigerant travels to the compressor, where it is pressurized and moved to the condenser coil. Here, the refrigerant releases the absorbed heat outside, turning it back into a gas form.

Circulation: This cycle repeats continually inside your HVAC system, keeping your indoor space at a steady, comfortable temperature.

Signs Your Refrigerant Might Need Attention

Your HVAC system gives clear signs when refrigerant levels are off or when there’s a problem. Here’s what to watch out for:

  • Warm air instead of cool: If your air conditioning is blowing warm air, it could be due to low refrigerant levels.
  • Hissing or bubbling sounds: This indicates a potential leak in the refrigerant line.
  • Ice on evaporator coils: Insufficient refrigerant can cause the coils to freeze, disrupting airflow.
  • Higher energy bills: A system low on refrigerant works harder to maintain temperatures, driving up energy costs.

If you notice these issues, it’s time to get in touch with an HVAC professional.

👉 Common Types of Refrigerants Used Today

hvac refrigerant-tool measuring refrigerant in an hvac system

The type of refrigerant your HVAC system uses matters, especially if you’re upgrading or repairing it. Choosing the right refrigerant impacts your system’s efficiency, lifespan, and environmental footprint. Here are the most common refrigerants in use today:

R-22 (Freon)

Once the go-to refrigerant for HVAC systems, R-22 has been largely phased out due to its harmful effects on the ozone layer. It’s now classified as an ozone-depleting substance under the Montreal Protocol, making it illegal to produce or import in many countries. However, it can still be found in older systems that haven’t been upgraded. If your system uses R-22, you may face higher costs for recharging, as it’s becoming increasingly expensive and scarce. Many HVAC owners are now transitioning to more eco-friendly alternatives.

R-410A (Puron)

This refrigerant is the standard for most modern HVAC systems. It offers a much lower environmental impact compared to R-22, as it doesn’t contribute to ozone depletion. R-410A also allows HVAC units to operate more efficiently, reducing energy consumption and lowering electricity bills. However, it does operate under higher pressure, which means older systems designed for R-22 cannot use R-410A unless they undergo significant modifications. Its widespread use has made it a reliable and accessible option in the market.

R-32

A newer refrigerant gaining popularity, R-32 is known for its exceptional energy efficiency and lower global warming potential (GWP) compared to R-410A. Its high efficiency allows HVAC systems to use less refrigerant to achieve the same cooling or heating effect, making it a cost-effective choice. R-32 is often used in advanced systems designed to meet stricter energy and environmental standards. As it becomes more widely adopted, it’s expected to play a key role in the future of HVAC technology.

If you’re unsure which refrigerant is in your system, it’s always best to consult HVAC professionals. They can help identify the refrigerant type, explain your options, and ensure your system operates safely and efficiently, whether you need repairs, recharging, or an upgrade.

✅ 5 Benefits of HVAC Refrigerant

hvac refrigerant-couple lounging on their couch, comfortable inside their home

HVAC refrigerant offers numerous advantages that improve comfort, enhance efficiency, and save money. Here’s why keeping your refrigerant levels in check is crucial for your home and the environment:

1. Energy Efficiency

A properly functioning refrigerant system ensures optimal heat transfer, which allows your HVAC unit to operate at peak efficiency. This means your system uses less energy to heat or cool your home, reducing overall energy consumption. Over time, this efficiency can lead to significantly lower utility bills, helping you save money while also reducing your carbon footprint.

2. Consistent Comfort

Having the correct refrigerant charge ensures that your HVAC system can regulate indoor temperatures effectively. Whether it’s the sweltering heat of summer or the chill of winter, your system will deliver a steady, comfortable climate in your home. No more hot or cold spots, just consistent, reliable comfort all year round.

3. Eco-Friendliness

Modern refrigerants, such as R-410A, have been designed with the environment in mind. Unlike older refrigerants, which contributed to ozone depletion and greenhouse gas emissions, newer options are far less harmful. By using eco-friendly refrigerants and maintaining proper levels, you can reduce your environmental impact and support a more sustainable future.

4. System Longevity

When refrigerant levels are maintained, your HVAC system doesn’t have to work as hard to perform its job. This reduces wear and tear on critical components like compressors and coils. With less strain on the system, you’ll experience fewer breakdowns, lower repair costs, and an extended lifespan for your HVAC unit. Proper refrigerant management is one of the key ways to protect your investment in your home’s comfort.

5. Cost Savings

A well-maintained refrigerant system saves you money in multiple ways. First, it lowers your monthly energy bills by improving system efficiency. Second, it reduces the need for expensive repairs by preventing unnecessary stress on your HVAC components. Finally, extending the life of your HVAC system means you won’t need to worry about replacing it as often, saving you significant costs in the long run. Proper refrigerant care is an investment that pays off.

🙌 Stay Comfortable, Save Energy

When it comes to your HVAC refrigerant needs, Thelen Plumbing, Heating, and Air is the trusted choice for exceptional service and reliable solutions. Our team of experienced technicians is dedicated to optimizing your home’s comfort and energy efficiency. Whether it’s routine maintenance, repairs, or eco-friendly upgrades, we have the expertise to deliver tailored solutions that meet your specific requirements. Trust us to keep your HVAC system operating seamlessly, ensuring your home remains comfortable all year round while saving energy and reducing costs. Contact Thelen Plumbing, Heating, and Air today to experience the Thelen Plumbing, Heating, and Air difference and discover why homeowners consistently choose us for their HVAC needs. Don’t wait – let us help you achieve the comfort and efficiency your home deserves!

How Does A Heat Pump Work In Winter?

If you’re a homeowner, you’ve likely heard about heat pumps as an efficient solution for heating and cooling your home year-round. But when the temperatures drop, many wonder, how does a heat pump work in winter? This guide will walk you through the science behind it and showcase why heat pumps are a fantastic choice for winter comfort, including:

  • What is a heat pump, and how does it work in winter?
  • The benefits of using an HVAC heat pump for your home.
  • Maintaining efficiency during extreme cold

🤔 What is a Heat Pump?

how does a heat pump work in winter-white house with heat pump outside windows

A heat pump is an innovative, energy-efficient system that provides both heating and cooling for your home. Instead of generating heat through combustion, as traditional furnaces do, heat pumps transfer heat using advanced technology. They work year-round by moving heat in or out of your home, depending on the season. In the winter, they extract heat from the air outside—even when it’s very cold—and bring it indoors. In the summer, they reverse the process, moving heat out of your home to keep it cool. This efficiency makes heat pumps a sustainable and cost-effective alternative to conventional HVAC systems.

How It Operates in Cold Weather

  • Heat Absorption: Even in freezing temperatures, heat pumps extract thermal energy from the outdoor air using a special refrigerant that absorbs heat, even in cold conditions. This makes heat pumps highly efficient by gathering and moving heat instead of creating it.
  • Heat Transfer: The absorbed heat is compressed to raise its temperature, turning it into a concentrated, usable form. This heated refrigerant is then transferred to the indoor unit to warm your home seamlessly.
  • Heat Distribution: The heat is released indoors through ductwork or air handlers, delivering consistent warmth throughout your home with greater efficiency than traditional heating methods.

Can Heat Pumps Really Handle Harsh Winters?

Absolutely! Modern heat pumps have come a long way and are specifically engineered to handle harsh winter climates. Unlike older models, which often struggled in extreme cold, today’s high-performance heat pumps are equipped with advanced technology that allows them to operate efficiently even in subzero temperatures. Many models are designed to function effectively in temperatures as low as -15°F, making them a reliable heating solution for colder regions. Additionally, some heat pumps come with supplemental heating systems that provide extra warmth during the most extreme weather conditions, giving you peace of mind no matter how low the temperature drops.

By combining efficiency, versatility, and reliability, heat pumps are an excellent choice for homeowners looking to minimize energy consumption while staying comfortable year-round.

✅ 6 Benefits of an HVAC Heat Pump

how does a heat pump work in winter-black heat pump outside a stone sided house

If you’re thinking about upgrading your home’s heating system, an HVAC heat pump could be the perfect solution. These systems offer a wide range of advantages that make them a smart, efficient, and eco-friendly choice. Let’s take a closer look at the key benefits:

1. Energy Efficiency

Heat pumps are designed to move heat rather than generate it, which makes them significantly more energy-efficient than traditional electric heaters or gas furnaces. By transferring heat from the air or ground outside your home, they use far less electricity to achieve the same level of warmth. This efficiency is especially beneficial for regions with moderate climates, as the system works effectively even in cooler temperatures. Over time, an energy-efficient heat pump can drastically reduce your overall energy consumption, helping both your wallet and the environment.

2. Cost Savings

The energy efficiency of heat pumps not only reduces electricity usage but also translates directly into lower utility bills. While the upfront cost of installing a heat pump may be higher than traditional systems, the long-term savings often outweigh the investment. Additionally, many governments and utility companies offer rebates or incentives for installing energy-efficient systems like heat pumps, further reducing the financial burden. Over time, you’ll enjoy a warm, comfortable home during winter without the worry of skyrocketing energy costs.

3. Eco-Friendly Heating

For homeowners looking to reduce their carbon footprint, heat pumps provide an environmentally friendly heating solution. Unlike oil or gas furnaces, which rely on burning fossil fuels, heat pumps use renewable energy by extracting heat from the air, water, or ground. This process results in significantly fewer greenhouse gas emissions. By switching to a heat pump, you’re not just improving your home’s energy efficiency—you’re also contributing to a healthier planet by reducing your reliance on non-renewable resources.

4. All-in-One Solution

One of the standout features of heat pumps is their versatility. These systems aren’t just for heating; they can also serve as an air conditioner during warmer months. Instead of purchasing and maintaining separate systems for heating and cooling, a heat pump offers a comprehensive, year-round solution. With the ability to seamlessly switch between heating and cooling modes, you’ll save space in your home and simplify your overall HVAC setup. It’s a convenient, all-in-one system that delivers comfort in every season.

5. Consistent Comfort

Traditional heating systems, such as radiators or baseboard heaters, often create uneven temperature distribution, leading to uncomfortable hot or cold spots within your home. Heat pumps, on the other hand, are designed to provide consistent and even heating throughout your space. By circulating warm air efficiently, they ensure that every corner of your home stays comfortably warm. Some models even include features like zoned heating, allowing you to customize the temperature in different areas of your home for maximum comfort.

6. Lower Maintenance

Compared to more complex heating systems like furnaces or boilers, heat pumps have fewer moving parts and are simpler in design. This simplicity means they require less frequent maintenance and are less prone to mechanical breakdowns. Regular upkeep, such as cleaning filters and checking for proper airflow, is usually enough to keep your heat pump running smoothly. This not only saves you time and effort but can also reduce long-term repair costs, making heat pumps a low-maintenance, hassle-free heating choice.

🛠️ Maintaining Efficiency During Extreme Cold

how does a heat pump work in winter-close up of heat pump outside of a white house

While heat pumps perform well in most weather conditions, freezing temperatures can pose unique challenges. Here are strategies to ensure your heat pump stays efficient during extreme cold:

Schedule Regular Maintenance:

Preventative maintenance is crucial for keeping your heat pump operating at peak performance. Regularly schedule professional check-ups to inspect and clean components, check refrigerant levels, and identify potential issues before they become serious. A well-maintained heat pump runs more efficiently, even in extreme conditions, saving you energy and preventing costly breakdowns.

Use Supplemental Heating (When Necessary):

In regions that experience prolonged sub-zero temperatures, a dual-fuel system can make a big difference. This setup combines a heat pump with a furnace, providing efficient heating during milder weather and reliable warmth during extreme cold. Supplemental heating ensures your home remains comfortable without overburdening your heat pump, extending its lifespan and lowering energy costs.

Clear Away Snow and Ice:

The outdoor unit of your heat pump needs unobstructed airflow to function properly. During heavy snow or icy conditions, regularly check the unit and remove any buildup of snow, ice, or debris. Blocked airflow can reduce efficiency, strain the system, or even cause it to stop working altogether. Use a broom or brush to gently clear away obstructions and ensure your heat pump has the ventilation it needs to operate efficiently.

🙌 Heat Up Your Home Comfort Today

Understanding how a heat pump works in winter is crucial for maintaining a cozy and comfortable home. At Thelen Plumbing, Heating, and Air, our team of experts is dedicated to providing exceptional heating and cooling solutions that exceed your expectations. With our commitment to expert craftsmanship, 24/7 emergency services, affordable pricing, and customer-centric approach, we are the team you can trust for all your home improvement needs. Don’t let the winter chill get the best of you—contact us today to heat up your home comfort and experience the Thelen Plumbing, Heating, and Air difference.

Ready to enhance your home’s heating efficiency? Contact us now to schedule a consultation and explore how our expert team can meet your unique needs. Let Thelen Plumbing, Heating, and Air be your partner in creating a warm and inviting atmosphere for your home all winter long.

5 Of The Best Under Sink Water Filters

Are you tired of lugging around heavy water jugs or dealing with unpleasant tap water? It’s time to discover the best under sink water filters that can transform your home’s water supply into a fresh, pure oasis. In this guide, we’ll explore the benefits of under sink water filters, help you choose the right one for your needs, and introduce you to some top-rated options. With cleaner, better-tasting water at your fingertips, you’ll wonder how you ever went without one!

  • The importance of clean water in your home
  • Key features to look for in the best under sink water filter
  • Top 5 under sink water filters worth considering
  • How to install your under sink water filter

🤔 The Importance of Clean Water in Your Home

best under sink water filter-young girl drinking water from a water spigot in the kitchen sink

Water is a fundamental part of our daily lives, and having access to clean, safe water is essential for health and well-being. Not only do we rely on water for drinking, but it also plays a crucial role in cooking, cleaning, and maintaining hygiene. Unfortunately, not all tap water meets the highest standards of purity. Contaminants such as chlorine, lead, pesticides, and bacteria can sometimes find their way into our supplies, posing potential health risks. This is where an under sink water filter comes into play, offering a convenient and effective solution to improve your home’s water quality and ensure that you and your family are drinking the best possible water.

Comprehensive Filtration

Under sink water filters are designed to remove a wide variety of impurities from your water, providing a multi-layered approach to filtration. They can tackle everything from sediment and chlorine, which can affect taste and odor, to more harmful impurities like heavy metals, including lead and mercury, as well as microorganisms such as bacteria and viruses. By utilizing advanced filtration technologies, these systems ensure that every drop you drink or use for cooking is as clean and safe as possible. This not only enhances the flavor of your water but also contributes to a healthier lifestyle by reducing exposure to harmful substances.

Convenient Installation

One of the remarkable features of under sink water filters is their convenient installation. Once installed, these systems are discreet and out of sight, which helps to maintain the aesthetics of your kitchen. Unlike countertop models or pitcher filters, which can take up valuable counter space and require constant refilling, under sink filters are seamlessly integrated into your plumbing system. This means you can enjoy clean water on demand without cluttering your kitchen workspace, making them perfect for any kitchen, regardless of size. Plus, many models come with easy installation instructions, allowing you to set them up with minimal hassle.

Cost-Effective Solution

Investing in an under sink water filter can lead to significant cost savings over time. By reducing your reliance on bottled water, you not only save money but also contribute to reducing plastic waste, which is better for the environment. Additionally, these filters can help minimize wear and tear on your plumbing system by removing harmful contaminants that can lead to costly repairs down the line. The savings you enjoy from improved water quality and reduced bottled water purchases make under sink water filters a smart and cost-effective investment that pays off with every sip you take, ensuring that you and your family have access to the cleanest water possible.

Why Choose an Under Sink Water Filter?

Before we jump into the specifics of choosing the best under sink water filter, let’s consider why this type of filtration system might be the ideal choice for your home.

  • Space Efficiency: For many homeowners, kitchen counter space is a premium commodity. Under sink water filters are installed directly into your plumbing, keeping them hidden and freeing up your workspace. This makes them an excellent choice for small kitchens or anyone who prefers a clutter-free environment.
  • Superior Filtration: Under sink systems typically offer more comprehensive filtration than smaller, pitcher-type filters. With robust multi-stage filtration processes, they can tackle a broader spectrum of contaminants, including those microscopic particles that might slip through less advanced filters.
  • Ongoing Supply of Clean Water: With an under sink filter, you won’t need to constantly fill pitchers or replace small filters. Instead, you’ll have a continuous supply of filtered water directly from your faucet, making it more convenient than other options.

👉 Key Features to Look For in the Best Under Sink Water Filter

When shopping for an under sink water filter, it’s crucial to consider several key features to ensure you select the best model for your needs.

Filtration Capabilities

Not all filters are created equal, and their effectiveness can vary significantly. Look for models that offer multi-stage filtration processes, which can include sediment filters, activated carbon filters, reverse osmosis membranes, and UV light purification. These systems are capable of removing a wide range of contaminants, such as heavy metals (like lead and mercury), chlorine, pesticides, volatile organic compounds (VOCs), bacteria, and viruses. The more comprehensive the filtration, the cleaner your water will be, leading to better taste and improved health. Additionally, check for certifications from organizations like NSF International or the Water Quality Association, which ensure that the filter meets specific safety and performance standards.

Maintenance Requirements

Maintenance is a crucial aspect to consider when choosing an under sink water filter. Some filters require frequent cartridge changes, which can be costly and time-consuming, while others are designed to last for several months or even years before needing replacement. Evaluate how much effort you are willing to invest in maintenance. Systems that come with easily replaceable filters or filter indicators that alert you when it’s time for a change can save you a lot of hassle. Additionally, consider whether the filter has a straightforward installation process, as some may require professional help to set up, which adds to the overall cost.

Flow Rate

A filter’s flow rate is an essential factor that impacts your daily convenience. It measures how quickly water can flow through the filter and out of your faucet. Look for models that offer a high flow rate, ideally over 1 gallon per minute, so you don’t have to wait long for a glass of water or when filling pots for cooking. However, it’s important to strike a balance between purification speed and thoroughness. Some filters may offer fast flow rates but compromise on the effectiveness of contaminant removal. Doing some research and reading reviews can help you find a filter that maintains a good flow rate without sacrificing quality.

🚰 Top 5 Under Sink Water Filters Worth Considering

best under sink water filter-under sink water filtration system

To simplify your search, we’ve compiled a list of some of the best under sink water filters available today. These options are highly rated for their performance and customer satisfaction.

1. Waterdrop WD-G3-W Reverse Osmosis System

Features: Removes over 1,000 pollutants, tankless design for compact spaces, smart LED display.

Benefits: High-capacity filtration ensures your water is free from harmful substances, and the tankless design saves space.

2. APEC Water Systems ROES-50

Features: 5-stage filtration, durable filters, certified to remove contaminants like lead and chlorine.

Benefits: Known for its reliability and effectiveness, this system provides crisp, clean drinking water consistently.

3. iSpring RCC7AK 6-Stage Reverse Osmosis System

Features: 6-stage filtration with Alkaline Remineralization, transparent housing for easy maintenance.

Benefits: Not only purifies water but also adds beneficial minerals back for improved taste and health benefits.

4. Frizzlife Under Sink Water Filter System

Features: Quick change filters, advanced filtration technology, high flow rate.

Benefits: Easy installation and maintenance, this system is user-friendly and delivers high-quality water fast.

5. CuZn UC-200 Under Counter Water Filter

Features: 5-year lifespan, Micro Sediment membranes, bacteriostatic filtration.

Benefits: Low maintenance with a long filter life, perfect for those seeking a hassle-free, eco-friendly solution.

🛠️ How to Install Your Under Sink Water Filter

Installing an under sink water filter can seem daunting, but most models are designed for user-friendly installation. Here’s a general step-by-step guide to get you started:

Gather Your Tools

Before you begin, make sure you have all the necessary tools on hand. This usually includes a wrench, a drill, and the installation kit that comes with your filter.

Turn Off the Water Supply

Locate the cold water valve under your sink and turn it off. This prevents any water spills during installation.

Install the Filter and Connect the Tubing

Follow the manufacturer’s instructions to install the filter unit. Most systems will require you to attach tubing to connect the filter to your water supply and faucet.

Maintaining Your Under Sink Water Filter

best under sink water filter-woman filling up a glass of water from the kitchen faucet

To keep your water filter functioning optimally, regular maintenance is crucial. Here are some tips to ensure your system stays in top condition:

  • Regularly Change Filters: Each filter type has its recommended lifespan. Make sure to replace your filters regularly to maintain water quality and system efficiency.
  • Inspect for Leaks: Periodically check your filter system for leaks, especially around connections and joints. This can prevent water damage and ensure your filter is working properly.
  • Clean the System: Some filters may require periodic cleaning to remove buildup. Refer to your system’s user manual for instructions on cleaning and maintenance.
  • Check Water Pressure: Monitor the water pressure in your system. Low pressure may indicate a clogged filter that needs attention.
  • Keep an Eye on Taste and Odor: If you notice any changes in the taste or smell of your water, it may be time to change your filter or check for issues.
  • Follow Manufacturer Guidelines: Always adhere to the maintenance schedule and guidelines provided by the manufacturer for the best results.

🙌 Enhance Your Home’s Water Quality with Thelen Plumbing, Heating, and Air

Investing in the best under sink water filter can significantly improve the quality of your home’s water supply. With cleaner, better-tasting water, you’ll enjoy every sip and gain peace of mind knowing you’re protecting your family from harmful contaminants.

At Thelen Plumbing, Heating, and Air, we’re passionate about helping homeowners create healthier, more comfortable living environments. With our plumbing expertise and dedication to customer satisfaction, you can trust us for all your water filtration needs. Whether you’re ready to install a new system or need expert advice, we’re here to help. Contact us today to schedule a consultation and take the first step towards a cleaner water future!

11 Common Plumbing Issues & How To Solve Them

Have you ever noticed a mysterious puddle forming under your sink or heard the dreaded sound of a running toilet? These are just a couple of the common plumbing issues homeowners face. But don’t worry—this blog will guide you through identifying and solving these pesky problems before they escalate. Our handy guide covers:

  • Leaks and Drips
  • Toilet Issues
  • Drainage Problems
  • Water Pressure and Heating
  • Pump and Pipe Issues

🚰 11 Common Plumbing Issues

Understanding common plumbing issues is essential for homeowners, as it enables them to identify problems early and take appropriate action. This knowledge can help prevent costly repairs and ensure a functional and safe plumbing system.

1. Leaky Faucets

plumbing issues-technician addressing a leaky faucet issue

Leaky faucets are one of the most common plumbing problems, and they can be quite the nuisance. The constant drip, drip, drip can keep you awake at night and inflate your water bill over time.

A leaky faucet is typically caused by a worn-out washer, O-ring, or valve seat. When any of these components wear out, water can seep through and cause a leak. To fix a leaky faucet, turn off the water supply, disassemble the faucet, and replace the faulty part. It’s a simple task that can save gallons of water each month.

If you’re unsure about handling this task, consult a professional plumber. They can quickly assess the situation and ensure your faucet is functioning correctly.

2. Running Toilets

A running toilet can waste up to 200 gallons of water a day. Not only is this wasteful, but it can also lead to a higher water bill.

Running toilets are often due to a malfunctioning flapper, which allows water to flow from the tank to the bowl. To fix a running toilet, check the flapper for wear and replace it if necessary. Adjusting the float arm or chain in the tank can also resolve the issue. If replacing the flapper doesn’t work, it might be time to replace the entire toilet fill valve.

If these steps don’t solve the problem, it may be time to bring in a professional to avoid further complications.

3. Clogged Drains

Clogged drains can occur in sinks, showers, or toilets, leading to slow drainage and unpleasant odors. Often, these clogs are caused by a buildup of hair, soap residue, or food particles.

To alleviate a clogged drain, try using a plunger or a drain snake. These tools can clear blockages and restore normal flow. For stubborn clogs, a mixture of baking soda and vinegar followed by hot water can help dissolve the debris.

Prevent future clogs by using drain covers to catch hair and food particles, and avoiding pouring grease down the sink.

4. Low Water Pressure

plumbing issues-low water pressure coming from a home shower head

Low water pressure can turn a refreshing shower into a frustrating experience. This issue can stem from several causes, including sediment buildup in pipes or fixtures, a malfunctioning pressure regulator, or water leaks.

Start by checking your faucets and showerheads for mineral deposits. Cleaning or replacing these fixtures can often improve water pressure. Another common culprit is a leaking pipe, which should be addressed promptly to prevent further damage.

If low water pressure persists, contact a professional plumber to evaluate your system and suggest appropriate solutions.

5. Water Heater Troubles

No one enjoys a cold shower when they expect hot water. Water heater issues can range from no hot water to water that’s too hot or not hot enough.

Begin by checking the thermostat settings on your water heater. If the water is not heating properly, the heating element or thermostat may need replacement. Regular maintenance, such as flushing the tank to remove sediment buildup, can extend the heater’s lifespan.

For persistent issues, it’s best to call a licensed plumber to inspect your water heater and ensure it’s operating efficiently.

6. Sewer Line Backups

A sewer line backup is a serious plumbing problem that requires immediate attention. It can lead to unpleasant odors, slow drains, and potential water damage.

Tree roots, debris, and grease buildup are common causes of sewer line clogs. Professional plumbers often use cameras to inspect sewer lines and hydro-jetting to clear obstructions.

Preventive measures include avoiding flushing non-degradable items and scheduling regular inspections to catch potential issues early.

7. Garbage Disposal Jams

A jammed garbage disposal can halt kitchen operations and create unpleasant odors. Common causes include trying to grind unsuitable items like bones or fibrous vegetables.

To address a jammed disposal, turn off the power, use an Allen wrench in the disposal’s bottom socket to manually turn the motor, and dislodge any obstructions. Regularly cleaning with ice cubes and citrus peels can help maintain its functionality.

Avoid putting grease and fibrous foods down the disposal to prevent future jams.

8. Burst Pipes

Burst pipes are a plumbing nightmare, often resulting from freezing temperatures or excessive pressure. They can cause significant water damage and require immediate attention.

To handle a burst pipe, shut off the main water supply and call a professional plumber immediately. While waiting, try to remove excess water and dry the area to minimize damage.

Prevent bursts by insulating exposed pipes and maintaining proper heating during colder months.

9. Sump Pump Failures

Sump pumps protect homes from flooding, so a failure can be disastrous. Common failure causes include power outages, improper installation, or a clogged discharge pipe.

Regularly test your sump pump by pouring water into the pit to ensure it activates correctly. Ensure it’s connected to a reliable power source, and consider installing a battery backup system for emergencies.

Routine maintenance and inspections can help identify potential issues before they become costly repairs.

10. Pipe Corrosion

plumbing issues-pipe corrosion on appliance

Corroded pipes can lead to leaks, water discoloration, and reduced water quality. This issue often arises from chemical reactions between the pipe material and water.

Inspect pipes regularly for signs of corrosion, such as discoloration or flaking. In some cases, installing a water softener can reduce corrosion by neutralizing acidic water.

Replace severely corroded pipes to prevent leaks and contamination, and consult a professional plumber for advice on minimizing corrosion.

11. Leaking Hose Bibs

Leaking hose bibs, or outdoor faucets, can waste water and increase utility bills. Leaks often occur due to a worn-out washer or freeze damage.

To fix a leaking hose bib, replace the washer and ensure all connections are tight. In colder climates, install frost-proof hose bibs to prevent freeze damage.

Turn off outdoor water supplies in the winter to further protect your hose bibs and prevent leaks.

🙌 Plumbing Solutions You Can Trust: Expert Help from Thelen Plumbing, Heating, and Air

Understanding common plumbing issues and knowing how to address them can save homeowners time, money, and frustration. However, while DIY fixes can be effective for minor problems, more complex issues warrant calling in the experts. At Thelen Plumbing, Heating, and Air, we pride ourselves on our ability to solve your plumbing problems efficiently and affordably. Our expert team is always ready to provide top-notch service and peace of mind. Ready to tackle your plumbing challenges? Trust our team at Thelen Plumbing, Heating, and Air to provide the solutions you need for a worry-free home. Contact us today to schedule a consultation or check out our comprehensive range of services online.

What To Do When Your Toilet Keeps Running (Homeowners Guide)

When it comes to annoying home issues, a running toilet is right up there with a dripping faucet. Not only is the sound irritating, but it can also lead to higher water bills and wasted resources. If your toilet keeps running, you’re not alone. Many homeowners face this common plumbing problem. This guide will help you understand why a toilet keeps running and what you can do about it. Expect to learn about the following:

  • Common causes of a running toilet
  • Tools you’ll need to fix a running toilet
  • 6 steps to take when your toilet keeps running
  • Preventive maintenance tips for your toilet

🤔 Common Causes of a Running Toilet

toilet keeps running-white toilet in a modern bathroom

Toilets are relatively simple devices, but they have several components that can malfunction. Understanding the common causes can save you time and money.

  • Flapper Valve: Wears out over time, failing to create a proper seal. Even a small leak can lead to continuous running.
  • Fill Valve: Similar to the flapper, it can also wear out and contribute to the issue.
  • Float Mechanism: If set too high, it may cause water to overflow into the overflow tube, keeping the toilet running.
  • Chain Connection: If the chain linking the handle to the flapper is too short or too long, it can prevent the flapper from sealing properly.

Addressing these components can help you fix a running toilet efficiently.

Identifying Problems in Your Toilet Tank

Before you start fixing your toilet, it’s essential to understand how each part works. With this knowledge, you can quickly identify the source of the problem.

Lift the lid off the toilet tank carefully. Inside, you’ll find the fill valve, overflow tube, flapper, and float. Each of these components plays a role in the toilet’s operation.

Check to see if the water level is too high or too low. Ideally, the water should be about an inch below the overflow tube. If it’s higher, the float needs adjustment.

Inspect the flapper to see if it closes completely. If the chain is tangled or too tight, it might not allow the flapper to seal, causing water to leak into the bowl continuously.

🧰 Tools You’ll Need to Fix a Running Toilet

Having the right tools on hand can make the repair process smoother. Fortunately, fixing a running toilet doesn’t require specialized equipment.

A pair of pliers can help adjust the float and tighten fittings. A screwdriver may be needed to replace the handle.

For more extensive repairs, you might need a wrench to secure the fill valve. Replacement parts like a new flapper or fill valve can be purchased at most hardware stores.

🚽 6 Steps to Take When Your Toilet Keeps Running

toilet keeps running-technician working in the back part of a toilet

Addressing a running toilet is crucial because it can waste a significant amount of water, leading to higher utility bills and unnecessary strain on plumbing systems. Taking timely action not only conserves water but also prevents potential damage to your bathroom fixtures.

1. Turn off the water supply.

Begin by locating the shut-off valve, which is typically situated behind the toilet near the wall. Turning the valve clockwise will stop the flow of water to the toilet, preventing further waste of water while you troubleshoot the issue. This is a crucial first step to avoid potential water damage or increased bills.

2. Inspect the flapper.

The flapper is a rubber component at the bottom of the tank that seals the opening to the bowl. Carefully remove it and inspect it for any signs of wear or damage, such as cracks or warping. A damaged flapper will not create a tight seal, causing water to continuously flow into the bowl. If you notice any issues, consider replacing the flapper with a new one to restore proper function.

3. Check the fill valve.

The toilet fill valve controls the water inflow to the tank after a flush. Remove the lid from the tank and observe the fill valve while the toilet is refilling. If you notice that it’s clogged with sediment or not functioning properly, it may need cleaning or replacement. A properly operating fill valve ensures that the tank refills to the correct level and stops when the tank is full.

4. Adjust the float.

The float is responsible for regulating the water level in the tank. If the float is set too high, it can cause water to overflow into the overflow tube, leading to a running toilet. Adjust the float arm or the height of the float itself to ensure it stops the flow of water at the appropriate level. This adjustment is essential for maintaining an efficient flushing system.

5. Examine the chain and handle.

Inspect the chain that connects the flapper to the handle. It should have a bit of slack to allow the flapper to fully close after flushing. If the chain is too tight or too loose, it can prevent the flapper from sealing properly. Additionally, check the handle to ensure it operates smoothly and isn’t stuck, as a malfunctioning handle can also contribute to a running toilet.

6. Test your fixes.

Once you’ve completed the necessary inspections and adjustments, turn the water supply back on by rotating the shut-off valve counterclockwise. Allow the tank to fill, then perform several test flushes to ensure that the toilet is functioning properly. Pay close attention to whether it continues to run after flushing; if it does, you may need to revisit the previous steps for further adjustments or repairs.

💡 Preventive Maintenance Tips for Your Toilet

toilet keeps running-close up view of a toilet that is flushing with clean water

Regular maintenance can prevent common toilet issues from recurring. By taking a few simple steps, you can extend the life of your toilet:

  • Periodically check the flapper and fill valve for wear. Replacing these parts before they fail can save you trouble later.
  • Adjust the float as needed to ensure the water level remains within the recommended range. This simple action can prevent many running toilet problems.

When to Call a Professional Plumber

Sometimes, despite your best efforts, the toilet keeps running. In such cases, it might be best to call a professional plumber.

If you’ve tried various fixes and nothing works, there may be a more complex issue at play. A plumber can diagnose the problem and provide a solution.

Don’t hesitate to seek professional help if you’re uncomfortable performing repairs yourself. It’s better to have the problem fixed correctly the first time.

🙌 Reliable Solutions for Plumbing and Roofing Needs

Tackling a running toilet can often be addressed with some DIY patience and the right tools, but when these fixes aren’t enough, Thelen Plumbing, Heating, and Air is here to help. Our team of experienced professionals doesn’t just excel in plumbing solutions; we are also your trusted partner for all your roofing needs. We pride ourselves on delivering top-notch service with a commitment to excellence and customer satisfaction. Whether it’s a minor leak or a major repair, choose Thelen Plumbing, Heating, and Air for reliable, efficient, and expert service. Contact us today to schedule your appointment and ensure your home is in the best possible hands.

How To Unclog Your Sink (8 DIY Methods)

Clogged sinks are a common household nuisance that can disrupt your daily routine. Luckily, unclogging your sink doesn’t always require a call to the plumber! If you find yourself searching “how to unclog sink” in a pinch, you can often restore your sink to its proper function without much hassle. In this guide, we’ll walk you through everything you need to know about how to unclog a sink. We’ll cover practical steps, tips, and tricks to keep your plumbing running smoothly, including:

  • Understanding sink clogs
  • Tools and materials you’ll need
  • 8 DIY ways to unclog your sink
  • Preventing future clogs

🤔 Understanding Sink Clogs

how to unclog sink-person using a snake to try to unclog a sink

Clogged sinks can happen in any home, and they’re often caused by a buildup of food particles, grease, soap scum, or hair. Understanding the root cause of your clog is the first step to solving the problem effectively. Whether you’re dealing with a kitchen sink that’s draining slowly or a bathroom sink that’s completely blocked, this guide is here to help.

Why Sinks Get Clogged

Sinks can get clogged for several reasons, and identifying the cause can aid in selecting the right unclogging method. In kitchen sinks, food scraps and grease are the primary culprits. These materials can build up over time, forming a blockage that prevents water from draining properly. Bathroom sinks may face issues with hair and soap residue, both of which can create stubborn clogs.

Signs Your Sink is Clogged

Recognizing the signs of a clogged sink is crucial for taking timely action. Common indicators include:

  • Water that drains slowly
  • Gurgling noises
  • Unpleasant odors
  • Standing water in severe cases

If you notice any of these signs, it’s time to address the issue before it worsens.

🧰 Tools and Materials You’ll Need

Having the right tools and materials on hand can make the process of unclogging your sink more efficient. Here’s a list of items you might need:

Basic Tools for Unclogging

A few basic tools are essential for most unclogging tasks:

  • Plunger: Creates suction to dislodge blockages.
  • Plumber’s snake (drain auger): Reaches deeper into the plumbing to break up and remove stubborn clogs.

For those with minimal plumbing experience, these tools are easy to use and can deliver impressive results.

Household Ingredients for DIY Solutions

Household ingredients like baking soda, vinegar, and salt can be powerful allies in unclogging your sink. These natural substances tackle mild to moderate clogs without damaging your pipes. When combined with boiling water, baking soda and vinegar create a fizzing reaction that helps break down the buildup in your drain.

Here are a few tips:

  • Baking Soda & Vinegar: Mix one cup of each and pour down the drain.
  • Boiling Water: Follow the mixture with boiling water to enhance effectiveness.
  • Salt: Use salt as a scrubbing agent for stubborn clogs.

Safety Precautions

Safety should always be a top priority when working with plumbing. Here are some important tips to remember:

  • Wear gloves to protect your hands from harsh cleaners and sharp objects.
  • Keep the area around the sink dry to prevent slips and falls.
  • If using commercial drain cleaners, follow the instructions carefully.
  • Ventilate the area to avoid exposure to fumes.

🪠 8 DIY Ways to Unclog Your Sink

how to unclog sink-woman using a plunger to unclog a kitchen sink

Follow these steps to effectively unclog your sink and restore its functionality.

1. Start with a Plunger

A plunger is often the first tool to try when dealing with a clogged sink. Begin by ensuring that there is enough water in the sink to cover the rubber part of the plunger. Place the plunger over the drain and create a strong seal by pressing down firmly. Pump the plunger up and down vigorously for about 15-20 seconds to build pressure and dislodge the clog. This method is particularly effective for shallow clogs caused by debris near the surface. If you notice any water bubbling up, it indicates that the clog is loosening. Afterward, run hot water to see if the drain flows smoothly.

2. Try a Baking Soda and Vinegar Solution

For a natural and non-toxic solution, use baking soda and vinegar, which can effectively break down many types of clogs. Begin by pouring a cup of baking soda down the drain, ensuring it goes as far down as possible. Next, follow it with a cup of white vinegar. You’ll observe the mixture foaming and fizzing, which indicates that it’s working to break apart the clog. Allow the solution to sit for about 15-30 minutes, giving it time to penetrate deeper into the blockage. Afterward, flush the drain with boiling water to wash away any remnants. This method works particularly well for clogs caused by grease, soap scum, and food particles.

3. Use a Plumber’s Snake

If the clog persists after trying the previous methods, a plumber’s snake can help reach deeper blockages that other tools cannot. Begin by inserting the snake into the drain, pushing it gently until you meet resistance. Rotate the handle of the snake to break up the clog and push it through the pipes. The flexible coil of the snake can navigate bends and curves in the plumbing, allowing it to clear away hair, soap buildup, and other stubborn debris. This tool is especially useful in bathrooms where hair accumulation can lead to frequent blockages.

4. Remove the P-Trap

In some cases, the clog may be located in the P-trap, the curved pipe beneath the sink that is designed to trap debris and prevent sewer gases from entering the home. To access it, place a bucket underneath to catch any residual water and unscrew the P-trap using a wrench or pliers. Be cautious as water may spill out. Once removed, inspect the P-trap for any visible clogs. Clean out any debris, hair, or buildup before reattaching the trap securely. This step is particularly useful for kitchen sinks where food particles and grease tend to collect, ensuring your plumbing system functions efficiently.

5. Use Hot Water

Sometimes, a simple yet effective solution is pouring hot water down the drain to help dissolve grease and soap buildup. Start by boiling a pot of water on the stove. Once it reaches a rolling boil, carefully pour it into the sink in stages, allowing it to work its way through the clog. This method is particularly effective for minor clogs as the heat can help break down grease and soap that may be adhering to the pipes. For stubborn clogs, repeat the process a couple of times, allowing the hot water to sit for a few minutes each time for optimal results.

6. Try a Wet/Dry Vacuum

If you have a wet/dry vacuum on hand, it can be a powerful tool for clearing clogs. First, make sure the vacuum is set to liquid mode. Create a tight seal over the drain to ensure maximum suction. Turn on the vacuum to suction out the blockage, allowing it to pull out debris and water. This method is particularly useful for larger clogs or when dealing with solid objects that are stuck in the drain. Be cautious and check the vacuum’s capacity, as you may need to empty it if it fills up quickly.

7. Salt and Baking Soda

For a more potent combination, mix half a cup of salt with half a cup of baking soda and pour it down the drain. This mixture acts as an abrasive agent, helping to break down stubborn clogs and remove buildup within the pipes. After pouring it down, let it sit for a few hours or overnight to allow it to work its magic. Finally, flush the drain with hot water to wash away any residue. This method is particularly effective for tough clogs that have resisted other techniques.

8. Coat Hanger

If you’re specifically dealing with hair clogs, a straightened coat hanger can be an effective tool for removing them. Start by bending the coat hanger into a long, straight wire with a small hook at one end. Carefully insert it into the drain and use the hook to snag and pull out hair and debris that are causing the blockage. Be gentle to avoid damaging your pipes. This method is a quick fix for bathroom sinks or tubs where hair tends to accumulate, providing a simple solution to keep your drains clear.

🛑 Preventing Future Clogs

how to unclog sink-close up of a person using baking soda and vinegar to unclog a kitchen sink

Taking preventive measures can help keep your sink from clogging in the future.

Regular Maintenance Tips

Regular maintenance can significantly reduce the risk of clogs. Run hot water down the drain after each use to prevent grease buildup. Install a drain screen to catch hair and food particles before they enter the plumbing. Periodically clean your sink with a mixture of vinegar and baking soda to keep it fresh and clear.

Avoiding Common Mistakes

Avoid pouring grease, coffee grounds, and fibrous foods down the kitchen sink. These materials can solidify and cause serious blockages. In the bathroom, refrain from flushing non-dissolvable items and use a hair catcher to prevent clogs.

Benefits of Professional Drain Cleaning

While DIY methods are effective for minor clogs, professional drain cleaning offers a thorough solution. Companies like Thelen Plumbing, Heating, and Air provide expert services to address complex plumbing issues. Their advanced techniques ensure your pipes remain clean and functional for years to come.

🙌 Your Guide to Unclogging Sinks: Tips and Professional Help

Unclogging your sink doesn’t have to be a daunting task. With the right tools and techniques, you can quickly restore the functionality of your sink and prevent future clogs. However, for persistent problems and peace of mind, professional assistance remains invaluable. At Thelen Plumbing, Heating, and Air, our team of experts is dedicated to providing top-notch plumbing services. Whether it’s routine maintenance or an emergency repair, we’re here to help. Trust us to handle your plumbing needs with care and expertise. Reach out today to learn more about our services and schedule an appointment.

How Much Does An AC Tune Up Cost? (7 Factors)

When the temperatures start rising, having a well-maintained air conditioning system is crucial for staying comfortable at home. If you’re a homeowner wondering about the cost of getting an AC tune-up, you’re not alone. The cost of an AC tune-up can vary based on several factors, but understanding these elements can help you budget and prepare for when the time comes. This blog post will cover AC tune up cost factors and more, including:

  • What to expect from an AC tune-up
  • 7 factors affecting AC tune-up costs
  • Average AC tune-up costs

🤔 What to Expect from an AC Tune-Up

ac tune up cost-technician inspecting an outdoor AC unit

An AC tune-up involves a comprehensive inspection and servicing of your air conditioner. This ensures optimal performance, energy efficiency, and longevity. But what does this service include? Typically, a technician will clean and inspect coils, check refrigerant levels, inspect electrical connections, lubricate moving parts, and assess overall system functionality.

Key Benefits of Regular AC Maintenance

Regular AC maintenance provides numerous benefits, including:

  • Improved energy efficiency: Leads to lower utility bills.
  • Extended lifespan: Reduces the need for costly replacements.
  • Consistent cooling performance: Ensures reliable temperature control.
  • Enhanced indoor air quality: Contributes to a healthier living environment.

These advantages highlight the importance of routine maintenance for your AC system.

💸 7 Factors Affecting AC Tune-Up Costs

ac tune up cost-replacing air filters for optimal performance

Understanding the factors affecting AC tune-up costs is crucial for homeowners to budget effectively and ensure their air conditioning systems operate efficiently. By being informed, you can make better decisions regarding maintenance, potentially saving on costly repairs down the line.

1. Geographic Location

Your location plays a significant role in AC tune-up costs. In metropolitan areas with high living costs, service prices may reflect the local economy and demand for HVAC services. Conversely, in rural or less populated regions, competition may drive prices lower. Additionally, areas with extreme weather conditions, such as scorching summers or frigid winters, may experience more frequent maintenance needs, impacting overall costs.

2. Type of Air Conditioning System

The kind of air conditioning system you own influences tune-up costs. Central air systems, for instance, require more intricate maintenance due to their complex design and connection to ductwork. Ductless mini-splits may need specialized servicing, while window units often have simpler requirements. Understanding your system type can help you anticipate the level of maintenance and associated costs.

3. System Age and Condition

The age and overall condition of your air conditioning system are crucial factors in maintenance costs. Older units tend to require more frequent and thorough inspections due to accumulated wear and tear. These systems might exhibit decreased performance, which can lead to higher costs if neglected. Regular maintenance can help you identify issues early, potentially saving you money on future repairs or replacements.

4. Service Provider Expertise

The level of expertise and reputation of your chosen HVAC service provider can greatly affect the cost of tune-ups. Companies with a long-standing presence and experienced technicians may charge more, as their rates reflect their skill and reliability. However, opting for a well-reviewed provider often results in better service and thorough inspections, which can ultimately save you money by preventing future problems.

5. Seasonal Demand

AC tune-up costs are subject to fluctuations based on seasonal demand patterns. During peak summer months, when air conditioning systems are frequently in use, service providers may increase prices due to heightened demand for their services. Planning your maintenance during off-peak times, such as early spring or fall, can lead to more competitive pricing and greater availability of service options.

6. Additional Services or Repairs

During an AC tune-up, technicians may uncover the need for additional services or repairs, such as refrigerant refills, component replacements, or duct cleaning. While these extras incur additional costs, addressing them during the tune-up can prevent more costly repairs down the line. Proactively managing your system’s needs ensures it runs smoothly and efficiently.

7. DIY vs. Professional Tune-Ups

While some homeowners may consider DIY tune-ups to reduce expenses, professional services come with significant advantages. Certified technicians have the necessary training, tools, and experience to accurately diagnose and resolve issues. Moreover, professional work is often backed by warranties, offering an added layer of security and peace of mind that DIY efforts may lack.

💵 Average AC Tune-Up Costs

ac tune up cost-regular maintenance of HVAC system by spraying down outdoor AC filters

The average cost of an AC tune-up typically ranges from $75 to $200. However, prices can vary significantly depending on location, the specific services offered, and the company you choose. It’s important to note that some companies provide service packages or membership options that include regular tune-ups, which can lead to long-term savings and added convenience for homeowners who want to keep their systems in top shape.

Finding a Reliable Service Provider

To find a trustworthy service provider for your AC needs, start by asking friends or family for recommendations based on their experiences. Additionally, reading online reviews on platforms like Google or Yelp can provide insights into the reliability and quality of service offered by different companies. Checking the provider’s credentials, such as licensing and insurance, is crucial to ensure you’re choosing a qualified professional. Don’t hesitate to request quotes from multiple service providers; this allows you to compare services, pricing, and customer service, helping you make an informed decision.

Importance of Preventive Maintenance

Preventive maintenance plays a vital role in avoiding unexpected breakdowns and extending the lifespan of your AC system. Regular tune-ups enable technicians to conduct thorough inspections, identify potential issues early, and address them before they escalate into costly repairs. This proactive maintenance approach not only saves you money in the long run but also ensures that your home remains comfortable, especially during the peak summer months when air conditioning is essential.

  • Reduces the risk of unexpected breakdowns
  • Increases the lifespan of your AC system
  • Identifies potential issues early
  • Saves money on costly repairs
  • Ensures home comfort during peak summer months

How Often Should You Schedule Tune-Ups?

Most HVAC experts recommend scheduling an AC tune-up at least once a year, ideally in the springtime. This timing allows you to prepare your system for the increased demands of the summer months ahead. However, if your AC system is heavily used or if you start to notice a decline in its performance, you may need to schedule tune-ups more frequently. Keeping up with regular maintenance helps ensure optimal efficiency and prolongs the life of your system, ultimately leading to a more comfortable living environment.

🙌 Essential AC Tune-Up Services for Optimal Home Comfort

Understanding the cost factors associated with an AC tune-up empowers homeowners to make informed decisions about their HVAC maintenance. By investing in regular tune-ups, you ensure optimal performance, energy efficiency, and longevity for your air conditioning system.

When it comes to reliable HVAC services, Thelen Plumbing, Heating, and Air is the team you can trust. Based in the Twin Cities area, we pride ourselves on delivering exceptional service with a focus on quality craftsmanship, affordable prices, and customer satisfaction. Our experienced technicians will ensure your AC system receives the care it deserves, leaving you with peace of mind and a comfortable home. Ready to schedule your AC tune-up or need more information? Reach out to our friendly team at Thelen Plumbing, Heating, and Air today! We’re here to help you keep your home comfortable and efficient year-round.

4 HVAC Troubleshooting Tips To Keep Your Home Warm

Keeping your home warm during the colder months can become a challenge when your HVAC system starts acting up. Whether it’s a sudden chill or a system that won’t turn on, simple troubleshooting can make a significant difference. Designed for homeowners, this guide offers practical HVAC troubleshooting tips to ensure you enjoy a cozy, warm home all winter long. In this article, you’ll discover:

  • Understanding your HVAC system
  • 4 HVAC troubleshooting tips to keep your home warm
  • DIY solutions vs. professional help
  • Seasonal maintenance tips

🤔 Understanding Your HVAC System

hvac troubleshooting-regular maintenance being performed on an HVAC system

Your HVAC system is an essential component of home comfort, responsible for heating, ventilation, and air conditioning. Understanding how it works helps in identifying potential issues early.

Firstly, most systems consist of a furnace, ducts, and a thermostat. The furnace heats the air; the ducts distribute it throughout your home, while the thermostat controls the temperature. Familiarizing yourself with these components can prevent minor issues from escalating into significant problems.

Secondly, regular maintenance of these parts ensures your system operates efficiently. For example, cleaning ducts and checking for blockages can improve airflow and heat distribution. Finally, understanding your system’s age and model can provide insights into its performance, helping you anticipate potential repairs or replacements.

Common HVAC Issues and Their Causes

HVAC systems can face various issues, often linked to their components. Identifying these issues early can save time and money on costly repairs.

  • Inadequate heating: This could result from clogged filters or a malfunctioning thermostat, restricting airflow or misreading temperature settings, affecting your home’s warmth.
  • Strange noises: These could be due to loose components, worn-out belts, or debris in the ducts. Ignoring these noises can lead to further damage if not addressed promptly.
  • Sudden increase in energy bills: This might indicate an inefficient system, stemming from outdated parts or poor maintenance, leading to increased energy consumption as the system struggles to maintain desired temperatures.

👉 4 HVAC Troubleshooting Tips To Keep Your Home Warm

hvac troubleshooting-electrician using a screwdriver to access panel of thermostat

These HVAC troubleshooting tips are crucial for ensuring your home remains warm and comfortable during cold weather. By addressing common issues proactively, you can avoid costly repairs and maintain an efficient heating system.

1. How to Check Your Thermostat

The thermostat is the brain of your HVAC system, and ensuring its proper function is crucial for home comfort.

Begin by inspecting the thermostat’s settings. Ensure it’s set to “heat” and the desired temperature is higher than the room’s current temperature. Also, check for the presence of any error codes or unusual display messages.

Then, examine the thermostat’s location. It should be placed away from direct sunlight, drafts, or heat sources, as these can affect its readings. Finally, replace old batteries to maintain consistent performance and prevent malfunctions.

2. Inspecting HVAC Filters for Optimal Performance

HVAC filters play a vital role in maintaining air quality and system efficiency. Regular inspection and maintenance are necessary for optimal performance.

Start by locating your system’s filter, typically found near the return air duct or blower compartment. Check for dust or debris accumulation, which can obstruct airflow.

Replace or clean filters every 1-3 months, depending on usage and air quality. Clean filters not only enhance airflow but also improve indoor air quality, benefiting your family’s health.

3. Evaluating Airflow Issues

Proper airflow is essential for efficient HVAC operation, ensuring even distribution of warm air throughout your home.

First, inspect vents and registers for blockages. Furniture, curtains, or debris can obstruct airflow, reducing heating efficiency. Ensure all vents are open and unobstructed, and replace dirty air filters.

Next, check for leaks in the ductwork. Damaged or disconnected ducts can lead to heat loss, causing uneven heating. Sealing leaks with duct tape or mastic can improve airflow.

Finally, consider balancing your HVAC system. Professional HVAC technicians can adjust dampers within the ducts to ensure even airflow distribution, enhancing comfort.

4. Identifying and Addressing Unusual Noises

Unusual noises from your HVAC system often indicate underlying issues that require attention.

Rattling noises may suggest loose components. In this case, tighten screws or fasteners to secure parts and prevent further damage.

Squealing or grinding noises could indicate a worn-out belt or motor issue. Promptly addressing these noises can prevent severe damage and costly repairs.

In the case of banging or clanging noises, check for debris in the ducts or loose components. Remove any debris and tighten connections to restore quiet operation.

👨‍🔧 DIY Solutions vs. Professional Help

While some HVAC issues can be resolved with DIY solutions, others require professional expertise.

Simple tasks such as changing filters, adjusting thermostats, and securing loose components can be done by homeowners. DIY solutions save time and money while maintaining system efficiency.

However, more complex issues such as electrical malfunctions, refrigerant leaks, or motor problems necessitate professional intervention. A qualified HVAC technician has the skills and equipment to diagnose and fix these issues, ensuring safety and reliability.

💡 Seasonal Maintenance Tips

hvac troubleshooting-check filters for optimal performance

Regular maintenance is key to preventing HVAC issues and extending system lifespan. Seasonal maintenance ensures optimal performance year-round.

Before winter, schedule a professional inspection to identify potential problems. Technicians can:

  • Clean components
  • Check electrical connections
  • Lubricate moving parts

Additionally, regularly cleaning vents, checking ducts for leaks, and replacing filters contribute to system longevity. These simple tasks enhance efficiency and reduce energy costs, providing comfort throughout the season.

Enhancing Energy Efficiency

Improving your HVAC system’s energy efficiency benefits both the environment and your wallet. Simple measures can significantly reduce energy consumption.

Firstly, invest in a programmable thermostat. These devices optimize heating schedules, reducing energy waste when you’re not home.

Next, ensure proper insulation throughout your home. Insulated walls, windows, and doors minimize heat loss, allowing your HVAC system to maintain consistent temperatures with less effort.

Finally, consider upgrading to energy-efficient HVAC systems. Modern systems offer improved performance and lower energy consumption, yielding long-term savings.

🙌 Keep Your Home Cozy This Winter

Effective HVAC troubleshooting helps homeowners maintain a warm and comfortable environment throughout the winter. By understanding your system, identifying common issues, and implementing basic solutions, you can effectively address problems and enhance efficiency. When challenges arise beyond your expertise, trust the professionals at Thelen Plumbing, Heating, and Air. Our commitment to quality service, skill, and reliability makes us the go-to choice for all your HVAC needs. Join our Happy Home Club for even greater peace of mind and discover why so many Twin Cities residents rely on us. Contact us today to schedule your service and keep your home cozy all winter long!

Schedule Service

"*" indicates required fields

This field is for validation purposes and should be left unchanged.