Author: Kevin

5 Main Functions Of An AC Drip Pan

Air conditioning is a modern marvel that keeps our homes cool and comfortable, especially during those sweltering summer months. But while most homeowners focus on the more prominent parts of their AC systems, such as the compressor or evaporator coil, there’s one small component that plays a crucial role in maintaining the efficiency and safety of your unit—the AC drip pan. In this post, we’ll cover everything you need to know about the AC drip pan, including:

  • What is an AC Drip Pan?
  • 5 Main Functions of an AC Drip Pan
  • How to Check Your AC Drip Pan
  • Benefits of a Properly Functioning AC Drip Pan
  • DIY vs. Professional Maintenance
  • When to Replace Your AC Drip Pan

🤔 What is an AC Drip Pan?

An AC drip pan, also known as a condensate tray, is a shallow container located beneath the indoor air handling unit (AHU) of your air conditioning system. Its primary function is to collect the condensation that forms on the evaporator coil, preventing water damage to your home.

The AC drip pan serves several important functions:

  • Water collection: It captures the water that drips off the evaporator coil during operation, preventing leaks into your home.
  • Damage prevention: By containing the water, it helps protect your floors, walls, and ceilings from potential water damage.
  • Humidity control: The collected water aids in maintaining proper humidity levels, contributing to a more comfortable indoor environment.

Overall, the AC drip pan is an essential component of your air conditioning system, ensuring both efficiency and protection for your living space.

Importance of Regular Maintenance

Regular maintenance of the AC drip pan is essential for several reasons. First and foremost, keeping the drip pan clean and free of debris prevents overflow, which can lead to significant water damage in your home.

Additionally, neglecting the drip pan can result in standing water, creating an ideal environment for mold and mildew to thrive. This not only affects indoor air quality but can also pose serious health risks to you and your family.

Lastly, a clean and properly functioning drip pan contributes to the overall efficiency of your air conditioning system. By ensuring that this component is well-maintained, you can enhance the performance of your AC and potentially lower your energy bills.

💡 5 Main Functions of an AC Drip Pan

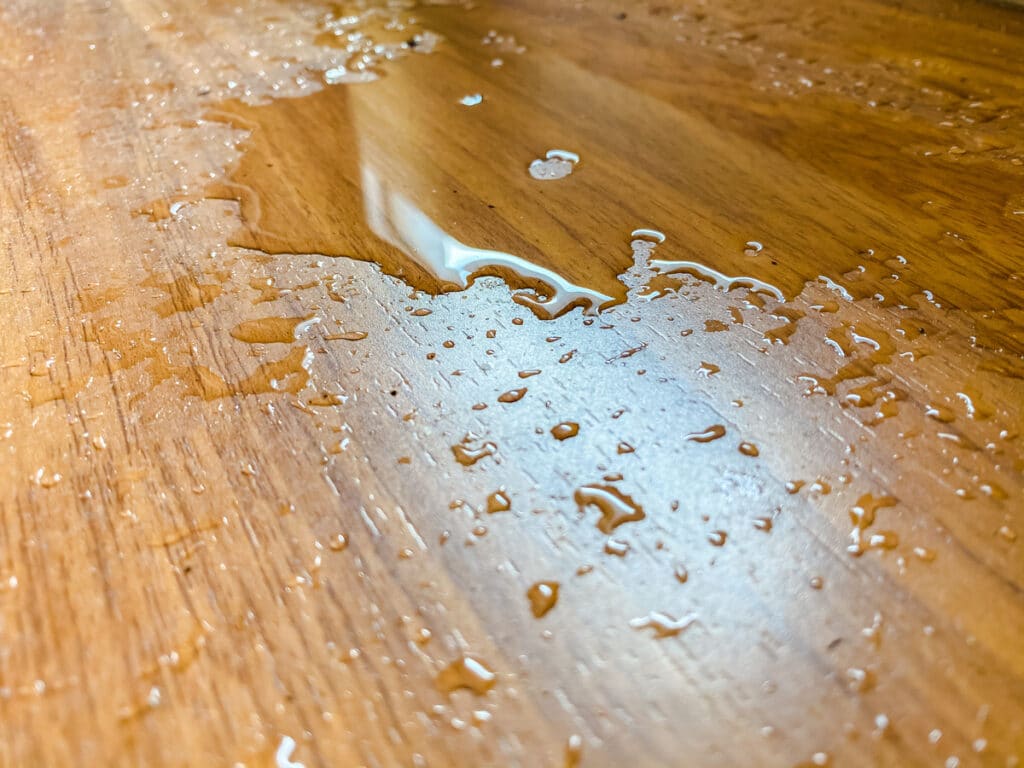
ac drip pan-water pooling on the floor

The AC drip pan plays a crucial role in preventing water damage by collecting condensation that drips from the air conditioning unit. It helps maintain the efficiency of the system and protects surrounding structures from potential leaks and mold growth.

1. Water Collection

The primary function of an AC drip pan is to collect condensation that forms during the cooling process. As warm air passes over the evaporator coil, moisture condenses and drips into the pan, preventing water from accumulating inside the unit.

2. Preventing Water Damage

By containing the water that collects, the drip pan prevents overflow, which can lead to water damage both within the AC unit and in the surrounding areas, such as ceilings or floors.

3. Maintaining Indoor Air Quality

A properly functioning drip pan reduces the likelihood of mold and mildew growth. By effectively managing water drainage, it helps maintain better indoor air quality, promoting a healthier living environment.

4. Supporting System Efficiency

The drip pan plays a crucial role in ensuring the air conditioning system operates efficiently. By managing excess moisture and preventing blockages, it allows the unit to maintain optimal performance and reduce energy consumption.

5. Enabling Easy Maintenance

Access to the drip pan allows for routine inspections and cleanings. This eases the maintenance process and ensures that any issues can be promptly identified and addressed, contributing to the longevity of the AC system.

🔎 How to Check Your AC Drip Pan

Checking your AC drip pan is a straightforward process that you can easily follow.

  • Always turn off the power to your air conditioning unit before performing maintenance for safety.
  • Locate the drip pan, usually found beneath the indoor unit; you may need to remove an access panel to reach it.
  • Inspect the drip pan for standing water, debris, or signs of mold.
  • If any issues are found during your inspection, consider a thorough cleaning or professional maintenance to ensure efficient operation.

Common Issues with AC Drip Pans

Understanding the common problems associated with AC drip pans can help you address them promptly. One major issue is a clogged drain line. When the drain line becomes blocked, water can back up and overflow the drip pan, leading to potential damage.

Another concern is the development of cracks or leaks over time. As the drip pan ages, it may develop imperfections that can result in water leakage, ultimately causing water damage to your property.

Additionally, standing water in the drip pan can create an environment conducive to mold and algae growth. This not only poses health risks but can also lead to unpleasant odors and further complications. Being aware of these issues can help you maintain your AC system effectively.

How to Fix AC Drip Pan Problems

If you encounter issues with your AC drip pan, there are several steps you can take to address the problem.

Clean the drip pan:

  • Remove any accumulated debris.
  • Use a mixture of water and mild detergent for thorough cleaning.

Unclog the drain line:

  • Use a wet/dry vacuum to efficiently clear any blockages.

Repair minor cracks in the drip pan:

  • Use epoxy or a waterproof sealant for temporary repairs.
  • Consider replacement if the damage is significant.

✅ Benefits of a Properly Functioning AC Drip Pan

ac drip pan-family enjoying better air quality from properly functioning ac unit

A well-maintained AC drip pan provides numerous benefits that can enhance your overall cooling experience:

  • Improved System Efficiency: Proper drainage prevents interference with the performance of the air conditioning unit, ensuring optimal operation.
  • Extended Lifespan: Regular maintenance and timely replacements of the drip pan can significantly extend the life of your air conditioning system, helping you avoid costly repairs and premature failures.
  • Better Indoor Air Quality: A well-maintained drip pan prevents the growth of mold and mildew, keeping the air circulating within your home clean and healthy.

Overall, investing time in maintaining your AC drip pan can lead to a more efficient, longer-lasting, and healthier air conditioning experience.

AC Drip Pan and Energy Efficiency

Your AC drip pan plays a surprisingly important role in energy efficiency. First, it helps reduce strain on the system. Efficient drainage prevents water buildup, which alleviates pressure on the evaporator coil and enhances the overall efficiency of the air conditioning unit.

A properly functioning drip pan prevents freezing. When drainage is adequate, the evaporator coil is less likely to freeze over, ensuring that the system operates effectively and does not increase energy consumption unnecessarily.

Maintaining the drip pan in good condition is crucial for optimal performance. A well-kept drip pan contributes to the overall efficiency and functionality of your AC unit, ensuring that it runs smoothly and effectively for years to come.

👨‍🔧 DIY vs. Professional Maintenance

Some homeowners may prefer a DIY approach to maintenance; however, professional maintenance offers several significant advantages.

Professionals possess expert knowledge. They have the experience and tools necessary to accurately identify and address any issues that may arise.

Comprehensive service is a key benefit of hiring professionals. Regular professional maintenance includes thorough checks and tune-ups that go beyond just inspecting the drip pan, ensuring the overall health of the entire system.

Professional maintenance provides peace of mind. Knowing that your air conditioning system is in the hands of experts not only alleviates anxiety but also helps prevent potential surprises down the line.

👉 When to Replace Your AC Drip Pan

Knowing when to replace your AC drip pan is crucial for preventing more extensive issues.

If the pan continues to leak even after repairs, it indicates that replacement is necessary. Persistent leaks can lead to further damage and complications if not addressed promptly.

Severe damage to the drip pan, such as significant cracks or corrosion, compromises its integrity. In such cases, a replacement is warranted to ensure the system functions properly and efficiently.

Consider the age of your AC unit. If it is older, replacing the drip pan as part of an overall system upgrade can enhance efficiency and prolong the life of your cooling system. Taking these factors into account will help maintain your air conditioning system in optimal condition.

🙌 Trust Thelen Plumbing, Heating, and Air for Your AC Needs

Maintaining your AC drip pan is essential for ensuring the efficiency and longevity of your air conditioning system. By understanding its primary functions—preventing water damage, promoting better air quality, and enhancing energy efficiency—you can take proactive steps to address any issues that arise. At Thelen Plumbing, Heating, and Air, we pride ourselves on delivering expert HVAC solutions, backed by a team of skilled professionals who are dedicated to keeping your systems running smoothly. Trust us to handle your air conditioning needs with precision and care, ensuring a comfortable home environment for you and your family. Reach out to us today for a consultation or service—your comfort is our top priority!

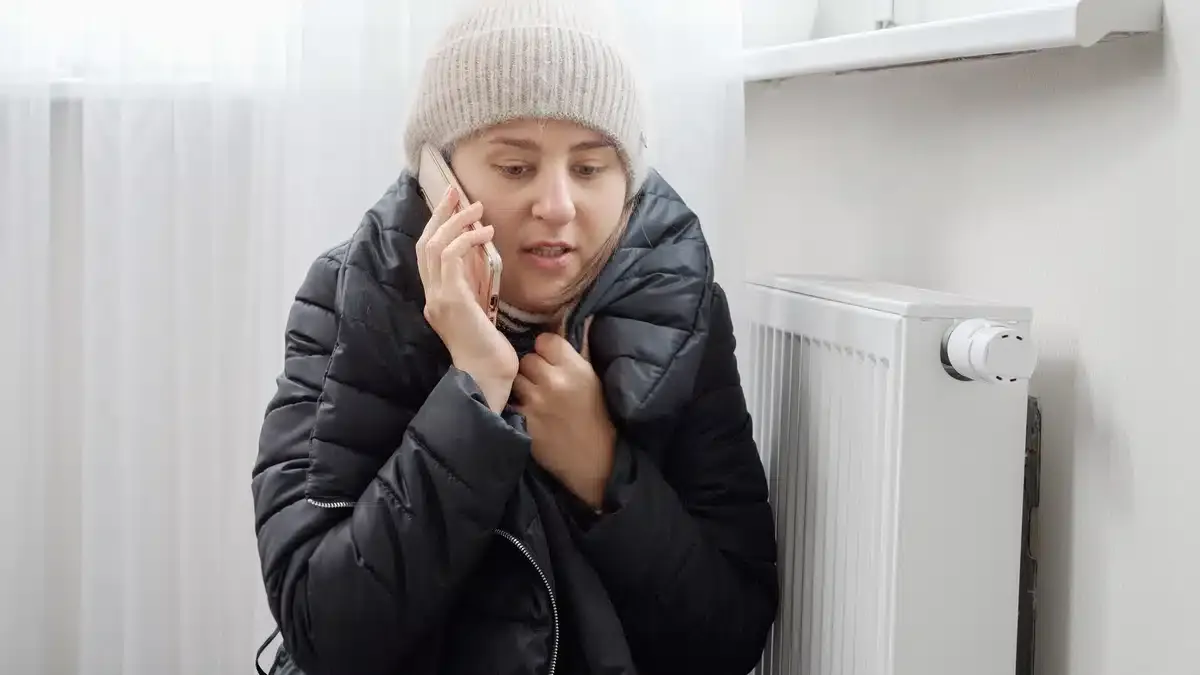
furnace problems-woman on the phone in a hat and winter coat near a broken furnace furnace problems-woman on the phone in a hat and winter coat near a broken furnace

10 Commonly Occurring Furnace Problems & Solutions

Furnaces are the heart of your home’s heating system, working tirelessly to keep you warm during the frigid months. However, like any other mechanical device, furnaces can experience issues that hinder their performance. Knowing how to identify and troubleshoot these problems can save you time, money, and discomfort. In this blog post, we’ll explore some of the most common furnace problems homeowners face and provide practical solutions to address them. Here’s what we’ll cover:

  • Furnace Not Heating
  • Strange Noises
  • Frequent Cycling
  • Pilot Light Problems
  • Blower Issues
  • Dirty Filters
  • Thermostat Malfunctions
  • Gas Leaks
  • Ignition Problems
  • Limit Switch Issues
  • Furnace Maintenance Tips

💡 10 Common Furnace Problems (and Solutions)

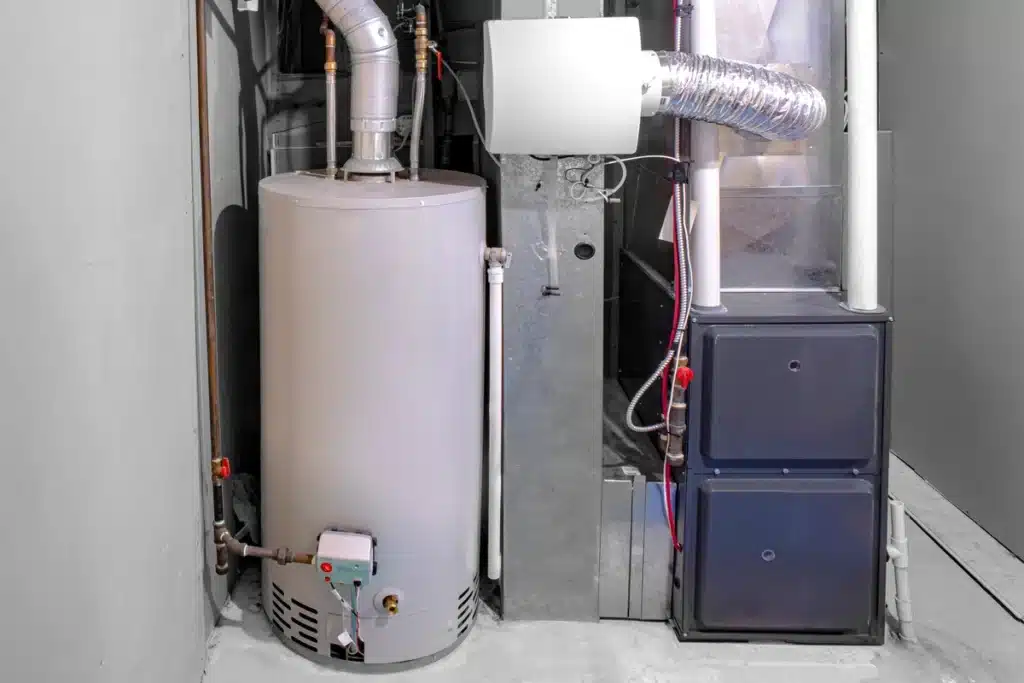
furnace problems-furnace room

When it comes to home heating, furnaces can encounter a variety of issues that disrupt their performance. Understanding these common problems and their solutions can help you maintain a warm and efficient home. Here are 10 frequent furnace issues and how to resolve them.

1. Furnace Not Heating

One common issue homeowners face is a furnace that isn’t heating properly. This problem can be caused by various factors, ranging from simple thermostat malfunctions to more complex mechanical failures. Understanding the potential causes can help in troubleshooting and resolving the issue efficiently.

  • Check Your Thermostat: The first step in diagnosing a furnace that’s not heating is to check the thermostat. Ensure it’s set to “heat” and the temperature setting is above the current room temperature. If the thermostat is battery-operated, replace the batteries.
  • Inspect the Power Supply: Sometimes, the solution is as simple as ensuring the furnace is receiving power. Check your circuit breaker or fuse box for any tripped breakers or blown fuses. If resetting the breaker doesn’t solve the problem, there might be an electrical issue that requires professional attention.
  • Examine the Pilot Light: For older furnaces with a pilot light, confirm that it is lit. If it’s out, follow the manufacturer’s instructions to relight it. For newer models, inspect the electronic ignition system for any faults.

2. Strange Noises

If you notice strange noises coming from your furnace, it could be a sign that something is wrong. These sounds can range from rattling and banging to whistling and squealing, each indicating a different potential issue. Addressing these noises promptly can prevent further damage and ensure your furnace operates efficiently.

  • Identify the Type of Noise: Furnaces can make various noises, each indicating a different issue. Common sounds include banging, squealing, and rattling. Understanding the type of noise can help pinpoint the problem.
  • Loose Components: Banging or rattling noises often stem from loose components within the furnace. Tighten any loose screws or panels and check the blower motor and fan for secure fitting.
  • Belt Issues: A high-pitched squealing sound usually indicates a worn or misaligned blower belt. Inspect the belt for any signs of wear and tear and adjust or replace it as needed.

3. Frequent Cycling

Frequent cycling of your furnace can indicate underlying issues that need attention. This section will explore the common causes and potential solutions to prevent your furnace from cycling too often, ensuring efficient and reliable operation.

  • Check the Filter: A clogged air filter can restrict airflow, causing the furnace to overheat and cycle on and off frequently. Replace the air filter every 1-3 months, depending on usage.
  • Thermostat Location: If your thermostat is located near a heat source, it can cause the furnace to cycle frequently. Relocate the thermostat to a more central location in your home.
  • Inspect the Blower Motor: A malfunctioning blower motor can also lead to frequent cycling. Check the motor for any signs of damage or wear and have it repaired or replaced if necessary.

4. Pilot Light Problems

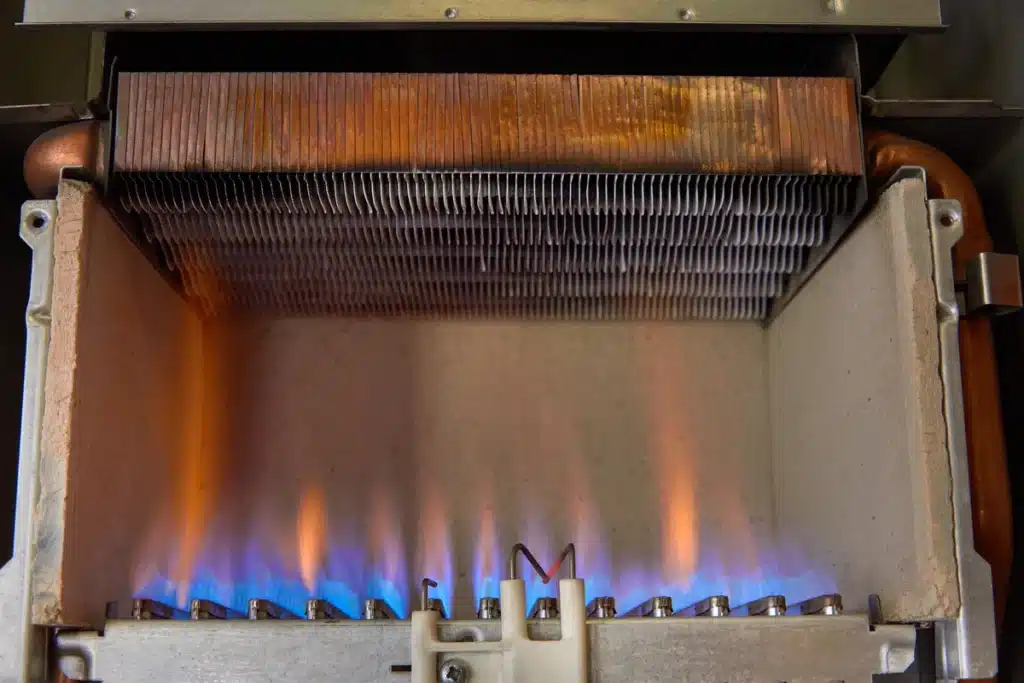
furnace problems-heat exchange system

Pilot light problems are common issues in furnaces that can affect their performance and efficiency. A malfunctioning pilot light may result in the furnace failing to ignite or producing insufficient heat. Understanding the causes and solutions for pilot light issues can help maintain a well-functioning heating system.

  • Pilot Light Color: A healthy pilot light should be blue. If it’s yellow or flickering, it could indicate a problem with the gas supply or a dirty pilot tube. Clean the pilot tube and ensure it’s free of debris.
  • Thermocouple Issues: The thermocouple is a safety device that shuts off the gas supply if the pilot light goes out. If the pilot light won’t stay lit, the thermocouple might be faulty. Have it inspected and replaced by a professional if needed.
  • Gas Supply: Ensure that the gas valve is fully open. If you suspect a gas supply issue, contact your gas company immediately.

5. Blower Issues

Blower issues are a common problem with furnaces that can impact their efficiency and performance. These issues can range from strange noises to complete blower failure, often requiring professional diagnosis and repair. Understanding the symptoms and potential causes can help in addressing them promptly.

  • Blower Not Running: If the blower isn’t running, check the thermostat settings and ensure it’s set to “auto” or “on.” Also, inspect the blower motor for any signs of damage or wear.
  • Blower Running Continuously: A blower that runs continuously might indicate a problem with the limit switch. This switch prevents the furnace from overheating by turning off the blower when the furnace reaches a certain temperature. Have it inspected and replaced if necessary.
  • Lubrication: Ensure that the blower motor and other moving parts are properly lubricated to prevent friction and wear. Refer to your furnace’s manual for lubrication instructions.

6. Dirty Filters

Dirty filters in furnaces can significantly reduce efficiency and air quality in your home. Over time, these clogged filters can lead to higher energy costs and even damage the furnace. It’s crucial to regularly check and replace filters to maintain optimal performance.

  • Importance of Clean Filters: Dirty filters can restrict airflow, reduce efficiency, and cause various furnace problems. Replace or clean the filters regularly to maintain optimal performance.
  • Types of Filters: There are several types of filters, including fiberglass, pleated, and electrostatic. Choose a filter that suits your furnace and your home’s air quality needs.
  • Replacement Schedule: Check the filter manufacturer’s recommendations for replacement schedules. Typically, filters should be replaced every 1-3 months.

7. Thermostat Malfunctions

Thermostat malfunctions can significantly impact the performance of your furnace, leading to inconsistent temperatures and inefficient heating. Understanding common issues and knowing how to troubleshoot them can help maintain a comfortable and energy-efficient home. 

  • Calibration: Sometimes, thermostats can lose calibration, leading to inaccurate temperature readings. Refer to your thermostat’s manual for calibration instructions or contact a professional for assistance.
  • Wiring Issues: Inspect the thermostat wiring for any signs of damage or loose connections. Turn off the power before handling any wires.
  • Upgrade: If your thermostat is old or malfunctioning, consider upgrading to a programmable or smart thermostat for better control and efficiency.

8. Gas Leaks

Gas leaks are a serious concern when it comes to furnaces. They can pose significant health and safety risks, including the potential for explosions and exposure to harmful gases. It’s crucial to regularly inspect and maintain your furnace to detect and prevent any leaks.

  • Smell of Gas: If you smell gas, it’s crucial to act immediately. Evacuate your home and contact your gas company or emergency services. Do not operate any electrical switches or appliances.
  • Inspection: Regularly inspect your furnace and gas lines for any signs of leaks or damage. Have a professional perform a thorough inspection at least once a year.
  • Safety Measures: Install carbon monoxide detectors in your home to alert you to any dangerous gas leaks. Test the detectors regularly and replace the batteries as needed.

9. Ignition Problems

Ignition problems in furnaces can be frustrating and often indicate underlying issues that need attention. Whether it’s a faulty ignition switch or a malfunctioning pilot light, these problems can disrupt the heating process and require timely intervention to ensure your furnace operates efficiently. In this section, we’ll explore common ignition problems and how to address them effectively.

  • Electronic Ignition: Modern furnaces use electronic ignitions instead of pilot lights. If the furnace fails to ignite, check the ignition system for any issues. Refer to the manufacturer’s manual for troubleshooting steps.
  • Flame Sensor: The flame sensor ensures that the furnace burner is functioning correctly. If it’s dirty or faulty, the furnace may not ignite. Clean the flame sensor with a fine abrasive pad or have it replaced by a professional.
  • Control Board: The control board manages the furnace’s operations. If it’s malfunctioning, the furnace may not ignite. Have a professional diagnose and repair any control board issues.

10. Limit Switch Issues

Limit switches play a crucial role in ensuring the safe operation of a furnace. When these switches malfunction, it can lead to overheating or the furnace failing to start. Understanding and addressing limit switch issues is essential for maintaining efficient and safe furnace performance.

  • Function of the Limit Switch: The limit switch prevents the furnace from overheating by monitoring the temperature and shutting off the burner if it gets too hot. A faulty limit switch can cause the furnace to overheat or fail to turn on.
  • Testing the Limit Switch: Turn off the power to the furnace and remove the limit switch for testing. Use a multimeter to check for continuity. Replace the switch if it’s faulty.
  • Professional Assistance: Limit switch issues should be addressed by a professional to ensure safety and proper functioning of the furnace.

💡 Furnace Maintenance Tips

furnace problems-woman near her furnace calling a repair tech

Proper furnace maintenance is crucial for ensuring efficient operation and extending the lifespan of your heating system. In this section, we’ll provide you with essential tips to keep your furnace in top condition. These simple practices can help you avoid costly repairs and maintain a comfortable home environment.

Regular Inspections

Schedule annual furnace inspections with a licensed HVAC technician to ensure your system is functioning correctly and efficiently.

  • An annual check-up can help identify potential issues before they become major problems.
  • Technicians can clean and adjust components to improve performance.
  • Regular inspections can extend the lifespan of your furnace.

Cleaning

Keep your furnace and its components clean to prevent dust and debris buildup. Clean the blower, motor, and other parts as needed.

  • Change or clean the air filter every 1-3 months.
  • Clean the blower assembly, belts, and pulleys to ensure smooth operation.
  • Remove any dust and debris from the motor to prevent overheating.

Ductwork

Inspect your ductwork for any leaks or damage. Seal any gaps or cracks to ensure efficient airflow and heating.

  • Use mastic sealant or metal tape to seal leaks in ducts.
  • Insulate ducts in unheated areas to prevent heat loss.
  • Regularly check for and remove obstructions that could impede airflow.

🙌 Ensure Your Home’s Comfort: Furnace Maintenance and Repair with Thelen Plumbing, Heating, and Air

Understanding and addressing common furnace problems can save you time, money, and discomfort. However, some issues require professional attention to ensure safety and proper functioning.

At Thelen Plumbing, Heating, and Air, we specialize in providing top-notch HVAC services to keep your home comfortable year-round. Our team of experienced technicians is ready to assist you with all your furnace needs, from routine maintenance to complex repairs.

Don’t wait until it’s too late—schedule your furnace inspection with Thelen Plumbing, Heating, and Air today and experience the peace of mind that comes with knowing your home is in good hands. Contact us now to book an appointment and keep your home warm and cozy all winter long.

how often to change furnace filter-close up of very dirty furnace filter how often to change furnace filter-close up of very dirty furnace filter

How Often Should You Change A Furnace Filter?

Keeping your home comfortable and energy-efficient is essential, and one of the easiest ways to achieve this is by regularly changing your furnace filter. Homeowners often overlook this simple task, but it plays a crucial role in maintaining your HVAC system’s performance and indoor air quality. In this blog post, we’ll explore how often to change furnace filter materials, factors that influence the frequency, and practical tips to ensure your furnace runs smoothly all year round, including:

  • The importance of changing your furnace filter
  • Factors affecting filter-changing frequency
  • Signs that your filter needs changing
  • Types of furnace filters
  • Benefits of regular filter changes
  • How often to change your furnace filter
  • 5 steps to change your furnace filter
  • Common mistakes to avoid
  • Tips for extending filter life
  • How to choose the right filter
  • The role of professional maintenance

❗️ The Importance of Changing Your Furnace Filter

how often to change furnace filter-hands holding a very dirty furnace filter

Changing your furnace filter is crucial for maintaining optimal airflow and energy efficiency in your home. Regularly replacing the filter not only improves indoor air quality but also extends the lifespan of your furnace. Let’s explore why this simple maintenance task is so important.

  • Maintain good indoor air quality: Over time, dust, pollen, and other particles accumulate in the filter, reducing its effectiveness. A dirty filter can cause these contaminants to circulate throughout your home, affecting your family’s health.
  • Enhance energy efficiency: A clogged filter forces your furnace to work harder to push air through, increasing energy consumption and utility bills. Regularly changing the filter ensures your system operates efficiently, saving you money in the long run.
  • Prolong HVAC system life: A clean filter prevents dust and debris from entering the system, reducing wear and tear on components and minimizing the risk of costly repairs.

⏳ Factors Affecting Filter-Changing Frequency

Several factors influence how often you should change your furnace filter. One of the most significant is the type of filter you use. Different filters have varying lifespans, so it’s essential to follow the manufacturer’s recommendations.

Household size and occupancy also play a role. Larger households or homes with multiple occupants generate more dust and debris, necessitating more frequent filter changes. Additionally, if you have pets, their fur and dander can quickly clog the filter.

Finally, consider your home’s air quality. If you live in an area with high pollution levels or have indoor air quality concerns, you may need to change your filter more frequently to maintain a healthy environment.

⚠️ Signs That Your Filter Needs Changing

Knowing when to change your furnace filter can be tricky, but several signs indicate it’s time for a replacement:

  • Noticeable drop in HVAC system performance: If your home isn’t heating or cooling as efficiently as before, a clogged filter might be to blame.
  • Increased dust accumulation around your home: More dust on surfaces or in the air could mean your filter isn’t effectively trapping particles.
  • Unusual noises from your furnace: Rattling or humming sounds can indicate a dirty filter restricting airflow.
  • Higher energy bills: A spike in utility costs without a clear reason might signal it’s time to check and change your furnace filter.

👇 Types of Furnace Filters

There are various types of furnace filters, each with its benefits and drawbacks. Understanding these differences can help you choose the best option for your home.

  • Fiberglass Filters: These are the most basic and affordable filters. They provide minimal filtration and need to be replaced frequently, typically every 30 days.
  • Pleated Filters: Pleated filters offer better filtration than fiberglass filters and can last up to 90 days. They capture smaller particles and are a popular choice for many homeowners.
  • Electrostatic Filters: Electrostatic filters use an electric charge to attract and trap particles. They are highly efficient and can last up to six months, making them a cost-effective option in the long run.
  • HEPA Filters: High-Efficiency Particulate Air (HEPA) filters provide the best air filtration, capturing up to 99.97% of particles. However, they may not be compatible with all HVAC systems and can be more expensive.
  • Washable Filters: These filters can be cleaned and reused, reducing waste and saving money over time. However, they require regular maintenance to ensure optimal performance.

✅ Benefits of Regular Filter Changes

how often to change furnace filter-gloved hand cleaning vent of dust

Regularly changing your furnace filter offers numerous benefits:

  • Improved Indoor Air Quality: Clean filters trap dust, pollen, and other allergens, creating a healthier environment for you and your family.
  • Energy Efficiency: A clean filter allows your HVAC system to operate at peak performance, reducing energy consumption and lowering utility bills.
  • Extended HVAC System Life: By preventing dust and debris from entering the system, you reduce wear and tear on components, minimizing the risk of breakdowns and costly repairs.

📆 How Often to Change Your Furnace Filter

The frequency of changing your furnace filter depends on several factors, including the type of filter and your home’s specific needs. However, general guidelines can help you determine the optimal schedule.

Monthly Checks

Inspect your filter every month, especially during peak usage seasons like winter and summer. Regular monthly inspections help ensure that the filter is functioning correctly and efficiently. This habit allows you to catch any potential issues early on, such as clogs or damage, which can otherwise lead to poor air quality and higher energy costs. Maintaining this routine helps in keeping your HVAC system running smoothly and ensures that the indoor air remains clean and healthy for you and your family.

Standard Replacement Intervals

  • Fiberglass Filters: These filters should be replaced every 30 days. They are the most basic type of filter and are inexpensive, but they need frequent changing to maintain effectiveness.
  • Pleated Filters: These filters typically last up to 90 days. They are more efficient than fiberglass filters and can capture smaller particles, making them a better choice for improved air quality.
  • Electrostatic Filters: These can last up to six months. They use self-charging electrostatic cotton or paper fibers to attract particles, offering a good balance between cost and efficiency.
  • HEPA Filters: Depending on usage, HEPA filters may need replacement every six to twelve months. They are highly efficient and can capture 99.97% of airborne particles, making them ideal for people with allergies or respiratory issues.

Adjust Based on Conditions

If you have pets, allergies, or live in a high-pollution area, consider changing your filter more frequently. Pets shed hair and dander, which can quickly clog filters. Allergens can accumulate and reduce air quality, exacerbating symptoms for those with allergies. High-pollution areas can cause filters to become dirty faster. Regular inspections will help you identify the best replacement schedule tailored to your home’s specific needs, ensuring optimal air quality and system performance.

🛠️ 5 Steps to Change Your Furnace Filter

Changing your furnace filter is a simple task that can significantly impact your HVAC system’s performance. Follow these steps to ensure a smooth replacement process.

1. Turn Off the Furnace

Before you begin any maintenance on your furnace, it’s essential to turn it off. This preventative step ensures that dust and debris do not circulate through your home while you’re working. Additionally, it prevents any accidental injury from the furnace starting up unexpectedly. Locate the power switch or circuit breaker for your furnace and make sure it is completely turned off.

2. Locate the Filter Compartment

Finding the filter compartment is the next step. Typically, the furnace filter is located near the air return duct or the blower compartment. These are often found near the base of the furnace. To be sure, refer to your furnace’s manual, which will provide specific guidance on the exact location of the filter compartment in your model. Knowing the exact location will save you time and effort.

3. Remove the Old Filter

Carefully slide out the old filter from its compartment. Pay close attention to the size of the filter and how it is oriented within the compartment. Filters usually come with specific dimensions and directional indicators, which are crucial for choosing the correct replacement and installing it properly. Taking a picture or making a note of these details can be helpful for future reference.

4. Install the New Filter

With the old filter removed, take your new filter and insert it into the compartment. Ensure that the new filter fits snugly into place and that it follows the correct orientation. Most filters have arrows marked on their frames to indicate the proper direction of airflow. Align these arrows with the airflow direction of your furnace to optimize efficiency and performance.

5. Turn On the Furnace

Once the new filter is securely in place, it’s time to turn your furnace back on. Return to the power switch or circuit breaker and activate the furnace. With the new filter installed, you should notice an improvement in air quality and energy efficiency. Regularly changing your furnace filter is a simple yet effective way to maintain the health of your HVAC system and ensure a comfortable living environment.

🚫 Common Mistakes to Avoid

While changing your furnace filter is straightforward, several common mistakes can hinder your efforts. Avoid these pitfalls to ensure optimal performance.

  • Neglecting Regular Inspections: Skipping monthly filter checks can lead to poor air quality and increased energy consumption. Make it a habit to inspect your filter regularly.
  • Using the Wrong Filter Size: Using an incorrect filter size can reduce efficiency and allow dust and debris to bypass the filter. Always check your furnace’s specifications and purchase the right size.
  • Ignoring Filter Orientation: Installing the filter in the wrong direction can restrict airflow and strain your HVAC system. Follow the arrows on the filter to ensure proper installation.

💡 Tips for Extending Filter Life

how often to change furnace filter-gloved hands replace furnace filter

Maximizing your filter’s lifespan can save you money and reduce waste. Here are some tips to help you get the most out of your furnace filter.

  • Keep Your Home Clean: Regularly dusting and vacuuming can reduce the amount of debris in your home, allowing your filter to last longer.
  • Maintain Proper Humidity Levels: High humidity can cause dust and mold growth, clogging your filter faster. Use a dehumidifier to maintain optimal humidity levels and prolong filter life.
  • Schedule Regular HVAC Maintenance: Professional HVAC maintenance can identify and address issues before they become significant problems. Regular tune-ups can help your system run efficiently and extend your filter’s life.

🤔 How to Choose the Right Filter

Selecting the right furnace filter is crucial for maintaining good air quality and system performance. Consider these factors when choosing a filter.

  • Filtration Efficiency: Higher MERV (Minimum Efficiency Reporting Value) ratings indicate better filtration. Choose a filter with a MERV rating that balances air quality and airflow for your specific needs.
  • Filter Material: Different materials offer varying levels of filtration and durability. Consider your home’s air quality needs and budget when selecting a filter material.
  • Compatibility: Ensure the filter you choose is compatible with your HVAC system. Consult your furnace’s manual or a professional technician if you’re unsure.

👨‍🔧 The Role of Professional Maintenance

While changing your furnace filter is essential, professional maintenance plays a crucial role in keeping your HVAC system running smoothly. Regular tune-ups can identify potential issues, improve efficiency, and extend the life of your system.

Our team at Thelen Plumbing, Heating, and Air is dedicated to ensuring your home comfort needs are met with top-notch service and expertise. From routine maintenance to emergency repairs, you can trust us to keep your HVAC system in peak condition.

🙌 Optimize Your Home’s Comfort and Efficiency with Thelen Plumbing, Heating, and Air

Regularly changing your furnace filter is a simple yet impactful task that can significantly improve your home’s comfort, energy efficiency, and air quality. By understanding the factors that influence filter-changing frequency and following best practices, you can ensure your HVAC system runs smoothly all year round.

At Thelen Plumbing, Heating, and Air, we’re committed to helping homeowners like you maintain a comfortable and efficient home. If you have any questions or need professional assistance, don’t hesitate to reach out to our expert team. We’re here to help you every step of the way.

Ready to optimize your home’s comfort and efficiency? Contact Thelen Plumbing, Heating, and Air today and discover the difference our professional service can make.

emergency furnace repair-woman looking at furnace emergency furnace repair-woman looking at furnace

Emergency Furnace Repair Guide (2024 Update)

When the temperatures drop, a functioning furnace isn’t just a convenience—it’s essential. Whether you’re a homeowner, property manager, or HVAC professional, understanding how to tackle emergency furnace repairs can save time, money, and stress. This guide will walk you through the critical steps of emergency furnace repair, ensuring your home stays warm and safe, including:

  • Recognizing Furnace Problems Early
  • Safety Precautions for Emergency Repairs
  • Basic Furnace Troubleshooting Steps
  • Common Furnace Problems and Solutions
  • Tools and Materials Needed for Repairs
  • DIY vs. Professional Repairs
  • 5 Steps for Making Emergency Furnace Repairs
  • Preventing Future Furnace Issues
  • When to Call a Professional
  • Maintenance Tips for Longevity
  • Why Choose Thelen Plumbing, Heating, and Air for Your Furnace Needs

🔥 Recognizing Furnace Problems Early

emergency furnace repair-technician using hand tools to repair furnace

Identifying furnace problems early can save you from costly repairs and uncomfortable downtime. By understanding common warning signs, you can address issues before they escalate. Let’s talk about how to spot these problems early and keep your heating system running smoothly.

  • Unusual Noises: Furnaces should run quietly. If you hear banging, rattling, or screeching sounds, it’s a sign something is wrong. These noises could indicate a loose component or a motor issue. Addressing these problems early can prevent more serious damage.
  • Inconsistent Temperatures: If some rooms are warmer than others, your furnace may not be distributing heat evenly. This can be due to issues with your ductwork or thermostat. Identifying and fixing these inconsistencies can improve your home’s comfort.
  • Increased Energy Bills: A sudden spike in your energy bills often signals that your furnace is working harder than it should. This increased workload can be due to a variety of issues, including dirty filters, worn-out parts, or inefficient operation. Keeping an eye on your energy costs can help you catch problems early.

🦺 Safety Precautions for Emergency Repairs

When dealing with emergency furnace repairs, safety should always be the top priority. Proper precautions can prevent accidents and ensure the repair process goes smoothly. Here are some essential safety measures to keep in mind during furnace repairs.

  • Turn Off the Power: Before starting any repairs, always turn off the power to your furnace. This will prevent accidental shocks and protect you from potential hazards.
  • Ventilate the Area: If you suspect a gas leak, ventilate the area immediately by opening windows and doors. Do not attempt to fix the leak yourself—call a professional right away.
  • Wear Protective Gear: Wear gloves, goggles, and a dust mask to protect yourself from debris and harmful particles. Safety first ensures that you tackle the repair without compromising your health.

❗️ Basic Furnace Troubleshooting Steps

When your furnace isn’t working properly, it can be frustrating and inconvenient. Before calling a professional, there are some basic troubleshooting steps you can follow to identify and possibly resolve the issue. This section will guide you through these initial checks.

  • Check the Thermostat: Ensure your thermostat is set to “heat” and that the temperature setting is higher than the current room temperature. Sometimes, the problem is as simple as incorrect thermostat settings.
  • Inspect the Air Filter: A clogged air filter can restrict airflow, causing your furnace to overheat and shut down. Check and replace your air filter regularly to maintain optimal furnace performance.
  • Reset the Circuit Breaker: If your furnace isn’t turning on, check the circuit breaker. A tripped breaker can interrupt power to your furnace. Simply reset it and see if that resolves the issue.

👇 Common Furnace Problems and Solutions

Dealing with furnace issues can be daunting, but understanding common problems and their solutions can make the process much easier. This section will guide you through typical furnace troubles and offer practical solutions to keep your heating system running smoothly. Whether it’s a malfunctioning thermostat or ignition problems, we’ve got you covered.

  • Pilot Light Issues: If your furnace’s pilot light is out, it won’t be able to ignite the burners. Relight the pilot according to your furnace’s manual instructions. If it doesn’t stay lit, you may need a new thermocouple.
  • Blower Motor Failure: A malfunctioning blower motor can prevent warm air from circulating throughout your home. Listen for any unusual noises and check if the motor is running. If not, it might need lubrication or replacement.
  • Ignition Problems: Modern furnaces use electronic ignitions. If the ignition system fails, the furnace won’t light. This can often be fixed by replacing the ignition sensor or control module.

🧰 Tools and Materials Needed for Repairs

emergency furnace repair-close up of technician using utility knife while repairing furnace

Here are the essential tools and materials required for emergency furnace repairs. Having the right equipment on hand can make all the difference in quickly resolving issues and restoring your furnace’s functionality. Let’s dive into the must-have items for any urgent repair situation.

  • Basic Toolkit: Ensure you have a basic toolkit with screwdrivers, pliers, a wrench set, and a multimeter for electrical testing. These tools will help you perform most minor repairs.
  • Replacement Parts: Keep common replacement parts like air filters, belts, and pilot light assemblies on hand. Being prepared can reduce downtime during an emergency.
  • Safety Equipment: Safety goggles, gloves, and a dust mask are essential for protecting yourself while performing repairs. Always prioritize safety to prevent accidents.

👨‍🔧 DIY vs. Professional Repairs

When your furnace breaks down, deciding between DIY repairs and hiring a professional can be challenging. DIY repairs might save you money, but they come with risks and complexities. On the other hand, professional repairs ensure expertise and safety, often providing a more reliable solution.

  • Simple Fixes You Can Do Yourself: Tasks like replacing air filters, relighting pilot lights, and resetting circuit breakers can typically be done by homeowners. These simple fixes require minimal tools and expertise.
  • When to Call a Professional: For complex issues involving gas lines, electrical components, or significant mechanical failures, it’s best to call a professional. Attempting to fix these problems without proper training can be dangerous.
  • Cost Considerations: While DIY repairs can save money, they may end up costing more if not done correctly. Evaluate the risks and benefits before deciding to tackle a repair on your own.

🛠️ 5 Steps for Making Emergency Furnace Repairs

When your furnace breaks down unexpectedly, quick action is essential to restore warmth and comfort in your home. This section will guide you through the necessary steps for performing emergency furnace repairs, ensuring you can address common issues effectively and safely.

1. Identify the Problem

Determine what’s wrong with your furnace. Start by listening for unusual noises such as banging, rattling, or hissing, which can indicate different issues. Check the thermostat to ensure it’s set correctly and functioning. Inspect the unit for obvious signs of damage, such as frayed wires, leaks, or broken components. Take note of any error codes displayed on the unit’s control panel, as these can provide clues about the problem.

2. Gather Your Tools

Make sure you have all necessary tools and replacement parts on hand. Common tools include a screwdriver set, wrench, multimeter, and flashlight. You may also need replacement parts such as filters, fuses, or belts. Having everything you need will help you work efficiently and avoid unnecessary trips to the store. Before starting, review the furnace manual to ensure you have the correct parts and understand the repair process.

3. Follow Safety Protocols

Turn off the power to the furnace to prevent electrical shocks. This can usually be done by switching off the breaker or unplugging the unit. Ventilate the area by opening windows or using fans to disperse any gas or fumes. Wear protective gear such as gloves, safety goggles, and a dust mask to protect yourself from injuries and inhaling harmful particles. Ensure you have a fire extinguisher nearby in case of an emergency. Safety should always be your top priority.

4. Make the Repair

Follow the appropriate steps to fix the identified issue. If the pilot light is out, relight it according to the furnace manual, ensuring you follow the manufacturer’s instructions precisely. For issues like clogged filters, replace them with new ones to ensure proper airflow. If you encounter more complex problems like a faulty blower motor or a damaged heat exchanger, it may be best to call a professional technician. Always double-check your work to ensure everything is reassembled correctly.

5. Test the Furnace

Once the repair is complete, turn the power back on and test the furnace to ensure it’s working correctly. Adjust the thermostat and listen for the furnace to kick on. Monitor it closely for any signs of recurring issues, such as strange noises or inconsistent heating. Check for proper airflow and consistent temperature throughout your home. If the problem persists, it may indicate a more serious issue that requires professional assistance.

✋ Preventing Future Furnace Issues

To ensure your furnace runs smoothly and efficiently, it’s crucial to take proactive steps in preventing potential issues. This section will provide valuable tips and maintenance strategies to keep your furnace in top condition and avoid costly repairs.

  • Regular Maintenance: Schedule annual maintenance checks with a professional HVAC technician. Regular inspections can identify potential problems before they become emergencies.
  • Clean and Replace Filters: Keep your air filters clean and replace them every 1-3 months. This simple task can significantly improve your furnace’s efficiency and longevity.
  • Monitor Performance: Keep an eye on your furnace’s performance throughout the year. If you notice any changes in efficiency, noise levels, or heating consistency, address them promptly.

👨‍🔧 When to Call a Professional

Knowing when to call a professional for emergency home furnace repairs is crucial to maintaining your home’s safety and comfort. If you experience unusual noises, persistent heating issues, or a complete system shutdown, it’s time to seek expert help immediately.

  • Persistent Problems: If you’ve tried troubleshooting and the problem persists, it’s time to call a professional. Ongoing issues can indicate a deeper problem that requires expert attention.
  • Safety Concerns: For any issues involving gas leaks, electrical problems, or significant mechanical failures, always call a professional. These situations can be dangerous and require specialized knowledge.
  • Warranty Considerations: If your furnace is still under warranty, attempting DIY repairs can void it. Check your warranty terms and call a professional to handle repairs covered by the warranty.

💡 Maintenance Tips for Longevity

emergency furnace repair-replacing furnace filter

Proper maintenance is key to extending the lifespan of your home furnace. Regularly inspecting and cleaning the components can prevent costly repairs and ensure efficient operation. Here are some essential tips to keep your furnace in top shape.

  • Annual Inspections: Have your furnace inspected yearly by a certified HVAC technician. They can clean components, check for wear and tear, and ensure everything is functioning properly.
  • Seasonal Preparations: Before winter arrives, perform a thorough check of your furnace. Make sure it’s in good working condition to handle the upcoming cold months.
  • Upgrade When Necessary: Older furnaces are less efficient and more prone to breakdowns. If your furnace is over 15 years old, consider upgrading to a newer, more efficient model.

💪 Why Choose Thelen Plumbing, Heating, and Air for Your Furnace Needs

At Thelen Plumbing, Heating, and Air, we pride ourselves on delivering top-quality service and unmatched expertise. Our team of certified HVAC professionals is dedicated to keeping your home comfortable and safe. We offer:

  • 24/7 Emergency Services to ensure you’re never left in the cold.
  • Expert Technicians with years of experience in furnace repair and maintenance.
  • Customer Satisfaction guaranteed with every service call.

Don’t wait until it’s too late—experience the peace of mind that comes with knowing your home’s heating needs are in trusted hands. [Get in touch with us today] to schedule your service or learn more about our offerings.

🙌 Ensuring a Warm Home: Your Guide to Emergency Furnace Repairs with Thelen Plumbing, Heating, and Air

Emergency furnace repairs don’t have to be daunting. By recognizing problems early, following safety protocols, and knowing when to call a professional, you can keep your home warm and comfortable all winter long. Trust Thelen Plumbing, Heating, and Air for all your furnace repair and maintenance needs, and enjoy the security of a well-heated home.Take the next step—contact our team at Thelen Plumbing, Heating, and Air and ensure your home stays cozy, no matter the weather.

heat not working in house-technician using hand tools on furnace system heat not working in house-technician using hand tools on furnace system

Heat Not Working In House? 10 Common Causes

Having a comfortable, warm home during the colder months is essential. But what happens when your heating system fails you? If you’re finding yourself bundled up in blankets and your heat not working in house, it’s time to get to the bottom of it. A malfunctioning heating system can quickly turn from an inconvenience into a serious problem. This blog post will guide homeowners and local residents through the common causes of heating issues and provide practical solutions to restore warmth to your home, including:

  • The importance of checking your thermostat
  • Ensuring your furnace has power
  • How to identify and replace a dirty air filter
  • Recognizing and resolving pilot light issues
  • Inspecting and fixing ductwork
  • Understanding the impact of insufficient insulation
  • Addressing blocked or closed vents
  • The role of a malfunctioning blower motor
  • Identifying issues with the heat exchanger
  • The significance of regular maintenance

💡 10 Common Causes (and Solutions) For The Heat Not Working in Your House

In this section, we will explore the ten common causes of heating issues in residential settings and provide effective solutions for each problem. Understanding these factors is crucial for homeowners seeking to maintain a comfortable living environment, especially during colder months. Our goal is to equip you with reliable insights that empower you to address and resolve heating concerns swiftly and efficiently.

1. Check Your Thermostat First 👀

heat not working in house-technician repairing thermostat

Before diving into more complex solutions, it’s always a good idea to start by checking your thermostat. This simple step can often resolve many common issues with your heating or cooling system. Let’s take a closer look at why this should be your first move.

  • Is It Set Correctly?: The first step is to ensure that your thermostat is set to the correct temperature. Sometimes, the simplest solutions can be overlooked. Make sure the thermostat is set to “heat” mode and the temperature is set higher than the current room temperature.
  • Is the Thermostat Functioning?: If the settings are correct, but there’s still no hot air, the thermostat itself might be faulty. Check its display to ensure it’s functioning properly. Replace batteries if necessary or consult the user manual for troubleshooting tips.
  • Consider Smart Thermostats: Upgrading to a smart thermostat can provide better control over your home’s temperature. These devices allow you to monitor and adjust settings remotely, ensuring your home is always at a comfortable temperature.

2. Ensure Your Furnace Has Power 🔌

Before troubleshooting any potential issues with your furnace, it’s crucial to first ensure it has power. A lack of power could be the primary reason your furnace isn’t operating. Start by checking the circuit breaker and ensuring all switches are in the appropriate positions.

  • Check the Power Switch: Your furnace needs power to operate. Locate the power switch, usually found near the furnace, and ensure it’s turned on. Sometimes, this switch can be accidentally turned off.
  • Inspect the Circuit Breaker: A tripped circuit breaker is another common issue. Head to your home’s electrical panel and check if the breaker for the furnace has tripped. If it has, reset it by flipping it off and then on again.
  • Look for Blown Fuses: If resetting the breaker doesn’t solve the issue, a blown fuse might be the culprit. Replace any blown fuses and see if the furnace powers up.

3. Identify and Replace a Dirty Air Filter 🗑️

heat not working in house-dirty filters

Keeping your air filter clean is essential for optimal performance and air quality. In this section, we’ll guide you through the process of identifying a dirty air filter and provide steps for replacing it efficiently. Regular maintenance can extend the life of your system and ensure it runs smoothly.

  • Importance of Clean Filters: Air filters play a crucial role in maintaining efficient airflow. A dirty air filter can restrict airflow and cause your heating system to work harder, leading to potential breakdowns.
  • Locating the Filter: Find the air filter in your furnace. It’s usually located in the return air duct or blower compartment. Check the condition of the filter and replace it if it’s covered in dust and debris.
  • Regular Replacement: Make it a habit to change the air filter every 1-3 months, especially during peak usage seasons. This simple maintenance task can prolong the life of your heating system and improve indoor air quality.

4. Pilot Light Issues 🔥

Pilot light problems are a common issue with home heating systems that can affect their efficiency and reliability. Understanding the symptoms and causes of these issues can help homeowners troubleshoot and resolve them more effectively.

  • Is the Pilot Light On?: If you have a gas furnace, check if the pilot light is on. A pilot light that’s out will prevent your furnace from producing heat.
  • Relighting the Pilot Light: Follow the manufacturer’s instructions to relight the pilot light. If you’re uncomfortable doing this, it’s best to call a professional to avoid any hazards.
  • Common Pilot Light Problems: Issues like a faulty thermocouple or gas supply problems can cause the pilot light to go out. These issues often require professional repair to ensure safe and effective operation.

5. Ductwork Inspection 🔎

Proper ductwork inspection is crucial for maintaining an efficient and healthy home heating system. Regular checks can identify leaks, blockages, and other issues that may reduce energy efficiency or compromise air quality. Ensuring your ductwork is in good condition helps in delivering optimal heating performance and comfort.

  • Visible Damage: Inspect the ductwork visible in your home for any signs of damage, such as holes, gaps, or disconnected sections. Damaged ductwork can lead to significant heat loss.
  • Sealing Leaks: Use duct tape or mastic sealant to seal any leaks you find. Properly sealed ducts ensure that warm air reaches all areas of your home efficiently.
  • Professional Inspection: For hard-to-reach areas or a thorough evaluation, consider hiring a professional to inspect and repair your ductwork. This can improve heating efficiency and reduce energy costs.

6. Insufficient Insulation 👇

Insufficient insulation in home heating systems can lead to significant energy loss and increased utility bills. Proper insulation is crucial for maintaining a comfortable indoor temperature and ensuring energy efficiency.

  • Checking Insulation Levels: Poor insulation can cause your home to lose heat quickly. Check the insulation in your attic, walls, and floors to ensure they meet recommended levels.
  • Adding More Insulation: If the insulation is insufficient, consider adding more. This can significantly improve your home’s heat retention, keeping it warmer during the winter months.
  • Benefits of Proper Insulation: Investing in good insulation not only keeps your home warm but also reduces energy bills and enhances overall comfort.

7. Blocked or Closed Vents 👉

Blocked or closed vents in home heating systems can lead to inefficient heating and increased energy costs. These obstructions prevent proper airflow, causing your system to work harder than necessary. Ensuring vents are open and clear is crucial for optimal performance and comfort.

  • Ensure Vents Are Open: Check all the vents in your home to ensure they’re open and unobstructed. Blocked vents can restrict airflow, making it difficult for heat to circulate.
  • Clearing Obstructions: Remove any furniture, rugs, or other items blocking the vents. Clear pathways ensure that warm air can flow freely throughout your home.
  • Balancing Airflow: Adjust the vents to balance airflow across different rooms. This helps maintain an even temperature and improves overall heating efficiency.

8. Malfunctioning Blower Motor 🛠️

A malfunctioning blower motor in your home heating system can lead to inefficient heating and increased energy costs. Recognizing the signs of a faulty blower motor early can help prevent more severe issues down the line.

  • Signs of a Faulty Blower: A blower motor that’s not working properly can prevent your furnace from circulating warm air. Listen for unusual noises or check if there’s no airflow coming from the vents.
  • Troubleshooting the Blower: Turn off the power to the furnace and inspect the blower motor. Look for any visible signs of damage or wear. Sometimes, a simple cleaning can resolve minor issues.
  • When to Call a Professional: If troubleshooting doesn’t fix the problem, it’s best to call a professional. A malfunctioning blower motor often requires expert repair or replacement.

9. Issues with the Heat Exchanger 🚫

heat not working in house-gas heat from furnace

The following section addresses the current issues with the heat exchanger. We will examine the root causes, impacts on system performance, and potential solutions. Understanding these challenges is crucial for maintaining optimal operation.

  • What Is a Heat Exchanger?: The heat exchanger is a critical component that transfers heat from the combustion chamber to the air that circulates through your home. A cracked or damaged heat exchanger can lead to serious issues.
  • Recognizing Heat Exchanger Problems: Signs of a faulty heat exchanger include unusual smells, soot buildup, or visible cracks. If you suspect an issue, turn off the furnace immediately and seek professional help.
  • Importance of Regular Maintenance: Regular maintenance checks can help identify heat exchanger problems early. Schedule annual inspections to ensure your heating system operates safely and efficiently.

10. Regular Maintenance is Key 💡

Regular maintenance of your heating system is crucial for ensuring efficient performance and longevity. By scheduling routine check-ups and addressing minor issues promptly, you can prevent costly repairs and improve overall energy efficiency. Let’s delve into the importance and benefits of maintaining your heating system regularly.

  • Preventative Maintenance: Regular maintenance is crucial for keeping your heating system in top condition. Schedule annual check-ups with a professional to catch potential issues before they become major problems.
  • DIY Maintenance: Simple tasks like changing air filters, checking thermostat settings, and ensuring vents are clear can be done by homeowners. These small steps can make a big difference in your system’s performance.
  • Benefits of Professional Maintenance: Professional maintenance services include thorough inspections, cleaning, and tuning up your system. This ensures optimal performance, extends the lifespan of your equipment, and improves energy efficiency.

🙌 Ensuring Your Home Stays Warm with Thelen Plumbing, Heating, and Air

When your heat is not working in house, there are several potential causes to explore. From checking your thermostat and ensuring your furnace has power to inspecting ductwork and addressing insulation issues, there are many steps you can take to diagnose and resolve the problem.

For homeowners in need of reliable heating solutions, our team at Thelen Plumbing, Heating, and Air is here to help. With years of experience and a commitment to customer satisfaction, we are the trusted choice for all your home comfort needs. Don’t wait for the cold to take over—contact Thelen Plumbing, Heating, and Air today and ensure your home stays warm and cozy all winter long.

forced air heating-technician performing maintenance of furnace forced air heating-technician performing maintenance of furnace

What Is Forced Air Heating? (Pros & Cons)

With the chilly season upon us, homeowners are often on the hunt for the most effective way to keep their homes warm and comfortable. If you’re exploring heating options, you might have come across “forced air heating.” But what exactly is it, and is it the right choice for your home? In this post, we’ll go through:

  • What forced air heating is
  • Energy efficiency
  • Installation and maintenance
  • Health considerations
  • Cost factors
  • Common issues and how to address them
  • 6 pros and cons of forced air heating

🤔 What Is Forced Air Heating?

forced air heating-forced air thermostat on a wall

Forced air heating is a common method used in many homes and buildings to distribute warm air. It involves heating air in a furnace and then using a system of ducts and vents to circulate it throughout the space.

Types of Forced Air Systems

There are two main types of forced air heating systems:

  • Furnaces: These use a fuel source to generate heat, which is then distributed through ductwork.
  • Heat Pumps: These systems transfer heat from one place to another and can both heat and cool your home, making them a year-round solution.

Components of a Forced Air System

Forced air heating systems rely on a furnace or heat pump, ductwork, vents, and a thermostat. The furnace can be powered by various fuel sources like natural gas, oil, or electricity. Ductwork distributes the heated air throughout your home, while vents allow the warm air to flow into each room. The thermostat controls the temperature.

How Forced Air Heating Works

When the thermostat detects a drop in temperature, it signals the furnace to begin heating. The furnace heats the air, and a fan or blower pushes this warm air through the ductwork. Vents or registers release the warm air into your living spaces. Once the desired temperature is reached, the system shuts off until the thermostat detects another temperature drop.

⚡️ Energy Efficiency of Forced Air Heating

Forced air heating systems are a common choice for maintaining comfortable indoor temperatures, but understanding their energy efficiency is crucial. This section delves into the factors that influence the efficiency of these systems, offering tips on how to optimize performance while minimizing energy consumption.

  • Key Efficiency Metrics: One of the main concerns for homeowners is energy efficiency. Forced air heating systems are rated by their Annual Fuel Utilization Efficiency (AFUE). The higher the AFUE rating, the more efficient the system.
  • Comparing Energy Efficiency: Modern forced air systems can achieve AFUE ratings of up to 98%. This means that 98% of the energy consumed goes directly into heating your home, with only 2% lost during the process. Older systems may have much lower efficiency ratings, often below 70%, making them more costly to operate.
  • Saving on Energy Bills: To maximize energy efficiency, regular maintenance is crucial. This includes changing air filters, cleaning ducts, and ensuring the system runs smoothly. Investing in a programmable thermostat can also help regulate the temperature more efficiently, saving you money on energy bills.

🛠️ Installation and Maintenance

This section covers the essential steps for the installation and maintenance of forced air heating systems. Proper installation ensures efficient operation, while regular maintenance prolongs the system’s lifespan and keeps it running smoothly. Follow these guidelines to optimize performance and avoid potential issues.

Installation Process

Installing a forced air heating system involves setting up the furnace or heat pump, connecting the ductwork, and installing vents and a thermostat. It’s advisable to have a certified professional handle the installation to ensure safety and efficiency.

Regular Maintenance

Regular maintenance is vital for keeping your forced air system running efficiently. This includes:

  • Changing air filters every 1-3 months.
  • Scheduling annual inspections.
  • Cleaning ductwork periodically.

Troubleshooting

Common issues, such as strange noises or uneven heating, can often be resolved with simple troubleshooting. However, persistent problems should be addressed by a professional to prevent more serious damage and ensure the longevity of your system.

😷 Health Considerations

forced air heating-technician inspecting ductwork on forced air system

When evaluating forced air heating systems, it’s important to consider their impact on health. These systems can circulate dust, allergens, and other pollutants, affecting indoor air quality. Understanding these factors and implementing proper maintenance can help mitigate potential health risks.

Air Quality Improvement

Forced air heating can improve indoor air quality when combined with high-quality air filters and humidifiers. These additional components can help remove allergens, dust, and pollutants from the air.

Potential Drawbacks

However, if not properly maintained, forced air systems can circulate dust and other allergens. Regular maintenance and using HEPA filters can mitigate these risks and keep your indoor air clean and healthy.

Best Practices

To maintain optimal indoor air quality:

  • Use high-efficiency filters.
  • Clean ducts regularly.
  • Incorporate air purifiers and humidifiers as needed.

💵 Cost Factors

When evaluating forced air heating, several cost factors come into play. These include the initial installation expenses, ongoing energy consumption, and potential maintenance or repair needs. Understanding these elements can help you make an informed decision about your heating system investment.

  • Initial Investment: The initial cost of a forced air heating system can vary widely depending on the type of system, its efficiency rating, and the size of your home. On average, homeowners can expect to spend between $2,500 and $7,500 for a new system, including installation.
  • Operating Costs: Operating costs are influenced by the efficiency of your system and the cost of your fuel source. Natural gas is often more affordable than electricity or oil, but availability can vary by region.
  • Long-term Savings: Investing in a high-efficiency system can result in significant long-term savings on your energy bills. Additionally, regular maintenance helps prevent costly repairs and extends the life of your system.

❗️ Common Issues and Solutions

In this section, we will explore common issues encountered with forced air heating systems and provide practical solutions to address them. Understanding these challenges and how to resolve them can help maintain optimal performance and extend the lifespan of your heating system. 

  • Uneven Heating: If you notice that some rooms are warmer than others, this can usually be addressed by balancing the system’s ductwork or adjusting the dampers.
  • Strange Noises: Unusual noises can indicate issues such as loose parts, debris in the ducts, or a failing motor. Identifying and resolving these issues early can prevent more extensive damage.
  • Poor Airflow: Poor airflow may be caused by clogged filters, blocked vents, or issues with the blower fan. Regular maintenance can help identify and resolve these problems before they become severe.

⚖️ 6 Pros and Cons of Forced Air Heating

Forced air heating systems are a popular choice for many homeowners, offering both advantages and disadvantages. In this section, we’ll explore the key pros and cons to help you determine if it’s the right heating solution for your home.

1. Efficiency ✅

Modern heating and cooling systems are designed to be highly efficient, significantly reducing energy consumption and subsequently lowering energy bills. This efficiency is achieved through advanced technology, including variable speed motors and improved heat exchangers, which optimize performance and energy use.

2. Versatility ✅

These systems are incredibly versatile and can be seamlessly integrated with air conditioning units to provide year-round comfort. This means that regardless of the season, you can maintain a comfortable indoor environment by efficiently managing both heating in winter and cooling in summer.

3. Air Quality ✅

When properly maintained, modern HVAC systems can significantly improve indoor air quality. This is achieved through the use of advanced filtration systems that remove dust, pollen, and other airborne contaminants, ensuring a cleaner and healthier living environment for occupants.

4. Maintenance 🚫

To function optimally, these systems require regular maintenance, including filter changes, duct cleaning, and occasional professional inspections. Neglecting maintenance can lead to decreased efficiency, higher energy bills, and potential system failures, making it essential to stay on top of upkeep.

5. Initial Cost 🚫

One of the drawbacks of modern HVAC systems is the higher upfront cost compared to some other heating options. The investment includes not only the purchase of the system but also installation fees, which can be substantial. However, the long-term energy savings and improved comfort often justify this initial expenditure.

6. Airflow Issues 🚫

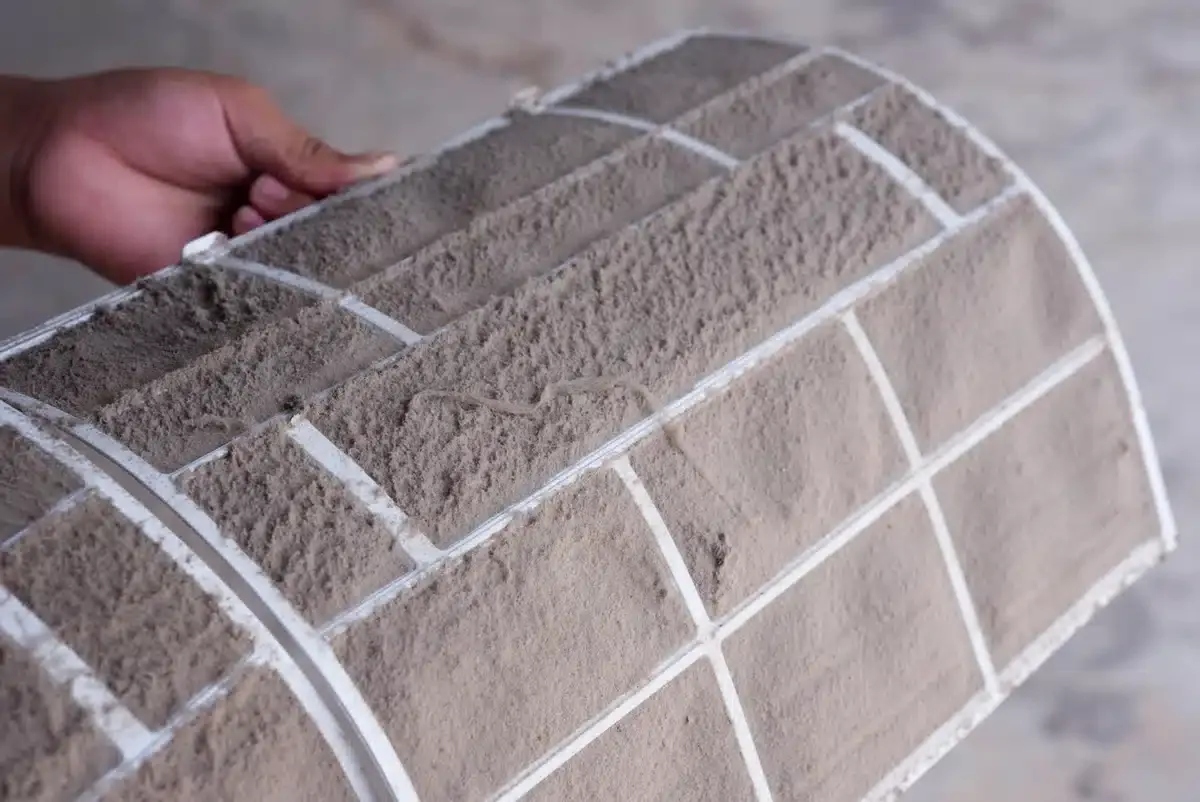
forced air heating-dusty and clogged air ducts

If not properly maintained, HVAC systems can distribute allergens and other airborne particles throughout the home. This is particularly concerning for individuals with allergies or respiratory conditions. Regular cleaning and maintenance are crucial to prevent these issues and ensure the system operates efficiently and effectively.

🙌 Choosing the Right Heating System with Thelen Plumbing, Heating, and Air

Forced air heating is a popular choice for many homeowners due to its efficiency, versatility, and potential to improve indoor air quality. Regular maintenance, proper installation, and choosing the right system for your home can help you enjoy these benefits to the fullest.

At Thelen Plumbing, Heating, and Air, we’re committed to helping you find the perfect heating solution for your home. Our team of experienced professionals is dedicated to ensuring your comfort and satisfaction. Get in touch with us today to learn more about how we can help you stay cozy all winter long.

Is it time to upgrade your home’s heating system? Contact Thelen Plumbing, Heating, and Air and discover why we’re the trusted choice for homeowners.

furnace replacement cost-technician replacing furnace filter furnace replacement cost-technician replacing furnace filter

Furnace Replacement Cost: What To Expect

Is it time for a new furnace? Whether you’re a homeowner or a property manager, understanding the costs associated with furnace replacement can save you a lot of stress and money. In this blog post, we’ll break down everything you need to know about furnace replacement cost factors so that you can make an informed decision, including:

  • Understanding Furnace Types
  • Signs It’s Time to Replace Your Furnace
  • Understanding Furnace Replacement Costs
  • How to Choose the Right Furnace for Your Home
  • Financing Your Furnace Replacement
  • Maintenance Tips for Your New Furnace

💡 Understanding Furnace Types

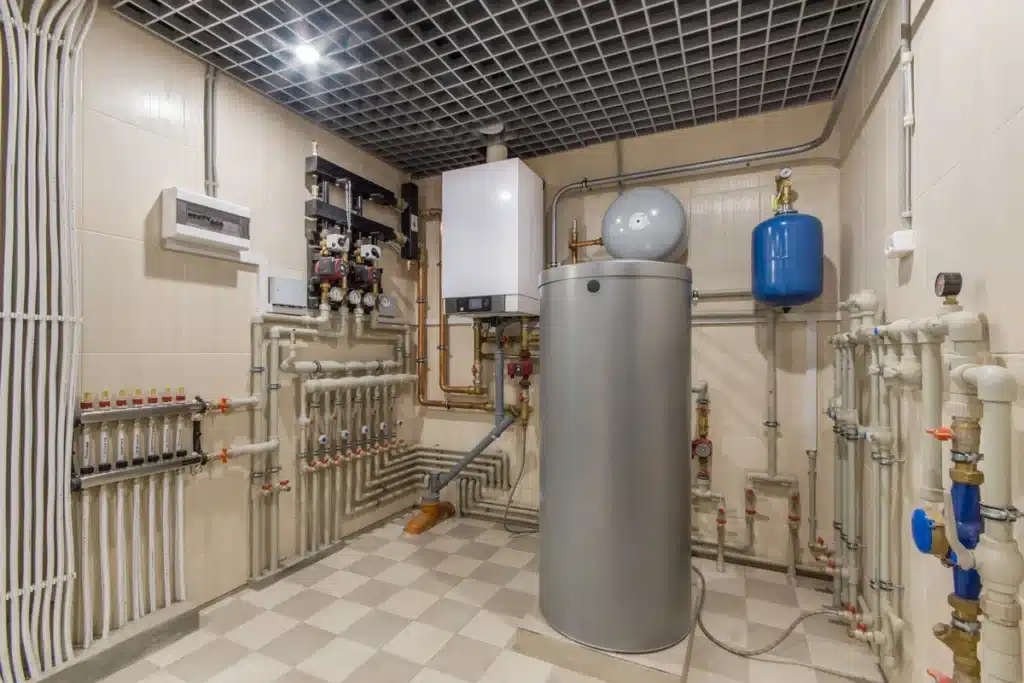
furnace replacement cost-room with HVAC systems

Before we dig into the costs, it’s essential to understand the different types of furnaces. Furnaces come in various forms, including gas, oil, electric, and propane. Each type has its pros and cons, impacting the overall furnace replacement cost.

  • Gas furnaces are the most popular due to their efficiency and lower operating costs. They use natural gas to heat your home, making them a cost-effective option in regions with harsh winters.
  • Oil furnaces, while less common today, are another alternative for areas where natural gas isn’t readily available. They’re typically more expensive to run but can be a good fit for old houses already equipped with oil tanks.
  • Electric furnaces are a versatile option but usually come with higher utility bills. However, they have fewer maintenance requirements and can last longer.
  • Propane furnaces are similar to gas furnaces but use propane as fuel. They are an excellent option for rural areas without natural gas lines.

⚠️ Signs It’s Time to Replace Your Furnace

Knowing when to replace your furnace can help you avoid unexpected breakdowns and high repair costs. There are several signs to watch out for:

  • If your furnace is more than 15-20 years old, it’s nearing the end of its life cycle.
  • Frequent repairs and increasing energy bills also indicate inefficiency.
  • Uneven heating and strange noises are additional red flags that should prompt you to consider a replacement.

If you notice any of these signs, it’s essential to consult a professional for an assessment. A timely replacement can save you from the inconvenience of a complete furnace failure during the cold months.

🤔 Understanding Furnace Replacement Costs

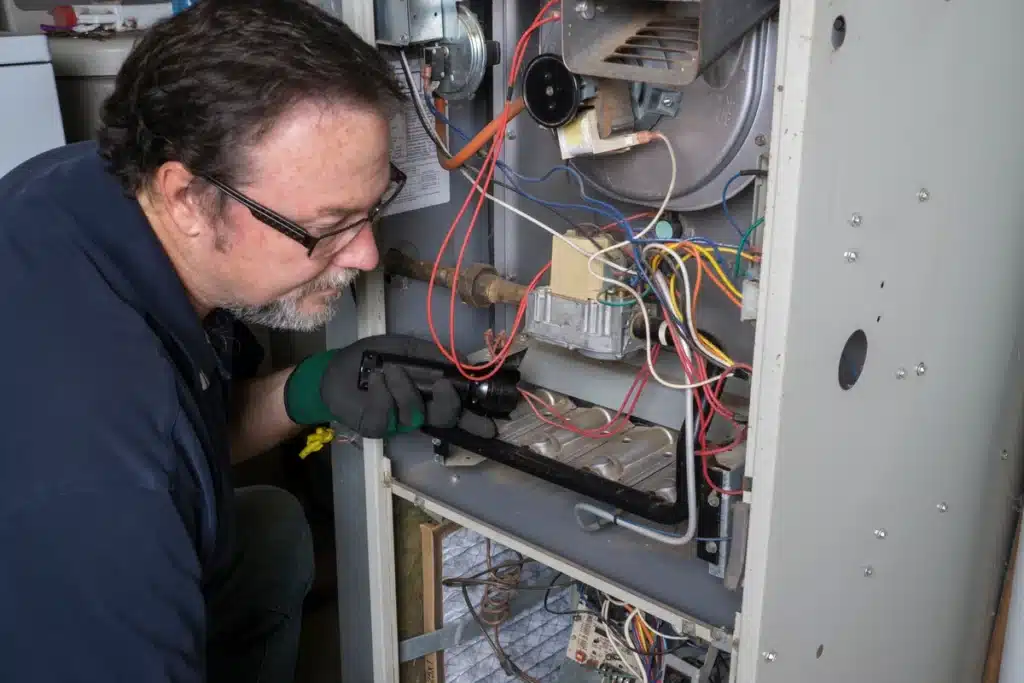
furnace replacement cost-technician using flashlight to inspect furnace

Replacing a furnace can be a significant investment, and understanding the associated costs is crucial for homeowners. This section will break down the various factors that influence furnace replacement expenses, helping you make an informed decision.

1. Average Costs of Furnace Replacement

One of the first questions homeowners and property managers ask is, “How much will this cost?” The average furnace replacement cost varies widely depending on factors like the type of furnace, the complexity of installation, and regional labor rates.

On average, replacing a furnace can cost anywhere from $2,500 to $6,000. Gas furnaces typically range from $3,000 to $5,000, while oil furnaces can cost between $4,000 and $6,000. Electric furnaces are generally the least expensive, ranging from $2,000 to $4,000. Propane furnaces fall somewhere in between, costing around $3,000 to $5,000.

It’s important to remember that these figures are averages. Your specific situation may result in higher or lower costs.

2. Labor Costs and What They Include

Labor costs are a significant part of the overall furnace replacement cost. These costs can range from $500 to $2,500, depending on the complexity of the job. Labor costs typically include removing the old furnace, installing the new one, and making any necessary adjustments to your home’s ductwork.

Experienced HVAC technicians will ensure that the installation meets all local codes and regulations. The labor cost might also cover a brief training session on how to operate and maintain your new furnace.

3. Factors Affecting Furnace Replacement Costs

Several variables can impact the overall cost of replacing your furnace. Here are some of the most common factors:

  • Type of Furnace – Different types of furnaces have varying costs. Gas furnaces, for example, are generally less expensive than oil or propane furnaces.
  • Size of the Unit – Larger homes require larger furnaces, which are more expensive. Always get the right size to ensure efficiency and comfort.
  • Installation Complexity – The complexity of the installation can significantly affect labor costs. If modifications to your ductwork or venting system are needed, expect to pay more.

4. Energy Efficiency and Savings

Investing in an energy-efficient furnace can save you money in the long run. High-efficiency furnaces use less fuel to produce the same amount of heat, which translates to lower energy bills. Look for furnaces with a high Annual Fuel Utilization Efficiency (AFUE) rating. An AFUE rating of 90% or higher means that 90% of the fuel is converted into heat, with only 10% lost in the exhaust.

An efficient furnace might cost more upfront but can provide significant savings over its lifespan. Additionally, some regions offer rebates and tax incentives for installing high-efficiency systems.

5. DIY versus Professional Installation

While it may be tempting to save money by choosing DIY furnace installation, professional installation is strongly recommended. HVAC systems are complex, and improper installation can lead to inefficiencies, higher energy bills, and even safety hazards like gas leaks or electrical fires.

A professional installer will ensure that your furnace is set up correctly, meets all local codes, and operates safely and efficiently. The peace of mind that comes with professional installation is well worth the additional cost.

👇 How to Choose the Right Furnace for Your Home

Choosing the right furnace involves more than just considering the initial cost. You’ll need to think about the size of your home, your climate, and your long-term energy costs. A furnace that’s too small will struggle to heat your home, while one that’s too large will cycle on and off frequently, leading to higher energy bills and wear and tear.

Consult a professional to perform a load calculation, which considers factors like square footage, insulation, and window quality. This calculation will help you choose a furnace with the right capacity for your home.

💵 Financing Your Furnace Replacement

Furnace replacement is a significant investment, but there are multiple financing options available to make it more manageable. Many HVAC companies offer payment plans or financing through third-party lenders. These plans often come with low-interest rates and flexible terms.

You can also check for manufacturer rebates and energy efficiency incentives offered by local utilities. These programs can help offset the initial cost of your new furnace.

🛠️ Maintenance Tips for Your New Furnace

furnace replacement cost-technician using hand tools to do maintenance on furnace

Once your new furnace is installed, regular maintenance is crucial for keeping it running efficiently and extending its lifespan. Change the air filter every 1-3 months, depending on the type of filter and your home’s air quality. Schedule an annual inspection with an HVAC professional to check for any issues and perform necessary tune-ups.

Keeping your furnace clean and well-maintained can prevent costly repairs down the line and ensure that your home stays warm and comfortable throughout the winter.

🙌 Choosing and Replacing Your Furnace with Thelen Plumbing, Heating, and Air

Replacing a furnace is a significant decision that involves multiple factors, from choosing the right type of furnace to understanding the costs involved. At Thelen Plumbing, Heating, and Air, we are committed to providing you with expert guidance and top-notch service to ensure your home stays comfortable year-round.

Our team of experienced professionals can help you choose the best furnace for your needs and budget, handle the installation process, and keep your system running smoothly with regular maintenance.

Ready to take the next step? Contact Thelen Plumbing, Heating, and Air today to schedule a consultation and learn more about how we can help you achieve optimal home comfort.

water tastes like metal-child drinking water straight from the tap water tastes like metal-child drinking water straight from the tap

Water Tastes Like Metal (What Does It Mean?)

Water is essential to our daily lives, and its quality significantly affects our health and well-being. When water tastes off, particularly when it has a metallic flavor, it can be concerning. Understanding the reasons behind this taste and how to address it is crucial. In this comprehensive guide, we’ll explore why your water tastes like metal, what to do next, and more, including:

  • Understanding the metallic taste in water
  • Health implications of metallic tasting water
  • Identifying the source of metallic taste in 3 steps
  • 4 solutions for metallic-tasting water
  • Preventing future issues in 4 steps

🤔 Understanding the Metallic Taste in Water

glass being filled with water.

A metallic taste in water can be attributed to several factors, ranging from the natural composition of the water source to issues within your plumbing system. Here are some common causes:

High Mineral Content

  • Iron and Manganese: These minerals are naturally present in groundwater. While they are not harmful in small amounts, high concentrations can lead to a metallic taste.
  • Zinc and Copper: Often found in water due to corrosion of plumbing materials. Older pipes, in particular, can release these metals into the water supply.

Corrosion of Plumbing

  • Galvanized Iron Pipes: Corrosion can release iron into the water, contributing to a metallic taste.
  • Copper Pipes: Similarly, corrosion in copper pipes can result in a metallic flavor.

Water Source

  • Well Water: More susceptible to having higher concentrations of minerals like iron and manganese.
  • Municipal Water: May have varying levels of these minerals depending on the source and the treatment process.

Environmental Factors

  • Industrial Pollution: Runoff from industrial areas can contaminate water sources with heavy metals.
  • Agricultural Runoff: Pesticides and fertilizers can introduce metals and other contaminants into the water supply.

😷 Health Implications of Metallic-Tasting Water

While the metallic taste is often more of a nuisance than a health threat, it’s essential to understand the potential health implications associated with long-term consumption of water containing high levels of certain metals.

Iron

  • Health Impact: Generally considered non-toxic at low levels, but excessive iron can lead to gastrointestinal issues and may stain teeth.
  • Regulations: The Environmental Protection Agency (EPA) sets a Secondary Maximum Contaminant Level (SMCL) for iron at 0.3 mg/L due to its impact on taste and staining, not because of toxicity.

Manganese

  • Health Impact: Essential in small amounts but can cause neurological problems at high levels.
  • Regulations: The EPA has set an SMCL for manganese at 0.05 mg/L to prevent unpleasant taste and staining.

Zinc

  • Health Impact: Necessary for human health but can cause nausea and stomach issues at high concentrations.
  • Regulations: The SMCL for zinc is 5 mg/L, primarily due to its effect on taste.

Copper

  • Health Impact: Essential nutrient, but high levels can cause liver and kidney damage.
  • Regulations: The EPA has set an Action Level of 1.3 mg/L for copper to protect against gastrointestinal distress and long-term health issues.

🧐 Identifying the Source of Metallic Taste in 3 Steps

Determining the source of the metallic taste in your water is the first step towards addressing the issue. Here are some methods to help identify the cause:

1. Visual Inspection

  • Check for Discoloration: Rust-colored or cloudy water can indicate high iron levels.
  • Look for Blue-Green Stains: These can suggest copper corrosion from pipes.

2. Taste and Odor Assessment

  • Smell the Water: A metallic smell often accompanies the taste and can help identify the presence of metals.
  • Taste the Water: If the metallic taste is only present in hot water, it may indicate issues with your water heater.

3. Water Testing

  • Professional Testing: Hiring a professional to test your water can provide a comprehensive analysis of mineral content and potential contaminants.
  • Home Testing Kits: Available for testing basic water parameters, including pH, hardness, and the presence of certain metals.

✅ 4 Solutions for Metallic-Tasting Water

Once the source of the metallic taste is identified, several solutions can help improve the taste and quality of your water:

1. Water Filtration Systems

  • Activated Carbon Filters: Effective at removing chlorine, sediment, and some metals, improving taste and odor.
  • Reverse Osmosis Systems: Highly effective at removing a wide range of contaminants, including heavy metals, providing clean, great-tasting water.
  • Water Softeners: Useful for reducing hardness caused by calcium and magnesium, which can sometimes contribute to a metallic taste.

2. Plumbing Upgrades

  • Replace Old Pipes: Updating old galvanized iron or copper pipes can significantly reduce the leaching of metals into your water.
  • Install Corrosion-Resistant Materials: Using materials like PEX or CPVC can help prevent future corrosion issues.

3. Regular Maintenance

  • Flush Water Heater: Sediment buildup in the water heater can contribute to a metallic taste. Regular flushing can help maintain water quality.
  • Clean Faucet Aerators: Sediment can accumulate in aerators, affecting water taste. Regular cleaning can help prevent this issue.

4. Source Protection

  • Protect Wells: Ensure wellheads are properly sealed and protected from surface runoff to prevent contamination.
  • Monitor Industrial and Agricultural Activities: Stay informed about activities near your water source that could introduce contaminants.

👇 Preventing Future Issues in 4 Steps

Preventive measures are key to maintaining high water quality and preventing the recurrence of a metallic taste. Here are some steps to take:

1. Regular Testing

Regular water testing is crucial, especially if you use well water or live in areas with known quality issues. Routine tests help detect contaminants like bacteria, nitrates, and heavy metals early, allowing for timely interventions. Use home kits or hire professionals for a comprehensive analysis. Keeping a log of results over time ensures ongoing safety and purity of your water supply.

  • Purchase reliable home testing kits for regular use
  • Hire professional services for comprehensive analysis
  • Keep a detailed log of test results over time
  • Stay updated on local water quality concerns

2. Water Treatment Systems

Install and maintain appropriate water treatment systems like water softeners, carbon filters, and reverse osmosis units based on your needs. Water softeners reduce hardness, preventing scale buildup and extending appliance lifespan. Carbon filters remove chlorine, sediment, and VOCs, improving water taste and odor. Reverse osmosis units provide comprehensive filtration, eliminating heavy metals, pesticides, and bacteria. Regular maintenance is crucial, including filter replacement and system checks. The right water treatment solutions protect your health, prolong plumbing life, and ensure cleaner, safer water for your household.

  • Choose the right water treatment system for your needs
  • Schedule regular maintenance and filter replacements
  • Monitor system performance and check for wear and damage
  • Invest in quality systems to ensure long-term benefits

3. Awareness and Education

Stay informed about potential contamination sources and protect your water supply by understanding local industrial activities, agricultural practices, and natural sources. Regularly check updates from water authorities and environmental organizations. Educate yourself and your family on water quality, health impacts of contaminants, common pollutants, and best practices for conservation. Encourage community clean-up efforts and advocate for policies that safeguard water resources. Knowledge is power—stay informed and proactive for a healthier environment.

  • Research local sources of water contamination
  • Follow updates from water authorities and environmental groups
  • Educate family on water quality and health impacts
  • Promote water conservation and protection practices

4. Community Action

Advocate for clean water in your community by organizing clean-ups, educating others, and supporting stricter pollution regulations. Engage with local officials to prioritize clean water infrastructure and partner with environmental organizations to amplify your impact. Your efforts can ensure health and environmental benefits for everyone.

  • Organize or join community clean-up events
  • Educate neighbors on the importance of clean water
  • Lobby for stricter environmental regulations
  • Engage with local officials to improve water infrastructure
  • Partner with environmental groups for greater impact

🙌 Eliminate Metallic Tastes in Your Water with Thelen Plumbing, Heating, and Air

woman drinking a glass of water

A metallic taste in your water can be unsettling, often caused by high mineral content, plumbing corrosion, or environmental factors. While not immediately harmful, long-term exposure to certain metals can affect health.

At Thelen Plumbing, Heating, and Air, our expert team specializes in identifying and resolving metallic tastes in water through inspections, taste assessments, and comprehensive testing. We provide tailored solutions like installing advanced filtration systems, upgrading plumbing, and performing regular maintenance to ensure your water remains safe and pleasant to drink.

Preventive measures are key, and we commit to regular testing, top-of-the-line treatment systems, and staying informed on clean water initiatives. Trust Thelen Plumbing, Heating, and Air to safeguard your health with clean, great-tasting water.

If you’re experiencing a metallic taste, contact Thelen Plumbing, Heating, and Air today to identify the cause and implement solutions. Your health and peace of mind are worth the effort. Get in touch with us now for a consultation and take the first step towards refreshing water!

furnace installation-direct view of furnace system in basement furnace installation-direct view of furnace system in basement

Furnace Installation Process Explained In 7 Steps

A furnace is an essential part of any home, especially during those cold winter months. But the installation process can be complex, and making mistakes can lead to inefficiency or even safety hazards. Installing a new furnace in your home can seem like a daunting task, but it doesn’t have to be. Whether you’re a homeowner looking to upgrade your heating system or an HVAC professional seeking to refine your installation techniques, understanding the furnace installation process is crucial. In this guide, we’ll break down the furnace installation process into easy-to-understand steps, including:

  • Choosing the Right Furnace
  • Preparing for Installation
  • Removing the Old Furnace
  • Installing the New Furnace
  • Connecting the Furnace
  • Testing the System
  • Maintenance Tips

7 Steps to Installing a Furnace

furnace installation-furnace system on concrete floor

This comprehensive approach breaks down the task into seven manageable steps, allowing you to understand the process thoroughly and feel confident in the installation. By following these steps, you can effectively navigate the challenges of furnace installation while prioritizing safety and performance.

1. Choosing the Right Furnace 🤔

Selecting the right furnace is a crucial decision for ensuring optimal home comfort and energy efficiency. In this section, we’ll explore the key factors to consider when choosing a furnace, including types, efficiency ratings, and sizing requirements. Understanding these elements will help you make an informed choice that meets your heating needs.

  • Understanding Your Heating Needs: Before you even think about installing a furnace, it’s important to understand your heating needs.
    • Factors such as the size of your home, the local climate, and your budget all play a role in determining the best furnace for you. For instance, a larger home will require a furnace with a higher BTU rating to ensure even heating.
  • Types of Furnaces: There are various types of furnaces to choose from, including gas, electric, and oil furnaces.
    • Each type has its pros and cons: Gas furnaces are the most common and are known for their efficiency. Electric furnaces are easier to install but can be more expensive to operate. Oil furnaces are less common but can be a good option in areas without natural gas service.
  • Energy Efficiency Ratings: Energy efficiency is another crucial factor to consider. Look for furnaces with a high Annual Fuel Utilization Efficiency (AFUE) rating. The higher the AFUE, the more efficient the furnace.
    • An efficient furnace can save you money on energy bills and reduce your carbon footprint.

2. Preparing for Installation 👇

Before you begin the installation process, it’s essential to ensure all necessary preparations are in place. This section will guide you through the steps required to set up a smooth and efficient installation.

  • Gathering Necessary Tools and Materials: Before you begin the installation, make sure you have all the necessary tools and materials. This includes wrenches, screwdrivers, a tape measure, and safety equipment like gloves and goggles. Having everything ready beforehand can save you time and stress during the installation process.
  • Ensuring Proper Ventilation: Proper ventilation is crucial for the safe operation of a furnace. Ensure that the installation area has adequate ventilation to prevent the buildup of harmful gases like carbon monoxide. This may involve installing new venting systems or upgrading existing ones.
  • Checking Local Codes and Regulations: Different regions have different building codes and regulations for furnace installation. Make sure to check your local codes to ensure your installation complies with all safety and efficiency standards. This may involve obtaining permits or scheduling inspections.

3. Removing the Old Furnace 🗑️

Before installing a new heating system, it’s important to properly remove the old furnace. This section will guide you through the steps needed to safely and efficiently dismantle and dispose of your outdated unit.

  • Safely Disconnecting the Old Unit: The first step in removing the old furnace is to safely disconnect it from the power source. Turn off the gas and electricity supply to the furnace to prevent any accidents. Use wrenches to disconnect the gas line and remove any electrical connections.
  • Proper Disposal: Disposing of the old furnace properly is important for both environmental and legal reasons. Many local municipalities have specific guidelines for disposing of old heating equipment. Some HVAC companies offer removal services as part of their installation package, making this step easier for homeowners.
  • Cleaning the Installation Area: Once the old furnace is removed, take the time to clean the installation area thoroughly. Remove any debris, dust, or old ductwork to ensure a smooth installation for the new furnace. A clean workspace can also help identify any potential issues that may arise during installation.

4. Installing the New Furnace 🛠️

furnace installation-person's hand replacing a furnace filter

Installing a new furnace can significantly improve your home’s heating efficiency and comfort. This section will guide you through the key steps and considerations to ensure a successful installation. Let’s get started with everything you need to know!

  • Positioning the Furnace: Carefully position the new furnace in the designated installation area. Make sure it is level and secure to prevent any operational issues. Use shims if necessary to achieve a level position.
  • Securing the Unit: Once the furnace is in place, secure it to the floor or platform using bolts or screws. This will keep the furnace stable and reduce vibration during operation. A secured unit also minimizes the risk of damage or displacement.
  • Connecting the Ductwork: Connect the existing ductwork to the new furnace. Ensure that all connections are airtight to maximize efficiency and prevent leaks. Use metal tape or duct sealant to secure the connections and check for any loose or damaged sections of ductwork.

5. Connecting the Furnace 🔌

In this section, we’ll guide you through the process of connecting the furnace. It’s crucial to ensure all connections are secure and properly aligned to guarantee efficient operation. Follow these steps carefully to avoid any potential issues.

  • Electrical Connections: Reconnect the electrical supply to the new furnace. Follow the manufacturer’s instructions carefully to ensure all connections are made correctly. Double-check all wiring to prevent electrical faults or hazards.
  • Gas Line Connection: If you are installing a gas furnace, reconnect the gas line. Use a wrench to secure the connection and check for any gas leaks using a soapy water solution. If bubbles form, tighten the connection and recheck.
  • Thermostat Setup: Connect the furnace to the thermostat. This involves wiring the thermostat to the furnace’s control board. Follow the manufacturer’s instructions for the specific model of your thermostat to ensure proper setup.

6. Testing the System 👉

furnace installation-hand adjusting the dial of a thermostat

Ensuring your furnace system is functioning properly is crucial for maintaining a comfortable and safe home environment. In this section, we will guide you through the necessary steps to test and evaluate the efficiency and performance of your furnace. Regular testing can help identify potential issues early on, preventing costly repairs and ensuring optimal operation.

  • Initial Power-Up: Turn on the power supply and set the thermostat to a high temperature to initiate the furnace. Listen for any unusual noises and check all connections to ensure everything is operating smoothly.
  • Checking for Leaks: Check all gas and duct connections for leaks. Use a soapy water solution on gas lines and inspect ductwork for any air leaks. Address any issues immediately to ensure the system operates efficiently and safely.
  • Verifying Efficiency: Monitor the furnace’s performance for the first few hours of operation. Check the airflow, temperature, and overall efficiency. Make any necessary adjustments to optimize the system’s performance.

7. Maintenance Tips 💡

Maintaining your furnace is crucial for ensuring its longevity and efficiency. In this section, we’ll provide essential tips to keep your furnace running smoothly and safely. Proper maintenance can save you money on repairs and keep your home warm all winter long.

  • Regular Inspections: To keep your furnace running efficiently, schedule regular inspections. This includes checking filters, ductwork, and electrical connections. Regular maintenance can prevent costly repairs and extend the life of your furnace.
  • Filter Replacement: Change the furnace filter every 1-3 months, depending on the manufacturer’s recommendations. A clean filter improves airflow and efficiency, reducing the strain on your furnace.
  • Professional Maintenance: Consider scheduling annual maintenance with a professional HVAC technician. They can perform a thorough inspection, cleaning, and tune-up to ensure your furnace operates at peak performance.

🙌 Ensuring Home Comfort with Thelen Plumbing, Heating, and Air

Installing a furnace is a complex process, but understanding each step can make it more manageable. From choosing the right furnace to ensuring it operates efficiently, this guide covers everything you need to know. For homeowners, this means a warm and comfortable home, and for HVAC professionals, it means providing top-notch service to your clients.

At Thelen Plumbing, Heating, and Air, we pride ourselves on our expertise and customer-focused approach. Whether you’re installing a new furnace or maintaining an existing one, our team is here to help. Contact us today to learn more about our services and how we can assist with your home comfort needs.

Fleck 5600SXT Water Softener Fleck 5600SXT Water Softener

10 Best Water Softener Systems (2024)

Water softener systems play a crucial role in ensuring the quality of water in homes, especially in areas with hard water. Hard water, which contains high levels of minerals like calcium and magnesium, can lead to various issues such as scale buildup in pipes, appliances, and even on skin and hair. To combat these problems, many homeowners turn to water softeners, devices designed to remove or reduce these minerals from the water supply.

In 2024, the market for water softener systems offers a variety of options, each catering to different needs and preferences. Choosing the right water softener system involves considering factors like water hardness levels, household size, budget, and installation requirements. To help you make an informed decision, we’ve compiled a list of some of the best water softener systems available this year, including:

  • Fleck 5600SXT Water Softener
  • Eddy Electronic Water Descaler
  • SpringWell FutureSoft Salt-Free Water Softener
  • Aquasana Whole House Water Filter and Salt-Free Softener
  • Pelican NaturSoft Salt-Free Water Softener
  • APEC Water Systems FUTURA-15 Salt-Free Water Conditioner
  • GE Appliances GXSH40V Water Softener
  • WaterBoss 220 Water Softener
  • Morton M30 Water Softener
  • Culligan High Efficiency Water Softener
GE Appliances GXSH40V Water Softener

💡 10 Of The Best Water Softener Systems in 2024

Selecting the ideal water softener system can be daunting with so many choices available. To help you make an informed decision, we have compiled a list of the top 10 water softener systems for 2024, each distinguished by its efficiency, features, and value for money.

1. Fleck 5600SXT Water Softener

The Fleck 5600SXT is a popular choice known for its reliability and efficiency. It uses ion exchange technology to remove hardness minerals from water effectively.

Key features:

  • Programmable system
  • Digital control panel for easy operation and monitoring
  • Suitable for medium to large households
  • Customizable settings to optimize water softening based on specific water conditions

2. Eddy Electronic Water Descaler

Unlike traditional salt-based water softeners, the Eddy Electronic Water Descaler operates without salt or chemicals. Instead, it uses electromagnetic waves to alter the structure of minerals in water, preventing them from causing scale buildup. This system is easy to install and requires no ongoing maintenance, making it a cost-effective and environmentally friendly option for those looking to avoid salt-based softeners.

3. SpringWell FutureSoft Salt-Free Water Softener

SpringWell’s FutureSoft system employs Template Assisted Crystallization (TAC) technology to neutralize hard minerals without using salt. It prevents scale formation and protects appliances and plumbing systems while preserving beneficial minerals in water. This system is ideal for those concerned about sodium intake or looking for a maintenance-free solution.

4. Aquasana Whole House Water Filter and Salt-Free Softener

Combining filtration and softening capabilities, the Aquasana Whole House Water Filter and Salt-Free Softener effectively removes contaminants and reduces scale buildup. It features a dual-tank design for optimal water treatment and is NSF certified to ensure water quality and safety. This system is suitable for households looking to improve both water softness and overall water quality.

5. Pelican NaturSoft Salt-Free Water Softener

The Pelican NaturSoft system utilizes a natural softening process that prevents scale buildup without the use of salt or chemicals. It employs a unique filtration media that transforms calcium ions into crystals, which are then flushed away harmlessly. This system is low-maintenance and eco-friendly, making it a great choice for environmentally conscious homeowners.

6. APEC Water Systems FUTURA-15 Salt-Free Water Conditioner

APEC’s FUTURA-15 Water Conditioner is designed to prevent scale formation and protect plumbing systems using salt-free technology. It’s compact, easy to install, and requires no electricity or drainage, making it suitable for smaller households or those with limited installation space. This conditioner is effective in reducing scale buildup and extending the lifespan of appliances.

7. GE Appliances GXSH40V Water Softener

Known for its reliability and performance, the GE Appliances GXSH40V Water Softener is designed to remove hardness minerals efficiently. It features customizable settings and a smart water softening system that adapts to household water usage patterns. This system also includes a recharge notification and low salt indicator for convenient maintenance.

8. WaterBoss 220 Water Softener

The WaterBoss 220 is a compact and efficient water softener suitable for smaller households. It uses a built-in self-cleaning filter and salt-saving technology to reduce maintenance and operating costs. This system is designed to handle high water hardness levels and provides softened water on demand without excessive salt usage.

9. Morton M30 Water Softener

Morton’s M30 Water Softener combines efficiency with user-friendly features. It utilizes demand-initiated regeneration to optimize salt and water usage based on household water consumption. This system is compact and can be installed in tight spaces, making it ideal for apartments or smaller homes where space is limited.

10. Culligan High Efficiency Water Softener

Culligan’s High Efficiency Water Softener is designed to deliver softened water efficiently while minimizing salt and water consumption. It features smart sensor technology that adjusts to water usage patterns, ensuring optimal performance and efficiency. This system is backed by Culligan’s reputation for quality and customer service, making it a reliable choice for homeowners.

best water softener systems-water softener salt

🙌 How to Choose the Best Water Softener System for Your Home: Expert Tips from Thelen Plumbing, Heating, and Air

Choosing the best water softener system for your home involves considering factors like water hardness levels, household size, budget, and preferences for salt-based or salt-free solutions. At Thelen Plumbing, Heating, and Air, we understand these complexities and offer a range of top-rated options for 2024, each with unique features to meet your specific water softening needs. Our expert team prioritizes efficiency, environmental impact, and low maintenance to ensure you get the best solution for your home. Trust Thelen Plumbing, Heating, and Air for your water filtration needs and experience enhanced water quality. Contact us today to find the perfect system for you!

how-to-test-water-hardness-hard-water-deposits-on-kitchen-appliance how-to-test-water-hardness-hard-water-deposits-on-kitchen-appliance

How to Test Water Hardness (DIY Guide)

Water hardness is a common concern for many homeowners. Hard water contains high levels of dissolved minerals, particularly calcium and magnesium, which can cause a range of issues in your home, from soap scum buildup to scale deposits in pipes and appliances. Testing your water’s hardness is the first step toward addressing these issues. In this comprehensive DIY guide, we will explore how to test water hardness, explain the importance of understanding your water quality, and more, including:

  • Understanding water hardness
  • Why test for water hardness
  • 4 Methods to Test Water Hardness
  • 3 Steps For Managing Hard Water

🤔 Understanding Water Hardness

how to test water hardness-hard water stains on shower glass in the bathroom

Water hardness is typically measured in grains per gallon (GPG) or milligrams per liter (mg/L), which is equivalent to parts per million (ppm). Water is considered hard if it contains more than 60 mg/L (3.5 GPG) of calcium carbonate.

  • Soft Water: 0-60 mg/L (0-3.5 GPG)
  • Moderately Hard Water: 61-120 mg/L (3.6-7.0 GPG)
  • Hard Water: 121-180 mg/L (7.1-10.5 GPG)
  • Very Hard Water: Over 180 mg/L (10.6 GPG)

💡 Why Test for Water Hardness?

Knowing the hardness of your water can help you make informed decisions about water treatment and maintenance for your home. Hard water can:

  • Affect Appliance Efficiency: Scale buildup in water heaters, dishwashers, and washing machines can reduce their efficiency and lifespan.
  • Increase Energy Bills: Scale buildup in water heaters requires more energy to heat water, increasing energy consumption and bills.
  • Cause Plumbing Issues: Scale can clog pipes, reducing water flow and leading to costly plumbing repairs.
  • Impact Cleaning: Hard water makes it difficult to form a lather with soap, leading to soap scum and requiring more cleaning products.
  • Affect Skin and Hair: Hard water can leave skin feeling dry and hair looking dull.

💧 4 Methods to Test Water Hardness

There are several methods to test water hardness, ranging from simple DIY techniques to more accurate test kits. Here are the most common methods:

1. Soap Test

The soap test is a simple and cost-effective way to get an approximate idea of your water hardness.

Materials Needed:

  • A clear, empty bottle with a cap
  • Liquid dish soap (without additives like moisturizers or fragrances)
  • Tap water

Instructions:

  • Fill the bottle one-third full with tap water.
  • Add 10 drops of liquid dish soap.
  • Cap the bottle and shake vigorously for 10 seconds.
  • Observe the results:
    • Soft Water: If the water forms a lot of suds and the water beneath the suds is clear, your water is likely soft.
    • Hard Water: If there are few suds and the water appears cloudy or milky, your water is likely hard.

2. Hard Water Test Strips

Test strips are an easy and relatively accurate method to measure water hardness. These strips are available at most hardware stores or online.

Materials Needed:

  • Hard water test strips
  • Tap water
  • A glass or container

Instructions:

  • Fill a glass or container with tap water.
  • Dip a test strip into the water and remove it immediately.
  • Wait for the specified time (usually a few seconds) as indicated on the test strip packaging.
  • Compare the color of the test strip to the color chart provided with the strips to determine the hardness level.

3. Digital Water Hardness Meters

Digital water hardness meters provide a quick and accurate measurement of water hardness.

Materials Needed:

  • Digital water hardness meter
  • Tap water
  • A glass or container

Instructions:

  • Fill a glass or container with tap water.
  • Turn on the digital meter and immerse the sensor end into the water.
  • Wait for the meter to display the reading.
  • The meter will show the hardness level in ppm or GPG.

4. Titration Kits

Titration kits are a bit more involved but provide a highly accurate measurement of water hardness.

Materials Needed:

  • Water hardness titration kit (includes reagent, test container, and color chart)
  • Tap water

Instructions:

  • Fill the test container with a specified amount of tap water (usually indicated in the kit instructions).
  • Add a specified number of drops of the reagent to the water.
  • Swirl the container gently after each drop.
  • Count the number of drops until the water changes color (usually from red to blue).
  • The number of drops indicates the hardness level, usually in GPG or ppm.

👉 3 Steps For Managing Hard Water

plumbing issue because of limescale

Once you’ve determined your water hardness level, you can take steps to manage and treat hard water in your home.

1. Water Softeners

Water softeners are the most effective way to treat hard water. They work by exchanging calcium and magnesium ions with sodium or potassium ions.

Types of Water Softeners:

  • Salt-Based Water Softeners: Use sodium chloride or potassium chloride to soften water. They require regular maintenance and replenishment of salt.
  • Salt-Free Water Softeners: Use a physical process called template-assisted crystallization to prevent scale buildup. They do not remove minerals but alter their form to prevent deposits.

Benefits:

  • Improved appliance efficiency and lifespan
  • Reduced energy bills
  • Softer skin and hair
  • Less soap scum and easier cleaning

2. Descaling Agents

Descaling agents can help remove existing scale buildup in appliances and plumbing.

Types of Descaling Agents:

  • Chemical Descalers: Use acids to dissolve scale. These are effective but require careful handling.
  • Electronic Descalers: Use electromagnetic waves to alter the properties of minerals, preventing scale buildup without removing minerals.

Benefits:

  • Prevents further scale buildup
  • Can extend the life of appliances
  • May reduce energy consumption

3. Regular Maintenance

Regular maintenance can help manage the effects of hard water.

Tips for Regular Maintenance:

  • Clean Appliances: Regularly clean appliances like dishwashers and washing machines to remove scale buildup.
  • Use Vinegar: Run a vinegar solution through coffee makers, kettles, and other small appliances to dissolve scale.
  • Install Faucet Aerators: Faucet aerators can help reduce water flow and prevent scale buildup.

🙌 Comprehensive Water Hardness Testing and Solutions by Thelen Plumbing, Heating, and Air

Testing your water hardness is crucial for maintaining your home’s efficiency, cutting down energy bills, and improving water quality. At Thelen Plumbing, Heating, and Air, our experienced team is dedicated to helping you with all your water filtration needs. We offer a range of services from simple soap tests to precise digital meters, ensuring you accurately determine your water’s hardness level.

Once we identify the hardness level, our experts provide tailored solutions to manage and treat hard water effectively. By partnering with us, you protect your plumbing system, extend the life of your appliances, and enjoy the benefits of softer water.

Whether you need a water softener installation, descaling agents, or regular maintenance, trust Thelen Plumbing, Heating, and Air to enhance your home’s comfort and efficiency. Contact us today for a consultation and take the first step towards a better home water experience!

water softener system cost-gloved hand holding a handful of water softener tablets water softener system cost-gloved hand holding a handful of water softener tablets

Water Softener System Cost: What to Expect in 2024

Understanding the cost of installing and maintaining a water softener system is crucial for homeowners planning to address hard water issues. As we move into 2024, various factors like technology advancements, installation fees, and regular maintenance costs will influence your water softener system cost factors. Whether you’re dealing with limescale build-up or simply want softer water for your household, this comprehensive guide will help you navigate what to expect financially, including these sections:

  • Understanding water softener systems
  • 4 factors influencing water softener costs
  • 4 long-term savings with water softeners
  • DIY installation vs. professional installation
  • Water softener maintenance costs
  • Choosing the right water softener system for your home

🤔 Understanding Water Softener Systems

water softener system cost-water softener nearly full of salt tablets

Types of Water Softeners

There are several types of water softener systems, each with its own set of advantages and price points:

  • Salt-Based Ion Exchange Softeners: These are the most common systems. They replace calcium and magnesium ions with sodium ions to soften the water. They require periodic replenishment with salt, which adds to the ongoing maintenance costs.
  • Salt-Free Softeners: Using a process called Template Assisted Crystallization (TAC), these systems condition water without the need for salt. Although they generally cost more initially, they can be cheaper in the long run due to lower maintenance costs.
  • Dual-Tank Softeners: Especially useful in places with heavy water usage, dual-tank models offer uninterrupted soft water as one tank regenerates while the other is in use. These are more expensive but very effective.
  • Magnetic and Electronic Descalers: These systems use magnetic fields or electrical currents to reduce limescale deposits. While cheaper and easier to install, their effectiveness can be somewhat limited compared to traditional systems.

Cost Breakdown for Water Softeners

When budgeting for a water softener system in 2024, consider the following costs:

  • System Purchase: Depending on the type and brand, prices can range from $500 for a basic salt-based softener to upwards of $3,000 for high-end dual-tank systems.
  • Installation: Professional installation fees can range from $200 to $1,000 depending on the complexity of the job and local labor rates.
  • Maintenance: Regular maintenance, such as refilling salt or pre-filter replacement, can cost anywhere from $50 to $300 annually.
  • Operational Costs: Expect to spend about $50 to $100 per year on additional electricity and water, especially for salt-based systems that require regeneration cycles.

💰 4 Factors Influencing Water Softener Costs

When considering the purchase of a water softener, it’s important to understand the various factors that can influence its cost. Several elements such as system type, capacity, installation requirements, and additional features all play a role in determining your overall expenditure.

1. Water Softener Size and Capacity

The size and capacity of your water softener will directly affect the cost. A larger capacity system designed for a big household or high water usage will cost more than a smaller unit designed for a single person or apartment.

2. Quality of Water

The hardness level of your water will also influence both the initial and ongoing costs. Harder water requires more robust systems and more frequent maintenance.

3. Additional Features

Modern water softeners come with a plethora of additional features like WiFi connectivity, remote monitoring, and advanced regeneration cycles. While these features can improve efficiency and convenience, they also add to the upfront cost.

4. Local Water Quality Regulations

In some regions, there are stringent regulations regarding water quality. Ensuring compliance can add to the total cost, particularly if additional filtration systems or modifications are required.

💸 4 Long-term Savings with Water Softeners

Investing in a water softener system can lead to significant long-term savings for homeowners. By preventing scale buildup, a water softener helps extend the lifespan of your plumbing, appliances, and heating systems. This not only reduces costly repairs and replacements but also enhances overall energy efficiency, lowering your monthly utility bills.

1. Protecting Appliances and Plumbing

One of the primary benefits of installing a water softener is the protection it offers to your plumbing system and household appliances. Hard water can cause limescale build-up in pipes, reducing water flow and increasing the risk of corrosion. It can also impact the efficiency and longevity of washing machines, dishwashers, and water heaters. By reducing the hardness of the water, you can extend the lifespan of these appliances and avoid costly repairs or replacements.

2. Reducing Energy Bills

Water heaters have to work harder to heat water that is laden with minerals, which can lead to higher energy consumption and increased utility bills. A water softener mitigates this by preventing limescale build-up, thereby improving the efficiency of your water heater and potentially lowering your energy bills. Here are some additional benefits and points to consider:

  • Prolongs Appliance Lifespan: Hard water can cause scale build-up inside your water heater, reducing its lifespan. A water softener helps protect your appliance, ensuring it operates longer.
  • Improves Water Quality: Soft water is gentler on your skin and hair, and it can enhance the taste of your drinking water.
  • Reduces Maintenance Costs: By preventing scale build-up, a water softener reduces the need for frequent maintenance and repairs, saving you money over time.
  • Enhances Soap Efficiency: Soft water improves the effectiveness of soaps and detergents, allowing you to use less product and save money.
  • Environmental Benefits: Using less energy to heat water means reducing your carbon footprint, making a water softener an environmentally friendly choice.
  • Increases Property Value: Having a water softener installed can be an attractive feature for potential homebuyers, potentially increasing the value of your property.

3. Using Less Soap and Detergent

Soft water lathers more effectively than hard water, meaning you can use less soap and detergent for your cleaning needs. This means that when you wash your clothes, dishes, or even yourself, you’ll notice that a smaller amount of cleaning product creates more bubbles and cleans just as effectively, if not better. Over time, this can lead to significant savings on household cleaning products, as you won’t need to purchase them as frequently. Moreover, less soap and detergent usage also means less residue left behind on clothes and surfaces, leading to cleaner results and potentially extending the lifespan of your clothing and appliances. Additionally, the reduced use of cleaning agents contributes to a lower environmental impact, making soft water a more sustainable option for your household.

  • Less soap and detergent required
  • Significant savings on cleaning products
  • Reduced residue on clothes and surfaces
  • Extended lifespan of clothing and appliances
  • Lower environmental impact

4. Enhanced Skin and Hair Health

While not a direct financial saving, many people find that soft water is gentler on their skin and hair. This can result in fewer skin irritations and the need for expensive skincare products. Over time, the reduced need for these products can lead to significant cost savings, as individuals might spend less on specialized lotions, creams, and treatments designed to combat dryness and irritation caused by hard water. Additionally, soft water can enhance the longevity and effectiveness of everyday personal care items such as shampoos and soaps, requiring less product for the same level of cleanliness and comfort. The overall benefits extend beyond just financial savings, contributing to better skin health and a more pleasant bathing experience.
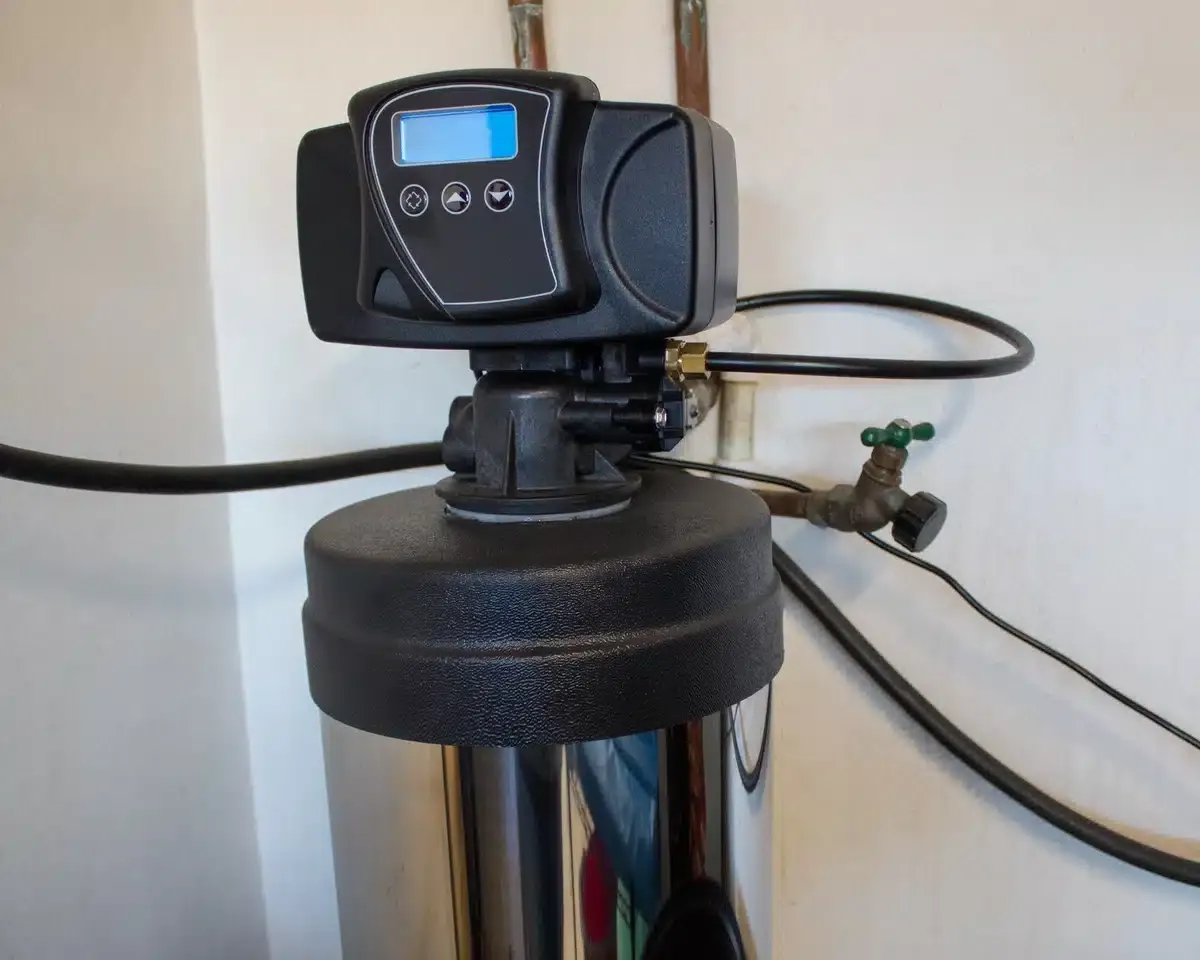
  • Gentler on skin and hair
  • Fewer skin irritations
  • Reduced need for expensive skincare products
  • Enhanced longevity of shampoos and soaps
  • Better overall skin health

👨‍🔧 DIY Installation vs. Professional Installation

DIY Installation

For those who are handy, installing a water softener system on your own can save on installation costs. Many systems come with detailed instructions and all the necessary parts. However, DIY installation can be complex and time-consuming. You also run the risk of incorrect installation, which could void warranties or lead to inefficiencies and additional costs down the line.

Professional Installation

Although it comes at a higher cost, professional installation ensures that your system is set up correctly and efficiently. Professional installers have the knowledge and tools to handle any challenges that may arise, ensuring optimal performance and longevity of your water softener system. Many companies also offer a warranty on their installation work, providing additional peace of mind.

🛠️ Water Softener Maintenance Costs

Regular Maintenance

  • Salt Refills: For salt-based systems, regularly adding salt is necessary to ensure proper function. Depending on your water usage, you might need to refill monthly, at a cost of about $5 to $15 per month.
  • Resin Bed Replacement: The resin bed in a salt-based system typically needs replacement every 10 years, costing between $200 and $400.
  • Filters and Pre-filters: Systems with additional filters may require periodic replacements, incurring additional costs. Pre-filters typically cost between $10 and $30 and need replacement every few months.
  • Service Visits: Annual service visits by professionals to check and clean the system can help maintain efficiency. These visits usually cost between $100 and $200.

Unexpected Repairs

Over time, parts of the water softener system may wear out or malfunction. Common issues include problems with the control valve, resin beads, or the brine tank. Repair costs can vary widely depending on the problem, ranging from $50 for minor fixes to over $500 for significant repairs.

👉 Choosing the Right Water Softener System for Your Home

Selecting the ideal water softener system is essential for treating hard water and enhancing the quality of water throughout your home. At Thelen Plumbing, Heating, and Air, we understand that every household has unique water treatment needs. Our experts are here to guide you through the process, ensuring you find the perfect solution for your specific requirements.

  • Assessing Your Needs: The first step in choosing a system is to assess your specific needs. Consider the hardness level of your water, your household size, and any specific features or budget constraints.
  • Researching Brands and Models: Do your research on different brands and models to find the best fit for your home. Consider factors like efficiency, maintenance requirements, and warranty options.
  • Seeking Professional Advice: If you are unsure about which system is right for you, seek advice from a professional. They can assess your water quality and provide recommendations based on their expertise and experience.
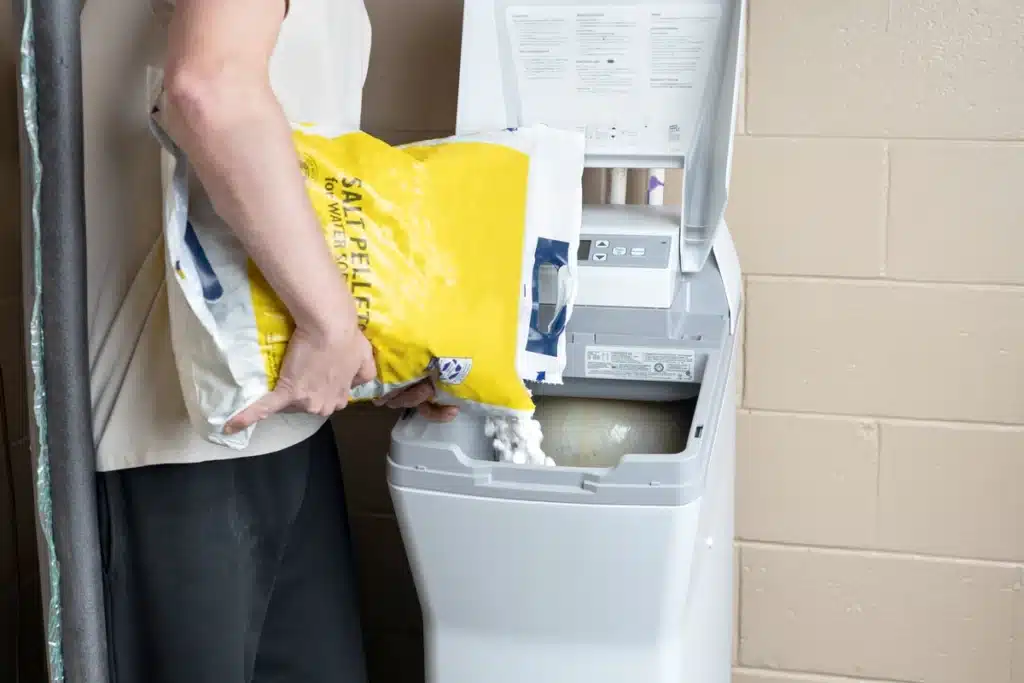
🙌 Investing in a Water Softener System With Thelen Plumbing, Heating, and Air

water softener system cost-man opening the lid to water softener system

At Thelen Plumbing, Heating, and Air, we pride ourselves on being the team you can trust for all your water filtration needs. Our experienced professionals provide personalized advice to help you find the perfect system for your home. We offer top-notch installation services and comprehensive maintenance plans to ensure your system runs efficiently for years. Our commitment to customer satisfaction and reliability sets us apart, making us your go-to choice for water softener solutions.
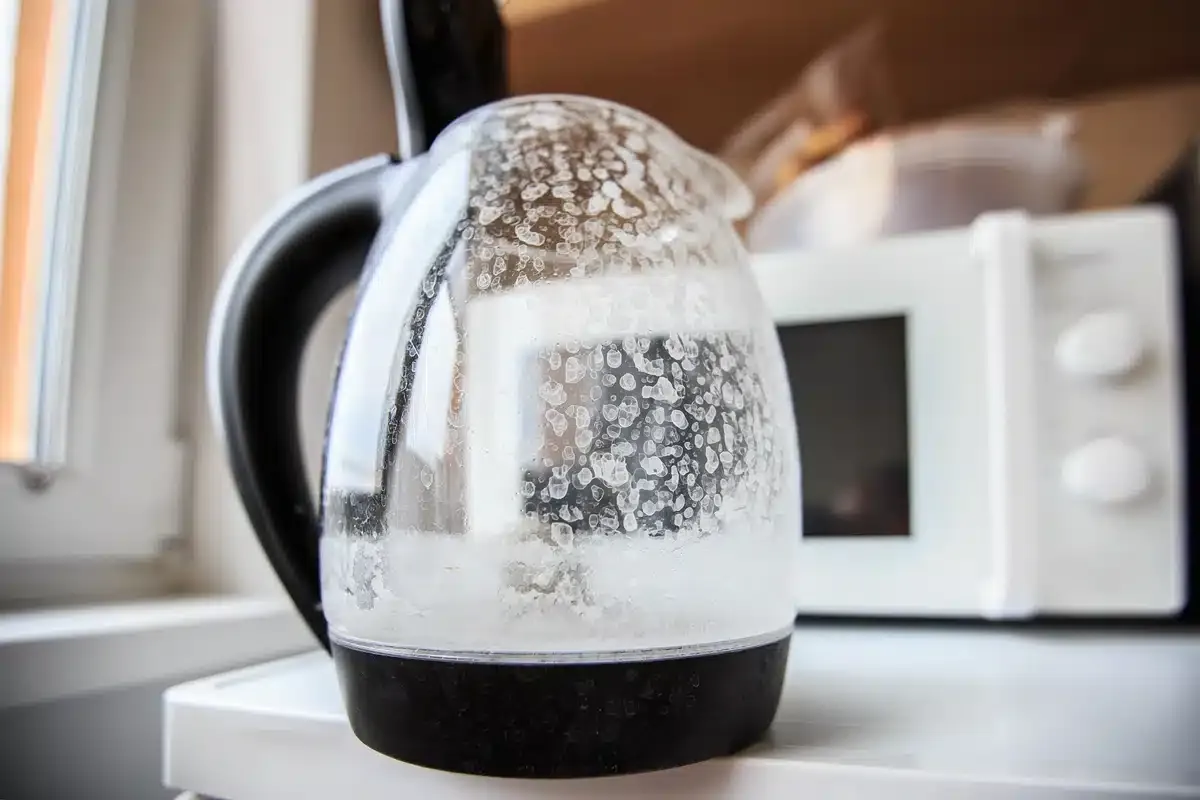

Choosing and maintaining a water softener system requires careful consideration and research. By understanding your needs, evaluating brands, seeking professional advice, and staying on top of maintenance, you can enjoy the benefits of soft water for years to come. Start researching and investing in a water softener system today—your wallet and your hair will thank you!

Contact Thelen Plumbing, Heating, and Air today to get started on your journey to better water quality and enhanced home comfort!

Schedule Service

"*" indicates required fields

This field is for validation purposes and should be left unchanged.