
Author: Kevin

Cost to Install Central Air in 2024

There’s nothing quite like stepping into an oasis from a sweltering day. In modern homes, the luxury of a cool, conditioned climate is a necessity, making central air conditioning systems more sought after than ever. Understanding the cost associated with this home upgrade is not just about dollars and cents; it is about making the best investment in your family’s comfort and the environment you live in. For homeowners considering the transition to central air, 2024 is the year to make informed decisions regarding their HVAC system.

This extensive guide will explore the granular details of the cost to install central air, breaking down the numbers, and providing valuable insights for homeowners looking to take the plunge.

Inside This Blog:

  • The importance of central air conditioning
  • Dissecting the variables that dictate cost
  • Savvy tips for central air budgeting
  • Payment options to make central air affordable

Continue reading to learn more about the cost of installing a central air unit.

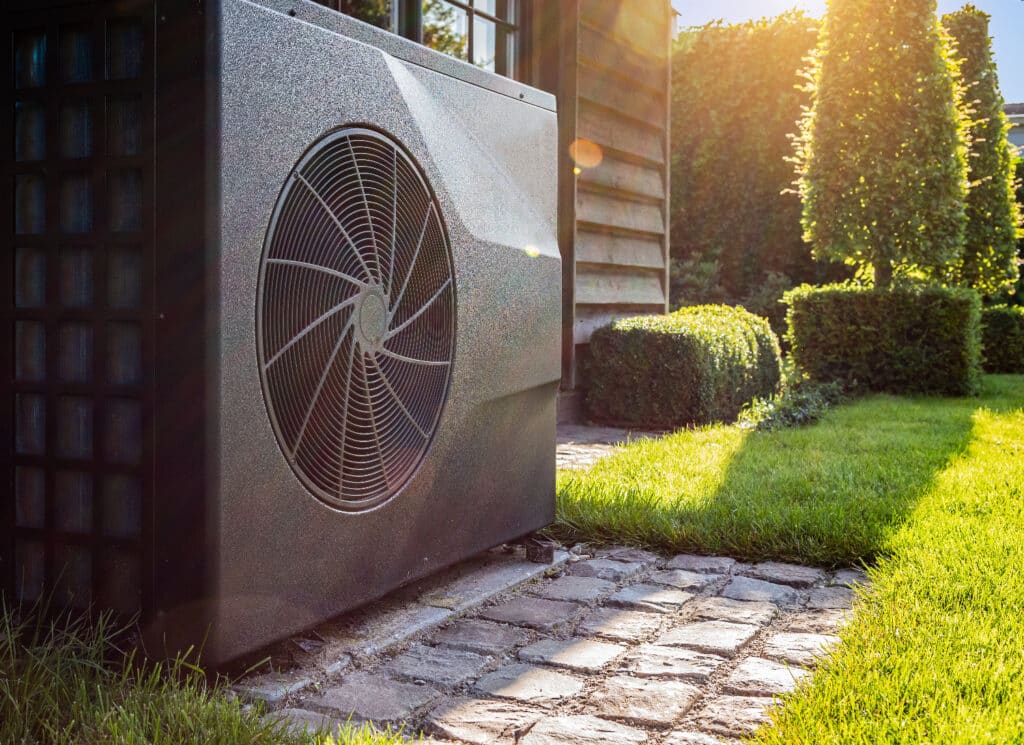
The Importance of Central Air Conditioning

In today’s fast-paced environment, many of us return from the daily grind to enjoy the tranquility of our homes. It’s the space where we recharge, renew, and… oh yes, relax. But there’s a catch – it’s hard to find tranquility in a home that’s warmer than your favorite latte.

Welcome to the world of central air conditioning, your ticket to year-round comfort. The benefits extend beyond mere temperature control – think humidity moderation, improved air quality, and acoustic insulation from the blaring commotion outside.

Unsurprisingly, these advantages come at a cost. In this post, we’ll explore the average cost of installing a central air conditioning system. But first, we must stress the importance of a well-tempered dwelling in promoting serenity and well-being, especially during the hot and sticky months. Now, without further ado, let’s plunge into the main event.

Dissecting the Variables That Dictate Cost

The cost of installing central air is as dynamic as the system itself. No two homes are the same, and therefore, the cost of AC system installation can vary significantly. Here are the principal factors that influence the price tag:

Home and System Size

The size of your home has a direct correlation with the size and power of the central air system required. It’s all about balance – too small a system, and you’re not cooling the entire space efficiently; too large, and you’re overpaying for unnecessary capacity.

The British Thermal Unit (BTU) output specifies the cooling capacity of a system. You can think of BTUs as the muscles of your AC unit. A professional will conduct a Manual J load calculation to determine the correct BTU size for your home, and this, in turn, dictates a large fraction of the overall cost.
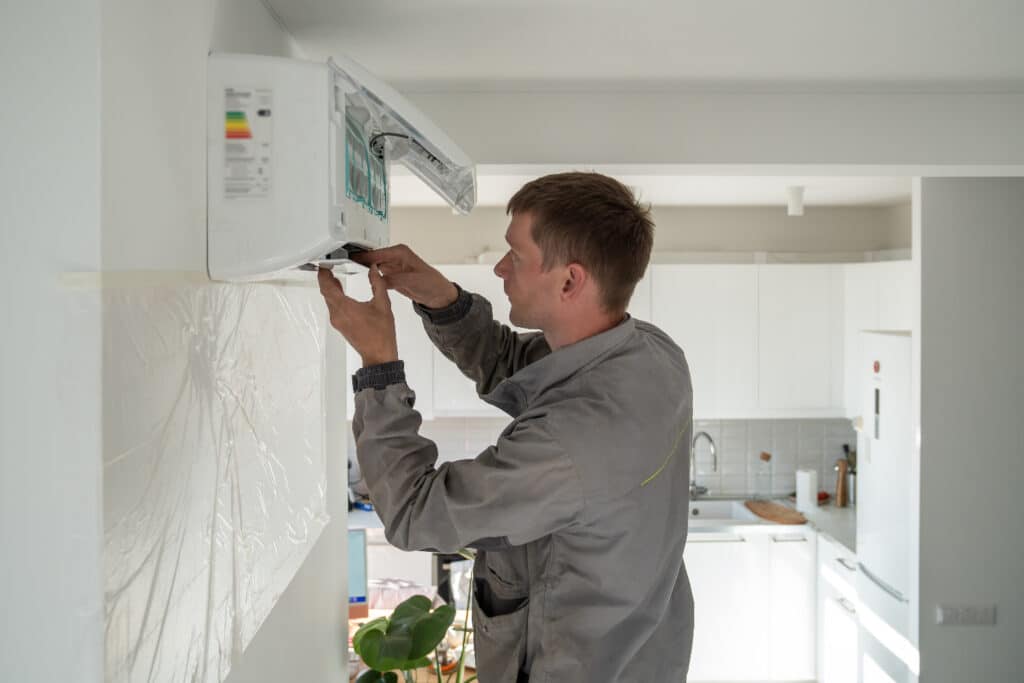
Efficiency

Efficiency, measured by the Seasonal Energy Efficiency Ratio (SEER) rating, is like your system’s gas mileage. Higher SEER ratings signify greater efficiency, which means lower energy bills.

While more efficient units come with a higher upfront cost, the long-term savings on your energy bill might just make the initial investment worth it. Energy Star models are a surefire way to enjoy savings and contribute to a greener planet.
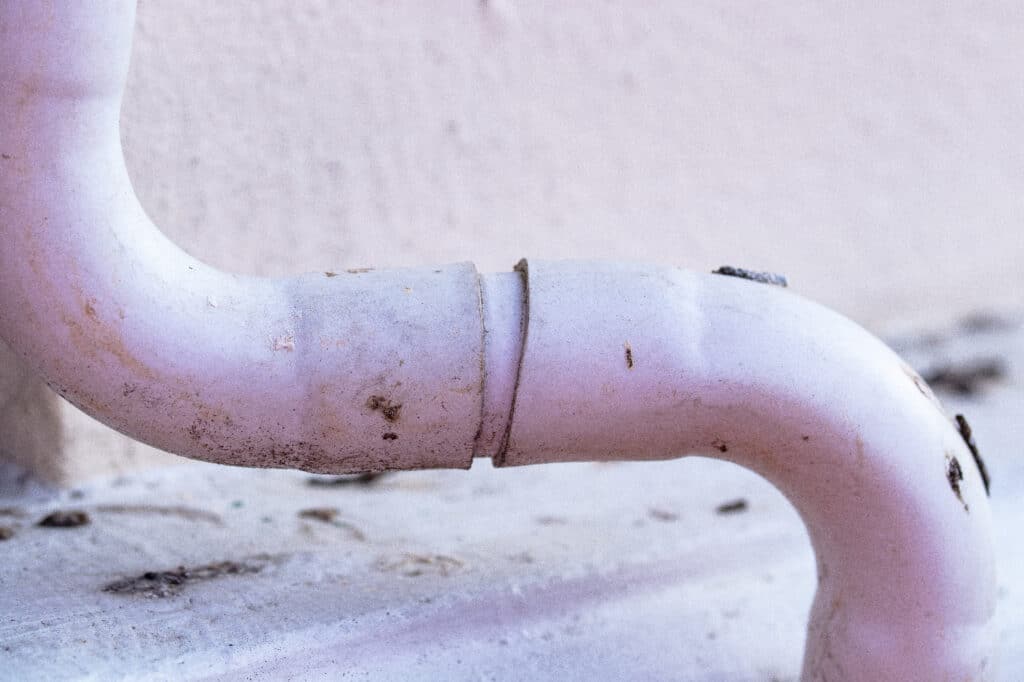
Ductwork

The condition and design of your home’s existing ductwork can be a significant cost factor. If your ducts are outdated, improperly installed, or simply not present, you may need to factor in duct repairs or installations, which can add several thousand dollars to the total bill.

Electrical Upgrades

Modern central air systems require a robust electrical system to function optimally. This may mean electrical panel upgrades and dedicated circuits, which are expenses that are critical and often overlooked.

Netting Out the Numbers

The average cost of installing central air can be daunting, but breaking it down can demystify the process. Here’s a rundown of the key components:

Equipment Costs

The most significant portion of the bill, equipment costs, covers the central air unit and, in some cases, a thermostat upgrade. The type and brand of the unit will significantly impact this cost.
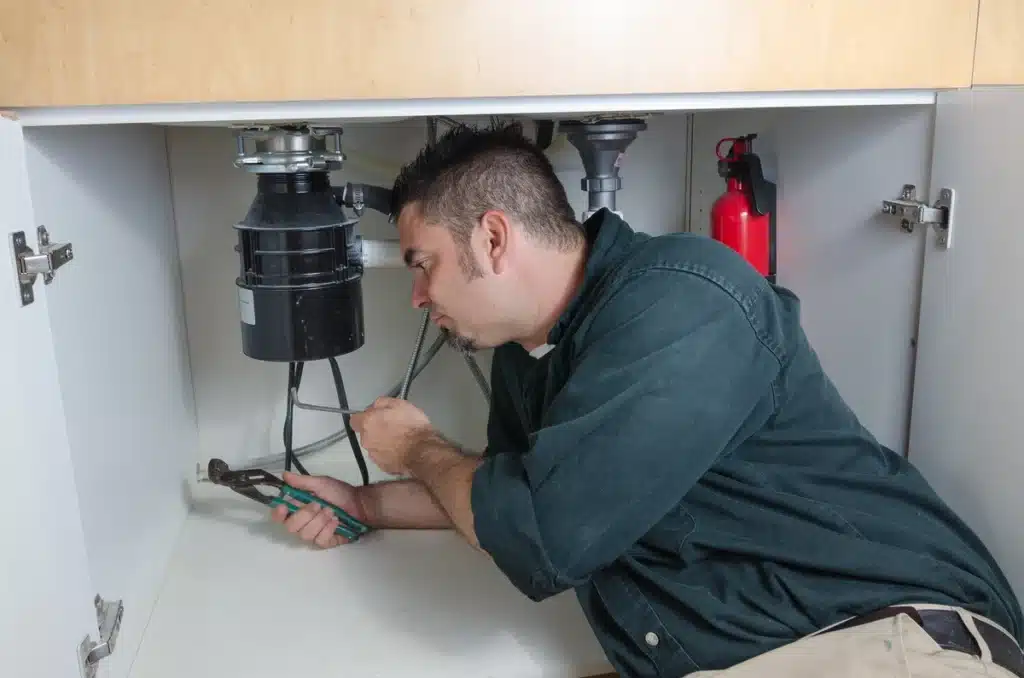
Labor

A complex task such as central air installation demands skilled labor, and their time doesn’t come cheap. From system set-up to testing and commissioning, labor costs are a necessary part of the process.

Additional Expenses

There are always miscellaneous expenses that creep up. These can include permits, disposal of old equipment, and any unforeseen repair costs. Budgeting a few extra dollars for these ‘just in case’ is a prudent move.

Lifetime Value

While the initial costs can be somewhat hefty, one must consider the lifetime value of a central air conditioning system. With proper maintenance, a well-installed unit can last 15 years or more.

HVAC outdoor unit

Savvy Tips for Central Air Budgeting

No one wants to pay more than they have to, especially when it comes to a home improvement as critical as central air. Here are some tips to keep your wallet cool:

  • Opt for Off-Peak Season Installation: Demand is typically less during the cooler months, so many HVAC companies offer significant discounts for installations performed off-peak.
  • DIY Pre-Work: You can often reduce labor costs by preparing your home for the system installation. This can include clearing space, minor repairs, or even painting walls where your new unit will be placed.
  • Incentives and Rebates: Check for available incentives, tax credits, or rebates offered by federal, state, or local governments for energy-efficient upgrades. These can substantially reduce your upfront investment.

Payment Options To Make Central Air Affordable

The cost of a central air system doesn’t need to be an immediate out-of-pocket expense. Several financing options can make the cost more manageable:

Company Financing

Many HVAC companies offer financing to customers. They sometimes provide low-interest offers that can spread the cost over several years.

Personal Loan

For those without home equity, personal loans can offer an unsecured way to spread the cost. Interest rates and terms will vary, so it’s essential to shop around.

Need a New Central Air Conditioner?

Investing in central air isn’t just about living in comfort—it’s about creating an environment conducive to the life you want to live. While it may seem like a steep upfront cost, the long-term benefits can be significant. Plus, with the right financing and smart decisions, making the upgrade can be more affordable than you think.

If you’re ready to discuss installing a central air system, get in touch with Thelen Plumbing, Heating, and Air. We specialize in transforming houses into cool, comfortable homes!

Heat Pump vs Central Air (Which Is Better Long-Term?)

When it comes to keeping your home comfortable, the choices you make can have a major impact—not just on your level of coziness, but on your energy bills, your home’s value, and even the environment. One key decision many homeowners face is whether to install a heat pump or a central air system. Both systems are designed to regulate temperature, but each has its own set of advantages and considerations, especially when looking at the long-term benefits.

Inside this blog:

  • Understanding Heat Pumps and Central Air Systems
  • Initial Cost vs Long-Term Savings
  • Maintenance and Durability
  • Environmental Impact
  • Making the Right Decision for Your Home

In this article, we’ll help you under the differences between a heat pump vs central air, empowering you to make a decision that’s not just for today, but for many years.

Understanding Heat Pumps and Central Air Systems

To understand which solution is better for your home, it’s vital to comprehend how they function. A heat pump extracts heat from a cold space and transfers it elsewhere, usually from the outside air into your home. In the reverse, it takes heat from your home and releases it outside to cool the interior. Central air systems, often integrated with forced air furnaces, use ducts to move cooled or heated air throughout the home.

How Heat Pumps Work

  • An evaporator coil absorbs heat from the outside air, which turns the refrigerant in the coil to vapor.
  • The compressor increases the temperature and pressure of the vapor.
  • The vapor is sent to the condenser coil or the indoor coil, releasing the heat into the interior of the home, where it condenses into a liquid.
  • The cycle repeats.

Central Air Systems in Action

  • Central air systems use the same principles but distribute the conditioned air through a network of ducts.
  • A system that integrates both heating and cooling (a heat pump combined with a furnace) offers year-round comfort.

Initial Cost vs Long-Term Savings

Both heat pumps and central air systems can involve significant upfront costs. Homeowners considering these options must weigh the initial investment against long-term savings, with some shopping for used air conditioning units to keep costs down.

Breakdown of Installation Costs

  • Heat pumps generally cost more to install than central air systems because they can be more complex.
  • Central air units often have a lower upfront cost since they are simpler in design and don’t require as much ground space for outdoor units.
  • A hybrid system combining a heat pump with a forced air system can add another layer of complexity and cost, but may result in greater overall efficiency.

Quantifying Long-Term Savings

  • Heat pumps are typically more energy-efficient and can offer better long-term cost savings, especially in regions with moderate climates.
  • Central air systems tend to be less efficient but may provide more robust cooling, especially in regions with hot, arid climates.
  • Factors like insulation quality and home size also play a significant role in overall efficiency and, consequently, long-term savings potential.

Climate Suitability

The climate of your region is a major determinant in the performance and cost-effectiveness of the HVAC system you choose.

Heat Pumps in Moderate Climates

  • In areas with mild winters, a heat pump can be the primary source of heating, providing cost-effective warmth without the need for a separate heating system.
  • Heat pumps can operate at a high efficiency in temperatures down to freezing, but their effectiveness drops as the climate becomes colder.

Central Air in Warmer Climates

  • In hot climates, central air systems are the go-to choice for efficient and powerful cooling.
  • They often work alongside gas furnaces or other heating systems, providing versatility in year-round temperature management.
HVAC system outdoor unit

Maintenance and Durability

The lifetime costs of an HVAC system go far beyond the initial installation. Regular maintenance and the potential for repair costs can significantly impact your long-term budget.

Heat Pump Maintenance

  • Heat pumps require semi-annual maintenance checks, mainly due to their dual-functionality necessitating year-round use.
  • The outdoor unit should be kept clear of debris, and the refrigerant levels need monitoring.
  • On average, a well-maintained heat pump can last around 15 years.

Central Air Maintenance

  • Central air systems typically require less frequent maintenance than heat pumps due to their simplicity when used solely for cooling.
  • Yearly service calls to clean coils and check refrigerant levels are common.
  • Proper maintenance can extend the life of a central air unit to around 12-15 years.

Environmental Impact

For environmentally-conscious homeowners, understanding the environmental impact of their HVAC system is critical.

Refrigerants and the Greenhouse Effect

  • Both heat pumps and central air systems use refrigerants that can contribute to the greenhouse effect, if not handled properly.
  • Awareness of the type of refrigerant and its environmental impact, particularly its ozone depletion and global warming potentials, is important.
  • Heat pumps have the potential to use refrigerants that are less harmful to the environment compared to some older central air systems.

Making the Right Decision for Your Home

Reflecting on the discussion, your unique circumstances will ultimately guide your choice.

Considering All the Factors

  • Evaluate your specific climate, the layout and size of your home, and your personal preferences.
  • Get quotes and energy estimates for both options to understand the real long-term cost difference.
  • Think about the future resale value and sustainability of your choice.

Get the Most Out of Your Air Conditioner

The heat pump vs central air debate doesn’t have a one-size-fits-all answer. Your choice must consider numerous factors, from initial costs and energy efficiency to climate suitability. By taking the time to understand your needs and researching your options, you can ensure that the HVAC system you choose will provide comfort and reliability.

For those seeking professional installation, Thelen Plumbing, Heating, and Air is ready to assist you in making your home a haven of comfort, efficiency, and environmental responsibility. Get in touch with us to take the next step in your home improvement journey.

Mini Split vs Central Air (Which Is Best?)

When it comes to ensuring your home is a haven from the outside temperatures, the type of cooling system you choose can make a world of difference. In the realm of home cooling, two options often stand out for their unique qualities and popularity among homeowners: the versatile mini split and the steadfast central air system. Below, we’ll compare the mini split vs central air systems from every relevant angle so you can determine which one is the best cooling solution for you.

Inside this blog:

  • Understanding Mini Split Systems
  • Understanding Central Air Systems
  • Efficiency and Performance
  • Maintenance and Longevity
  • Environmental Impact

Ready to steer your home towards year-round comfort? Read on to equip yourself with the knowledge you need to make a cool, calculated decision.

Understanding Mini Split Systems

Mini split systems contain an outdoor compressor unit and an indoor air-handling unit. They are joined by a conduit that houses the power cable, refrigerant tubing, suction tubing, and a condensate drain. The inside unit is usually mounted high on the wall of the room it is intended to cool, and the outdoor unit can be placed on the ground or mounted on a wall.

Advantages

  • Zoning capabilities, allowing you to control the temperature of individual rooms.
  • Easy installation, as no ductwork is required.
  • Excellent energy efficiency, resulting in lower energy bills.
  • Silent operation compared to some traditional air conditioning units.
  • They can double as heating systems in cooler months.

Disadvantages

  • Higher upfront costs compared to window units or portable air conditioners.
  • The indoor units may not blend well with certain interior designs.
  • They require professional installation, which can be more expensive than the installation of other systems.

Ideal Home Types for Mini Splits

  • Homes without ductwork
  • Small apartments or condos
  • Older homes with non-standard construction
  • Homes seeking energy-efficient upgrades

Understanding Central Air Systems

Central air systems utilize a network of ducts to distribute cooled air throughout the home. The system is composed of an outdoor unit that houses the condenser and compressor, an indoor unit that often contains the evaporator and the ductwork that connects them throughout the home.

Advantages

  • Cools the entire home uniformly, maintaining consistent temperatures.
  • The central system can also dehumidify the air, providing added comfort.
  • Can increase home value and aesthetic appeal, as the units are largely hidden.
  • Can be integrated with heating systems to provide year-round climate control.

Disadvantages

  • The high initial cost of installation, especially if there is no existing ductwork.
  • Not as energy-efficient as mini splits, particularly in homes with inefficient duct systems.
  • Can be noisier than mini splits due to the integrated system and larger condenser unit.
  • Air quality can be an issue if the filters and ducts are not properly maintained.

Ideal Home Types for Central Air

  • Newer homes with existing duct systems
  • Larger homes with multiple stories
  • Homes with consistent, typical floor plans
  • Homeowners who prioritize a set-it-and-forget-it approach to home cooling

Efficiency and Performance

Mini splits are renowned for their high energy efficiency ratings, often boasting SEER (Seasonal Energy Efficiency Ratio) ratings of 20 or higher. Central air systems can vary in efficiency, with newer models averaging about 15-18 SEER. The higher the SEER rating, the more energy-efficient the system.

Evaluation of Cooling Performance in Different Climates

Central air systems perform well in maintaining consistent temperatures throughout the entire home, making them ideal for larger homes and more extreme climates. Mini splits can struggle with larger spaces and are generally more suitable for mild to moderate climates.

a technician is fixing a HVAC

Maintenance and Longevity

Both mini split and central air systems require regular maintenance to ensure longevity and optimal performance. This includes filter replacement, coil cleaning, and refrigerant checks. However, the nature of the maintenance may differ due to the systems’ designs.

Expected Lifespan of Mini Splits versus Central Air

When properly maintained, a well-installed mini split system can last 20 years or more. Similarly, a central air system can have a lifespan of about 15-20 years. The longevity will depend on factors such as usage, climate, and maintenance.

Environmental Impact

Central air systems can have a larger environmental footprint due to the potential for energy waste in homes with inefficient duct systems or older units. Mini splits, with their high efficiency and ability to use less power when cooling specific zones, can be a greener choice for many homeowners.

Energy consumption and costs are key factors in the ecological impact of your home cooling system. Considering the source of the energy used is also important; for example, if your electricity provider relies on renewable sources, the environmental impact can be further reduced.

Making the Right Choice for Your Home

When choosing between a mini split and central air system, it’s crucial to consider your home’s size, layout, existing infrastructure (such as ductwork), your budget, and your environmental values. Zoning needs, aesthetic preferences, and any available incentives for energy-efficient systems are also important factors.

Consult with a professional HVAC technician to conduct a home evaluation and provide recommendations. Consider engaging in a cost-benefit analysis to determine the upfront investment against long-term savings. Look into warranties and service guarantees for additional peace of mind.

Understanding Your Air Conditioning System

In the grand battle of mini split vs central air, there is no one-size-fits-all answer. Both systems have their strengths and weaknesses, and the best choice for you will depend on your specific circumstances and preferences. Whether you opt for the precision and efficiency of a mini split or the tried-and-true central air for your home, investing in your home’s comfort is always a smart move.

For those in the market for a cooling system, exploring professional advice is the next step. At Thelen Plumbing, Heating, and Air, our team is ready to guide you through the process, from consultation to installation, to ensure the perfect fit for your home. Take control of your indoor climate and reach out to us for more information on how we can enhance your home life with our premium cooling solutions.

garbage disposal unit under a kitchen sink garbage disposal unit under a kitchen sink

Garbage Disposal Not Draining: 8 Possible Causes & Solutions

A garbage disposal is a convenient appliance that makes kitchen cleanup easier and more efficient. However, when it stops draining properly, it can be a significant hassle. Whether you’re dealing with a minor clog or a more complex problem, this guide will help you get your disposal back in working order. This blog post explores:

  • possible causes and solutions of a garbage disposal not draining
  • Preventative maintenance tips
  • When to call the professionals

✅ 8 Possible Causes and Solutions of Garbage Disposal Not Draining

garbage disposal being used to dispose of food scraps

In this section, we will explore eight possible causes for a garbage disposal not draining and provide practical solutions for each issue. Understanding and addressing these common problems can help restore your disposal’s functionality.

1. Clogged Disposal

Cause: One of the most common reasons for a garbage disposal not draining is a clog within the disposal itself. Food particles, grease, and other debris can accumulate, leading to a blockage.

Solution: To clear a clogged disposal:

  • Turn off the Power: Always start by turning off the power to the disposal to avoid accidents. You can unplug the unit or turn off the circuit breaker.
  • Use a Plunger: Place a plunger over the sink drain and plunge vigorously. This can help dislodge any minor clogs in the disposal.
  • Manual Cleaning: If plunging doesn’t work, you might need to clean the disposal manually. Use a flashlight to look inside the disposal. If you see debris, use pliers or tongs to remove it. Never use your hands.
  • Reset the Disposal: After clearing the clog, press the reset button on the bottom of the unit. This can help reset the motor if it has overheated.

2. Jammed Blades

Cause: The blades inside the disposal can become jammed due to hard or fibrous food items such as bones, corn husks, or fruit pits.

Solution: To fix jammed blades:

  • Turn off the Power: Again, ensure the disposal is off.
  • Use a Hex Wrench: Insert a hex (Allen) wrench into the hole at the bottom of the disposal and turn it back and forth. This can help free the jammed blades.
  • Check for Obstructions: Use a flashlight to inspect the disposal for any visible obstructions. Remove them with pliers or tongs.
  • Reset the Disposal: Press the reset button once the jam is cleared.

3. Faulty Motor

Cause: If the motor in your garbage disposal is faulty, it might not be powerful enough to grind food waste, leading to drainage issues.

Solution: To address a faulty motor:

  • Inspect the Motor: Listen for any unusual sounds such as humming or a complete lack of noise when the disposal is switched on.
  • Check the Reset Button: Press the reset button on the disposal’s bottom. If the motor is still not working, it might need replacement.
  • Professional Repair: If you’re not comfortable replacing the motor yourself, hire a professional to diagnose and fix the issue.

4. Clogged Drain Line

Cause: Sometimes, the clog isn’t in the disposal itself but in the drain line connected to it. This can happen if food particles accumulate and create a blockage.

Solution: To clear a clogged drain line:

  • Use a Plunger: Plunge the sink to try and dislodge the clog.
  • Clean the P-Trap: The P-trap is the curved pipe beneath your sink. Place a bucket underneath it, unscrew the slip nuts, and remove the trap. Clean out any debris and reassemble it.
  • Snake the Drain: If the clog is further down the line, use a plumbing snake to reach and clear it.

5. Improper Installation

Cause: An improperly installed garbage disposal can lead to drainage problems. This can include incorrect alignment or loose connections.

Solution: To fix installation issues:

  • Check Connections: Inspect all the connections between the disposal, sink, and drain pipes. Tighten any loose fittings.
  • Reinstall if Necessary: If you suspect improper installation, you might need to reinstall the disposal. Follow the manufacturer’s instructions carefully.
  • Professional Help: Consider hiring a professional plumber to ensure the disposal is installed correctly.

6. Inadequate Water Flow

Cause: Adequate water flow is crucial for the disposal to function correctly. Without enough water, food particles can’t be flushed through the system, leading to clogs.

Solution: To ensure proper water flow:

  • Run Water While Using Disposal: Always run cold water before, during, and after using the disposal. This helps flush food particles through the system.
  • Check for Blockages: Ensure there are no blockages in the water supply line to the disposal.
  • Increase Water Pressure: If your water pressure is low, consult a plumber to increase it.

7. Foreign Objects

Cause: Non-food items such as silverware, plastic, or glass can accidentally fall into the disposal and cause a blockage.

Solution: To remove foreign objects:

  • Turn off the Power: Safety first—always turn off the power.
  • Remove the Object: Use tongs or pliers to carefully remove the object from the disposal. Avoid using your hands.
  • Inspect for Damage: Check the disposal for any damage caused by the foreign object. If you notice any, you may need to repair or replace the unit.

8. Old Disposal Unit

Cause: Over time, garbage disposals can wear out and lose efficiency. An old unit may struggle to grind food waste effectively, leading to drainage issues.

Solution: To deal with an old disposal:

  • Inspect the Unit: If your disposal is more than 10 years old, it might be time to replace it.
  • Upgrade to a New Model: Consider upgrading to a newer, more powerful model. Newer disposals are often more efficient and can handle a wider range of food waste.
  • Professional Installation: Hire a professional to install the new unit to ensure it works correctly from the start.

💡 Preventative Maintenance Tips

To keep your garbage disposal in good working order and avoid future drainage issues, follow these preventative maintenance tips:

  • Run Cold Water: Always run cold water while using the disposal and for a few seconds after turning it off. Cold water helps solidify any grease or fat, allowing it to be chopped up before reaching the drain.
  • Avoid Fibrous Foods: Avoid putting fibrous foods like celery, corn husks, and onion skins down the disposal. These can wrap around the blades and cause jams.
  • Use Citrus Peels: Grinding citrus peels can help clean and deodorize your disposal. The natural oils in the peels can also help keep the blades sharp.
  • Regular Cleaning: Clean your disposal regularly by grinding ice cubes and a bit of coarse salt. This helps remove food buildup and sharpens the blades.
  • Avoid Harsh Chemicals: Do not use harsh chemicals to clean your disposal. These can damage the unit and pipes. Instead, use a mixture of baking soda and vinegar for a natural, effective cleaner.
  • Inspect Regularly: Periodically inspect your disposal and the drain line for any signs of leaks or wear. Early detection can prevent more significant issues down the line.

🧑‍🔧 When to Call a Professional

garbage disposal being serviced by a professional

While many garbage disposal issues can be resolved with some DIY troubleshooting, there are times when it’s best to call a professional. Consider seeking professional help if:

  • Persistent Clogs: If you’ve tried clearing clogs and the disposal still isn’t draining, a plumber can help identify and resolve the issue.
  • Electrical Problems: If the disposal has electrical issues, such as tripping the circuit breaker or not turning on, a professional can safely diagnose and fix the problem.
  • Unusual Noises: If you hear grinding, rattling, or other unusual noises that you can’t identify or fix, a professional can inspect the unit for damage.
  • Water Leaks: If you notice water leaking from the disposal or the surrounding pipes, a plumber can identify the source and repair it.
  • Old Unit Replacement: If your disposal is old and inefficient, a professional can recommend and install a new unit.

🙌 Expert Solutions for Garbage Disposal Troubles

A garbage disposal not draining can be a frustrating problem, but with the right knowledge and tools, it’s often a manageable fix. Understanding the possible causes and solutions allows you to troubleshoot and resolve many common issues on your own. Regular maintenance and proper use can also help prevent future problems, ensuring your garbage disposal remains a reliable kitchen appliance.

At Thelen Plumbing, Heating, and Air, our team of experts specializes in plumbing issues, including garbage disposals that won’t drain. We provide comprehensive solutions and reliable service to keep your kitchen running smoothly. Remember, safety is paramount when working with a garbage disposal. Always turn off the power before attempting any repairs or maintenance. If you’re ever unsure or uncomfortable with a repair, don’t hesitate to call a professional. Choose Thelen Plumbing, Heating, and Air for all your plumbing needs—let our experienced team handle the tough jobs so you can enjoy peace of mind. Contact us today to schedule a service appointment!

AC Drain Line Clogged: 5 Steps to Fix It Fast

When you’re basking in the cool oasis of your home during the scorching summer months, the last thing you want is for your AC to sputter and halt. One of the sneaky culprits that can take your AC by surprise is a clogged drain line. This seemingly small issue can lead to big problems like water damage, mold growth, and an AC unit that’s out of commission. Understanding, identifying, and promptly resolving a clogged AC drain line is essential maintenance that every homeowner should be familiar with. To help you out, we’ll take you through the process of what to do when your AC drain line is clogged.

Inside this blog:

  • What Is an AC Drain Line and Why Should I Care?
  • Signs of a Clogged AC Drain Line
  • DIY Steps to Unclog the AC Drain Line
  • Preventing Future Clogs
  • When to Call for Professional Help

Get ready to keep your home cool, dry, and your AC unit running like a dream.

What Is an AC Drain Line and Why Should I Care?

Air conditioning units are unsung heroes in the summer months, tirelessly cooling our homes. But even heroes have their weaknesses, and for your AC, one of those is a clogged drain line. It might sound trivial, but the impact of a blocked drain line on your household comfort and wallet can be significant. Not only can it lead to water damage, but it also hampers the efficiency of the AC system, causing you to rack up higher energy bills.

Understanding how the AC drain line fits into your home’s HVAC system and recognizing the signs of a clog is the first step in safeguarding your AC unit. With a little knowledge and some elbow grease, you can tackle this issue head-on and keep your home’s climate just as you like it – perfectly regulated.

Understanding the AC Drain Line

Picture this: your AC unit is humming along. The warm air blows over the evaporator coil, where it’s cooled down. Essential to this process is the condensate drain line, designed to carry the excess moisture away from the unit. Over time, if the line becomes clogged, that moisture backs up into the system, eventually spilling unwanted water into your home.

Common reasons for this line to become obstructed include algae growth, debris, or even pests like insects who find their way into the line. This is more common in hotter climates where the AC runs for longer periods of time.

Signs of a Clogged AC Drain Line

Even if you’re not sure what an AC drain line is, the indications of a blockage are fairly distinctive. If you spot any of these signs, it’s time to investigate:

  • Pools of water near the indoor unit
  • Visible mold growth around the intake
  • The system frequently turns on and off
  • A rise in indoor humidity levels
  • A sudden increase in your electricity bill

The longer you ignore these signs, the more likely it is for water damage to occur. Neither your home nor your wallet can afford that luxury.

DIY Steps to Unclog the AC Drain Line

Before you roll up your sleeves, shut off the power to the air conditioner at the main switch or the breaker box. This is non-negotiable. You don’t want to risk any electrical hazards or damage to the unit. Here are the steps to take:

  1. Locate the condensate drain line, typically found near the ground.
  2. Check for the cleanout plug, usually a pvc cap. Remove it and look inside. If you can see the clog, you may be able to simply pull it out.
  3. If you can’t see any clear obstruction, clear the line using a wet/dry vac. Fit the hose over the opening and create a tight seal with duct tape if necessary. Turn the vacuum on and that should dislodge any blockage.
  4. Once that’s done, pour a mixture of warm water and vinegar down the drain. This will help prevent future buildup and kill any remaining algae in the line.
  5. Replace the cleanout cap and turn the power to the AC back on. Keep an eye on the line for any further issues.
curved pipe

Preventing Future Clogs

An ounce of prevention is worth a pound of cure. After all, you’ll want to enjoy that precious cool air without concerns. To keep your AC drain line free of clogs, consider these regular maintenance habits:

  • Pour a cup of bleach down the drain line every month during peak usage months. This can help reduce algae growth.
  • Change the air filter regularly. This not only improves the air quality in your home but also reduces the amount of dust and debris that can make its way into the drain.
  • Consider installing a float switch that cuts off power to the AC when it detects a clog. This is a more permanent solution for peace of mind.

When to Call for Professional Help

Sometimes a clog is too stubborn to be dislodged with a vacuum and some DIY vinegar treatments. It’s important to know when to call in a professional. Consider these signs:

  • You’ve tried the DIY fixes, and the clog persists.
  • The water has caused damage to walls or flooring.
  • There’s visible mold in the area.
  • You’re uncomfortable with the complexity of the AC system.

Expert technicians have the tools and expertise to handle even the most severe clogs and ensure long-lasting solutions to the problem.

Get Rid of Your AC Drain Line Clog

Remember, a well-maintained AC is a happy AC. By staying on top of issues, you’re investing in your home and comfort. Don’t wait for the signs to escalate into a crisis. Taking proactive action can save you the headache of major repairs and keep your home cool and dry. It’s easy to overlook this kind of home maintenance, but getting to the root of the issue is the key to an efficient AC system

Of course, when you need help, call on the professionals. When your AC unit needs a boost, be sure to reach out to Thelen Plumbing, Heating, and Air.

sink drain being serviced underneath the sink with a hand tool sink drain being serviced underneath the sink with a hand tool

How to Remove Sink Drain (Homeowner’s Guide)

Homeownership comes with its fair share of maintenance tasks, and one of the most common plumbing issues you might encounter is a clogged or faulty sink drain. Knowing how to remove and replace a sink drain can save you time and money. A sink drain removal might seem like a daunting task, especially if you are not particularly handy. However, with the right tools and a bit of patience, it’s a job that most homeowners can tackle themselves. This guide will cover :

  • How to know when you need to remove your sink drain
  • Tools and materials you’ll need
  • 6 step guide on how to remove sink drain

🤔 How To Know When You Need To Remove Your Sink Drain

Knowing when to remove your sink drain is crucial to maintaining a functional and sanitary kitchen or bathroom. Key indicators include:

  • Persistent clogging that isn’t resolved by traditional cleaning methods, such as using a plunger or drain cleaner.
  • Water draining slowly or not at all, despite your efforts, signaling a buildup of debris deep within the drain.
  • Unpleasant odors emanating from the sink, indicating trapped food particles or other organic matter that needs to be cleared.
  • Aged or corroded sink hardware, where replacing the drain can prevent potential leaks and improve the aesthetic and functionality of your fixture.

Identifying these signs early helps prevent more severe plumbing issues and keeps your sink in optimal condition.

🛠️ Tools and Materials You’ll Need

Before you start, gather the following tools and materials:

  • Adjustable wrench
  • Pliers
  • Large pipe wrench
  • Plumber’s putty, putty knife
  • Screwdriver (flathead and Phillips)
  • Bucket
  • Towels or rags
  • Cleaning brush
  • Replacement sink drain kit (if necessary)
  • Plumber’s tape
  • Safety gloves
  • Flashlight

💡 6 Step Guide to Remove a Sink Drain

sink drain being cleaned with a snake tool

In this section, we will walk you through a straightforward 6-step guide to remove a sink drain. Whether you’re dealing with a clogged drain or replacing an old drain, these steps will help you accomplish the task efficiently.

1. Preparation

  • Turn off the Water Supply: Before starting any plumbing task, it’s crucial to turn off the water supply. Locate the shut-off valves under the sink and turn them clockwise until they are fully closed. This prevents any water from flowing while you work on the drain.
  • Clear the Area: Remove any items stored under the sink to give yourself ample workspace. Place a bucket underneath the sink to catch any water that might spill out when you disconnect the pipes.

2. Disconnect the Drain Pipe

  • Locate the P-Trap: The P-trap is the curved section of the drainpipe located beneath the sink. It holds water to prevent sewer gases from entering your home but can also trap debris and cause clogs.
  • Loosen the Slip Nuts: Using an adjustable wrench or pliers, loosen the slip nuts on both ends of the P-trap. Be prepared for water to spill out when you disconnect the trap. Carefully remove the P-trap and empty its contents into the bucket. Inspect the trap for any blockages and clean it thoroughly if you plan to reuse it.

3. Remove the Sink Drain

  • Unscrew the Drain Flange: The drain flange is the visible part of the drain inside the sink. Use pliers or a pipe wrench to grip the flange from below the sink while you unscrew it from the top. You may need a second person to hold the flange in place while you turn it from below.
  • Remove the Drain Body: Once the flange is removed, the drain body should easily come out from the bottom of the sink. If it’s stuck, gently tap around the edges with a screwdriver to loosen it.
  • Clean the Sink Opening: With the drain body removed, clean the sink opening thoroughly. Remove any old plumber’s putty or debris to ensure a smooth surface for the new drain installation.

4. New Drain Assembly

  • Apply Plumber’s Putty: Roll a small amount of plumber’s putty into a snake-like shape and place it around the underside of the new flange. This will create a watertight seal.
  • Drain Assembly: Insert the new drain body into the sink opening from the top. Press down firmly to ensure the plumber’s putty spreads evenly and seals the area.
  • Secure the Drain Body: From under the sink, screw the lock nut onto the drain body. Use pliers or a pipe wrench to tighten it, ensuring a secure fit. Be careful not to overtighten, as this can damage the sink.
  • Reattach the P-Trap: Reconnect the P-trap to the new drain body and the drainpipe. Hand-tighten the slip nuts, then use an adjustable wrench to give them an extra quarter turn for a secure fit.

5. Test for Leaks

  • Turn on the Water: Slowly turn the water supply back on and let the sink fill with water. Check under the sink for any leaks around the drain and P-trap connections.
  • Check the Seal: If you notice any leaks, tighten the connections further. If the leak persists, you may need to reapply plumber’s putty or use plumber’s tape on the threads of the connections.

6. Troubleshooting Common Issues

  • Persistent Leaks: If you encounter persistent leaks, double-check that all connections are tight and that the plumber’s putty is evenly applied. Sometimes, replacing worn-out washers or using additional plumber’s tape can resolve the issue.
  • Drain Still Clogged: If your sink drain is still clogged after reinstallation, the clog might be further down the pipe. You may need to use a plumbing snake or call a professional plumber to address deeper blockages.
  • Difficulty Removing Old Drain: Older drains can be challenging to remove due to corrosion or hard water buildup. Applying a penetrating lubricant and allowing it to sit for a few minutes can help loosen stubborn connections.

✅ Maintenance Tips

sink drain with water draining in a whirlpool

To keep your sink drain functioning properly and prevent future clogs, consider the following maintenance tips:

  • Regular Cleaning: Clean your sink drain regularly by flushing it with hot water and mild detergent, or using vinegar and baking soda (but never combine bleach with vinegar). Avoid using harsh chemicals, as they can damage pipes and seals.
  • Use Drain Screens: Install drain screens to catch hair, food particles, and other debris before they enter the drain. This simple measure can significantly reduce the likelihood of clogs.
  • Avoid Pouring Grease: Never pour grease or oil down the sink drain. These substances can solidify and cause blockages. Instead, dispose of grease in a separate container.
  • Periodic Inspections: Periodically inspect your sink drain and plumbing connections for signs of wear or leaks. Early detection of issues can prevent costly repairs in the future.

🧑‍🔧 When to Call a Professional

While removing and replacing a sink drain is a task many homeowners can handle, there are situations where it’s best to call a professional plumber:

  • Extensive Corrosion: If you notice extensive corrosion on the pipes or fittings, a professional can assess the situation and recommend the best course of action.
  • Persistent Leaks: If you cannot resolve persistent leaks despite your best efforts, a plumber can ensure the connections are correctly installed and watertight.
  • Complex Plumbing Systems: In homes with complex plumbing systems or multiple interconnected drains, professional expertise can help avoid complications.

🙌 Trust Thelen Plumbing, Heating, and Air for Expert Sink Drain Replacement and Plumbing Services

Removing and replacing a sink drain may seem like a manageable DIY project, but for lasting results and peace of mind, trust the experts at Thelen Plumbing, Heating, and Air. Our team is dedicated to saving you money and preventing future plumbing issues with professional, reliable service. By choosing Thelen Plumbing, Heating, and Air, you ensure your home’s plumbing is handled with the utmost care and expertise. We use top-of-the-line tools and thorough testing to guarantee leak-free, smooth operation. For regular maintenance and all your plumbing needs, contact Thelen Plumbing, Heating, and Air today and experience the difference of working with trusted professionals. Call us now to schedule your service!

5 Best AC Brands to Keep Your Home Cool

In the sweltering heat of summer, your air conditioning system is a godsend, quietly keeping the indoors cool and comfortable. For homeowners, choosing the right air conditioner is not just about fending off heat; it’s about balancing comfort with energy efficiency and cost. With numerous brands dominating the market, selecting the best one can be a daunting task.

Here, we present an in-depth guide to the best AC brands that set the standard for performance, durability, and innovation. Whether you’re considering a new installation or an upgrade, this detailed overview will shed light on the factors to prioritize when selecting your cooling companion.

Inside This Blog:

  • How to Select the Perfect AC System
  • Top 5 AC Brands
  • Choosing the Right AC for You

Ready to turn your home into an oasis of cool, fresh air? Read on to discover the best AC brands that cater to both your comfort and your wallet.

How to Select the Perfect AC System

Selecting an air conditioning system is more than just a one-size-fits-all decision. Several factors must play into your choice to ensure optimal performance and efficiency.

Energy Efficient ACs

Energy efficiency goes beyond the initial cost of purchase. High-efficiency systems can save homeowners hundreds on annual energy costs. Understanding the Seasonal Energy Efficiency Ratio (SEER) is vital. The higher the SEER, the more efficient the system.

When shopping for an AC unit, look for models with a SEER rating of 16 or above. These units often come with the Energy Star certification, indicating they meet the stringent energy efficiency guidelines set by the US Environmental Protection Agency(EPA).

Sizing Up Your Options

AC size is not about physical dimensions but the system’s cooling capacity. An undersized unit will struggle to maintain a comfortable temperature, while an oversized unit can cycle on and off too frequently, leading to inefficiency and increased wear and tear.

The square footage of your home is only the starting point for sizing your AC. Other factors like insulation, ceiling height, and number of windows play a role. An HVAC professional can perform a load calculation to determine the correct tonnage for your home.

Finding the Right Type for Your Home

  • Central Air Conditioning: Ideal for whole-house cooling, central AC units use a network of air ducts to distribute cool air.
  • Ductless Mini-Split Systems: These are perfect for room additions or houses without ductwork. They are highly energy efficient and offer zoned cooling options.
  • Window and Portable Units: These compact options are suited for smaller spaces or temporary cooling solutions.

When it comes to picking the right type, consider the layout and design of your home, your heating and cooling needs, and your budget.

a technician is working on a HVAC system with a smiling face

Top 5 AC Brands

Choosing the best air conditioner brand is subjective and often based on unique needs and preferences. However, several brands stand out for their commitment to innovation, reliability, and performance.

Here are the top five AC brands to look into:

1. Lennox

Lennox has a long history of innovation, introducing the first riveted-steel furnace in 1895 and the first air conditioner in 1952. Today, Lennox offers a wide range of efficient and dependable AC systems, with top models, like the Signature® Collection XC25, boasting a SEER rating of up to 26.

Their variable-capacity technology adjusts to changing conditions to ensure the highest levels of comfort and efficiency. Lennox systems come with features, like the iComfort® S30 smart thermostat and the PureAir™ air purification system, setting a high bar for indoor air quality.

2. Carrier

Carrier is synonymous with air conditioning and is often credited with inventing the modern air conditioner. Their Infinity Series central air conditioners are known for their quiet operation and precise control of temperature and humidity.

The Greenspeed Intelligence feature modulates the compressor based on household demand, offering superior dehumidification and comfort while saving energy. Carrier’s AC systems are compatible with the Infinity® Touch control for seamless integration and control.

3. Trane

Trane air conditioners are known for their energy efficiency and durability. Their XV line, including the XV20i, offers industry-leading efficiency with a SEER rating of up to 22.

Trane’s ComfortLink™ II communicating technology connects all the key components of your home’s HVAC system so they ‘talk’ to each other. This modulates the temperature in your home to ensure you’re as comfortable as possible while saving the most energy possible.

4. Rheem

Rheem has been a trusted name in the heating and cooling industry for over 100 years. Their central air conditioners are known for their quiet operation and reliability.

The RA20, part of the Prestige Series, features a composite base pan that dampens sound, and EcoNet™ enabled, which allows for wireless monitoring and control of your system. With a SEER rating of up to 20, this model offers excellent efficiency.

5. Goodman

Goodman is highly respected for providing quality equipment at affordable prices. Their AC systems offer reliable performance and good efficiency.

Goodman’s ComfortBridge technology provides consistent and comfortable temperature throughout your home, and with the investment in a quality installation, Goodman units can last for many years.

Choosing the Right AC for You

Selecting the right air conditioning system for your home is a significant decision that requires careful consideration. It’s not just about the initial outlay; it’s an investment in your home’s comfort and your family’s well-being.

Here’s a quick recap of how to ensure you make the right choice:

  • Prioritize energy efficiency by looking for high SEER ratings and Energy Star certification.
  • Consult an HVAC professional to correctly size your AC system for your home.
  • Choose a type of AC that suits your needs, whether it’s a central system, ductless mini-split, or a window unit.

Do You Need a New Air Conditioner Unit?

Choosing an air conditioner doesn’t have to be a taxing endeavor. It can be an exciting step toward creating a home environment that’s both comfortable and cost-effective. By understanding the ins and outs of the top air conditioner brands, you’re well on your way to making a purchase you can be proud of.

If you’re ready to upgrade your AC system, reach out to Thelen Plumbing, Heating, and Air. We offer a variety of HVAC services.

hand tool resting on a bathtub ledge next to bathtub parts hand tool resting on a bathtub ledge next to bathtub parts

How to Fix Leaky Bathtub Faucet (In 7 Easy Steps)

A leaky bathtub faucet is not only annoying but can also lead to significant water wastage and increased utility bills. Fortunately, fixing a leaky faucet is a relatively straightforward home repair task that most homeowners can undertake without professional help. In this blog, we’ll walk you through:

  • how to fix leaky bathtub faucet in 7 easy steps
  • Tips to avoid a leaking bathtub faucet

🛠️ 7 Steps To Fix A Leaky Bathtub

bathtub faucet being replaced

Here are 5 simple steps to help you fix a leaky bathtub and prevent further water damage.

1. Gather Your Tools and Materials

Before you start, it’s essential to have all the necessary tools and materials on hand. Here’s what you’ll need:

Tools:

  • Adjustable wrench
  • Screwdrivers (Phillips and flathead)
  • Allen wrench (if needed)
  • Plumber’s tape
  • Needle-nose pliers
  • Cartridge puller (if necessary)
  • Towels or rags

Materials:

  • Replacement parts (washer, O-rings, or cartridge)
  • Cleaning supplies (vinegar, cloth, brush)

Having these items ready will make the process smoother and more efficient.

2. Turn Off the Water Supply

Safety first! The last thing you want is a flood in your bathroom. Locate the shut-off valves for your bathtub’s water supply. These are typically found near the faucet or in a utility area. If you can’t find individual shut-off valves, you might need to turn off the main water supply to your home.

Once the water is off, open the faucet to drain any remaining water in the lines. This will prevent any unwanted spills while you’re working.

3. Remove the Faucet Handle

To access the internal parts of the faucet, you’ll need to remove the handle. Here’s how to do it:

  • Identify the type of handle: Faucet handles come in various styles, including knobs, levers, and cross handles. Look for any visible screws that may be holding the handle in place. These are often located under decorative caps.
  • Remove the decorative cap: If your handle has a cap, use a flathead screwdriver to gently pry it off. Be careful not to damage the finish.
  • Unscrew the handle: Use a screwdriver or an Allen wrench to remove the screw holding the handle in place. Once the screw is out, you should be able to pull the handle off easily. If it’s stuck, gently wiggle it back and forth or use a handle puller.

Step 4: Access the Faucet Stem

With the handle removed, you’ll now see the faucet stem or cartridge, which is the part responsible for controlling the flow of water. Depending on the type of faucet you have, the steps to access and remove the stem may vary.

For Compression Faucets:

  • Remove the packing nut: Use an adjustable wrench to unscrew the packing nut, which holds the stem in place.
  • Remove the stem: Once the packing nut is off, you can pull the stem out of the valve body. Use needle-nose pliers if necessary.

For Cartridge Faucets:

  • Remove the retaining clip: Some cartridge faucets have a retaining clip that holds the cartridge in place. Use needle-nose pliers to carefully remove it.
  • Pull out the cartridge: Use a cartridge puller or pliers to pull the cartridge straight out of the valve body. Be gentle to avoid damaging the cartridge or the valve body.

5. Inspect and Replace Faulty Parts

Now that you have access to the faucet’s internal components, it’s time to identify and replace the faulty parts causing the leak.

For Compression Faucets:

  • Inspect the washer: The most common cause of leaks in compression faucets is a worn-out washer. Examine the washer at the bottom of the stem for signs of wear or damage.
  • Replace the washer: If the washer is worn, replace it with a new one of the same size. Apply plumber’s tape around the stem threads to ensure a tight seal when you reassemble the faucet.

For Cartridge Faucets:

  • Inspect the cartridge: Check the cartridge for cracks, mineral buildup, or other damage. If the cartridge is damaged, it will need to be replaced.
  • Replace the cartridge: Install a new cartridge that matches the old one. Make sure it is seated properly in the valve body and replace the retaining clip if applicable.

6. Clean and Reassemble the Faucet

Before reassembling the faucet, take a few moments to clean the valve body and other components. Mineral deposits and debris can accumulate over time, affecting the faucet’s performance.

  • Clean the valve body: Use a cloth and vinegar to clean the inside of the valve body. A small brush can help remove stubborn deposits.
  • Reassemble the faucet: Follow the reverse order of disassembly to reassemble the faucet. Start by reinserting the stem or cartridge, then secure it with the packing nut or retaining clip. Finally, reattach the handle and any decorative caps.

7. Turn On the Water Supply and Test

With the faucet reassembled, it’s time to turn the water supply back on and test for leaks. Follow these steps:

  • Turn on the water supply: Open the shut-off valves or the main water supply to your home.
  • Test the faucet: Turn the faucet on and off several times to check for leaks. Pay close attention to the handle and spout area. If you notice any leaks, ensure all connections are tight and that the replacement parts are properly installed.

💡Tips To Avoid A Leaking Bathtub In The Future

To avoid a leaking bathtub in the future, regular maintenance and timely repairs are key. Follow these steps:

  • Routinely check the caulk and grout around the tub; promptly reseal any areas showing signs of wear or cracks.
  • Clean the bathtub and surrounding tiles regularly to prevent mold and mildew buildup, which can deteriorate seals over time.
  • Ensure the plumbing connections are secure and not corroded; replace old or worn-out parts as needed.
  • Install a quality bathtub mat or liner to protect the tub’s surface from scratches and damage that could lead to leaks.

By staying proactive with these simple steps, you can significantly extend the life of your bathtub and minimize the risk of leaks.

Leave Your Plumbing Worries to The Pros at Thelen Plumbing, Heating, and Air

bathtub being serviced by a professional repair tech

At Thelen Plumbing, Heating, and Air, we understand that fixing a leaky bathtub faucet might seem like a simple DIY project, but for consistent, reliable results, trust our professional team. Our expert plumbers save you time and money by efficiently addressing leaks, preventing water wastage, and ensuring your fixtures work perfectly. We take the guesswork out of plumbing repairs, so you can avoid costly mistakes and further issues.

With Thelen Plumbing, Heating, and Air, you benefit from our extensive experience and dedication to top-notch service, enhancing your home’s plumbing systems and giving you peace of mind. Trust the team at Thelen Plumbing, Heating, and Air for all your plumbing needs. Contact us today to schedule an appointment and experience the best in home plumbing solutions!

AC Not Blowing Cold Air: How to Troubleshoot Your HVAC System

Is there anything more frustrating than walking into your home on a sweltering summer day, only to find that the air conditioner is failing to deliver the much-needed cool relief? For homeowners, a functioning HVAC system is not just a luxury—it’s an essential component that ensures indoor comfort regardless of the weather outside.

Inside this blog:

  • Signs Your AC Isn’t Blowing Cold Air
  • Understanding How Your HVAC System Works
  • Troubleshooting Steps
  • When to Call for Professional Help
  • Importance of Regular HVAC Maintenance

This insightful article serves as a valuable resource for anyone grappling with an AC not blowing cold air. Read on to understand the common problems, how to identify them, and the steps you can take to resolve the issue before it turns into a major headache.

Signs Your AC Isn’t Blowing Cool Air

Before we jump into the mechanics of your air conditioning system, it’s essential to recognize the telltale signs that something might be amiss. The noisy operation, weak airflow, and noticeable variations in cooling can all hint at an underlying problem. Whether it’s a dirty component impeding performance or a more significant mechanical issue, being aware of these symptoms gives you a head start on resolving the malfunction.

Odd Sounds and Smells

If you hear clanking, hissing, or rattling coming from your A/C, or if there’s a funky smell, it’s time to investigate.

Uneven Cooling

Is one room an Arctic tundra, while the next feels like Death Valley? This could indicate a distribution issue within your A/C system.

Weak Airflow

If the air coming from the vents is weaker than normal or feels like a gentle breeze rather than a forceful stream, it’s a sign that your A/C is struggling.

Understanding How Your HVAC System Works

Your HVAC system is a complex network of machinery designed to regulate the temperature and air quality in your home. The air conditioner’s primary function is to remove heat and humidity from the indoor air and, transfer it outside. Understanding the key components of this process is instrumental in identifying where the breakdown might be occurring.

The Components At Work

Your A/C system consists of an evaporator coil inside your home, a condenser coil outside, and a compressor and expansion valve that play essential roles in cooling the air and circulating it throughout your living space.

The Basic Mechanism

Refrigerant, a special fluid that undergoes changes in pressure and temperature, absorbs the indoor heat as it moves over the evaporator coils. It then goes to the compressor, where its temperature increases further before releasing the heat outside.

Troubleshooting Steps

When you’re sweating it out with an A/C that’s not blowing cold air, it’s natural to want to take matters into your own hands. Thankfully, there are several troubleshooting steps that you, as a homeowner, can safely undertake:

1. Check the Thermostat

Sometimes, the solution is as simple as adjusting the thermostat settings. Ensure it’s set to “cool” and that the desired temperature is lower than the current room temperature. If that’s in order, it might still be a problem with the thermostat calibration, which could require professional attention.

2. Inspect and Change the Air Filters

Dirty or clogged air filters can restrict airflow and lead to various problems, including a frozen evaporator coil. Check your filters—dirty filters can be a prime suspect if your A/C isn’t blowing cold air. If they’re dusty or discolored, it’s time for a change or a thorough cleaning.

3. Clear the Area Around the Outdoor Unit

Your A/C’s condenser unit needs space to breathe. Ensure there are no obstructions such as leaves, branches, or other debris that could impede its functioning.

4. Check for Refrigerant Leaks

Low refrigerant levels can be due to a leak in the system. You can visually inspect the unit for any signs of leaks, such as oil around connections or lines, but the detection and repair of such leaks are tasks best left to professionals.

5. Assess the Ductwork

Leaks or blockages in the duct system can significantly impact the effectiveness of your A/C. Check for tears, loose connections, or any obstacles within the ducts that might be causing the issue.

a technician is fixing a HVAC machine

When to Call for Professional Help

While many A/C issues can be resolved with the aforementioned troubleshooting steps, some problems are more complex and require the expertise of an HVAC technician. It’s time to enlist professional help if:

  • Your A/C unit is more than a decade old and has a history of problems.
  • The air coming from the vents isn’t just warm but feels hot.
  • There are ice formations on the A/C unit or refrigerant lines.
  • You’ve performed the basic checks and the issue persists.

Importance of Regular HVAC Maintenance

Preventive HVAC maintenance is the first line of defense against unexpected breakdowns. By scheduling regular service, you can ensure that your A/C system is in peak condition to handle the hot months without a hitch. Professional maintenance typically includes the inspection of electrical connections, system controls, and the overall condition of the unit, as well as cleaning components, like the coils and blower parts.

We Can Fix Your Air Conditioning Unit

Your home’s comfort is a high priority, and your HVAC system plays a pivotal role in maintaining it. Knowing how to troubleshoot common A/C problems is empowering, but it’s just as important to recognize when a job is better left to the professionals. Regular maintenance is key to avoiding major issues down the line. If you’ve followed these steps, and you still can’t seem to fix the problem, it’s probably a good idea to reach out to an expert.

In any case, remember that Thelen Plumbing, Heating, and Air is always here to help ensure that your air conditioning system is up to the task of keeping your home cool and comfortable. Don’t hesitate to contact us for a thorough inspection and the highest quality service for all your home improvement needs. Stay cool and stress-free, no matter the weather.

dishwasher being serviced by a repair tech dishwasher being serviced by a repair tech

How to Fix Dishwasher Leaking From Bottom (In 8 Steps)

Dishwashers are a modern convenience that save time and effort, but when they malfunction, it can be a major hassle. One common issue homeowners face is a dishwasher leaking from the bottom. While this can seem like a daunting problem, it’s often fixable with a bit of patience and some basic tools. In this guide, we’ll walk you through:

  • 8 steps to diagnose and fix a dishwasher leaking from bottom
  • Preventative measures to avoid future leaks
  • When to call a professional

💡 8 Steps To Fix A Leaking Dishwasher

dishwasher being repaired by a repair tech

In this section, we will explore a systematic approach to addressing common dishwasher leaks. Follow these 8 steps to troubleshoot and fix your leaking dishwasher effectively.

1. Gather Your Tools and Supplies

Before you start, make sure you have the necessary tools and supplies:

  • Screwdrivers (Phillips and flathead)
  • Adjustable wrench
  • Towels or rags
  • Bucket
  • Flashlight
  • Replacement parts (gaskets, hoses, etc.)
  • Dish soap and a scrub brush
  • Plumbers tape

2. Safety First

Safety should always be your top priority. Start by turning off the power to the dishwasher. You can do this by either unplugging it from the wall outlet or switching off the circuit breaker that controls the dishwasher. Additionally, turn off the water supply to the dishwasher to prevent any further leakage.

3. Identify the Source of the Leak

To fix the leak, you first need to determine where it’s coming from. Here are some common sources:

  • Door Gasket: The rubber seal around the door that prevents water from leaking out during a wash cycle.
  • Water Inlet Valve: The valve that allows water to enter the dishwasher.
  • Hoses and Connections: Various hoses and their connections inside the dishwasher that could be loose or damaged.
  • Pump and Motor Assembly: Located at the bottom of the dishwasher, responsible for circulating water.
  • Float Switch: A device that prevents the dishwasher from overfilling.

Lay some towels around the dishwasher to catch any water, and use a flashlight to inspect these areas for signs of leakage.

4. Check and Replace the Door Gasket

The door gasket is a common culprit for leaks. Over time, it can become brittle, cracked, or loose. Here’s how to check and replace it:

  • Open the Door: Open the dishwasher door and inspect the gasket for any visible signs of damage.
  • Remove the Gasket: If damaged, gently pull the gasket out of its groove.
  • Clean the Groove: Use dish soap and a scrub brush to clean the groove where the gasket sits.
  • Install the New Gasket: Push the new gasket firmly into the groove, ensuring it sits evenly all around the door.

Close the door and run a short cycle to check if the leak persists.

5. Inspect the Water Inlet Valve

The water inlet valve can sometimes malfunction, causing leaks at the bottom of the dishwasher. Here’s how to inspect and replace it if necessary:

  • Access the Valve: The water inlet valve is usually located at the bottom of the dishwasher. You may need to remove the lower front panel to access it.
  • Check for Damage: Inspect the valve and the area around it for any signs of water leakage.
  • Test the Valve: Use a multimeter to test the valve for continuity. If it’s faulty, it will need to be replaced.
  • Replace the Valve: Disconnect the water supply line and the electrical connections, then remove the valve. Install the new valve by reversing these steps.

Run a test cycle to ensure the leak is fixed.

6. Examine Hoses and Connections

Leaks can also occur due to loose or damaged hoses and their connections. Here’s how to check them:

  • Access the Hoses: Open the dishwasher and remove the lower rack to access the hoses.
  • Inspect the Hoses: Look for any signs of wear, cracks, or loose connections.
  • Tighten Connections: Use an adjustable wrench to tighten any loose connections.
  • Replace Damaged Hoses: If you find any damaged hoses, replace them. Make sure to use plumbers tape on the threads to ensure a tight seal.

Run the dishwasher to check if the problem is resolved.

7. Check the Pump and Motor Assembly

The pump and motor assembly is another potential source of leaks. Here’s how to inspect and replace it if necessary:

  • Access the Assembly: The pump and motor assembly is located at the bottom of the dishwasher. You may need to remove the lower front panel and the bottom cover to access it.
  • Inspect for Leaks: Check the pump housing and the motor for any signs of water leakage.
  • Test the Motor: Use a multimeter to test the motor for continuity. If the motor is faulty, it will need to be replaced.
  • Replace the Assembly: Disconnect the electrical connections and the hoses attached to the pump and motor assembly. Remove the assembly and install the new one by reversing these steps.

Run a test cycle to ensure the leak is fixed.

8. Inspect the Float Switch

The float switch prevents the dishwasher from overfilling with water. If it’s malfunctioning, it could cause a leak. Here’s how to check and replace it:

  • Locate the Float Switch: The float switch is usually located at the bottom of the dishwasher tub.
  • Inspect for Damage: Check the float switch and the area around it for any signs of damage or debris that could prevent it from functioning properly.
  • Test the Switch: Use a multimeter to test the float switch for continuity. If it’s faulty, it will need to be replaced.
  • Replace the Switch: Disconnect the electrical connections and remove the float switch. Install the new switch by reversing these steps.

Run the dishwasher to check if the leak is resolved.

🗓️ Preventive Measures to Avoid Future Leaks

dishwasher being serviced by a dishwasher repair tech

Once you’ve fixed the leak, take some preventive measures to avoid future problems:

  • Regular Maintenance: Clean the dishwasher’s filter, spray arms, and door gasket regularly to prevent buildup that could cause leaks.
  • Check for Clogs: Periodically check the drain hose and the garbage disposal (if connected) for clogs that could cause water to back up into the dishwasher.
  • Run Hot Water: Before starting a cycle, run hot water in the sink to ensure the dishwasher starts with hot water, which can help dissolve detergent better and reduce residue buildup.
  • Use the Right Detergent: Use only dishwasher-specific detergents to prevent excessive sudsing that could cause leaks.

🧑‍🔧 When to Call a Professional

While many dishwasher leaks can be fixed with the steps outlined above, some issues may require professional help. If you’ve tried these steps and the dishwasher still leaks, or if you’re uncomfortable performing any of the repairs yourself, it’s best to call a professional appliance repair technician.

A professional can diagnose and fix more complex issues, such as problems with the dishwasher’s internal plumbing or electronic controls, ensuring your appliance is repaired safely and effectively.

🙌 Solve Your Leaking Dishwasher Woes with Thelen Plumbing, Heating, and Air

A leaking dishwasher can be a frustrating problem, but with the expertise of Thelen Plumbing, Heating, and Air, you can rest assured knowing your plumbing issues are in capable hands. Our team of trusted experts is equipped with the right tools and extensive know-how to diagnose and repair common causes of leaks efficiently. We prioritize safety and provide professional, reliable service, ensuring that your dishwasher remains in top condition for years to come. Don’t let plumbing problems disrupt your home – contact Thelen Plumbing, Heating, and Air today for a prompt and dependable solution!

circular shower head not turning off circular shower head not turning off

Shower Won’t Turn Off (5 Steps to Take Next)

A malfunctioning shower that won’t turn off can be a significant inconvenience and a potential source of water damage. Understanding the root cause and knowing the correct steps to address the issue can save you time, money, and stress. In this blog post, we will outline the steps to take if your shower won’t turn off, including:

  • 5 steps to take when your shower won’t turn off
  • Preventative measures to avoid future problems
  • Common types of shower valves and their specific issues
  • When to repalce a shower valve

💡 5 Steps to Take When Your Shower Won’t Turn Off

woman holding shower head whose shower won't turn off

Dealing with a shower that won’t turn off can be frustrating and inconvenient. Here are five steps to help you quickly resolve the issue and get your shower back to normal.

1. Immediate Actions to Stop Water Flow

  • Turn Off the Water Supply: The first and most crucial step is to turn off the water supply to your shower. Most homes have a shut-off valve for the bathroom, typically located near the water heater, under the sink, or behind an access panel. If you cannot find the individual shut-off valve for your bathroom, you may need to turn off the main water supply to your house.
  • Open Other Faucets: Once the water supply is turned off, open other faucets in your home to drain the remaining water in the pipes. This can help minimize the flow of water from the malfunctioning shower and reduce the risk of water damage.

2. Identify the Cause of the Problem

After stopping the water flow, the next step is to identify the cause of the problem. Several common issues can prevent a shower from turning off, including:

  • Faulty Shower Valve: The shower valve controls the flow of water and the mix of hot and cold water. Over time, the valve can wear out, become corroded, or develop sediment build-up, leading to malfunction.
  • Broken Handle or Cartridge: The handle or cartridge inside the shower faucet can break or become stripped, preventing you from properly turning off the water.
  • Loose or Damaged Washer: A loose or damaged washer inside the shower valve can also cause water to continue flowing. Washers are small, rubber or plastic components that create a watertight seal when the valve is closed.
  • Mineral Build-Up: Hard water can cause mineral deposits to build up inside the shower valve, obstructing the proper function of the valve and preventing it from shutting off completely.
removing the shower handle of a shower that won't turn off

3. Gather Necessary Tools and Materials

Before attempting any repairs, gather the necessary tools and materials. Common tools and supplies needed for shower repairs include:

  • Adjustable wrench
  • Screwdrivers (flathead and Phillips)
  • Plumber’s tape
  • Replacement parts (e.g., shower valve, cartridge, washers)
  • Bucket or container (to catch excess water)
  • Towels or rags

4. Repairing the Shower Valve

  • Remove the Shower Handle: Use a screwdriver to remove the screw holding the shower handle in place. If the handle is stuck, you may need to use a handle puller tool to gently pry it off.
  • Inspect and Remove the Cartridge: Once the handle is removed, inspect the cartridge inside the valve. Depending on the type of shower valve you have, the cartridge may need to be pulled out with pliers or unscrewed. If the cartridge is damaged or corroded, it will need to be replaced.
  • Check and Replace Washers: Inspect the washers inside the valve for signs of wear or damage. If the washers are loose, cracked, or worn out, replace them with new ones. Be sure to use washers that are compatible with your specific shower valve model.
  • Clean the Valve: Use a clean cloth to wipe away any mineral deposits or debris inside the valve. You can also use a vinegar solution to dissolve stubborn mineral build-up.
  • Reassemble the Valve: Reassemble the shower valve by reversing the steps you took to disassemble it. Apply plumber’s tape to any threaded connections to ensure a watertight seal. Reattach the shower handle and test the valve to ensure it turns off properly.

5. Consider Professional Help

If you have followed the steps above and the problem persists, it may be time to consider professional help. Professional plumbing services can diagnose and repair more complex issues with your shower, such as damaged pipes or internal valve components that require specialized tools and expertise.

🛠️ Preventive Measures to Avoid Future Problems

shower head spraying water

Preventing future issues with your shower involves regular maintenance and timely repairs. Here are some preventive measures to keep your shower in good working condition:

  • Regularly Inspect and Clean the Shower Valve: Periodically inspect the shower valve for signs of wear, corrosion, or mineral build-up. Clean the valve and replace any worn-out components as needed.
  • Install a Water Softener: If you have hard water in your home, consider installing a water softener to reduce mineral deposits in your plumbing system. A water softener can help prolong the life of your shower valve and other plumbing fixtures.
  • Use High-Quality Replacement Parts: When repairing your shower, use high-quality replacement parts that are compatible with your specific valve model. Cheap or incompatible parts can lead to further problems and reduce the longevity of your repairs.
  • Schedule Regular Plumbing Inspections: Schedule regular plumbing inspections with a licensed plumber to identify and address potential issues before they become major problems. A professional inspection can catch early signs of wear and tear and ensure your plumbing system is functioning correctly.

🚿 Common Types of Shower Valves and Their Specific Issues

Understanding the type of shower valve in your home can help you address issues more effectively. Here are some common types of shower valves and their specific problems:

  • Compression Valve: Compression valves use rubber washers to control water flow. Over time, these washers can wear out, causing leaks or difficulty turning off the water. Replacing the washers is usually a straightforward fix.
  • Ball Valve: Ball valves use a rotating ball with holes to control water flow. These valves can develop leaks due to worn-out seals or o-rings. Replacing the seals or o-rings can often resolve the issue.
  • Cartridge Valve: Cartridge valves use a movable stem cartridge to control water flow. These valves are known for their durability but can still develop issues such as leaks or difficulty turning off the water. Replacing the cartridge is a common solution.
  • Ceramic Disc Valve: Ceramic disc valves use two ceramic discs to control water flow. These valves are highly durable and less prone to wear. However, if they do develop problems, they often require specialized replacement parts.

🤔 When to Replace the Shower Valve

In some cases, repairing the shower valve may not be enough, and replacement may be necessary. Here are some signs that it may be time to replace the shower valve:

  • Frequent Leaks: If your shower valve is prone to frequent leaks despite multiple repairs, it may be more cost-effective to replace the valve entirely.
  • Difficulty Turning Off the Water: If you consistently have difficulty turning off the water, it may indicate that the valve is worn out and needs replacement.
  • Visible Corrosion or Damage: Visible signs of corrosion or physical damage to the valve components are clear indicators that replacement is necessary.
  • Age of the Valve: If your shower valve is old and has been in use for many years, it may be time to consider replacement as part of regular maintenance.

🙌 Expert Shower Repairs: Trust Thelen Plumbing, Heating, and Air for Reliable Solutions

Dealing with a shower that won’t turn off can be frustrating, but Thelen Plumbing, Heating, and Air is here to help. Our team of experts can efficiently resolve the issue by turning off the water supply, identifying the root cause, and performing the necessary repairs to restore your shower to perfect working condition. Regular maintenance and timely repairs by our professionals can prevent future issues and extend the life of your shower valve.

Understanding different types of shower valves and their specific issues is crucial for making informed repair and replacement decisions. At Thelen Plumbing, Heating, and Air, we use high-quality replacement parts and offer regular plumbing inspections to maintain the integrity of your plumbing system and prevent costly water damage. By choosing Thelen Plumbing, Heating, and Air, you save time and money while gaining peace of mind knowing your shower is in expert hands. Contact us today to schedule your service and ensure a reliable, functional shower for years to come.

shower parts wrapped around tub faucet shower parts wrapped around tub faucet

6 Types of Shower Valves (Function, Brands, & More)

When it comes to bathroom renovations, one of the key elements that homeowners must consider is the shower valve. This often-overlooked component plays a crucial role in controlling the flow and temperature of the water in your shower. With a plethora of options available in the market, selecting the right shower valve can be a daunting task. In this comprehensive guide, we will explore the various types of shower valves, including:

  • 6 types of shower valves
  • Factors to consider when choosing shower valves
  • Top brands and their offerings

🚿 6 Types of Shower Valves

shower parts being installed

Understanding the various types of shower valves is crucial to selecting the right fit for your bathroom. Below, we outline the key features and benefits of each type, helping you make an informed decision.

1. Pressure-Balancing Valves

Function: Pressure-balancing valves are designed to maintain a consistent water temperature by adjusting the water flow to compensate for pressure changes. If someone flushes the toilet or uses a faucet while you are showering, this type of valve ensures that you won’t experience a sudden change in water temperature.

Pros:

  • Prevents sudden temperature changes
  • Enhances safety, especially for children and the elderly
  • Typically more affordable than thermostatic valves

Cons:

  • Less precise temperature control
  • May not be as effective in homes with significant water pressure variations

Popular Brands: Delta, Kohler, Moen

2. Thermostatic Valves

Function: Thermostatic valves provide precise control over water temperature. They maintain the desired temperature by mixing hot and cold water and adjusting automatically to compensate for changes in water pressure and temperature. This type of valve often includes a separate control for water flow and temperature.

Pros:

  • Consistent and precise temperature control
  • Enhanced safety features
  • Suitable for homes with varying water pressure

Cons:

  • More expensive than pressure-balancing valves
  • May require professional installation

Popular Brands: Grohe, Hansgrohe, Brizo

3. Diverter Valves

Function: Diverter valves are used in showers with multiple outlets, such as a combination of a showerhead, handheld shower, and body jets. This valve allows you to direct water to different outlets without the need for separate controls for each one.

Pros:

  • Convenient control of multiple shower outlets
  • Space-saving design
  • Adds versatility to your shower experience

Cons:

  • Limited to directing water flow, not controlling temperature
  • May require additional valves for temperature control

Popular Brands: Symmons, American Standard, Pfister

4. Transfer Valves

Function: Transfer valves are similar to diverter valves but offer more precise control over the direction of water flow. They are typically used in complex shower systems with multiple functions, allowing you to operate different outlets simultaneously or separately.

Pros:

  • Precise control over multiple shower functions
  • Enhances the luxury shower experience
  • Compatible with advanced shower systems

Cons:

  • More expensive than basic diverter valves
  • Installation can be complex

Popular Brands: Delta, Kohler, Grohe

5. Mixing Valves

Function: Mixing valves combine hot and cold water to deliver the desired temperature. They are a fundamental component of both pressure-balancing and thermostatic valves and can be found in a variety of shower systems.

Pros:

  • Simple and effective temperature control
  • Widely available and affordable
  • Essential for maintaining water temperature

Cons:

  • Basic models may lack advanced features
  • Not suitable for precise temperature control without additional mechanisms

Popular Brands: Moen, Kohler, Delta

6. Volume Control Valves

Function: Volume control valves regulate the flow of water to the showerhead or other outlets. They are often used in conjunction with thermostatic or pressure-balancing valves to provide independent control over water flow and temperature.

Pros:

  • Allows fine-tuning of water flow
  • Enhances water conservation
  • Compatible with various shower systems

Cons:

  • Requires additional valves for temperature control
  • Can add to the overall cost of the shower system

Popular Brands: Hansgrohe, Grohe, Kohler

🤔 Factors to Consider When Choosing a Shower Valve

shower valve being installed with hand tools

Selecting the right shower valve involves more than just picking a reputable brand. It’s essential to consider several factors such as the type of shower system, water pressure, and personal preferences to ensure optimal performance and satisfaction.

  • Water Pressure: Understanding the water pressure in your home is crucial when selecting a shower valve. Homes with inconsistent water pressure may benefit from thermostatic valves, which offer more precise temperature control.
  • Shower System Configuration: Consider the complexity of your shower system. If you have multiple outlets, such as a rain shower head, handheld shower, and body jets, a transfer valve may be the best option. For simpler setups, a pressure-balancing or mixing valve might suffice.
  • Safety Features: Safety is a paramount concern, especially in households with children or elderly individuals. Thermostatic valves with anti-scald technology can prevent accidental burns by maintaining a consistent water temperature.
  • Budget: Shower valves come in a wide range of prices. While thermostatic valves and advanced transfer valves offer numerous benefits, they are also more expensive. Pressure-balancing valves and mixing valves are typically more affordable and can still provide reliable performance.
  • Brand Reputation: Choosing a reputable brand ensures quality, durability, and customer support. Brands like Delta, Kohler, Moen, and Grohe have established themselves as leaders in the industry, offering a range of products to suit different needs and budgets.
  • Installation Requirements: Some shower valves are more complex to install and may require professional assistance. Consider the ease of installation and whether you are comfortable with a DIY project or prefer to hire a professional plumber.

✅ Top Brands and Their Offerings

Selecting high-quality shower valves and choosing a reputable brand can make all the difference. Here, we explore the top brands in the market—Delta, Kohler, Moen, Grohe, and Hansgrohe—and highlight what each offers to enhance your shower experience.

  • Delta: Delta is known for its innovative designs and reliable performance. Their pressure-balancing valves, such as the Delta MultiChoice Universal Valve, are popular choices for homeowners looking for affordability and functionality. Delta also offers advanced thermostatic valves for those seeking precise temperature control.
  • Kohler: Kohler offers a wide range of shower valves, including pressure-balancing, thermostatic, and transfer valves. The Kohler Rite-Temp valve is a standout product known for its reliability and ease of installation. Kohler’s thermostatic valves, like the MasterShower Thermostatic Valve, are designed for luxury shower systems.
  • Moen: Moen is a trusted name in bathroom fixtures, and their shower valves are no exception. The Moen Posi-Temp valve is a popular pressure-balancing option that provides consistent temperature control. For those seeking advanced features, the Moen ExactTemp thermostatic valve offers precise temperature adjustments and enhanced safety.
  • Grohe: Grohe is renowned for its high-quality products and innovative technology. Their GrohTherm thermostatic valves are designed for precision and safety, making them ideal for luxurious shower setups. Grohe also offers reliable diverter and transfer valves for more complex shower systems.
  • Hansgrohe: Hansgrohe combines German engineering with stylish designs, offering a range of shower valves to suit different needs. The Hansgrohe Ecostat thermostatic valve is a popular choice for its precise temperature control and eco-friendly features. Hansgrohe’s volume control valves are also highly regarded for their functionality and design.

🙌 Find Your Perfect Shower Valve with Thelen Plumbing, Heating, and Air’s Expertise!

Choosing the right shower valve is essential for a comfortable and safe shower experience. At Thelen Plumbing, Heating, and Air, our expert team is here to help you make the best choice. Whether you need a basic pressure-balancing valve or a sophisticated thermostatic valve, we ensure you understand the different types and their functions for an informed decision. We consider your specific needs, budget, and shower system configuration to find the perfect fit. Trust in our experience and dedication to quality service. With reputable brands like Delta, Kohler, Moen, Grohe, and Hansgrohe, we guarantee the perfect valve to enhance your shower experience.

Contact us at Thelen Plumbing, Heating, and Air today to start your project and experience the difference our expertise makes!

Schedule Service

"*" indicates required fields

This field is for validation purposes and should be left unchanged.