Author: Kevin

5 Of The Best Under Sink Water Filters

Are you tired of lugging around heavy water jugs or dealing with unpleasant tap water? It’s time to discover the best under sink water filters that can transform your home’s water supply into a fresh, pure oasis. In this guide, we’ll explore the benefits of under sink water filters, help you choose the right one for your needs, and introduce you to some top-rated options. With cleaner, better-tasting water at your fingertips, you’ll wonder how you ever went without one!

  • The importance of clean water in your home
  • Key features to look for in the best under sink water filter
  • Top 5 under sink water filters worth considering
  • How to install your under sink water filter

🤔 The Importance of Clean Water in Your Home

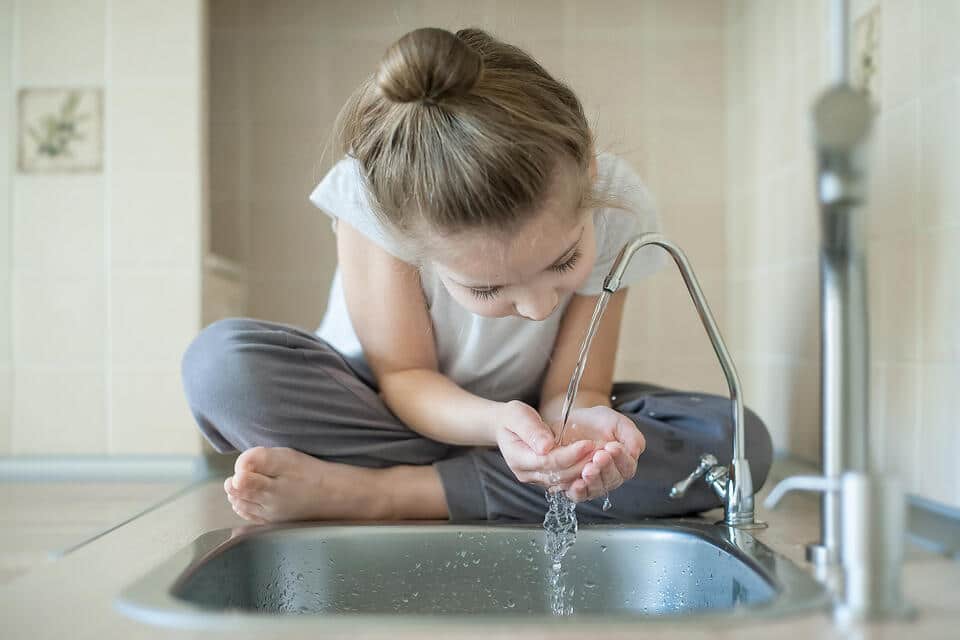
best under sink water filter-young girl drinking water from a water spigot in the kitchen sink

Water is a fundamental part of our daily lives, and having access to clean, safe water is essential for health and well-being. Not only do we rely on water for drinking, but it also plays a crucial role in cooking, cleaning, and maintaining hygiene. Unfortunately, not all tap water meets the highest standards of purity. Contaminants such as chlorine, lead, pesticides, and bacteria can sometimes find their way into our supplies, posing potential health risks. This is where an under sink water filter comes into play, offering a convenient and effective solution to improve your home’s water quality and ensure that you and your family are drinking the best possible water.

Comprehensive Filtration

Under sink water filters are designed to remove a wide variety of impurities from your water, providing a multi-layered approach to filtration. They can tackle everything from sediment and chlorine, which can affect taste and odor, to more harmful impurities like heavy metals, including lead and mercury, as well as microorganisms such as bacteria and viruses. By utilizing advanced filtration technologies, these systems ensure that every drop you drink or use for cooking is as clean and safe as possible. This not only enhances the flavor of your water but also contributes to a healthier lifestyle by reducing exposure to harmful substances.

Convenient Installation

One of the remarkable features of under sink water filters is their convenient installation. Once installed, these systems are discreet and out of sight, which helps to maintain the aesthetics of your kitchen. Unlike countertop models or pitcher filters, which can take up valuable counter space and require constant refilling, under sink filters are seamlessly integrated into your plumbing system. This means you can enjoy clean water on demand without cluttering your kitchen workspace, making them perfect for any kitchen, regardless of size. Plus, many models come with easy installation instructions, allowing you to set them up with minimal hassle.

Cost-Effective Solution

Investing in an under sink water filter can lead to significant cost savings over time. By reducing your reliance on bottled water, you not only save money but also contribute to reducing plastic waste, which is better for the environment. Additionally, these filters can help minimize wear and tear on your plumbing system by removing harmful contaminants that can lead to costly repairs down the line. The savings you enjoy from improved water quality and reduced bottled water purchases make under sink water filters a smart and cost-effective investment that pays off with every sip you take, ensuring that you and your family have access to the cleanest water possible.

Why Choose an Under Sink Water Filter?

Before we jump into the specifics of choosing the best under sink water filter, let’s consider why this type of filtration system might be the ideal choice for your home.

  • Space Efficiency: For many homeowners, kitchen counter space is a premium commodity. Under sink water filters are installed directly into your plumbing, keeping them hidden and freeing up your workspace. This makes them an excellent choice for small kitchens or anyone who prefers a clutter-free environment.
  • Superior Filtration: Under sink systems typically offer more comprehensive filtration than smaller, pitcher-type filters. With robust multi-stage filtration processes, they can tackle a broader spectrum of contaminants, including those microscopic particles that might slip through less advanced filters.
  • Ongoing Supply of Clean Water: With an under sink filter, you won’t need to constantly fill pitchers or replace small filters. Instead, you’ll have a continuous supply of filtered water directly from your faucet, making it more convenient than other options.

👉 Key Features to Look For in the Best Under Sink Water Filter

When shopping for an under sink water filter, it’s crucial to consider several key features to ensure you select the best model for your needs.

Filtration Capabilities

Not all filters are created equal, and their effectiveness can vary significantly. Look for models that offer multi-stage filtration processes, which can include sediment filters, activated carbon filters, reverse osmosis membranes, and UV light purification. These systems are capable of removing a wide range of contaminants, such as heavy metals (like lead and mercury), chlorine, pesticides, volatile organic compounds (VOCs), bacteria, and viruses. The more comprehensive the filtration, the cleaner your water will be, leading to better taste and improved health. Additionally, check for certifications from organizations like NSF International or the Water Quality Association, which ensure that the filter meets specific safety and performance standards.

Maintenance Requirements

Maintenance is a crucial aspect to consider when choosing an under sink water filter. Some filters require frequent cartridge changes, which can be costly and time-consuming, while others are designed to last for several months or even years before needing replacement. Evaluate how much effort you are willing to invest in maintenance. Systems that come with easily replaceable filters or filter indicators that alert you when it’s time for a change can save you a lot of hassle. Additionally, consider whether the filter has a straightforward installation process, as some may require professional help to set up, which adds to the overall cost.

Flow Rate

A filter’s flow rate is an essential factor that impacts your daily convenience. It measures how quickly water can flow through the filter and out of your faucet. Look for models that offer a high flow rate, ideally over 1 gallon per minute, so you don’t have to wait long for a glass of water or when filling pots for cooking. However, it’s important to strike a balance between purification speed and thoroughness. Some filters may offer fast flow rates but compromise on the effectiveness of contaminant removal. Doing some research and reading reviews can help you find a filter that maintains a good flow rate without sacrificing quality.

🚰 Top 5 Under Sink Water Filters Worth Considering

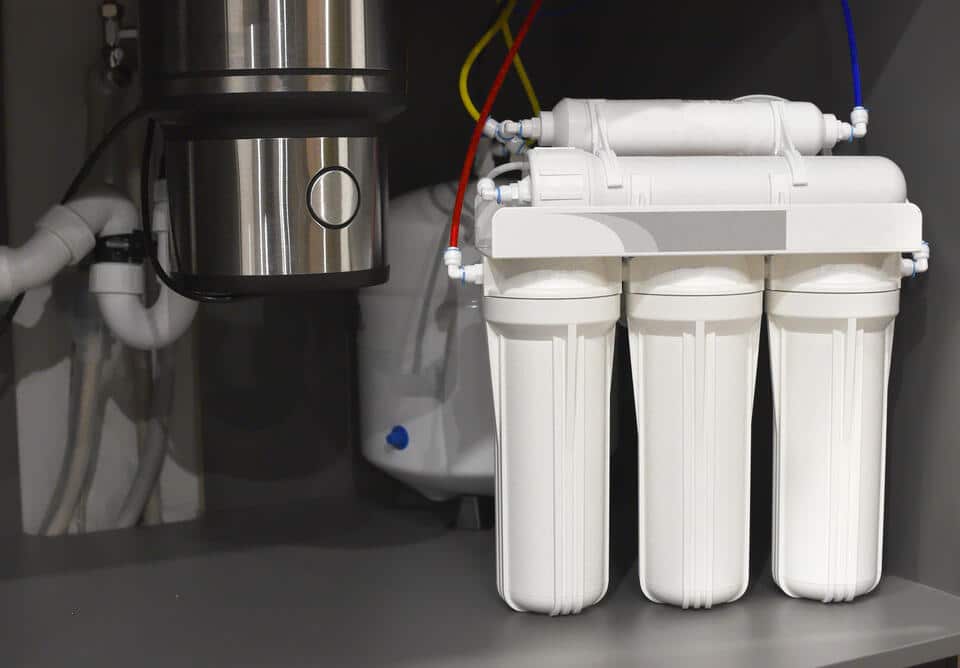
best under sink water filter-under sink water filtration system

To simplify your search, we’ve compiled a list of some of the best under sink water filters available today. These options are highly rated for their performance and customer satisfaction.

1. Waterdrop WD-G3-W Reverse Osmosis System

Features: Removes over 1,000 pollutants, tankless design for compact spaces, smart LED display.

Benefits: High-capacity filtration ensures your water is free from harmful substances, and the tankless design saves space.

2. APEC Water Systems ROES-50

Features: 5-stage filtration, durable filters, certified to remove contaminants like lead and chlorine.

Benefits: Known for its reliability and effectiveness, this system provides crisp, clean drinking water consistently.

3. iSpring RCC7AK 6-Stage Reverse Osmosis System

Features: 6-stage filtration with Alkaline Remineralization, transparent housing for easy maintenance.

Benefits: Not only purifies water but also adds beneficial minerals back for improved taste and health benefits.

4. Frizzlife Under Sink Water Filter System

Features: Quick change filters, advanced filtration technology, high flow rate.

Benefits: Easy installation and maintenance, this system is user-friendly and delivers high-quality water fast.

5. CuZn UC-200 Under Counter Water Filter

Features: 5-year lifespan, Micro Sediment membranes, bacteriostatic filtration.

Benefits: Low maintenance with a long filter life, perfect for those seeking a hassle-free, eco-friendly solution.

🛠️ How to Install Your Under Sink Water Filter

Installing an under sink water filter can seem daunting, but most models are designed for user-friendly installation. Here’s a general step-by-step guide to get you started:

Gather Your Tools

Before you begin, make sure you have all the necessary tools on hand. This usually includes a wrench, a drill, and the installation kit that comes with your filter.

Turn Off the Water Supply

Locate the cold water valve under your sink and turn it off. This prevents any water spills during installation.

Install the Filter and Connect the Tubing

Follow the manufacturer’s instructions to install the filter unit. Most systems will require you to attach tubing to connect the filter to your water supply and faucet.

Maintaining Your Under Sink Water Filter

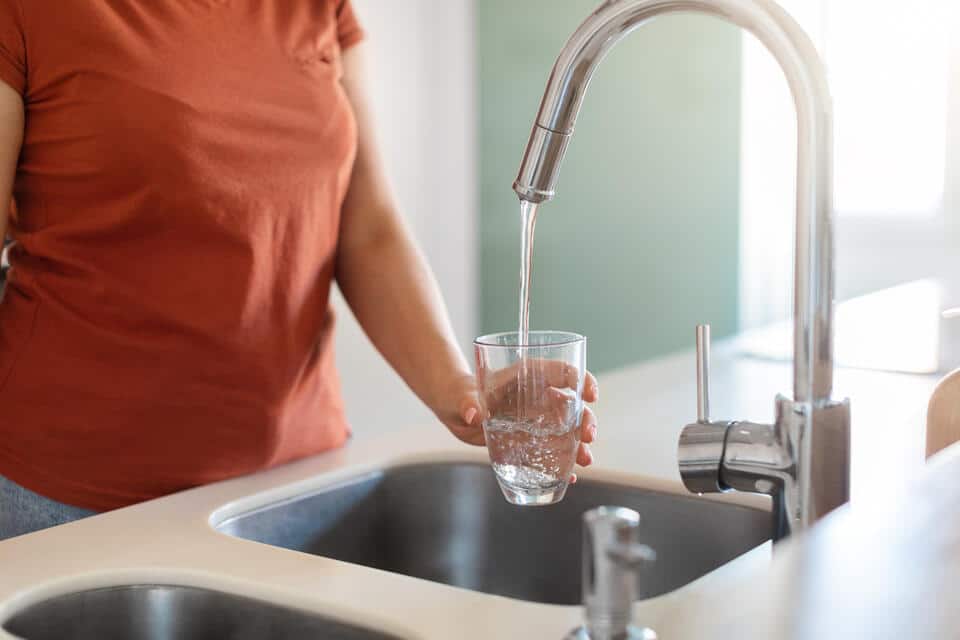
best under sink water filter-woman filling up a glass of water from the kitchen faucet

To keep your water filter functioning optimally, regular maintenance is crucial. Here are some tips to ensure your system stays in top condition:

  • Regularly Change Filters: Each filter type has its recommended lifespan. Make sure to replace your filters regularly to maintain water quality and system efficiency.
  • Inspect for Leaks: Periodically check your filter system for leaks, especially around connections and joints. This can prevent water damage and ensure your filter is working properly.
  • Clean the System: Some filters may require periodic cleaning to remove buildup. Refer to your system’s user manual for instructions on cleaning and maintenance.
  • Check Water Pressure: Monitor the water pressure in your system. Low pressure may indicate a clogged filter that needs attention.
  • Keep an Eye on Taste and Odor: If you notice any changes in the taste or smell of your water, it may be time to change your filter or check for issues.
  • Follow Manufacturer Guidelines: Always adhere to the maintenance schedule and guidelines provided by the manufacturer for the best results.

🙌 Enhance Your Home’s Water Quality with Thelen Plumbing, Heating, and Air

Investing in the best under sink water filter can significantly improve the quality of your home’s water supply. With cleaner, better-tasting water, you’ll enjoy every sip and gain peace of mind knowing you’re protecting your family from harmful contaminants.

At Thelen Plumbing, Heating, and Air, we’re passionate about helping homeowners create healthier, more comfortable living environments. With our plumbing expertise and dedication to customer satisfaction, you can trust us for all your water filtration needs. Whether you’re ready to install a new system or need expert advice, we’re here to help. Contact us today to schedule a consultation and take the first step towards a cleaner water future!

11 Common Plumbing Issues & How To Solve Them

Have you ever noticed a mysterious puddle forming under your sink or heard the dreaded sound of a running toilet? These are just a couple of the common plumbing issues homeowners face. But don’t worry—this blog will guide you through identifying and solving these pesky problems before they escalate. Our handy guide covers:

  • Leaks and Drips
  • Toilet Issues
  • Drainage Problems
  • Water Pressure and Heating
  • Pump and Pipe Issues

🚰 11 Common Plumbing Issues

Understanding common plumbing issues is essential for homeowners, as it enables them to identify problems early and take appropriate action. This knowledge can help prevent costly repairs and ensure a functional and safe plumbing system.

1. Leaky Faucets

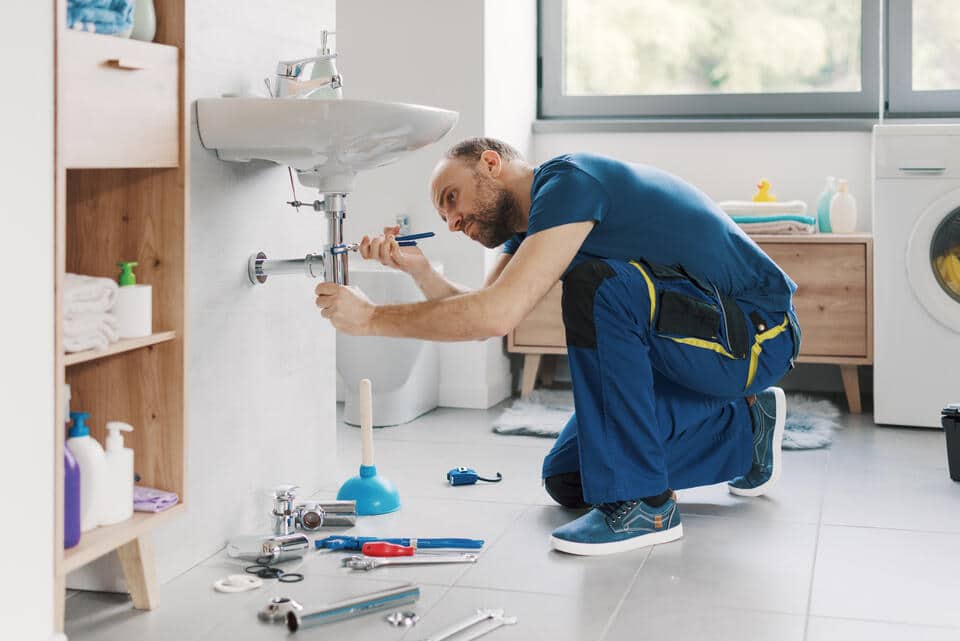
plumbing issues-technician addressing a leaky faucet issue

Leaky faucets are one of the most common plumbing problems, and they can be quite the nuisance. The constant drip, drip, drip can keep you awake at night and inflate your water bill over time.

A leaky faucet is typically caused by a worn-out washer, O-ring, or valve seat. When any of these components wear out, water can seep through and cause a leak. To fix a leaky faucet, turn off the water supply, disassemble the faucet, and replace the faulty part. It’s a simple task that can save gallons of water each month.

If you’re unsure about handling this task, consult a professional plumber. They can quickly assess the situation and ensure your faucet is functioning correctly.

2. Running Toilets

A running toilet can waste up to 200 gallons of water a day. Not only is this wasteful, but it can also lead to a higher water bill.

Running toilets are often due to a malfunctioning flapper, which allows water to flow from the tank to the bowl. To fix a running toilet, check the flapper for wear and replace it if necessary. Adjusting the float arm or chain in the tank can also resolve the issue. If replacing the flapper doesn’t work, it might be time to replace the entire toilet fill valve.

If these steps don’t solve the problem, it may be time to bring in a professional to avoid further complications.

3. Clogged Drains

Clogged drains can occur in sinks, showers, or toilets, leading to slow drainage and unpleasant odors. Often, these clogs are caused by a buildup of hair, soap residue, or food particles.

To alleviate a clogged drain, try using a plunger or a drain snake. These tools can clear blockages and restore normal flow. For stubborn clogs, a mixture of baking soda and vinegar followed by hot water can help dissolve the debris.

Prevent future clogs by using drain covers to catch hair and food particles, and avoiding pouring grease down the sink.

4. Low Water Pressure

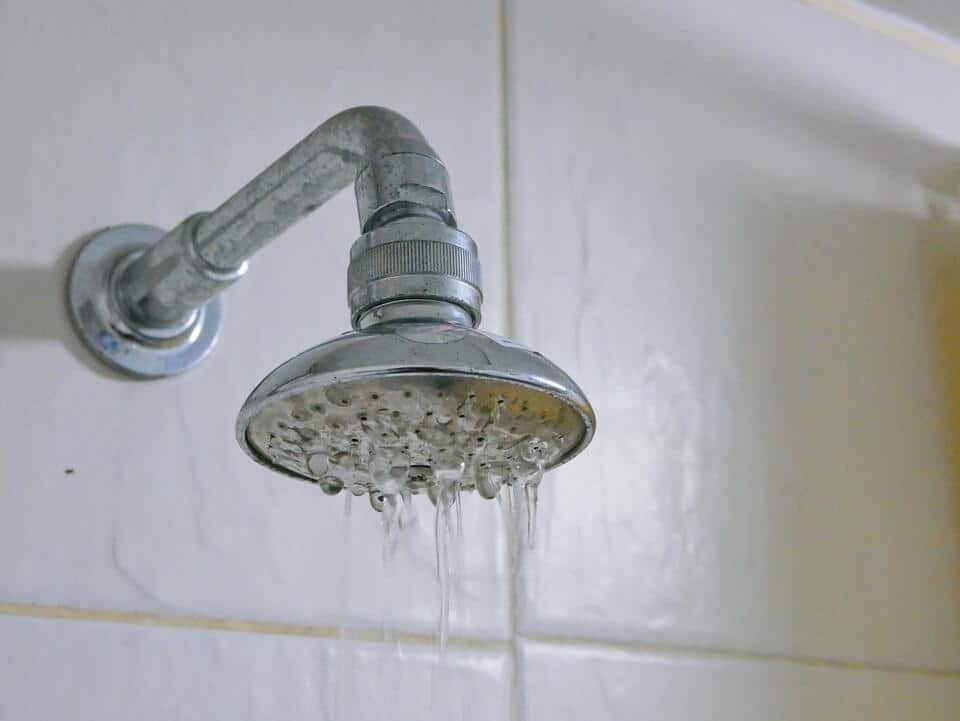
plumbing issues-low water pressure coming from a home shower head

Low water pressure can turn a refreshing shower into a frustrating experience. This issue can stem from several causes, including sediment buildup in pipes or fixtures, a malfunctioning pressure regulator, or water leaks.

Start by checking your faucets and showerheads for mineral deposits. Cleaning or replacing these fixtures can often improve water pressure. Another common culprit is a leaking pipe, which should be addressed promptly to prevent further damage.

If low water pressure persists, contact a professional plumber to evaluate your system and suggest appropriate solutions.

5. Water Heater Troubles

No one enjoys a cold shower when they expect hot water. Water heater issues can range from no hot water to water that’s too hot or not hot enough.

Begin by checking the thermostat settings on your water heater. If the water is not heating properly, the heating element or thermostat may need replacement. Regular maintenance, such as flushing the tank to remove sediment buildup, can extend the heater’s lifespan.

For persistent issues, it’s best to call a licensed plumber to inspect your water heater and ensure it’s operating efficiently.

6. Sewer Line Backups

A sewer line backup is a serious plumbing problem that requires immediate attention. It can lead to unpleasant odors, slow drains, and potential water damage.

Tree roots, debris, and grease buildup are common causes of sewer line clogs. Professional plumbers often use cameras to inspect sewer lines and hydro-jetting to clear obstructions.

Preventive measures include avoiding flushing non-degradable items and scheduling regular inspections to catch potential issues early.

7. Garbage Disposal Jams

A jammed garbage disposal can halt kitchen operations and create unpleasant odors. Common causes include trying to grind unsuitable items like bones or fibrous vegetables.

To address a jammed disposal, turn off the power, use an Allen wrench in the disposal’s bottom socket to manually turn the motor, and dislodge any obstructions. Regularly cleaning with ice cubes and citrus peels can help maintain its functionality.

Avoid putting grease and fibrous foods down the disposal to prevent future jams.

8. Burst Pipes

Burst pipes are a plumbing nightmare, often resulting from freezing temperatures or excessive pressure. They can cause significant water damage and require immediate attention.

To handle a burst pipe, shut off the main water supply and call a professional plumber immediately. While waiting, try to remove excess water and dry the area to minimize damage.

Prevent bursts by insulating exposed pipes and maintaining proper heating during colder months.

9. Sump Pump Failures

Sump pumps protect homes from flooding, so a failure can be disastrous. Common failure causes include power outages, improper installation, or a clogged discharge pipe.

Regularly test your sump pump by pouring water into the pit to ensure it activates correctly. Ensure it’s connected to a reliable power source, and consider installing a battery backup system for emergencies.

Routine maintenance and inspections can help identify potential issues before they become costly repairs.

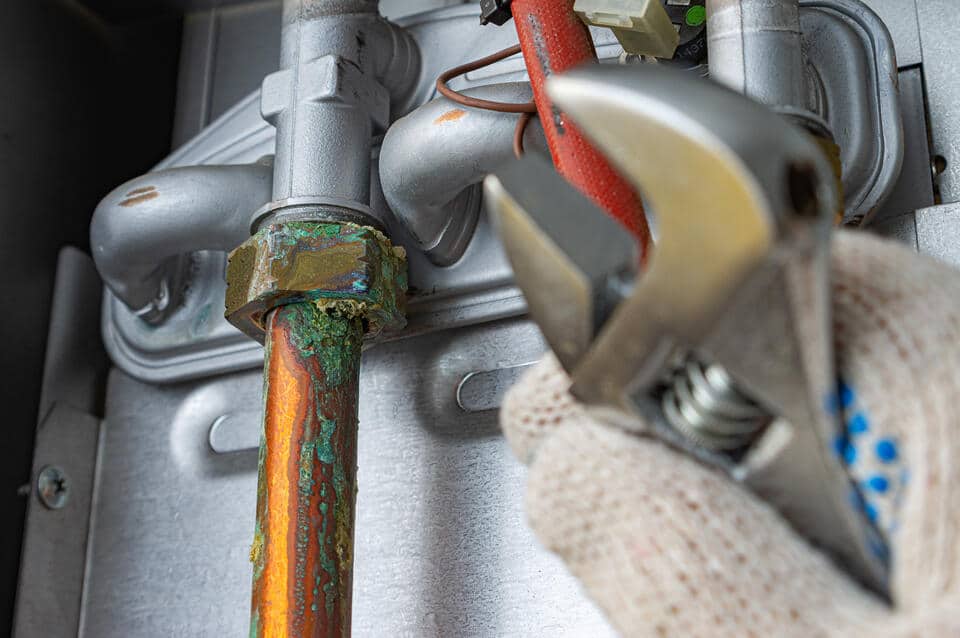
10. Pipe Corrosion

plumbing issues-pipe corrosion on appliance

Corroded pipes can lead to leaks, water discoloration, and reduced water quality. This issue often arises from chemical reactions between the pipe material and water.

Inspect pipes regularly for signs of corrosion, such as discoloration or flaking. In some cases, installing a water softener can reduce corrosion by neutralizing acidic water.

Replace severely corroded pipes to prevent leaks and contamination, and consult a professional plumber for advice on minimizing corrosion.

11. Leaking Hose Bibs

Leaking hose bibs, or outdoor faucets, can waste water and increase utility bills. Leaks often occur due to a worn-out washer or freeze damage.

To fix a leaking hose bib, replace the washer and ensure all connections are tight. In colder climates, install frost-proof hose bibs to prevent freeze damage.

Turn off outdoor water supplies in the winter to further protect your hose bibs and prevent leaks.

🙌 Plumbing Solutions You Can Trust: Expert Help from Thelen Plumbing, Heating, and Air

Understanding common plumbing issues and knowing how to address them can save homeowners time, money, and frustration. However, while DIY fixes can be effective for minor problems, more complex issues warrant calling in the experts. At Thelen Plumbing, Heating, and Air, we pride ourselves on our ability to solve your plumbing problems efficiently and affordably. Our expert team is always ready to provide top-notch service and peace of mind. Ready to tackle your plumbing challenges? Trust our team at Thelen Plumbing, Heating, and Air to provide the solutions you need for a worry-free home. Contact us today to schedule a consultation or check out our comprehensive range of services online.

What To Do When Your Toilet Keeps Running (Homeowners Guide)

When it comes to annoying home issues, a running toilet is right up there with a dripping faucet. Not only is the sound irritating, but it can also lead to higher water bills and wasted resources. If your toilet keeps running, you’re not alone. Many homeowners face this common plumbing problem. This guide will help you understand why a toilet keeps running and what you can do about it. Expect to learn about the following:

  • Common causes of a running toilet
  • Tools you’ll need to fix a running toilet
  • 6 steps to take when your toilet keeps running
  • Preventive maintenance tips for your toilet

🤔 Common Causes of a Running Toilet

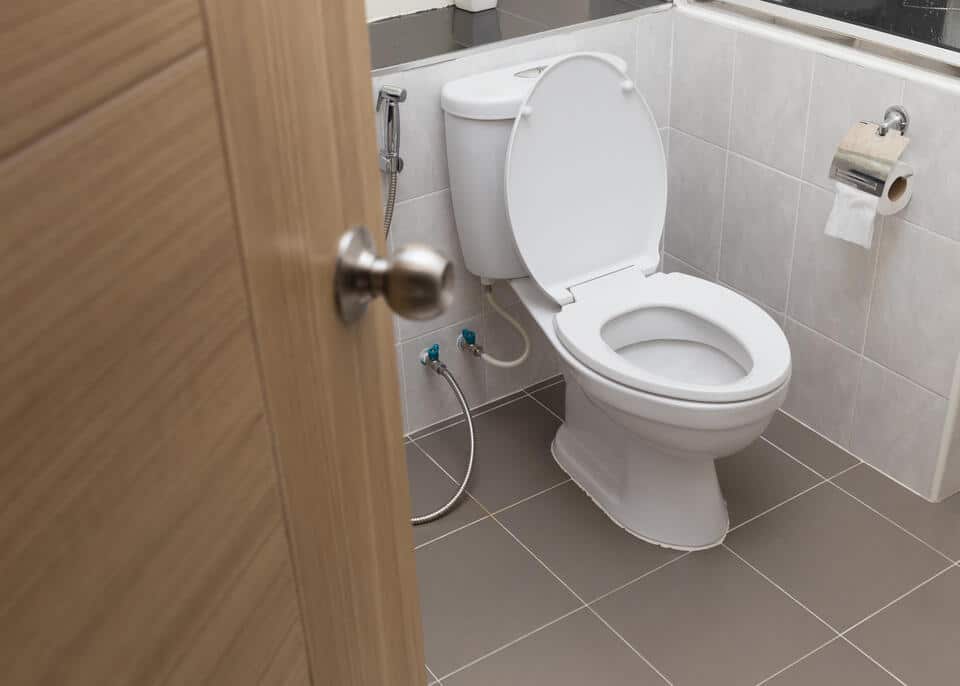
toilet keeps running-white toilet in a modern bathroom

Toilets are relatively simple devices, but they have several components that can malfunction. Understanding the common causes can save you time and money.

  • Flapper Valve: Wears out over time, failing to create a proper seal. Even a small leak can lead to continuous running.
  • Fill Valve: Similar to the flapper, it can also wear out and contribute to the issue.
  • Float Mechanism: If set too high, it may cause water to overflow into the overflow tube, keeping the toilet running.
  • Chain Connection: If the chain linking the handle to the flapper is too short or too long, it can prevent the flapper from sealing properly.

Addressing these components can help you fix a running toilet efficiently.

Identifying Problems in Your Toilet Tank

Before you start fixing your toilet, it’s essential to understand how each part works. With this knowledge, you can quickly identify the source of the problem.

Lift the lid off the toilet tank carefully. Inside, you’ll find the fill valve, overflow tube, flapper, and float. Each of these components plays a role in the toilet’s operation.

Check to see if the water level is too high or too low. Ideally, the water should be about an inch below the overflow tube. If it’s higher, the float needs adjustment.

Inspect the flapper to see if it closes completely. If the chain is tangled or too tight, it might not allow the flapper to seal, causing water to leak into the bowl continuously.

🧰 Tools You’ll Need to Fix a Running Toilet

Having the right tools on hand can make the repair process smoother. Fortunately, fixing a running toilet doesn’t require specialized equipment.

A pair of pliers can help adjust the float and tighten fittings. A screwdriver may be needed to replace the handle.

For more extensive repairs, you might need a wrench to secure the fill valve. Replacement parts like a new flapper or fill valve can be purchased at most hardware stores.

🚽 6 Steps to Take When Your Toilet Keeps Running

toilet keeps running-technician working in the back part of a toilet

Addressing a running toilet is crucial because it can waste a significant amount of water, leading to higher utility bills and unnecessary strain on plumbing systems. Taking timely action not only conserves water but also prevents potential damage to your bathroom fixtures.

1. Turn off the water supply.

Begin by locating the shut-off valve, which is typically situated behind the toilet near the wall. Turning the valve clockwise will stop the flow of water to the toilet, preventing further waste of water while you troubleshoot the issue. This is a crucial first step to avoid potential water damage or increased bills.

2. Inspect the flapper.

The flapper is a rubber component at the bottom of the tank that seals the opening to the bowl. Carefully remove it and inspect it for any signs of wear or damage, such as cracks or warping. A damaged flapper will not create a tight seal, causing water to continuously flow into the bowl. If you notice any issues, consider replacing the flapper with a new one to restore proper function.

3. Check the fill valve.

The toilet fill valve controls the water inflow to the tank after a flush. Remove the lid from the tank and observe the fill valve while the toilet is refilling. If you notice that it’s clogged with sediment or not functioning properly, it may need cleaning or replacement. A properly operating fill valve ensures that the tank refills to the correct level and stops when the tank is full.

4. Adjust the float.

The float is responsible for regulating the water level in the tank. If the float is set too high, it can cause water to overflow into the overflow tube, leading to a running toilet. Adjust the float arm or the height of the float itself to ensure it stops the flow of water at the appropriate level. This adjustment is essential for maintaining an efficient flushing system.

5. Examine the chain and handle.

Inspect the chain that connects the flapper to the handle. It should have a bit of slack to allow the flapper to fully close after flushing. If the chain is too tight or too loose, it can prevent the flapper from sealing properly. Additionally, check the handle to ensure it operates smoothly and isn’t stuck, as a malfunctioning handle can also contribute to a running toilet.

6. Test your fixes.

Once you’ve completed the necessary inspections and adjustments, turn the water supply back on by rotating the shut-off valve counterclockwise. Allow the tank to fill, then perform several test flushes to ensure that the toilet is functioning properly. Pay close attention to whether it continues to run after flushing; if it does, you may need to revisit the previous steps for further adjustments or repairs.

💡 Preventive Maintenance Tips for Your Toilet

toilet keeps running-close up view of a toilet that is flushing with clean water

Regular maintenance can prevent common toilet issues from recurring. By taking a few simple steps, you can extend the life of your toilet:

  • Periodically check the flapper and fill valve for wear. Replacing these parts before they fail can save you trouble later.
  • Adjust the float as needed to ensure the water level remains within the recommended range. This simple action can prevent many running toilet problems.

When to Call a Professional Plumber

Sometimes, despite your best efforts, the toilet keeps running. In such cases, it might be best to call a professional plumber.

If you’ve tried various fixes and nothing works, there may be a more complex issue at play. A plumber can diagnose the problem and provide a solution.

Don’t hesitate to seek professional help if you’re uncomfortable performing repairs yourself. It’s better to have the problem fixed correctly the first time.

🙌 Reliable Solutions for Plumbing and Roofing Needs

Tackling a running toilet can often be addressed with some DIY patience and the right tools, but when these fixes aren’t enough, Thelen Plumbing, Heating, and Air is here to help. Our team of experienced professionals doesn’t just excel in plumbing solutions; we are also your trusted partner for all your roofing needs. We pride ourselves on delivering top-notch service with a commitment to excellence and customer satisfaction. Whether it’s a minor leak or a major repair, choose Thelen Plumbing, Heating, and Air for reliable, efficient, and expert service. Contact us today to schedule your appointment and ensure your home is in the best possible hands.

How To Unclog Your Sink (8 DIY Methods)

Clogged sinks are a common household nuisance that can disrupt your daily routine. Luckily, unclogging your sink doesn’t always require a call to the plumber! If you find yourself searching “how to unclog sink” in a pinch, you can often restore your sink to its proper function without much hassle. In this guide, we’ll walk you through everything you need to know about how to unclog a sink. We’ll cover practical steps, tips, and tricks to keep your plumbing running smoothly, including:

  • Understanding sink clogs
  • Tools and materials you’ll need
  • 8 DIY ways to unclog your sink
  • Preventing future clogs

🤔 Understanding Sink Clogs

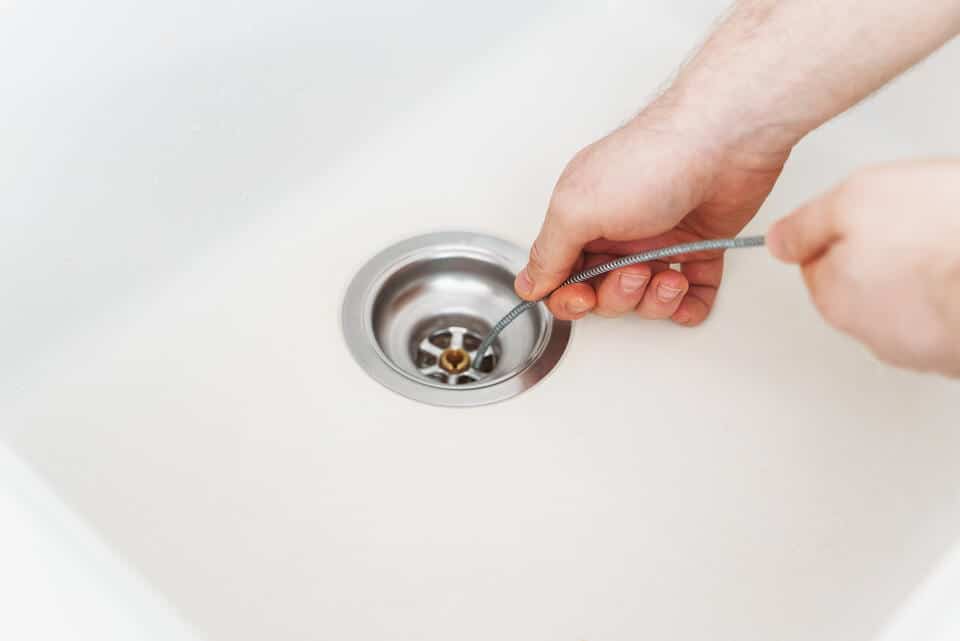
how to unclog sink-person using a snake to try to unclog a sink

Clogged sinks can happen in any home, and they’re often caused by a buildup of food particles, grease, soap scum, or hair. Understanding the root cause of your clog is the first step to solving the problem effectively. Whether you’re dealing with a kitchen sink that’s draining slowly or a bathroom sink that’s completely blocked, this guide is here to help.

Why Sinks Get Clogged

Sinks can get clogged for several reasons, and identifying the cause can aid in selecting the right unclogging method. In kitchen sinks, food scraps and grease are the primary culprits. These materials can build up over time, forming a blockage that prevents water from draining properly. Bathroom sinks may face issues with hair and soap residue, both of which can create stubborn clogs.

Signs Your Sink is Clogged

Recognizing the signs of a clogged sink is crucial for taking timely action. Common indicators include:

  • Water that drains slowly
  • Gurgling noises
  • Unpleasant odors
  • Standing water in severe cases

If you notice any of these signs, it’s time to address the issue before it worsens.

🧰 Tools and Materials You’ll Need

Having the right tools and materials on hand can make the process of unclogging your sink more efficient. Here’s a list of items you might need:

Basic Tools for Unclogging

A few basic tools are essential for most unclogging tasks:

  • Plunger: Creates suction to dislodge blockages.
  • Plumber’s snake (drain auger): Reaches deeper into the plumbing to break up and remove stubborn clogs.

For those with minimal plumbing experience, these tools are easy to use and can deliver impressive results.

Household Ingredients for DIY Solutions

Household ingredients like baking soda, vinegar, and salt can be powerful allies in unclogging your sink. These natural substances tackle mild to moderate clogs without damaging your pipes. When combined with boiling water, baking soda and vinegar create a fizzing reaction that helps break down the buildup in your drain.

Here are a few tips:

  • Baking Soda & Vinegar: Mix one cup of each and pour down the drain.
  • Boiling Water: Follow the mixture with boiling water to enhance effectiveness.
  • Salt: Use salt as a scrubbing agent for stubborn clogs.

Safety Precautions

Safety should always be a top priority when working with plumbing. Here are some important tips to remember:

  • Wear gloves to protect your hands from harsh cleaners and sharp objects.
  • Keep the area around the sink dry to prevent slips and falls.
  • If using commercial drain cleaners, follow the instructions carefully.
  • Ventilate the area to avoid exposure to fumes.

🪠 8 DIY Ways to Unclog Your Sink

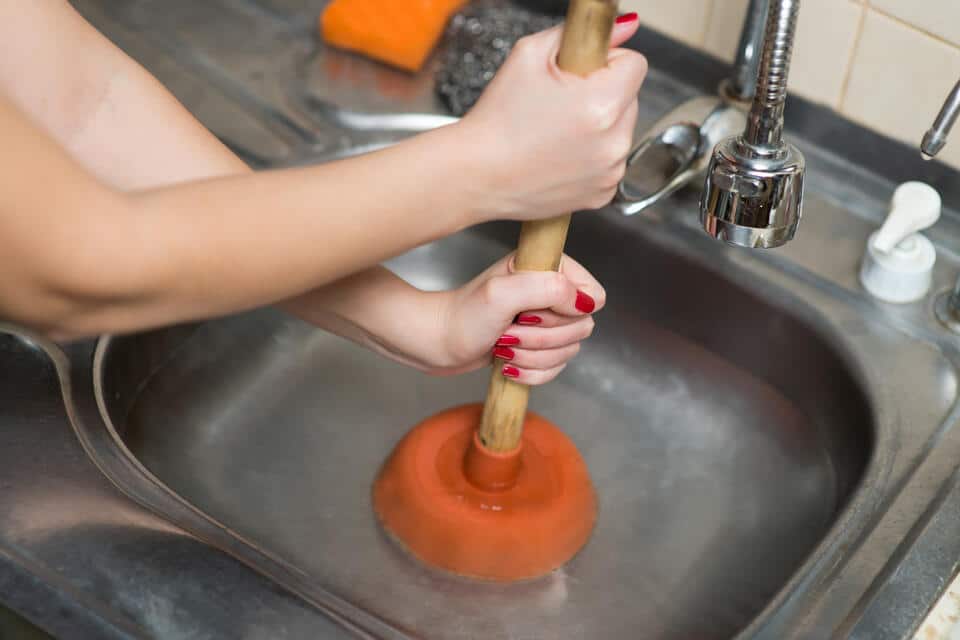
how to unclog sink-woman using a plunger to unclog a kitchen sink

Follow these steps to effectively unclog your sink and restore its functionality.

1. Start with a Plunger

A plunger is often the first tool to try when dealing with a clogged sink. Begin by ensuring that there is enough water in the sink to cover the rubber part of the plunger. Place the plunger over the drain and create a strong seal by pressing down firmly. Pump the plunger up and down vigorously for about 15-20 seconds to build pressure and dislodge the clog. This method is particularly effective for shallow clogs caused by debris near the surface. If you notice any water bubbling up, it indicates that the clog is loosening. Afterward, run hot water to see if the drain flows smoothly.

2. Try a Baking Soda and Vinegar Solution

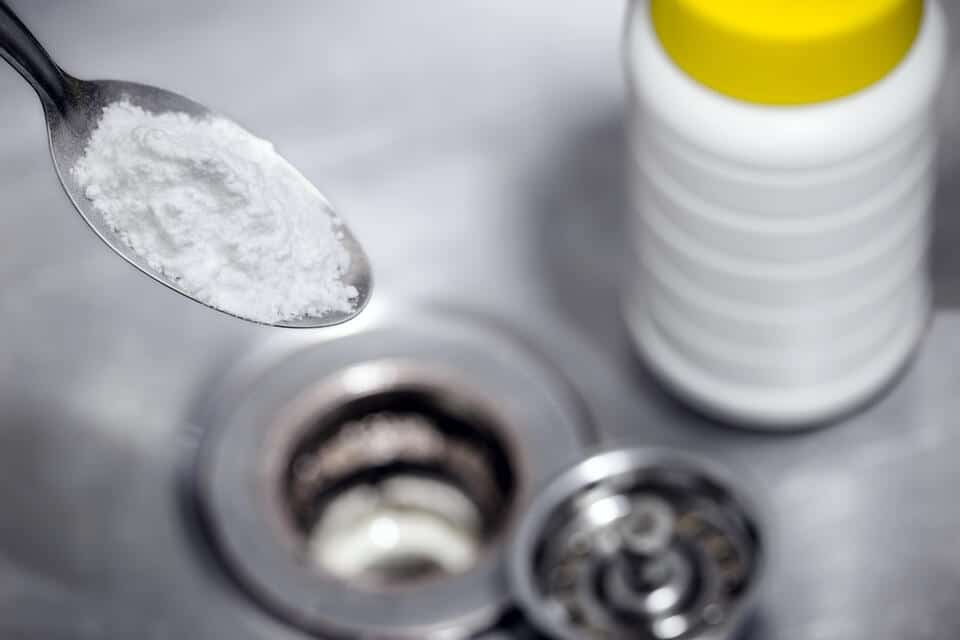
For a natural and non-toxic solution, use baking soda and vinegar, which can effectively break down many types of clogs. Begin by pouring a cup of baking soda down the drain, ensuring it goes as far down as possible. Next, follow it with a cup of white vinegar. You’ll observe the mixture foaming and fizzing, which indicates that it’s working to break apart the clog. Allow the solution to sit for about 15-30 minutes, giving it time to penetrate deeper into the blockage. Afterward, flush the drain with boiling water to wash away any remnants. This method works particularly well for clogs caused by grease, soap scum, and food particles.

3. Use a Plumber’s Snake

If the clog persists after trying the previous methods, a plumber’s snake can help reach deeper blockages that other tools cannot. Begin by inserting the snake into the drain, pushing it gently until you meet resistance. Rotate the handle of the snake to break up the clog and push it through the pipes. The flexible coil of the snake can navigate bends and curves in the plumbing, allowing it to clear away hair, soap buildup, and other stubborn debris. This tool is especially useful in bathrooms where hair accumulation can lead to frequent blockages.

4. Remove the P-Trap

In some cases, the clog may be located in the P-trap, the curved pipe beneath the sink that is designed to trap debris and prevent sewer gases from entering the home. To access it, place a bucket underneath to catch any residual water and unscrew the P-trap using a wrench or pliers. Be cautious as water may spill out. Once removed, inspect the P-trap for any visible clogs. Clean out any debris, hair, or buildup before reattaching the trap securely. This step is particularly useful for kitchen sinks where food particles and grease tend to collect, ensuring your plumbing system functions efficiently.

5. Use Hot Water

Sometimes, a simple yet effective solution is pouring hot water down the drain to help dissolve grease and soap buildup. Start by boiling a pot of water on the stove. Once it reaches a rolling boil, carefully pour it into the sink in stages, allowing it to work its way through the clog. This method is particularly effective for minor clogs as the heat can help break down grease and soap that may be adhering to the pipes. For stubborn clogs, repeat the process a couple of times, allowing the hot water to sit for a few minutes each time for optimal results.

6. Try a Wet/Dry Vacuum

If you have a wet/dry vacuum on hand, it can be a powerful tool for clearing clogs. First, make sure the vacuum is set to liquid mode. Create a tight seal over the drain to ensure maximum suction. Turn on the vacuum to suction out the blockage, allowing it to pull out debris and water. This method is particularly useful for larger clogs or when dealing with solid objects that are stuck in the drain. Be cautious and check the vacuum’s capacity, as you may need to empty it if it fills up quickly.

7. Salt and Baking Soda

For a more potent combination, mix half a cup of salt with half a cup of baking soda and pour it down the drain. This mixture acts as an abrasive agent, helping to break down stubborn clogs and remove buildup within the pipes. After pouring it down, let it sit for a few hours or overnight to allow it to work its magic. Finally, flush the drain with hot water to wash away any residue. This method is particularly effective for tough clogs that have resisted other techniques.

8. Coat Hanger

If you’re specifically dealing with hair clogs, a straightened coat hanger can be an effective tool for removing them. Start by bending the coat hanger into a long, straight wire with a small hook at one end. Carefully insert it into the drain and use the hook to snag and pull out hair and debris that are causing the blockage. Be gentle to avoid damaging your pipes. This method is a quick fix for bathroom sinks or tubs where hair tends to accumulate, providing a simple solution to keep your drains clear.

🛑 Preventing Future Clogs

how to unclog sink-close up of a person using baking soda and vinegar to unclog a kitchen sink

Taking preventive measures can help keep your sink from clogging in the future.

Regular Maintenance Tips

Regular maintenance can significantly reduce the risk of clogs. Run hot water down the drain after each use to prevent grease buildup. Install a drain screen to catch hair and food particles before they enter the plumbing. Periodically clean your sink with a mixture of vinegar and baking soda to keep it fresh and clear.

Avoiding Common Mistakes

Avoid pouring grease, coffee grounds, and fibrous foods down the kitchen sink. These materials can solidify and cause serious blockages. In the bathroom, refrain from flushing non-dissolvable items and use a hair catcher to prevent clogs.

Benefits of Professional Drain Cleaning

While DIY methods are effective for minor clogs, professional drain cleaning offers a thorough solution. Companies like Thelen Plumbing, Heating, and Air provide expert services to address complex plumbing issues. Their advanced techniques ensure your pipes remain clean and functional for years to come.

🙌 Your Guide to Unclogging Sinks: Tips and Professional Help

Unclogging your sink doesn’t have to be a daunting task. With the right tools and techniques, you can quickly restore the functionality of your sink and prevent future clogs. However, for persistent problems and peace of mind, professional assistance remains invaluable. At Thelen Plumbing, Heating, and Air, our team of experts is dedicated to providing top-notch plumbing services. Whether it’s routine maintenance or an emergency repair, we’re here to help. Trust us to handle your plumbing needs with care and expertise. Reach out today to learn more about our services and schedule an appointment.

How Much Does An AC Tune Up Cost? (7 Factors)

When the temperatures start rising, having a well-maintained air conditioning system is crucial for staying comfortable at home. If you’re a homeowner wondering about the cost of getting an AC tune-up, you’re not alone. The cost of an AC tune-up can vary based on several factors, but understanding these elements can help you budget and prepare for when the time comes. This blog post will cover AC tune up cost factors and more, including:

  • What to expect from an AC tune-up
  • 7 factors affecting AC tune-up costs
  • Average AC tune-up costs

🤔 What to Expect from an AC Tune-Up

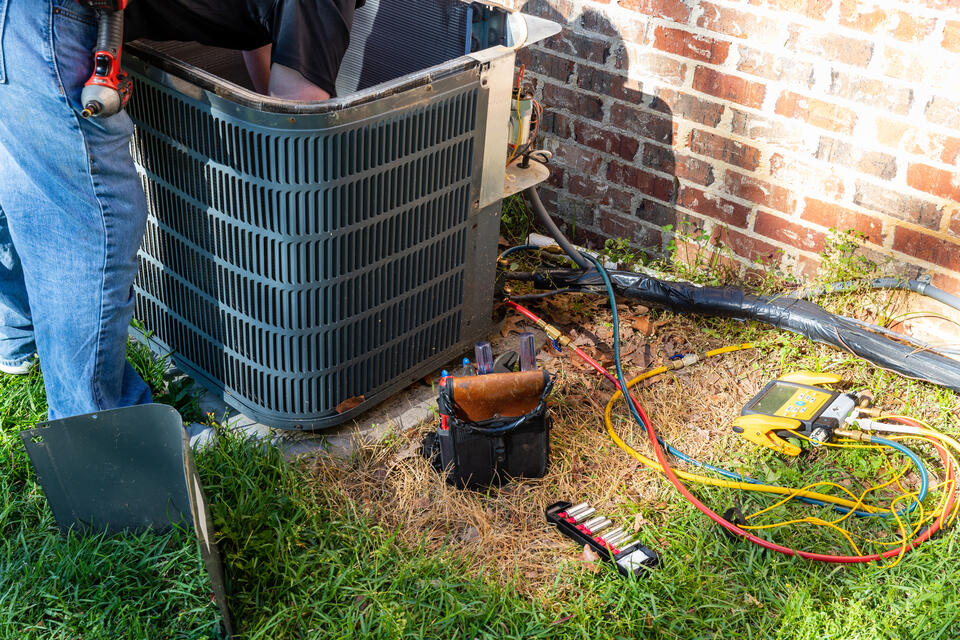
ac tune up cost-technician inspecting an outdoor AC unit

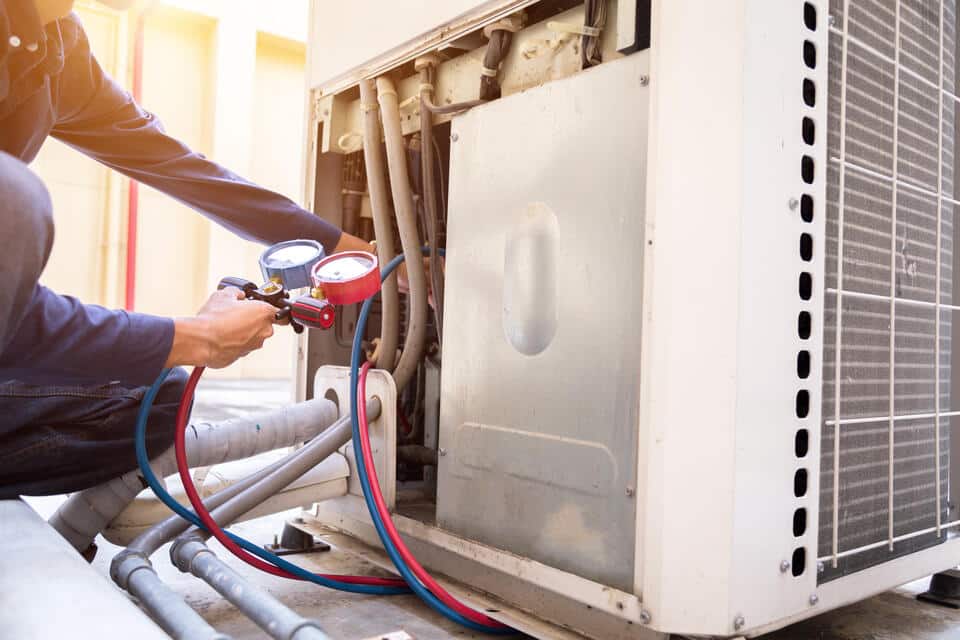
An AC tune-up involves a comprehensive inspection and servicing of your air conditioner. This ensures optimal performance, energy efficiency, and longevity. But what does this service include? Typically, a technician will clean and inspect coils, check refrigerant levels, inspect electrical connections, lubricate moving parts, and assess overall system functionality.

Key Benefits of Regular AC Maintenance

Regular AC maintenance provides numerous benefits, including:

  • Improved energy efficiency: Leads to lower utility bills.
  • Extended lifespan: Reduces the need for costly replacements.
  • Consistent cooling performance: Ensures reliable temperature control.
  • Enhanced indoor air quality: Contributes to a healthier living environment.

These advantages highlight the importance of routine maintenance for your AC system.

💸 7 Factors Affecting AC Tune-Up Costs

ac tune up cost-replacing air filters for optimal performance

Understanding the factors affecting AC tune-up costs is crucial for homeowners to budget effectively and ensure their air conditioning systems operate efficiently. By being informed, you can make better decisions regarding maintenance, potentially saving on costly repairs down the line.

1. Geographic Location

Your location plays a significant role in AC tune-up costs. In metropolitan areas with high living costs, service prices may reflect the local economy and demand for HVAC services. Conversely, in rural or less populated regions, competition may drive prices lower. Additionally, areas with extreme weather conditions, such as scorching summers or frigid winters, may experience more frequent maintenance needs, impacting overall costs.

2. Type of Air Conditioning System

The kind of air conditioning system you own influences tune-up costs. Central air systems, for instance, require more intricate maintenance due to their complex design and connection to ductwork. Ductless mini-splits may need specialized servicing, while window units often have simpler requirements. Understanding your system type can help you anticipate the level of maintenance and associated costs.

3. System Age and Condition

The age and overall condition of your air conditioning system are crucial factors in maintenance costs. Older units tend to require more frequent and thorough inspections due to accumulated wear and tear. These systems might exhibit decreased performance, which can lead to higher costs if neglected. Regular maintenance can help you identify issues early, potentially saving you money on future repairs or replacements.

4. Service Provider Expertise

The level of expertise and reputation of your chosen HVAC service provider can greatly affect the cost of tune-ups. Companies with a long-standing presence and experienced technicians may charge more, as their rates reflect their skill and reliability. However, opting for a well-reviewed provider often results in better service and thorough inspections, which can ultimately save you money by preventing future problems.

5. Seasonal Demand

AC tune-up costs are subject to fluctuations based on seasonal demand patterns. During peak summer months, when air conditioning systems are frequently in use, service providers may increase prices due to heightened demand for their services. Planning your maintenance during off-peak times, such as early spring or fall, can lead to more competitive pricing and greater availability of service options.

6. Additional Services or Repairs

During an AC tune-up, technicians may uncover the need for additional services or repairs, such as refrigerant refills, component replacements, or duct cleaning. While these extras incur additional costs, addressing them during the tune-up can prevent more costly repairs down the line. Proactively managing your system’s needs ensures it runs smoothly and efficiently.

7. DIY vs. Professional Tune-Ups

While some homeowners may consider DIY tune-ups to reduce expenses, professional services come with significant advantages. Certified technicians have the necessary training, tools, and experience to accurately diagnose and resolve issues. Moreover, professional work is often backed by warranties, offering an added layer of security and peace of mind that DIY efforts may lack.

💵 Average AC Tune-Up Costs

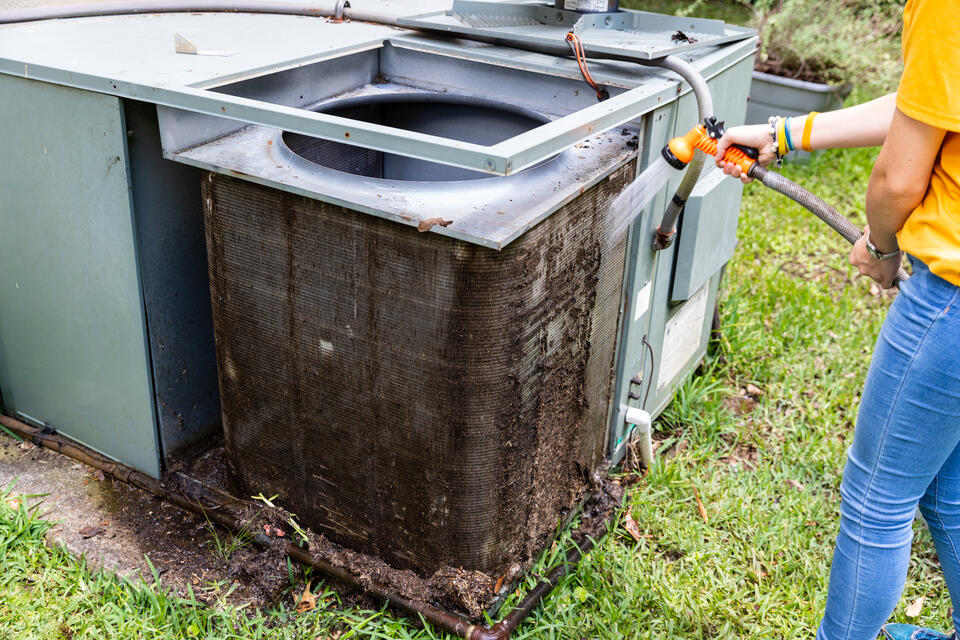
ac tune up cost-regular maintenance of HVAC system by spraying down outdoor AC filters

The average cost of an AC tune-up typically ranges from $75 to $200. However, prices can vary significantly depending on location, the specific services offered, and the company you choose. It’s important to note that some companies provide service packages or membership options that include regular tune-ups, which can lead to long-term savings and added convenience for homeowners who want to keep their systems in top shape.

Finding a Reliable Service Provider

To find a trustworthy service provider for your AC needs, start by asking friends or family for recommendations based on their experiences. Additionally, reading online reviews on platforms like Google or Yelp can provide insights into the reliability and quality of service offered by different companies. Checking the provider’s credentials, such as licensing and insurance, is crucial to ensure you’re choosing a qualified professional. Don’t hesitate to request quotes from multiple service providers; this allows you to compare services, pricing, and customer service, helping you make an informed decision.

Importance of Preventive Maintenance

Preventive maintenance plays a vital role in avoiding unexpected breakdowns and extending the lifespan of your AC system. Regular tune-ups enable technicians to conduct thorough inspections, identify potential issues early, and address them before they escalate into costly repairs. This proactive maintenance approach not only saves you money in the long run but also ensures that your home remains comfortable, especially during the peak summer months when air conditioning is essential.

  • Reduces the risk of unexpected breakdowns
  • Increases the lifespan of your AC system
  • Identifies potential issues early
  • Saves money on costly repairs
  • Ensures home comfort during peak summer months

How Often Should You Schedule Tune-Ups?

Most HVAC experts recommend scheduling an AC tune-up at least once a year, ideally in the springtime. This timing allows you to prepare your system for the increased demands of the summer months ahead. However, if your AC system is heavily used or if you start to notice a decline in its performance, you may need to schedule tune-ups more frequently. Keeping up with regular maintenance helps ensure optimal efficiency and prolongs the life of your system, ultimately leading to a more comfortable living environment.

🙌 Essential AC Tune-Up Services for Optimal Home Comfort

Understanding the cost factors associated with an AC tune-up empowers homeowners to make informed decisions about their HVAC maintenance. By investing in regular tune-ups, you ensure optimal performance, energy efficiency, and longevity for your air conditioning system.

When it comes to reliable HVAC services, Thelen Plumbing, Heating, and Air is the team you can trust. Based in the Twin Cities area, we pride ourselves on delivering exceptional service with a focus on quality craftsmanship, affordable prices, and customer satisfaction. Our experienced technicians will ensure your AC system receives the care it deserves, leaving you with peace of mind and a comfortable home. Ready to schedule your AC tune-up or need more information? Reach out to our friendly team at Thelen Plumbing, Heating, and Air today! We’re here to help you keep your home comfortable and efficient year-round.

4 HVAC Troubleshooting Tips To Keep Your Home Warm

Keeping your home warm during the colder months can become a challenge when your HVAC system starts acting up. Whether it’s a sudden chill or a system that won’t turn on, simple troubleshooting can make a significant difference. Designed for homeowners, this guide offers practical HVAC troubleshooting tips to ensure you enjoy a cozy, warm home all winter long. In this article, you’ll discover:
  • Understanding your HVAC system
  • 4 HVAC troubleshooting tips to keep your home warm
  • DIY solutions vs. professional help
  • Seasonal maintenance tips

🤔 Understanding Your HVAC System

hvac troubleshooting-regular maintenance being performed on an HVAC system

Your HVAC system is an essential component of home comfort, responsible for heating, ventilation, and air conditioning. Understanding how it works helps in identifying potential issues early.
Firstly, most systems consist of a furnace, ducts, and a thermostat. The furnace heats the air; the ducts distribute it throughout your home, while the thermostat controls the temperature. Familiarizing yourself with these components can prevent minor issues from escalating into significant problems.

Secondly, regular maintenance of these parts ensures your system operates efficiently. For example, cleaning ducts and checking for blockages can improve airflow and heat distribution. Finally, understanding your system’s age and model can provide insights into its performance, helping you anticipate potential repairs or replacements.

Common HVAC Issues and Their Causes

HVAC systems can face various issues, often linked to their components. Identifying these issues early can save time and money on costly repairs.

  • Inadequate heating: This could result from clogged filters or a malfunctioning thermostat, restricting airflow or misreading temperature settings, affecting your home’s warmth.
  • Strange noises: These could be due to loose components, worn-out belts, or debris in the ducts. Ignoring these noises can lead to further damage if not addressed promptly.
  • Sudden increase in energy bills: This might indicate an inefficient system, stemming from outdated parts or poor maintenance, leading to increased energy consumption as the system struggles to maintain desired temperatures.

👉 4 HVAC Troubleshooting Tips To Keep Your Home Warm

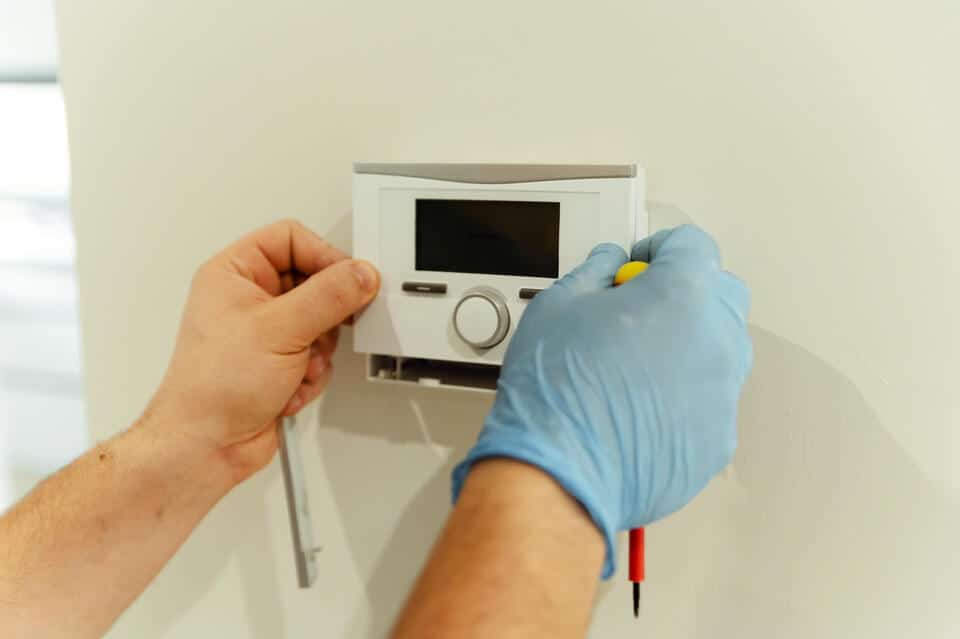
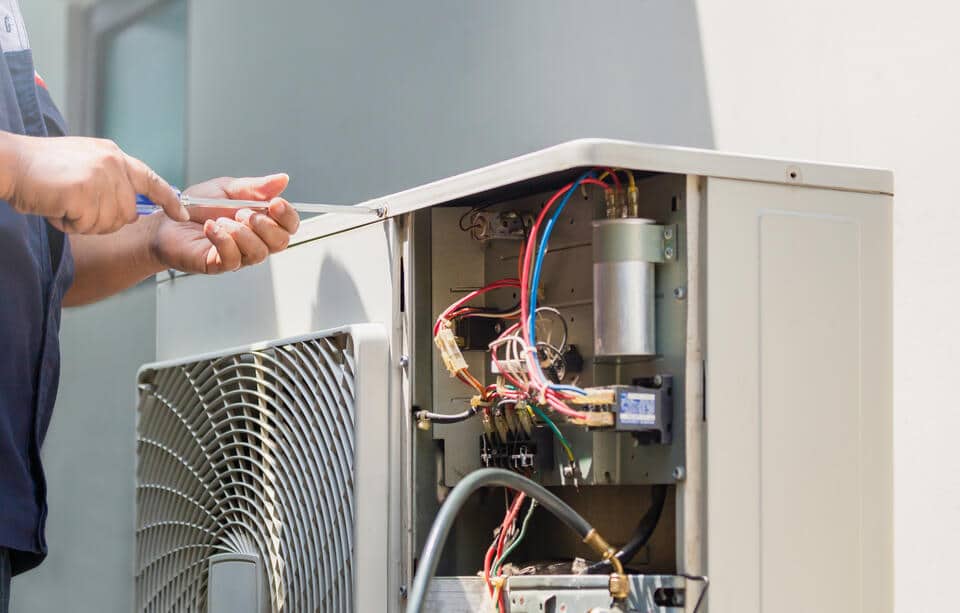
hvac troubleshooting-electrician using a screwdriver to access panel of thermostat

These HVAC troubleshooting tips are crucial for ensuring your home remains warm and comfortable during cold weather. By addressing common issues proactively, you can avoid costly repairs and maintain an efficient heating system.

1. How to Check Your Thermostat

The thermostat is the brain of your HVAC system, and ensuring its proper function is crucial for home comfort.

Begin by inspecting the thermostat’s settings. Ensure it’s set to “heat” and the desired temperature is higher than the room’s current temperature. Also, check for the presence of any error codes or unusual display messages.

Then, examine the thermostat’s location. It should be placed away from direct sunlight, drafts, or heat sources, as these can affect its readings. Finally, replace old batteries to maintain consistent performance and prevent malfunctions.

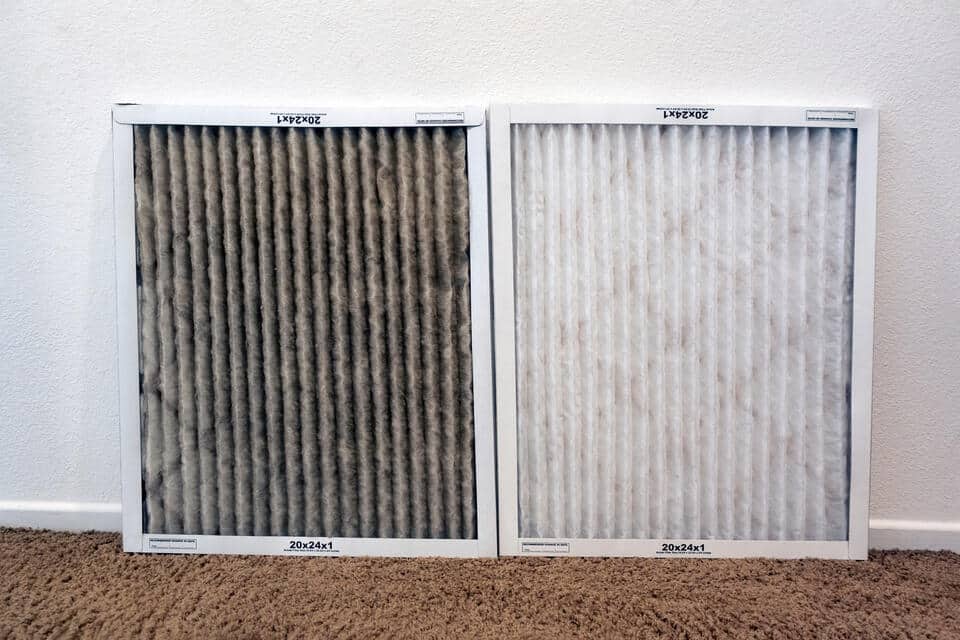
2. Inspecting HVAC Filters for Optimal Performance

HVAC filters play a vital role in maintaining air quality and system efficiency. Regular inspection and maintenance are necessary for optimal performance.

Start by locating your system’s filter, typically found near the return air duct or blower compartment. Check for dust or debris accumulation, which can obstruct airflow.

Replace or clean filters every 1-3 months, depending on usage and air quality. Clean filters not only enhance airflow but also improve indoor air quality, benefiting your family’s health.

3. Evaluating Airflow Issues

Proper airflow is essential for efficient HVAC operation, ensuring even distribution of warm air throughout your home.

First, inspect vents and registers for blockages. Furniture, curtains, or debris can obstruct airflow, reducing heating efficiency. Ensure all vents are open and unobstructed, and replace dirty air filters.

Next, check for leaks in the ductwork. Damaged or disconnected ducts can lead to heat loss, causing uneven heating. Sealing leaks with duct tape or mastic can improve airflow.
Finally, consider balancing your HVAC system. Professional HVAC technicians can adjust dampers within the ducts to ensure even airflow distribution, enhancing comfort.

4. Identifying and Addressing Unusual Noises

Unusual noises from your HVAC system often indicate underlying issues that require attention.

Rattling noises may suggest loose components. In this case, tighten screws or fasteners to secure parts and prevent further damage.

Squealing or grinding noises could indicate a worn-out belt or motor issue. Promptly addressing these noises can prevent severe damage and costly repairs.

In the case of banging or clanging noises, check for debris in the ducts or loose components. Remove any debris and tighten connections to restore quiet operation.

👨‍🔧 DIY Solutions vs. Professional Help

While some HVAC issues can be resolved with DIY solutions, others require professional expertise.

Simple tasks such as changing filters, adjusting thermostats, and securing loose components can be done by homeowners. DIY solutions save time and money while maintaining system efficiency.

However, more complex issues such as electrical malfunctions, refrigerant leaks, or motor problems necessitate professional intervention. A qualified HVAC technician has the skills and equipment to diagnose and fix these issues, ensuring safety and reliability.

💡 Seasonal Maintenance Tips

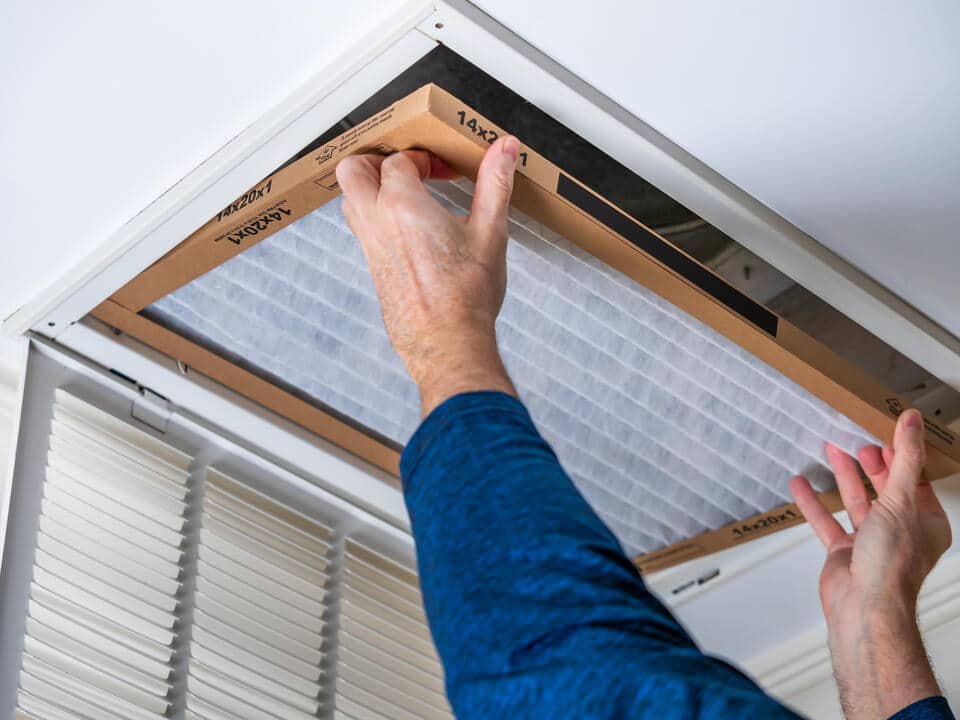
hvac troubleshooting-check filters for optimal performance

Regular maintenance is key to preventing HVAC issues and extending system lifespan. Seasonal maintenance ensures optimal performance year-round.

Before winter, schedule a professional inspection to identify potential problems. Technicians can:

  • Clean components
  • Check electrical connections
  • Lubricate moving parts

Additionally, regularly cleaning vents, checking ducts for leaks, and replacing filters contribute to system longevity. These simple tasks enhance efficiency and reduce energy costs, providing comfort throughout the season.

Enhancing Energy Efficiency

Improving your HVAC system’s energy efficiency benefits both the environment and your wallet. Simple measures can significantly reduce energy consumption.

Firstly, invest in a programmable thermostat. These devices optimize heating schedules, reducing energy waste when you’re not home.

Next, ensure proper insulation throughout your home. Insulated walls, windows, and doors minimize heat loss, allowing your HVAC system to maintain consistent temperatures with less effort.

Finally, consider upgrading to energy-efficient HVAC systems. Modern systems offer improved performance and lower energy consumption, yielding long-term savings.

🙌 Keep Your Home Cozy This Winter

Effective HVAC troubleshooting helps homeowners maintain a warm and comfortable environment throughout the winter. By understanding your system, identifying common issues, and implementing basic solutions, you can effectively address problems and enhance efficiency. When challenges arise beyond your expertise, trust the professionals at Thelen Plumbing, Heating, and Air. Our commitment to quality service, skill, and reliability makes us the go-to choice for all your HVAC needs. Join our Happy Home Club for even greater peace of mind and discover why so many Twin Cities residents rely on us. Contact us today to schedule your service and keep your home cozy all winter long!

8 Signs Of A Refrigerant Leak & What To Do Next

In the sweltering heat of summer, the last thing you need is an air conditioner on the fritz. Yet, lurking beneath the surface of your cooling system is a potential culprit—refrigerant leaks. Understanding these leaks is crucial for homeowners who want to maintain comfort and efficiency in their homes. In this blog post, we’ll explore the signs of a refrigerant leak, what actions you should take, and why choosing a reliable service provider is essential. Here’s a sneak peek into what we’ll cover:

  • Understanding refrigerant leaks
  • 8 signs of a refrigerant leak
  • Potential impacts of a leaking refrigerant
  • Temporary fixes you can try

🤔 Understanding Refrigerant Leaks

refrigerant leak-weakened cooling performance of a home AC unit

Refrigerant leaks are more than just a nuisance; they can significantly disrupt your home’s comfort. A refrigerant leak occurs when there is a release of the cooling agent used in AC systems. This agent is essential for absorbing heat and ensuring your home stays cool. But what causes these leaks?

Most leaks result from wear and tear on your system. Over time, the metal in the coils and joints can corrode, leading to tiny holes through which refrigerant escapes. Additionally, improper installation or faulty service jobs can also set the stage for leaks. Understanding these origins is the first step in recognizing and addressing the problem.

Ignoring refrigerant leaks can lead to larger issues down the line, such as reduced cooling capacity and increased energy bills. It’s crucial to be aware of the signs that indicate a leak, so you’re prepared to act quickly and efficiently.

Causes of Refrigerant Leaks

Understanding the root causes of refrigerant leaks helps in both prevention and repair. Several factors can contribute to a leak:

  • Poor Installation Practices: If your system was installed with subpar attention to sealing and connections, leaks are more likely to develop over time.
  • Vibrations: Vibrations from the system itself can loosen connections and create gaps for refrigerant to escape.
  • Corrosion: Exposure to the elements can lead to corrosion, especially in areas where moisture and air pollutants are prevalent.

Regular maintenance and inspections can mitigate these risks and keep your system running smoothly.

⚠️ 8 Signs of a Refrigerant Leak

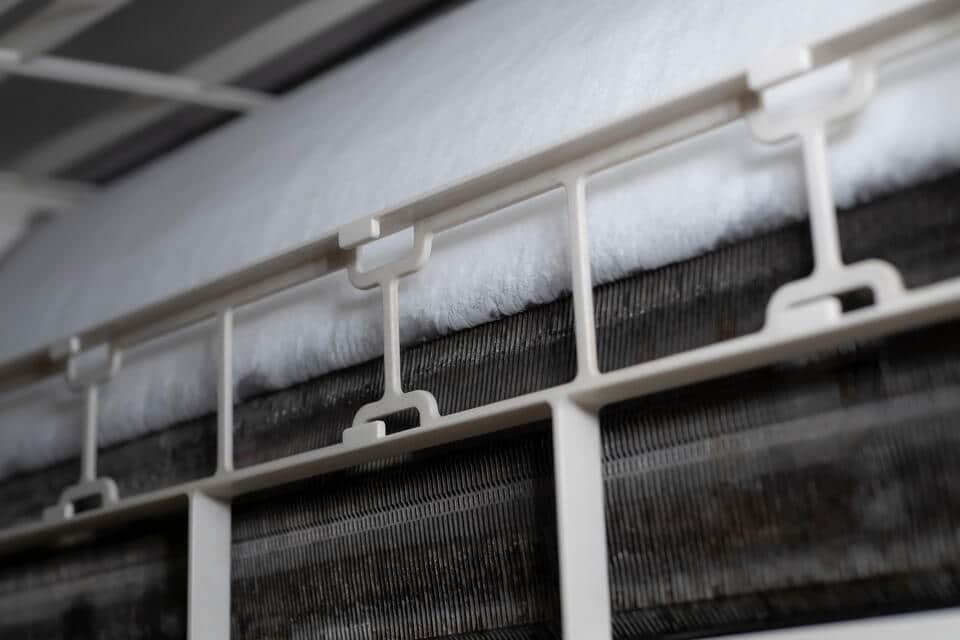
refrigerant leak-ice build up on AC unit coils

A refrigerant leak manifests through several telltale signs. Recognizing these early can prevent extensive damage and costly repairs. Understanding these signs can empower homeowners to act quickly and ensure their AC system runs efficiently.

1. Ice Buildup on Coils

One of the most common signs of a refrigerant leak is ice buildup on the coils of your AC unit. When refrigerant levels drop, the evaporator coil gets too cold, causing moisture in the air to freeze. This ice can block airflow and severely reduce the system’s efficiency. If you spot ice forming on the coils, it’s a clear indication that your system needs immediate attention. Regular maintenance checks can help prevent this issue and ensure your AC operates optimally.

2. Hissing Sounds

If you hear a hissing noise coming from your air conditioner, it could be due to a refrigerant leak. The sound usually indicates that gas is escaping from a small hole or crack in the coils. This noise can be alarming, especially if accompanied by a noticeable drop in cooling performance. It’s crucial to address this sound promptly, as ignoring it can lead to more severe issues over time. Have a professional inspect the unit to identify and fix the source of the leak.

3. Weak Cooling Performance

A decrease in your AC’s ability to cool your home effectively is another red flag. If it feels like the unit is constantly running without achieving the desired temperature, a refrigerant leak might be to blame. This not only affects your comfort but can also put additional strain on your system, leading to further damage and higher repair costs. Regularly monitoring your AC’s performance can help spot this issue early, allowing for timely repairs.

4. Increased Energy Bills

If you notice a sudden spike in your energy bills without a corresponding increase in usage, it could be a sign of a refrigerant leak. The AC unit has to work harder to cool your home, leading to higher energy costs. This inefficiency can significantly impact your monthly budget. Keeping track of your energy consumption and recognizing patterns can help you identify potential problems and seek professional assistance when needed.

5. Frost on the Refrigerant Lines

If you see frost forming on the refrigerant lines, it can indicate that the refrigerant is not circulating properly, often due to a leak. This frost can disrupt the system’s operation and lead to more severe repercussions if left unchecked. Regular inspections can help identify issues before they escalate, ensuring that your refrigerant lines remain clear and functional.

6. Unusual Odors

A refrigerant leak can sometimes produce a chemical smell. If you detect unusual or unpleasant odors near your AC unit, it’s essential to investigate further. This smell might indicate the presence of refrigerant in the air, which can be harmful to your health. If you notice this odor, it’s crucial to turn off your AC and contact a professional immediately to assess the situation and ensure your safety.

7. Frequent Cycling

If your air conditioner is turning on and off more frequently than usual, this can be a sign of a refrigerant issue. The system struggles to maintain the desired temperature, leading to constant cycling. Frequent cycling not only reduces your comfort but can also lead to increased wear and tear on the system components, potentially leading to costly repairs or the need for a replacement. Monitoring your AC’s cycling patterns can provide valuable insights into its health.

8. System Short-Cycling

This refers to the AC system shutting off and restarting frequently due to pressure imbalances caused by low refrigerant levels. It’s another indicator that there may be a leak needing attention. Short-cycling can lead to inefficient cooling and increased energy costs, as well as potential damage to the compressor. If you notice this behavior, consult with a qualified technician to diagnose and resolve the underlying issue before it leads to more significant problems.

❗️ Potential Impacts of a Leaking Refrigerant

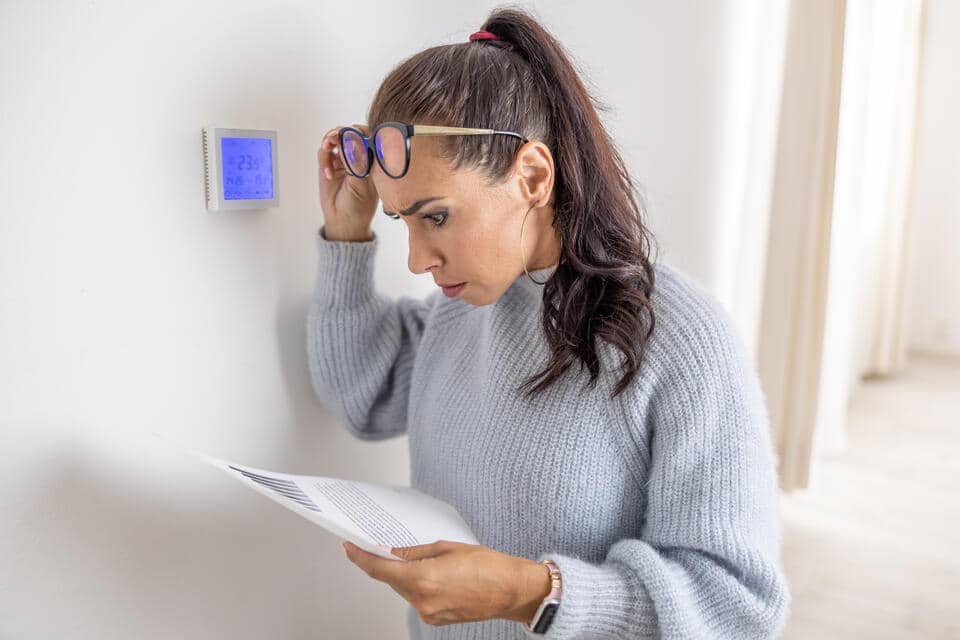
refrigerant leak-woman standing next to her thermostat looking at an increased energy bill

A leaking refrigerant can have significant environmental and health impacts, contributing to ozone depletion and global warming. Additionally, it can lead to inefficient cooling systems, increasing energy costs and affecting overall HVAC performance.

Impact on Energy Efficiency

A leaking refrigerant not only affects comfort but also leads to higher utility bills. When the refrigerant level is low, the system must work harder to cool your home, consuming more energy in the process. This inefficiency can lead to a significant increase in your energy expenses.

Additionally, the added strain on the system can shorten its lifespan, leading to more frequent repairs or even the need for a complete replacement. By addressing leaks promptly, you can save on both repair costs and monthly utility bills.

Health Risks to Consider

Refrigerant leaks can pose health risks if not addressed. While refrigerants are generally contained within the system, a leak can lead to exposure. Inhalation of refrigerants can cause headaches, dizziness, and irritation of the eyes, nose, and throat.

In severe cases, prolonged exposure can lead to respiratory issues. It’s important to ensure that leaks are fixed quickly and that your living environment remains safe and healthy for you and your family.

👉 Temporary Fixes You Can Try

While waiting for professional help, there are a few temporary solutions you can try. One option is to clean the coils. By removing any dirt or debris, you can improve airflow and reduce the strain on the system.

Another step is to check for and seal any obvious gaps around the AC unit. Although this won’t stop a refrigerant leak, it can improve efficiency temporarily.

Preventing Future Leaks

Prevention is key when it comes to refrigerant leaks. Regular maintenance checks by a qualified technician can catch potential issues before they become serious problems. Implementing a maintenance schedule can extend the life of your system and reduce the likelihood of leaks.

Additionally, investing in quality installation services ensures that your system starts off on the right foot. Proper sealing and attention to detail during installation can prevent many common causes of leaks.

When to Call a Professional

While some homeowners may be tempted to tackle refrigerant leaks themselves, it’s often best to call in the experts. Professional HVAC technicians have the tools and expertise to diagnose and repair leaks efficiently.

Consider calling a professional if you notice:

  • Unusual hissing or bubbling sounds
  • Increased energy bills without a clear reason
  • Frost buildup on the evaporator coils
  • Frequent cycling of the HVAC system

Attempting a DIY fix without the proper knowledge can lead to further damage or even void warranties. Instead, rely on a trusted HVAC service provider to ensure your system is handled with care.

🙌 Understanding and Addressing Refrigerant Leaks for a Comfortable Home

Refrigerant leaks are a common issue for many homeowners, but tackling them doesn’t have to be daunting. By understanding the signs, causes, and solutions, you can ensure your home remains cool and efficient throughout the year.If you suspect a refrigerant leak or are interested in enhancing your home’s comfort, reach out to us at Thelen Plumbing, Heating, and Air. Our team is ready to help you with all your HVAC needs. Contact us today and experience the difference of working with top-tier professionals.

What Is An Air Handler And What Is It Used For?

In the modern home, comfort is key. Yet, not everyone knows about the vital role an air handler plays in creating that comfort. Whether you’re a seasoned homeowner or just settling into your first house, understanding how this essential component works can be a game-changer. This guide will discuss everything you need to know about air handlers, explaining what they are, their significance, and how they fit into your home’s HVAC system, and more, including:

  • What is an air handler?
  • The importance of air handlers in home comfort
  • 3 key steps to choosing the right air handler
  • Tips for maintaining air handlers
  • Factors influencing air handler installation
  • Understanding energy efficiency and costs

🤔 Understanding Air Handlers

air handler in a home attic

An air handler, often referred to as an AHU (Air Handling Unit), is a critical component in your HVAC system. It’s responsible for circulating air throughout your home, ensuring that every room receives the right temperature and humidity level. Unlike air conditioners or furnaces, which generate hot or cold air, an air handler’s primary job is to move and condition the air.

Air handlers typically include a blower, heating or cooling elements, filters, and dampers. These components work together to distribute conditioned air, making them indispensable in achieving a comfortable living environment.

Different from Air Conditioners and Furnaces

While air handlers are part of the HVAC system, they serve a different purpose than air conditioners and furnaces. Air conditioners cool the air, while furnaces heat it. The air handler’s role is to ensure this conditioned air reaches every corner of your home efficiently.

Think of the air handler as the “middleman” in your HVAC system. It distributes air produced by the furnace or AC, making it an essential component for even temperature distribution.

Why Air Handlers Matter

Air handlers are essential for maintaining indoor air quality and comfort. Without a properly functioning air handler, you may experience:

  • Uneven heating or cooling
  • Poor air circulation
  • Increased energy bills

This makes understanding and maintaining your air handler crucial for a comfortable home.

🏠 The Importance of Air Handlers in Home Comfort

Air handlers play a crucial role in maintaining home comfort by effectively circulating conditioned air throughout the living space. They help regulate temperature and humidity, ensuring a consistent and pleasant indoor environment regardless of external weather conditions.

Key Features and Benefits

Air handlers come equipped with various features that enhance your home’s comfort. They can be customized with variable speed blowers, offering flexibility in controlling airflow. This adaptability leads to consistent temperatures and reduced energy consumption.

Another benefit of air handlers is their ability to improve indoor air quality. With proper filtration, they can capture dust, pollen, and other pollutants, ensuring the air you breathe is clean and fresh.

Choosing the Right Air Handler

Selecting the right air handler involves understanding your home’s specific needs. Consider factors such as the size of your home, existing HVAC components, and any specific comfort requirements. Consulting with experts like Thelen Plumbing, Heating, and Air can help ensure you choose an air handler that perfectly complements your system.

Maintaining Comfort and Efficiency

Regular maintenance is key to keeping your air handler running smoothly. Simple tasks like changing filters and cleaning blower components can prevent issues and extend the lifespan of your equipment. Regular check-ups by professionals ensure optimal performance and energy efficiency.

👇 3 Key Steps to Choosing the Right Air Handler

Choosing the right air handler is crucial for ensuring optimal HVAC performance and energy efficiency in your space. The right air handler can enhance air circulation, improve comfort levels, and reduce energy costs, making it a key component in maintaining a healthy indoor environment.

1. Assess Your Needs

Before purchasing an air handler, it’s important to assess your home’s needs. Consider the size of your space, the level of insulation, and any specific comfort preferences. These factors will guide you in selecting the right capacity and features.

2. Consult with Professionals

Professional guidance can make a significant difference when choosing an air handler. Experts like Thelen Plumbing, Heating, and Air can provide valuable insights into the best options for your home. They can recommend models that align with your budget and energy efficiency goals.

3. Consider Energy Efficiency

Energy efficiency is a crucial factor when selecting an air handler. Look for models with high SEER (Seasonal Energy Efficiency Ratio) ratings, as these units consume less energy while providing optimal comfort. Investing in an energy-efficient air handler can lead to significant long-term savings.

💡 Tips for Maintaining Air Handlers

air handler-technician performing maintenance on an HVAC unit

Maintaining air handlers is crucial for ensuring optimal indoor air quality and energy efficiency. Regular upkeep prevents breakdowns, extends the lifespan of the equipment, and ensures consistent performance in climate control.

Regular Cleaning and Filter Replacement

Regular maintenance is essential for keeping your air handler in top condition. Start by cleaning the unit’s components, including the blower and coils, to prevent dust buildup. Additionally, replace filters every 1-3 months to maintain optimal airflow and indoor air quality.

Professional Inspections

Schedule regular inspections with HVAC professionals to ensure your air handler operates efficiently. Technicians can identify potential issues before they escalate, saving you time and money on costly repairs.

Monitor Performance

Pay attention to your air handler’s performance. If you notice unusual noises, reduced airflow, or inconsistent temperatures, it may be time to seek professional assistance. Addressing problems early can prevent further damage and maintain comfort in your home.

Common Air Handler Issues & Troubleshooting

Understanding common air handler issues and how to troubleshoot them is crucial for maintaining optimal HVAC performance. Timely identification and resolution of these problems can enhance energy efficiency and prolong the lifespan of the system.

Identifying Common Problems

Like any mechanical equipment, air handlers can experience issues over time. Common problems include insufficient airflow, unusual noises, and leaks. Identifying these problems early is crucial for effective troubleshooting.

Basic Troubleshooting Steps

When facing minor issues, homeowners can perform basic troubleshooting steps. Check for clogged filters, loose connections, and debris in the blower. In some cases, resetting the unit can resolve minor glitches.

When to Call Professionals

While DIY troubleshooting can address some issues, it’s important to know when to call professionals. If problems persist despite your efforts, or if you notice electrical issues or refrigerant leaks, it’s best to enlist the help of experts like Thelen Plumbing, Heating, and Air.

🛠️ Factors Influencing Air Handler Installation

Compatibility with Existing Systems

When installing an air handler, compatibility with existing HVAC systems is crucial. Ensure that the unit you choose is compatible with your furnace or AC to avoid operational issues and maximize efficiency.

Proper Sizing

Selecting the right size air handler is essential for optimal performance. An oversized unit may cycle on and off frequently, while an undersized one may struggle to maintain comfort. Consulting professionals can help determine the appropriate size for your home.

Location and Ventilation

Consider the location of your air handler during installation. Proper ventilation and accessibility for maintenance are vital factors. Placing the unit in a well-ventilated area ensures efficient operation and prolongs the lifespan of your equipment.

💵 Understanding Energy Efficiency and Costs

air handler-family cool and comfortable in their home

Understanding energy efficiency and costs is crucial for air handlers because it directly impacts operational expenses and sustainability. By optimizing energy use, facilities can reduce their carbon footprint while ensuring reliable performance and comfort.

Energy Efficiency and Air Handlers

Benefits of Energy-Efficient Models: Energy-efficient air handlers offer numerous benefits, including reduced utility bills and a smaller carbon footprint. These models use advanced technologies to optimize airflow and minimize energy consumption, making them an environmentally-friendly choice.

SEER Ratings Explained: The SEER (Seasonal Energy Efficiency Ratio) rating measures the efficiency of air conditioning and heat pump systems. Higher SEER ratings indicate greater energy efficiency, leading to lower operating costs.

Long-Term Cost Savings: While energy-efficient air handlers may have a higher upfront cost, they can lead to substantial long-term savings. Reduced energy consumption translates to lower utility bills, providing a return on investment over time.

Cost Implications and Potential Savings

Initial Investment: The cost of purchasing and installing an air handler varies depending on factors like size, features, and brand. While it’s important to consider your budget, prioritize quality and energy efficiency to ensure a worthwhile investment.

Calculating Long-Term Savings: To determine potential savings, calculate the annual energy consumption of your current system and compare it to energy-efficient models. Consider factors like reduced repair costs and extended equipment lifespan.

Financing Options: For homeowners concerned about upfront costs, financing options are available. Many HVAC companies, including Thelen Plumbing, Heating, and Air, offer flexible payment plans to make upgrading to an energy-efficient air handler more affordable.

🙌 The Importance of Air Handlers for Home Comfort and Efficiency

Air handlers play a vital role in maintaining comfort and efficiency in your home. By understanding their functions and benefits, homeowners can make informed decisions when selecting, maintaining, and troubleshooting these essential HVAC components. With the support of trusted professionals like Thelen Plumbing, Heating, and Air, you can ensure that your air handler operates at its best, providing comfort and peace of mind for years to come. Contact us today to learn more about our air handler solutions and how Thelen Plumbing, Heating, and Air can help enhance your home’s comfort and efficiency.

11 Main Water Softener Parts Everyone Should Know

Water softeners are a critical component in maintaining the quality and longevity of your plumbing system and appliances. For homeowners, understanding the essential parts of a water softener can lead to better maintenance and more informed decisions when selecting or repairing units. But where do you start? In this guide, we’ll explore the key water softener parts that you should know about, ensuring you’re equipped with the knowledge to keep your system running smoothly. Here’s what you can expect to learn:

  • Brine Tank
  • Resin Tank
  • Control Valve
  • Salt Bridge
  • Resin Beads
  • Brine Solution
  • Bypass Valve
  • Brine Injector
  • Float Valve
  • Drain Line
  • Water Meter

💡 11 Parts of a Water Softener You Should Know

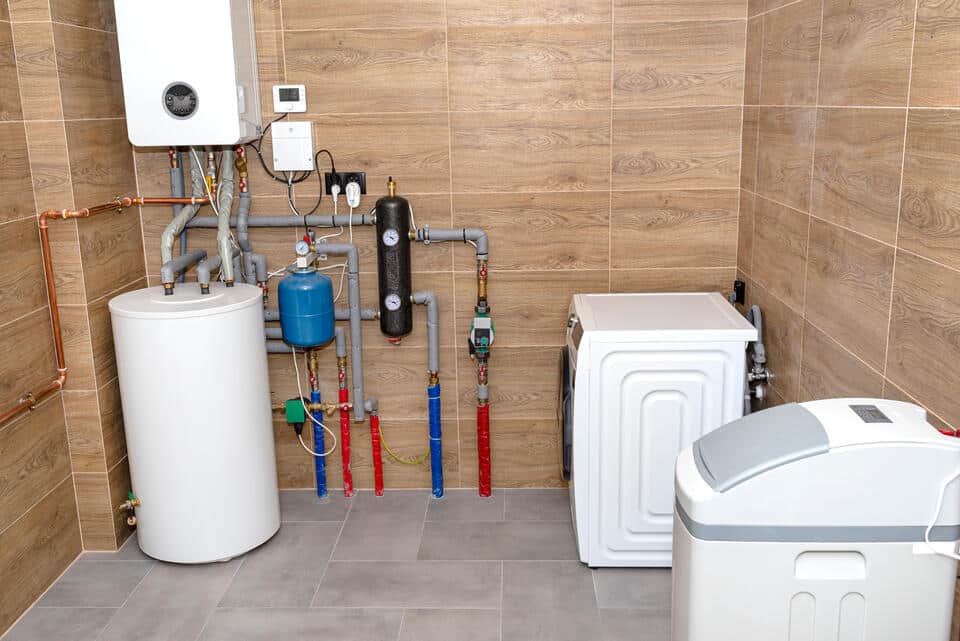
water softener parts-utility room with water heater, washing machine, and water softener

Understanding the 11 parts of a water softener is crucial for effective maintenance and troubleshooting. Familiarity with these components can help ensure optimal performance and longevity of the system, ultimately improving water quality in your home.

1. Brine Tank

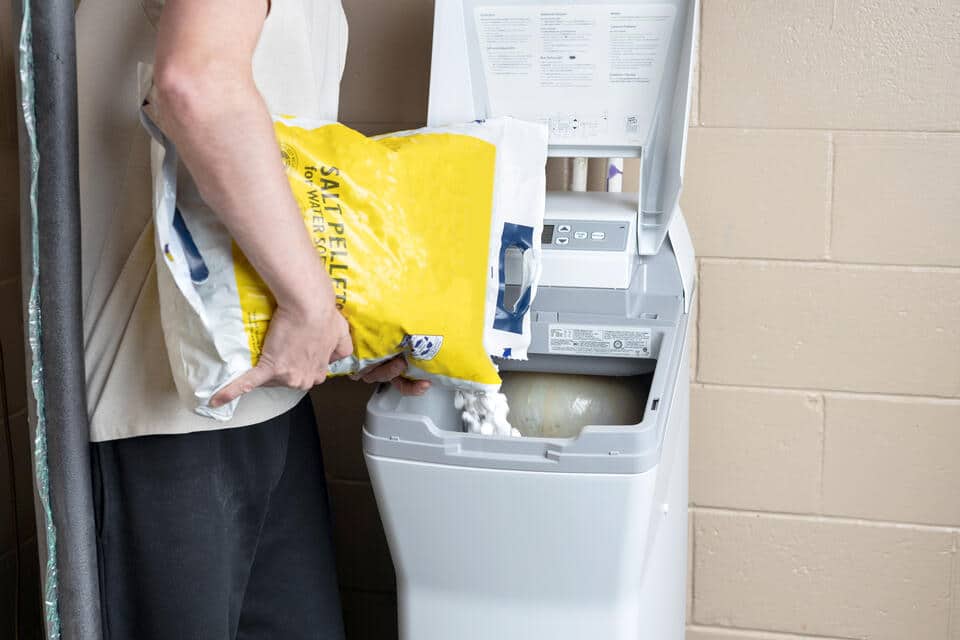
The brine tank is a vital part of your water softener system. It holds the salt that regenerates the resin beads responsible for softening water. Typically made of durable plastic, this tank is crucial for maintaining your system’s efficiency. Maintaining your brine tank involves regular checks to ensure it’s not overfilled and that the salt hasn’t clumped together. A well-managed brine tank will result in a more efficient water softening process and fewer issues down the line. Beyond just holding salt, the brine tank works in tandem with the resin tank to ensure continuous soft water. By understanding its role, you can prevent common issues like salt bridging and ensure your home always has soft, usable water.

2. Resin Tank

The resin tank is where the actual softening magic happens. Filled with resin beads, this tank facilitates the ion exchange process that removes calcium and magnesium from your water. The resin beads are coated with sodium ions. When hard water passes over them, the calcium and magnesium ions are exchanged for sodium ions, effectively softening the water. It’s a straightforward process but vital for maintaining water quality. Regular maintenance, such as cleaning and occasionally replacing the resin, ensures optimal performance. Understanding how your resin tank works helps you troubleshoot and maintain better water quality in your home.

3. Control Valve

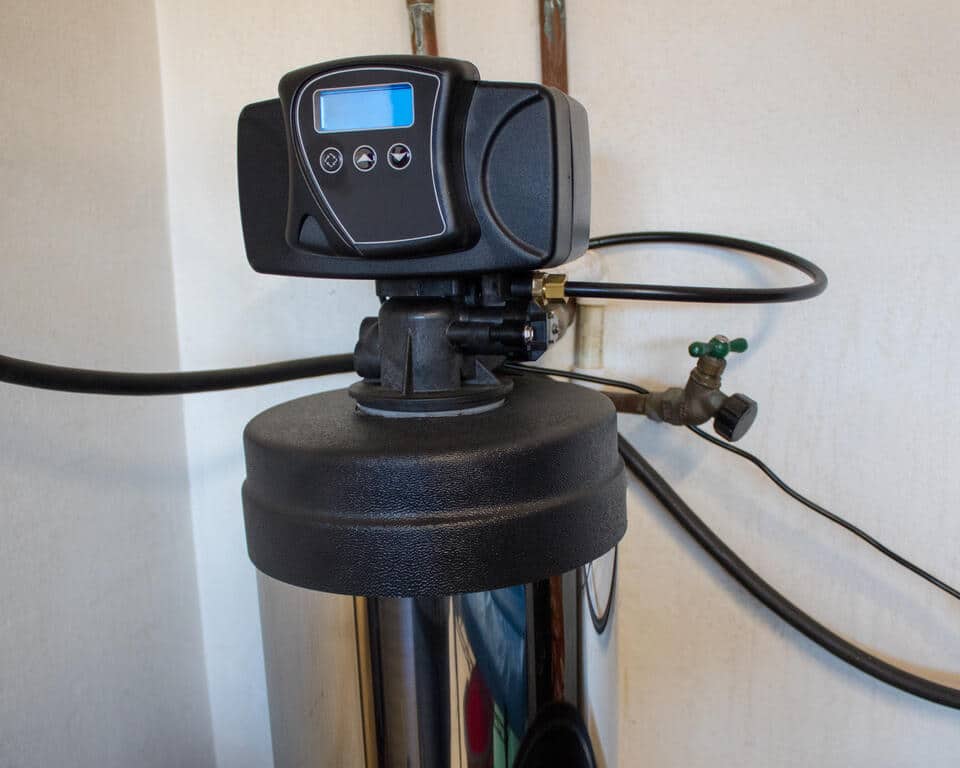
The control valve functions as the brain of the water softener system. It regulates the flow of water, directs it through the appropriate cycles, and initiates the regeneration of the resin beads. This component is essential for efficiently managing water usage in your home. A malfunctioning control valve can lead to inefficiencies, either over-regenerating or failing to regenerate the resin beads. Staying informed about your control valve’s operation can help you quickly identify potential problems, ensuring that water softening remains consistent and your system operates at peak efficiency.

4. Salt Bridge

Salt bridging occurs when a hard crust forms in the brine tank, preventing proper regeneration of the resin beads. This is an issue that can lead to hard water slipping through your system. Preventing salt bridging involves regular tank inspections and maintaining optimal humidity levels in your storage area. Using high-quality salt can also minimize the risk of formation. Addressing a salt bridge promptly is crucial. Breaking up the crust ensures proper brine formation, which is necessary for effective water softening.

5. Resin Beads

Resin beads are the unsung heroes of your water softener. They carry out the critical ion exchange process, swapping calcium and magnesium ions in your water for sodium ions. These tiny components are durable but still require attention over time. Regular cleaning and occasional replacement will ensure they continue performing their duties effectively. Understanding the role of resin beads helps homeowners appreciate their value, leading to better maintenance and longer-lasting softening results.

6. Brine Solution

The brine solution is a mixture of salt and water used to regenerate the resin beads. It is an essential part of ensuring continued water softening. An effective brine solution needs a balanced concentration. Too much or too little salt can hinder the regeneration process, impacting water quality. Regularly checking the salinity of your brine solution can help maintain the effectiveness of your water softener and ensure you continue to receive high-quality water.

7. Bypass Valve

water softener parts-bypass valve

The bypass valve allows you to shut off the water softener without disrupting the entire water supply. This is particularly useful during maintenance or repairs. Knowing how to use the bypass valve effectively can save you time and prevent unnecessary stress. It’s a handy feature that adds convenience to water softener ownership. Regularly testing your bypass valve ensures it functions correctly when needed, enhancing the overall reliability of your water softener system.

8. Brine Injector

The brine injector plays a pivotal role in directing the brine solution into the resin tank for regeneration. Over time, it can become clogged with impurities. Regular cleaning of the brine injector prevents blockages that could compromise the softening process. Ensuring a clear pathway maintains the efficiency of your water softener. Understanding how the brine injector fits into the overall system helps homeowners troubleshoot and maintain consistent soft water quality.

9. Float Valve

The float valve in the brine tank regulates the water level to prevent overflow. It’s a simple yet vital component for maintaining system balance. Regular checks ensure the float valve functions properly. A malfunctioning float valve can lead to brine tank issues, affecting the softening process. Being familiar with the float valve helps homeowners quickly identify and address potential issues, ensuring the water softener operates smoothly.

10. Drain Line

The drain line removes wastewater from the regeneration process. Proper functioning is crucial for efficient operation and preventing water damage. Checking for clogs or leaks in the drain line should be part of your regular maintenance routine. This ensures the water softener system operates efficiently and safely. By understanding the role of the drain line, homeowners can better maintain their systems, prolonging the life of their water softener.

11. Water Meter

water softener parts-water meter

A water meter measures water usage and helps the control valve determine when resin beads need regenerating. It’s an essential tool for optimizing water softening. Regularly monitoring your water meter can provide insights into your water usage patterns, helping you fine-tune your system for maximum efficiency. Understanding how the water meter interacts with other components aids homeowners in keeping their water softener systems efficient and cost-effective.

🙌 Trust Thelen Plumbing, Heating, and Air for Expert Service

Understanding the main parts of a water softener empowers homeowners to maintain their systems effectively, ensuring a consistent supply of soft water. Whether it’s tackling common issues like salt bridging or keeping components like the resin beads in top condition, a well-maintained water softener protects your appliances and plumbing system. At Thelen Plumbing, Heating, and Air, we pride ourselves on providing top-notch service and expertise to homeowners. Our team is dedicated to ensuring your home’s water softener system operates smoothly and efficiently. Trust us to deliver exceptional service, from routine maintenance to emergency repairs. Contact us today to schedule a consultation and experience our commitment to quality and customer satisfaction. Your home deserves the best, and we’re here to provide it.

3 Best Water Softener Salt Brands You Can Use

Hard water is a common household issue, affecting everything from laundry to the lifespan of appliances. Enter water softeners—a must-have for homeowners looking to improve water quality. However, choosing the right water softener salt is crucial for optimal performance. Here, we’ll guide you through the best brands available, ensuring your system runs smoothly and efficiently, including:

  • Why water softener salt matters
  • Recognizing the Benefits of High-Quality Softener Salt
  • 3 Best Water Softener Salt Brands
  • Tips for Maintaining Your Water Softener System
  • The Impact of Soft Water on Household Appliances
  • FAQs

🤔 Why Water Softener Salt Matters

best water softener salt-man pouring water softener salt into brine tank

Water softener salt is essential for reducing the minerals in hard water. It helps regenerate the resin beads that trap calcium and magnesium, preventing buildup in pipes and appliances.

The Role of Water Softener Salt in Softening Water

Without the right salt, a water softener cannot effectively remove the minerals that cause hard water. Salt ensures that these minerals do not cling to your pipes or shorten the lifespan of your appliances, saving you money in repairs and replacements.

Different Types of Water Softener Salt

There are several types of water softener salts, including solar, evaporated, and rock. Each type comes in various shapes and styles, such as salt crystals, salt pellets, rock salt, and blocks, which can influence how efficiently your system operates. Choosing the right type and form can make a significant difference in water quality.

How to Determine the Best Type for Your Home

Consider factors like water hardness level, household size, and softener compatibility. Understanding these elements will help you select the most efficient and cost-effective salt for your needs.

Recognizing the Benefits of High-Quality Softener Salt

Investing in high-quality water softener salt enhances both the performance of your system and the quality of your water.

  • Improved Appliance Longevity: Using quality salt prevents mineral buildup, prolonging the life of water-dependent appliances. This means fewer repairs and replacements, providing long-term savings.
  • Enhanced Cleaning Efficiency: Softened water improves the effectiveness of soaps and detergents, leading to cleaner dishes, clothes, and surfaces. It also reduces soap scum, making cleaning easier and more efficient.
  • Skin and Hair Care Benefits: By reducing the mineral content in your water, high-quality salt improves skin hydration and hair texture, offering noticeable benefits for your personal care routine.

✅ 3 Best Water Softener Salt Brands

best water softener salt-gloved hand holding water softener tablets

Choosing the best brands ensures reliability and performance, providing peace of mind for your household. Water softeners play a crucial role in improving water quality by removing minerals like calcium and magnesium that cause hardness. Selecting the right salt not only enhances the efficiency of the softening process but also prolongs the lifespan of your system.

1. Morton Salt

Renowned for its high purity and effective results, Morton Salt has established itself as a popular choice among homeowners for decades. This brand offers a wide range of products, including pellet and crystal forms, tailored to suit various water softener systems and household needs. The unique formulation of Morton Salt helps prevent the buildup of deposits in your water softener, ensuring efficient operation. Additionally, Morton is committed to sustainability, with initiatives aimed at reducing environmental impact, making it a responsible choice for eco-conscious consumers.

2. Diamond Crystal Bright & Soft Salt

Known for its high solubility and effectiveness, Diamond Crystal offers excellent value for money, making it a favorite among many users. Its formulation is specifically designed to reduce issues such as bridging and mushing, which can disrupt the softening process and lead to inefficiencies. With a commitment to quality, Diamond Crystal ensures that its salt dissolves quickly and completely, helping to maintain a consistent flow in your softener. Their products are also compatible with a variety of systems, making it easy for homeowners to find the right solution for their specific needs.

3. Cargill Salt

Offering both solar and evaporated options, Cargill Salt stands out for its versatility and efficiency in the water softening market. With a focus on high purity, Cargill’s products help ensure optimal performance in softening systems, which can lead to significant savings in maintenance and replacement costs over time. The brand is known for its rigorous quality control processes, guaranteeing that its salt meets the highest standards. Moreover, Cargill Salt is dedicated to sustainability, utilizing environmentally friendly practices in its production processes, making it an excellent choice for those looking to balance performance with ecological responsibility.

💡 Tips for Maintaining Your Water Softener System

Regular maintenance keeps your water softener in top condition, ensuring continuous water quality improvement.

  • Regular Cleaning and Inspection: Inspect your softener regularly for buildup and clean it as needed. This prevents clogging and maintains efficient operation.
  • Monitoring Salt Levels: Check salt levels monthly to ensure your softener functions correctly. Top off the salt when necessary to avoid interruptions in soft water supply.
  • Professional Servicing: Schedule annual servicing with a professional to address any potential issues before they become major problems, ensuring long-term efficiency.
  • Setting the Right Water Hardness Level: Adjust the hardness setting on your water softener according to your local water quality. This ensures optimal performance and helps prolong the lifespan of the system.
  • Flushing the System: Periodically flush your water softener system to remove any accumulated minerals and debris. This helps maintain its efficiency and improves overall water quality.

🚰 The Impact of Soft Water on Household Appliances

Soft water significantly enhances the performance and longevity of your household appliances, offering numerous benefits that can lead to a more efficient and cost-effective home.

Reduced Scale Build-Up

Hard water contains high levels of minerals such as calcium and magnesium, which can lead to scale buildup in your appliances over time. This buildup can clog pipes, reduce water flow, and decrease the efficiency of appliances like dishwashers, washing machines, and water heaters. By minimizing mineral deposits, soft water helps keep these appliances running smoothly and efficiently. This not only improves their performance but also means fewer maintenance issues and less frequent repairs, giving you peace of mind.

Energy Efficiency

Appliances that use soft water operate more efficiently because they do not have to work as hard to overcome the effects of scale and mineral buildup. For example, water heaters can heat water more quickly and efficiently, resulting in quicker showers and less energy consumption. As a result, using soft water can lead to significant savings on your utility bills. Over time, these savings can add up to a substantial amount, making soft water a smart choice for both your wallet and the environment.

Longer Appliance Lifespan

The reduced wear and tear on appliances due to lower mineral deposits translates to a longer lifespan. Appliances that are not constantly battling against scale buildup will experience fewer breakdowns and require less frequent replacements. This longevity not only saves you money on costly repairs and replacements but also reduces the amount of waste generated from discarded appliances. By investing in a water softener or ensuring that your household has access to soft water, you can enhance the longevity of your appliances and contribute to a more sustainable home.

How Water Softener Salt Enhances Everyday Living

The right water softener salt transforms everyday activities, from bathing to cleaning, offering tangible benefits for homeowners.

Improved Cooking and Tasting: Soft water enhances the flavors of your food and beverages, making them taste better. It also prevents mineral deposits in cookware and coffee makers.

Easier Laundry Days: Soft water improves the effectiveness of laundry detergents, leading to softer, cleaner clothes with less residue.

Eco-Friendly Cleaning: Using soft water reduces the need for harsh cleaning chemicals, supporting environmentally friendly practices in your household.

❓ FAQs

best water softener salt-overhead view of water softener full of pellets

Answers to common questions help homeowners make informed decisions about their water softener systems.

Q: Is All Water Softener Salt the Same?

No, there are different types and qualities of salt, each affecting the performance and efficiency of your softener. Choose based on your specific water conditions and system requirements.

Q: How Often Should I Refill My Water Softener with Salt?

The frequency depends on your water usage and softener size. Check levels monthly and refill as needed to maintain soft water supply.

Q: Can I Use Any Brand of Salt in My Water Softener?

While many brands are compatible, it’s best to follow manufacturer recommendations for optimal performance and to avoid potential issues.

🙌 Your Guide to Choosing the Best Water Softener Salt

Choosing the best water softener salt is essential for maintaining high-quality water and extending the life of your appliances. Our team at Thelen Plumbing, Heating, and Air is here to assist you with your water softening needs and ensure you make the best choice for your home. With our expertise and commitment to quality service, you can trust us to keep your home running smoothly. Contact us today to learn more about our services and how we can help you achieve stress-free living with our comprehensive home solutions.

Burst Pipe Repair When To Call a Professional

Imagine waking up to the sound of rushing water only to find your home flooded due to a burst pipe. It’s a nightmare scenario for any homeowner, but understanding when to call in the experts can save you time, money, and a lot of stress. In this guide, we’ll explore everything you need to know about burst pipe repair, including:

  • Understanding Burst Pipes
  • 9 Steps to Take When you discover a burst pipe
  • Common Causes of Burst Pipes
  • DIY vs. Professional Repair
  • Cost Implications of Pipe Repairs
  • Preventive Measures for Homeowners

🤔 Understanding Burst Pipes

burst pipe repair-woman catching leaking water from a pipe into a bucket and holding a cloth over the pipe

Burst pipes are a common yet potentially devastating issue for homeowners. A burst pipe occurs when the pressure in the pipe exceeds what it can handle, causing the pipe to rupture. This can lead to significant water damage, which can be costly to repair. Common causes include freezing temperatures and a buildup of pressure due to clogs. Recognizing the early signs of a burst pipe can help mitigate damage and reduce repair costs.

In most homes, pipes are made of copper, PVC, or galvanized steel. Each material has its strengths and weaknesses, and knowing which type you have can help you understand the risks and maintenance needs. For instance, older homes often have galvanized steel pipes, which can rust and corrode over time, leading to weaknesses that might cause a burst.

The location of the pipe is another important factor. Pipes located in exterior walls, basements, or attics are more susceptible to freezing. It’s crucial to monitor these areas, especially during cold spells, to ensure your pipes are in good condition.

Signs Your Pipe Has Burst

Detecting a burst pipe early can prevent extensive damage to your home. Here are some signs to watch for:

  • Sound of rushing water: If you hear water flowing in your walls or beneath your floors, act quickly.
  • Sudden drop in water pressure: A decrease in pressure at your shower or faucets could indicate a burst pipe.
  • Discoloration in water: Rust or debris may be present from damaged pipes.
  • Unexpected puddles or damp patches: Spotting these on floors, walls, or ceilings means immediate investigation is needed.

Ignoring these signs can lead to mold growth and structural damage, which can be costly to repair.

👉 9 Steps to Take When You Discover a Burst Pipe

When you suspect a burst pipe, acting quickly is key to minimizing damage. Here’s a detailed guide on what you should do:

1. Turn Off the Water Supply

The first and most crucial step is to locate your main water shut-off valve and turn it off. This valve is typically found in the basement, crawl space, or near your water meter. By stopping the flow of water, you can significantly mitigate the risk of flooding and prevent further damage to your home and belongings. Make sure everyone in your household knows where this valve is located for future emergencies.

2. Drain the System

Once the water supply is off, open all faucets in your home, including sinks, bathtubs, and outdoor spigots. This allows any remaining water in the pipes to drain out, reducing pressure and minimizing the chance of additional leaks occurring. You might also want to flush toilets to ensure all water is emptied from the system. This step is essential to prevent further complications.

3. Assess the Damage

Carefully inspect the affected area to determine the extent of the damage. Look for visible signs such as cracks in the walls, damp spots, or water accumulation on the floor. Pay close attention to surrounding areas where water may have migrated. It’s important to document your findings, as this information will be useful when discussing repairs with your plumber or insurance agent.

4. Call a Plumber

As soon as you have assessed the situation, contact a professional plumber. Their expertise is invaluable in this situation; they will be able to diagnose the problem, recommend the best course of action, and carry out necessary repairs. Make sure to choose a licensed and insured plumber to ensure that the work is done correctly and safely.

5. Turn Off Electricity

If the burst pipe is near electrical outlets or appliances, it’s essential to turn off the electricity in that area. Do this at your circuit breaker to prevent any risks of electric shock or fire hazards. Water and electricity don’t mix, so taking this precaution is crucial for your safety. If you’re unsure about handling the electrical components, it’s best to call an electrician for assistance.

6. Document the Damage

burst pipe repair-water pooling on tile floor from a burst pipe

Take comprehensive photos or videos of the damage for insurance purposes. Capture all affected areas, including close-ups of any leaks or structural damage. This documentation is vital for any claims you may need to file with your insurance company. Be thorough, as having detailed evidence can help expedite the claims process and ensure you receive the coverage you’re entitled to.

7. Remove Belongings

If safe to do so, remove any valuable items, furniture, or personal belongings from the affected area. This includes electronics, artwork, and sentimental items that could be damaged by water. If necessary, store these items in a dry place to prevent further damage. Taking prompt action can save your belongings and reduce the need for extensive repairs later.

8. Use Towels or Buckets

If water is pooling on the floor, act quickly to soak up as much water as possible using towels or buckets. This initial response can help prevent water from spreading to other areas of your home. If you have access to a wet/dry vacuum, use it to remove larger amounts of water. Keeping the area as dry as possible will help reduce the risk of mold growth and additional damage.

9. Check for Mold

Once the immediate situation is under control, continue to monitor the area for any signs of mold growth. Mold can develop rapidly in damp conditions, usually within 24-48 hours. If you notice any discoloration, musty odors, or visible mold, it’s important to act quickly. Consider hiring a mold remediation specialist to assess the situation and recommend appropriate steps to eliminate the mold safely. Regular inspections will help ensure that your home remains safe and healthy.

👉 Common Causes of Burst Pipes

Understanding what causes burst pipes can help you take preventive measures. Freezing temperatures are a leading cause, as water expands when it freezes, increasing pressure on the pipes. Insulating exposed pipes can help prevent this issue.

Corrosion is another common cause, particularly in older homes with galvanized steel pipes. Over time, these pipes can rust and weaken, making them prone to bursting. Regular inspections can help you identify and replace corroded pipes before they fail.

High water pressure and clogs within the plumbing system can also lead to burst pipes. Installing a pressure regulator and routinely clearing drains can mitigate these risks.

👨‍🔧 DIY vs. Professional Repair

When faced with a burst pipe, deciding whether to attempt a DIY repair or call a professional can be challenging. Simple leaks or minor damage may be manageable for a skilled DIYer, but burst pipes often require specialized tools and expertise.

Professional plumbers have the experience to accurately diagnose the problem and implement a long-term solution. They can identify potential underlying issues, like corrosion or improper installation, that might not be apparent to the untrained eye.

Additionally, professionals can ensure repairs comply with local building codes, which is crucial for maintaining your home’s safety and value.

Key Benefits of Hiring Professionals

Hiring a professional for burst pipe repair offers several advantages:

  • Quick Problem Identification: Experts can quickly identify the source of the issue and implement an effective fix, minimizing further damage to your home.
  • Access to Quality Materials: Professionals have access to high-quality materials and tools, ensuring repairs are durable and long-lasting.
  • Preventive Advice: They can provide valuable advice on preventing future issues, such as routine maintenance or upgrading old pipes.
  • Emergency Services: In emergency situations, time is of the essence. Professional plumbers often offer 24/7 emergency services, ensuring that help is available when you need it most.

What to Expect During a Professional Repair

During a professional burst pipe repair, the plumber will begin by assessing the damage and identifying the source of the leak. They may use specialized tools, such as cameras or leak detection equipment, to locate the problem accurately.

Once the issue is pinpointed, the plumber will outline the necessary repairs and provide an estimate for the work. This transparency ensures you understand the scope of the project and any associated costs.

The repair process typically involves replacing damaged sections of pipe and reinforcing connections to prevent future leaks. Once complete, the plumber will test the system to ensure everything is functioning correctly before cleaning up the work area.

💵 Cost Implications of Pipe Repairs

burst pipe repair-water leaking from ceiling due to pipe burst

The cost of repairing a burst pipe can vary widely depending on factors like the severity of the damage, the location of the pipe, and the materials used. On average, homeowners can expect to pay between $200 and $500 for minor repairs, while more extensive damage can cost upwards of $1,000.

It’s essential to consider both the immediate repair costs and potential future expenses when evaluating your options. While a DIY fix might seem more affordable initially, improper repairs can lead to more significant problems down the line, increasing overall costs.

Many plumbing services offer financing options or payment plans to help manage the cost of repairs without straining your budget.

💡 Preventive Measures for Homeowners

Taking proactive steps to prevent burst pipes can save you time, money, and stress. Here are some key measures to consider:

  • Insulate exposed pipes, especially in unheated areas, to protect against freezing temperatures.
  • Conduct regular maintenance by inspecting pipes for signs of corrosion or leaks to identify potential issues early.
  • Install a water pressure regulator to prevent damage from excessive pressure.
  • Perform routine drain cleaning to reduce the risk of clogs.
  • Schedule annual inspections with a professional plumber to ensure your plumbing system is in good condition and address any concerns proactively.

🙌 Exceptional Burst Pipe Repair Services by Thelen Plumbing, Heating, and Air

When it comes to burst pipe repair, trust Thelen Plumbing, Heating, and Air to deliver exceptional service and peace of mind. With years of experience in the Twin Cities region, our team of skilled professionals is equipped to handle any plumbing challenge, big or small. We pride ourselves on our commitment to quality craftsmanship, affordability, and lightning-fast turnaround times. Our 24/7 emergency repair services ensure we’re always available when you need us most. Don’t leave your plumbing needs to chance—reach out to Thelen Plumbing, Heating, and Air today and experience the difference for yourself. Whether it’s a burst pipe or routine maintenance, we’ve got you covered.

How To Unclog Garbage Disposal In 6 Different Ways

Garbage disposals are a modern kitchen convenience, but they can become a source of frustration when they get clogged. Whether you’re dealing with a minor blockage or a more serious jam, knowing how to unclog a garbage disposal can save you time, money, and stress. This comprehensive guide will walk you through how to unclog garbage disposal units and other measures to prevent clogs, including:

  • Common reasons a garbage disposal get clogged
  • Prepping to unclog a disposal
  • 6 ways to unclog a garbage disposal
  • Preventative measures

🤔 Common Reasons a Garbage Disposal Gets Clogged

how to unclog garbage disposal-woman peeling vegetables directly into a garbage disposal

Understanding the common reasons behind garbage disposal clogs can help in both preventing future issues and addressing current ones. Here are some primary culprits:

  • Improper food waste disposal: Certain items should never be put down the garbage disposal. Eggshells can create a sandy texture that clogs the blades, while coffee grounds can build up and create sludge. Fibrous vegetables like celery and potato peels can wrap around the disposal’s components, leading to blockages. Always check what you are discarding and opt for composting or trashing items that could cause issues.
  • Overloading the disposal: Every garbage disposal has a limit on how much food it can handle at once. When too much food is put in, it can overwhelm the system, causing it to jam or fail to grind the waste properly. To avoid this, feed the disposal gradually, allowing it to process small amounts before adding more. This not only prevents clogs but also extends the life of your appliance.
  • Accumulation of grease and fat: Pouring grease or fat down the disposal might seem convenient, but these substances can solidify in the pipes as they cool, leading to persistent clogs. Instead of disposing of oils in the sink, save them in a container and throw them in the trash once they have cooled. Regularly running hot water and soap through the disposal can help keep grease buildup in check.
  • Foreign objects: It’s easy to accidentally drop items like utensils, bones, or even small toys into the disposal. These foreign objects can cause serious mechanical jams that might require professional repair. To prevent this, always be mindful when using the disposal and avoid placing your hands or any other objects near the opening. If something does get stuck, turn off the disposal immediately and use tongs or pliers to retrieve the item safely.

By recognizing these common causes, you can take better care of your garbage disposal and reduce the risk of clogs. Regular maintenance and mindful disposal practices will ensure your unit operates smoothly and efficiently for years to come.

👉 Prepping to Unclog a Disposal

Prepping to unclog a disposal is crucial to ensure a safe and effective process. Proper preparation allows you to identify the clog accurately and take necessary safety precautions, preventing potential injuries and further damage to your disposal unit.

Safety First

Before you begin, ensure your safety by disconnecting the power supply to the disposal. This prevents any accidental activation while you’re working on the unit.

Disconnect the Power: Locate the breaker that controls your garbage disposal and switch it off. Alternatively, unplug the unit from the outlet under your sink if it’s connected this way.

Use Protective Gear: Wear rubber gloves to protect your hands from sharp objects and debris. Safety goggles are also a good idea in case of any splashes.

Identifying the Clog

Understanding the nature of the clog can help you determine the best method to unclog it.

Check for Visible Obstructions: Shine a flashlight into the disposal to see if there are any visible obstructions that you can remove manually.

Listen for Unusual Sounds: Turn on the disposal (with the power reconnected) to see if it makes unusual noises, like humming without grinding. This can indicate that the blades are jammed.

💡 6 Ways to Unclog a Garbage Disposal

Unclogging a garbage disposal is crucial for maintaining kitchen hygiene and preventing plumbing issues. Regular maintenance ensures your disposal operates efficiently, reducing the risk of costly repairs and unpleasant odors.

1. Resetting the Disposal

Sometimes, a simple reset is all it takes to fix a clogged disposal.

Locate the Reset Button: Find the reset button underneath the disposal unit. It’s usually a small red button.

Press and Hold the Button: Press and hold the reset button for about 10-15 seconds. This can reset the internal circuit and potentially clear minor clogs.

2. Manual Crank Method

If the reset button doesn’t work, try manually turning the disposal blades.

Use an Allen Wrench: Insert an Allen wrench into the hole at the bottom of the disposal. Turn the wrench back and forth to manually rotate the blades and dislodge any debris.

Check for Movement: Once the blades start moving freely, the clog may be cleared. Reconnect the power and test the disposal.

3. Using a Plunger

how to unclog garbage disposal-gloves and plunger in a sink to unclog the drain

A plunger can create suction and pressure to dislodge the clog.

Position the Plunger: Place the plunger over the sink drain and fill the sink with enough water to cover the plunger’s bell.

Plunge Vigorously: Use quick, forceful plunges to create suction. This can help push the clog through the pipes.

4. Baking Soda and Vinegar Solution

This natural solution can help break down food particles and grease.

Mix the Solution: Pour half a cup of baking soda into the disposal, followed by a cup of vinegar.

Wait and Flush: Allow the mixture to fizz and sit for about 10-15 minutes. Then, flush the disposal with hot water.

5. Boiling Water Method

Boiling water can help dissolve grease and flush out debris.

Boil Water: Bring a pot of water to a boil on your stove.

Pour Carefully: Carefully pour the boiling water down the drain in stages, allowing it to work through the clog.

6. Cleaning the P-Trap

If other methods fail, the clog may be in the P-trap under the sink.

Remove the P-Trap: Place a bucket under the P-trap to catch water and debris. Loosen the slip nuts with a wrench and remove the P-trap.

Clear the Blockage: Clean out any debris from the P-trap and reassemble it. Reconnect the power and test the disposal.

👇 Preventative Measures

Taking proactive steps to prevent clogs can save you from future headaches and costly repairs. Here are a few essential tips:

Avoid Hard or Fibrous Foods: Stay clear of putting hard items like bones and tough, fibrous foods like celery down the disposal. These can damage the blades and lead to blockages, so opt for softer food scraps instead.

Regular Maintenance: To keep your disposal in top shape, run cold water before and after use. This helps flush away food particles. Additionally, grinding ice cubes every few weeks can help clean the blades and prevent buildup.

When to Call a Professional

If you’ve tried all these methods and the disposal is still clogged, it may be time to call in a professional.

Expertise and Tools: Professional plumbers come equipped with specialized tools and extensive knowledge to diagnose and resolve more serious issues effectively. They can identify underlying problems without causing damage to your plumbing system.

Thelen Plumbing, Heating, and Air

Our team at Thelen Plumbing, Heating, and Air is dedicated to providing expert plumbing services, including garbage disposal repair and maintenance. We take pride in our fast turnaround times and commitment to quality craftsmanship, all at affordable prices. Whether you need routine maintenance or urgent repairs, we’re here to help.

how to unclog garbage disposal-close up of water and bubbles being rinsed down a garbage disposal

🙌 A Guide to Unclogging and Professional Help

Unclogging a garbage disposal can be a straightforward task if you know the right methods. From simple resets to more involved techniques, this guide provides you with the tools to tackle common clogs. However, if you find yourself facing persistent issues, don’t hesitate to reach out to professionals. At Thelen Plumbing, Heating, and Air, we’re here to help with all your plumbing needs, ensuring your home remains comfortable and functional. Ready to solve your garbage disposal woes? Contact us today for expert assistance.

Schedule Service

"*" indicates required fields

This field is for validation purposes and should be left unchanged.