
Author: Kevin

plumber using hand tools to fix a sink drain plumber using hand tools to fix a sink drain

What Do Plumbers Do? (Services, Expertise, & More)

Plumbers are often the unsung heroes of our homes and businesses, ensuring that our water systems function smoothly and efficiently. Their expertise spans a wide range of services, from simple repairs to complex installations. This article answers the question, “What do plumbers do?”, including:

  • The essential role of plumbers
  • 8 key services offered by plumbers
  • Expertise and skills of plumbers
  • Specialized areas in plumbing
  • The importance of hiring a professional plumber

🧑‍🔧 The Essential Role of Plumbers

Plumbers are skilled professionals responsible for installing, repairing, and maintaining pipes, fixtures, and other plumbing systems used for water distribution and waste disposal. They work in residential, commercial, and industrial settings, ensuring that the essential infrastructure that delivers clean water and removes waste is functioning correctly.

🙌 8 Key Services Offered by Plumbers

In this section, we will explore the eight main services offered by plumbers. These essential services ensure the proper functioning and maintenance of residential and commercial plumbing systems.

1. Installation Services

One of the primary roles of plumbers is to install new plumbing systems in buildings. This includes laying pipes, setting up fixtures like sinks, toilets, and showers, and connecting appliances such as dishwashers and water heaters to the water supply and drainage systems. They ensure that all installations comply with local building codes and standards.

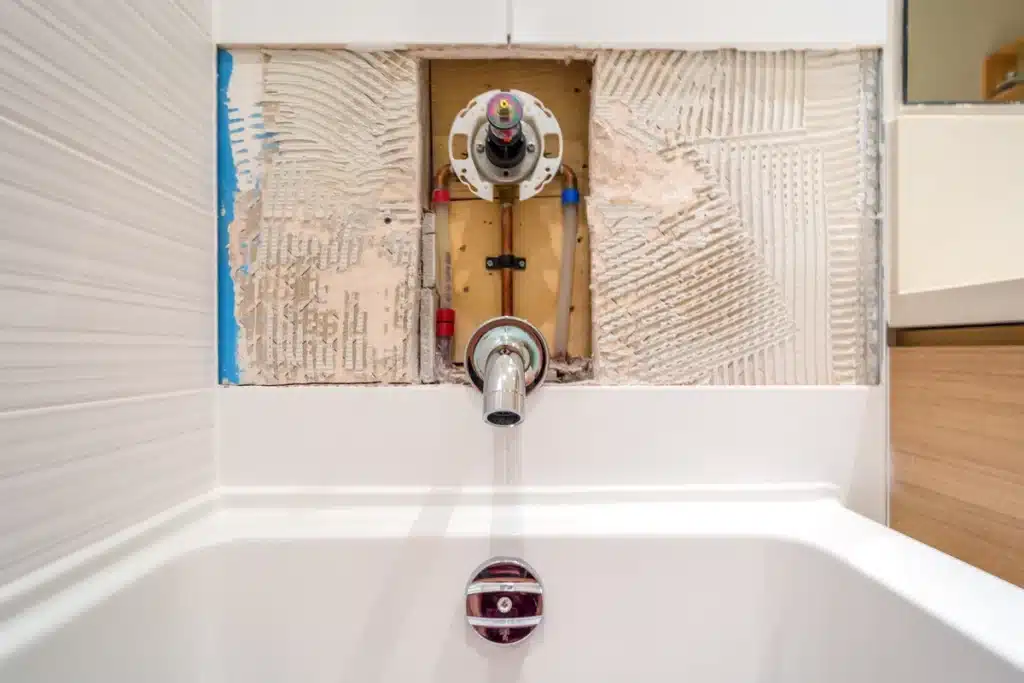
2. Repair and Maintenance

Plumbers are often called upon to repair faulty plumbing systems. This can range from fixing a leaky faucet or a clogged drain to more complex tasks like repairing or replacing broken pipes and fixtures. Regular maintenance performed by plumbers can help prevent plumbing issues before they become major problems, saving homeowners and businesses time and money.

3. Emergency Services

Plumbing emergencies can occur at any time, and when they do, they often require immediate attention to prevent further damage. Plumbers offer emergency services to address urgent issues such as burst pipes, severe leaks, or sewer backups. Their prompt response can mitigate damage and restore functionality to the affected systems.

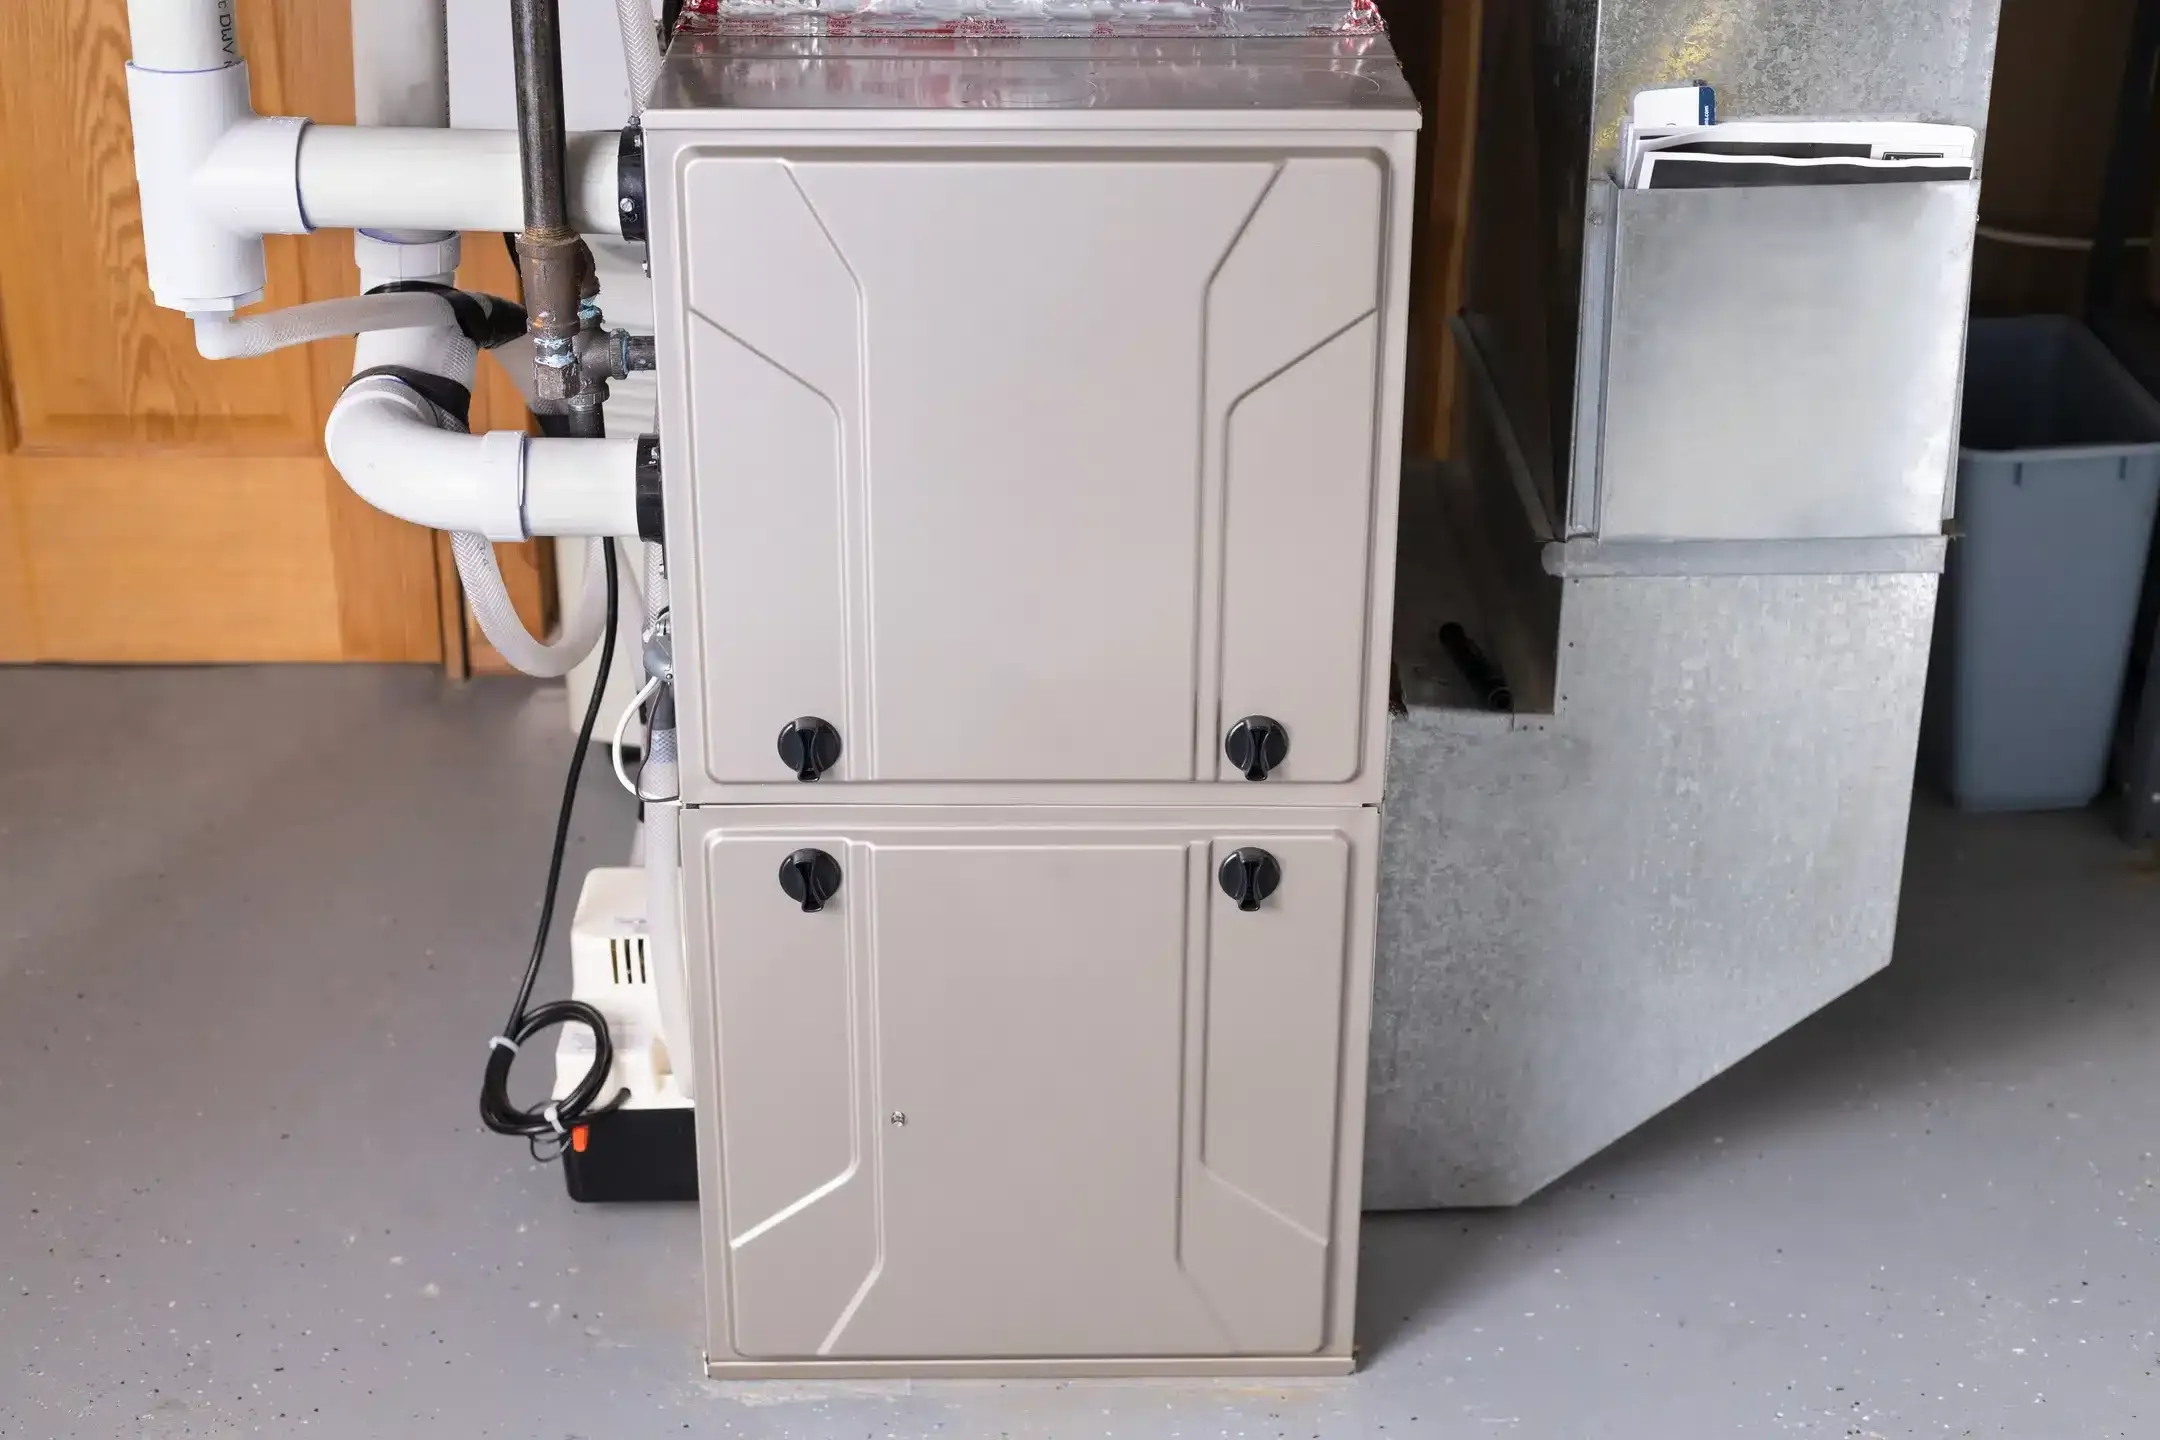
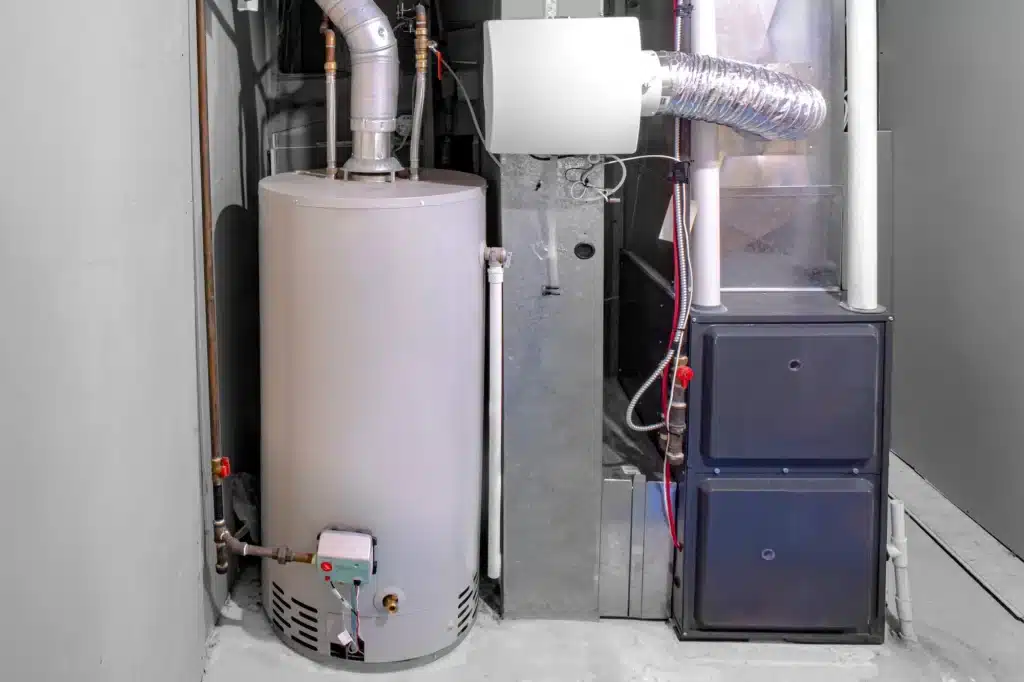
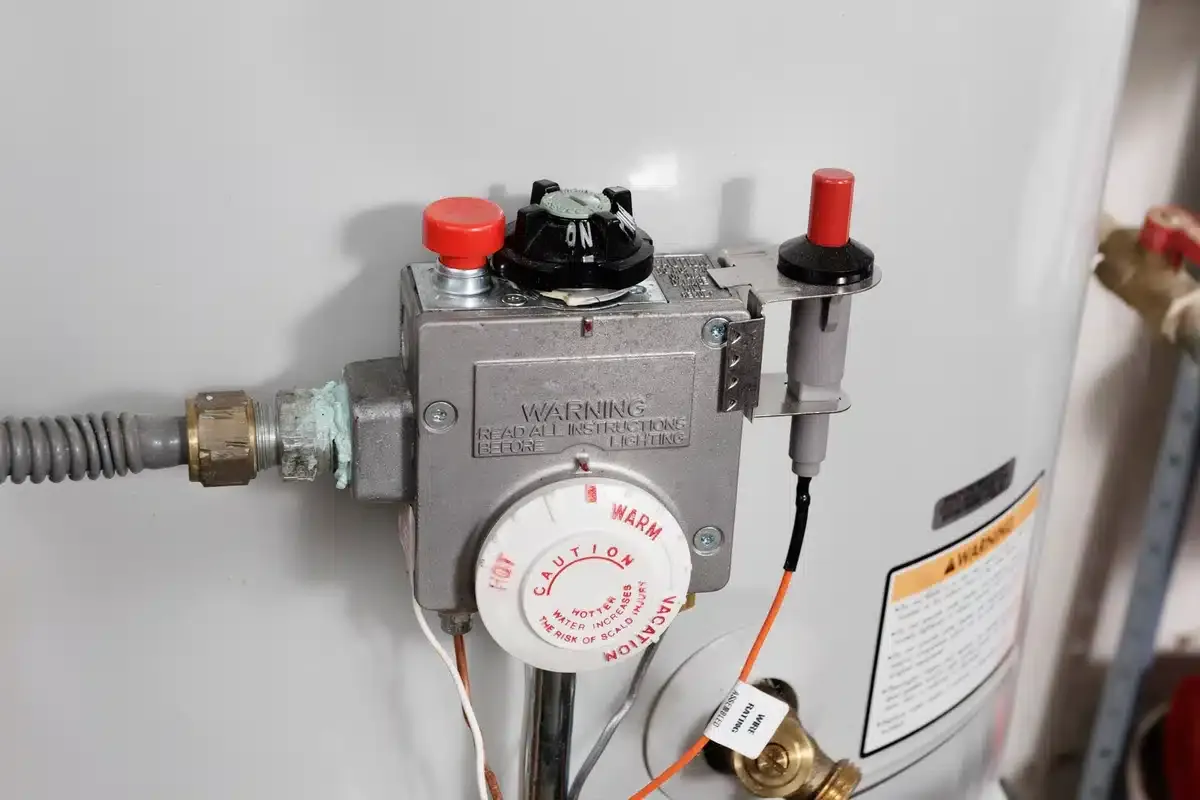
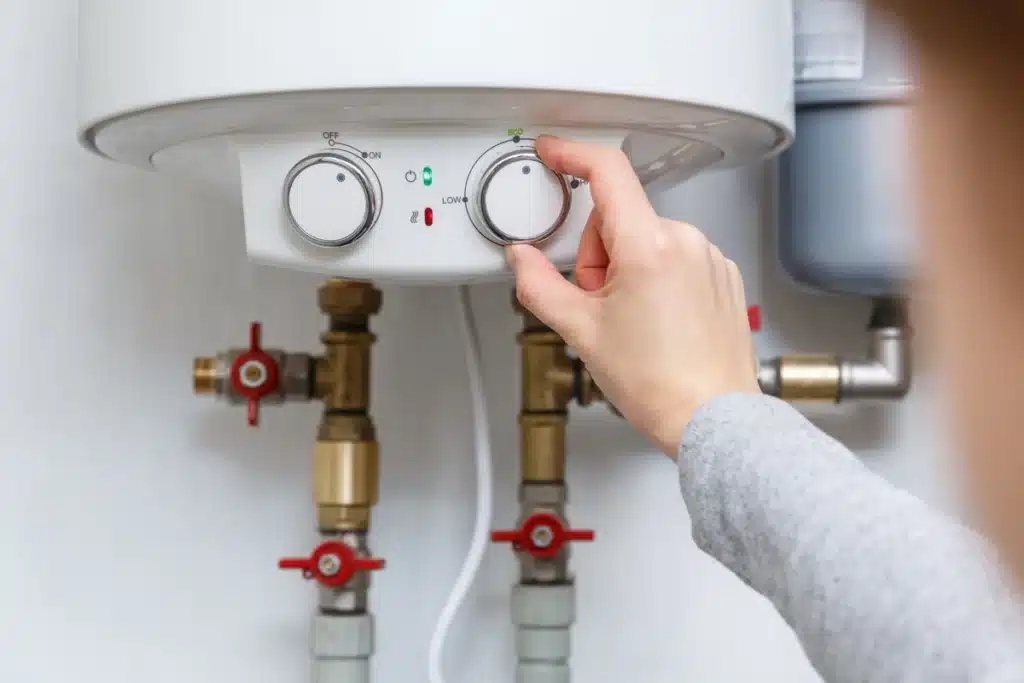
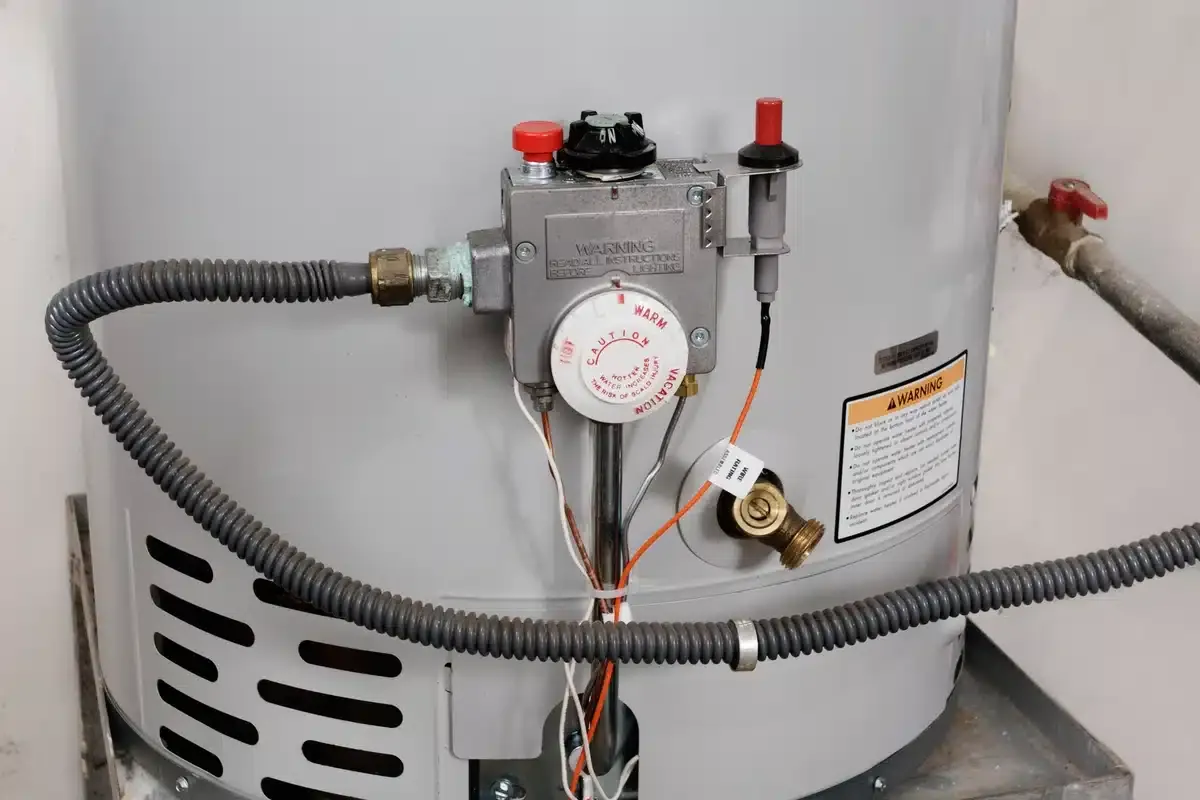
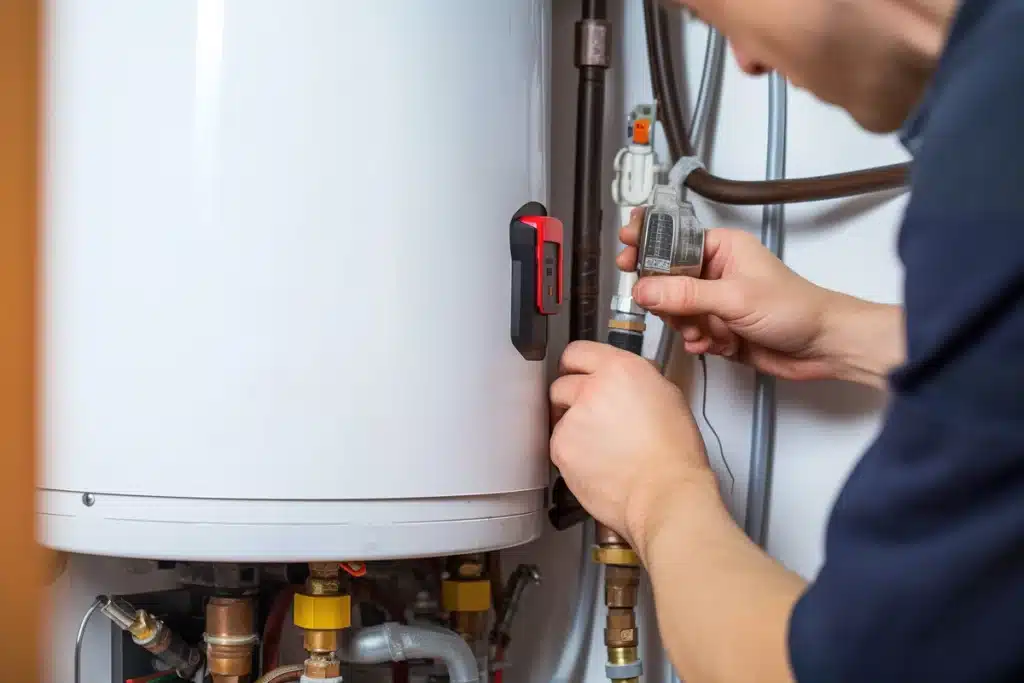
4. Water Heater Services

Water heaters are crucial for providing hot water in homes and businesses. Plumbers are skilled in installing, repairing, and maintaining various types of water heaters, including traditional tank water heaters, tankless water heaters, and solar water heating systems. They can also advise on the best water heater for your needs and ensure it operates efficiently.

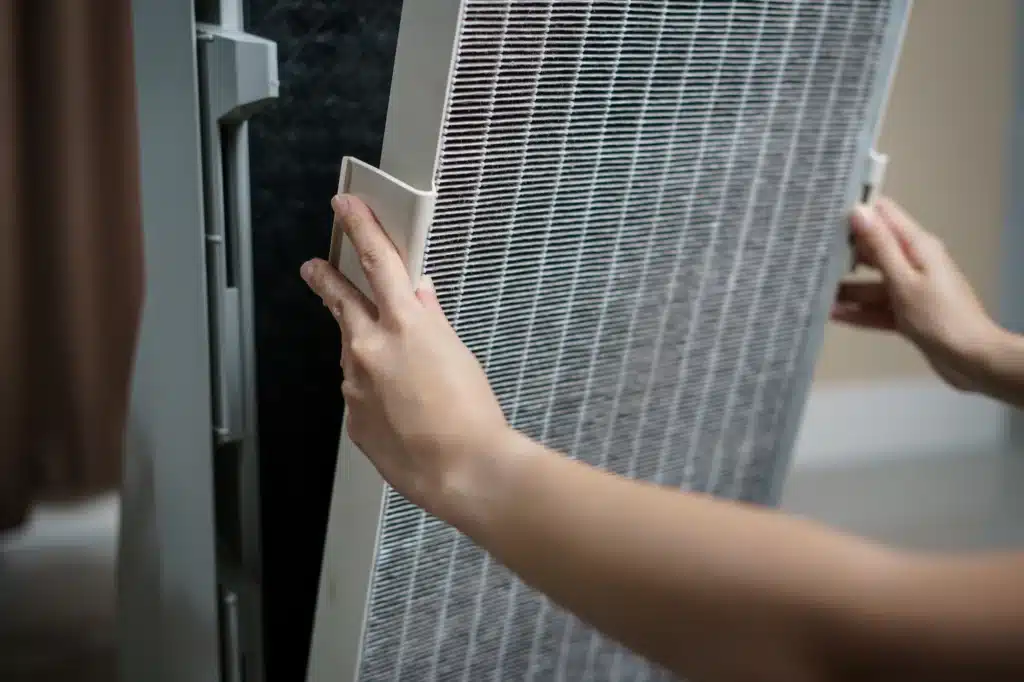
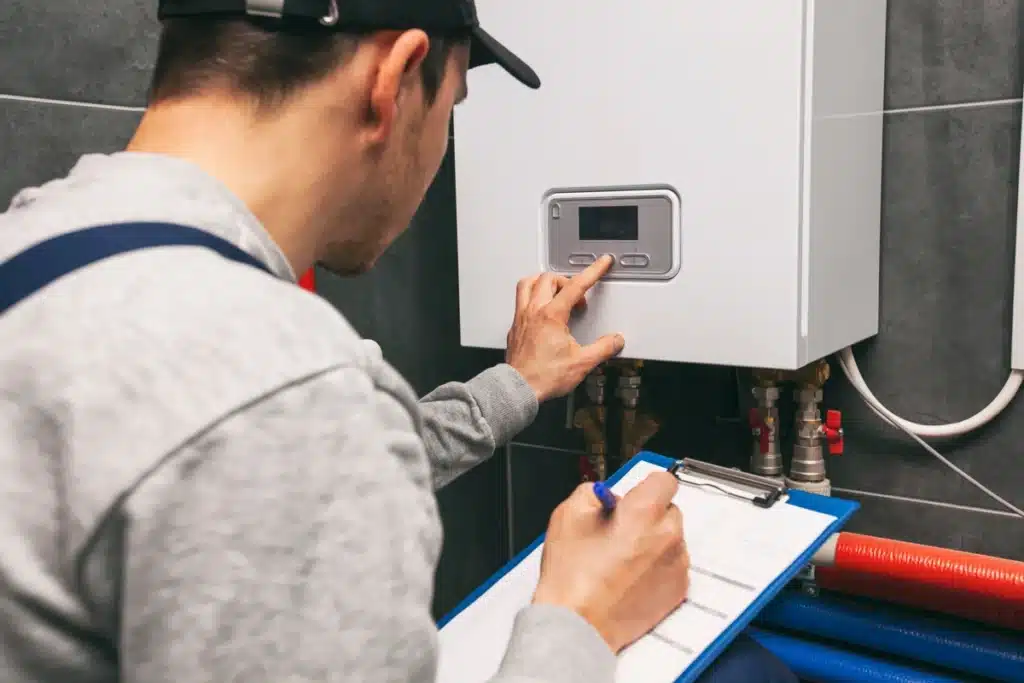
5. Pipe Inspection and Leak Detection

Modern plumbers use advanced technology such as video cameras to inspect pipes and detect leaks that are not visible to the naked eye. This non-invasive method allows them to identify issues within the plumbing system accurately and recommend appropriate solutions. Early detection of leaks can prevent water damage and reduce water bills.

6. Sewer and Drain Cleaning

Over time, drains and sewer lines can become clogged with debris, grease, and other materials. Plumbers use specialized equipment like drain snakes and hydro-jetting machines to clear blockages and restore proper flow. Regular cleaning of drains and sewer lines can prevent backups and extend the life of the plumbing system.

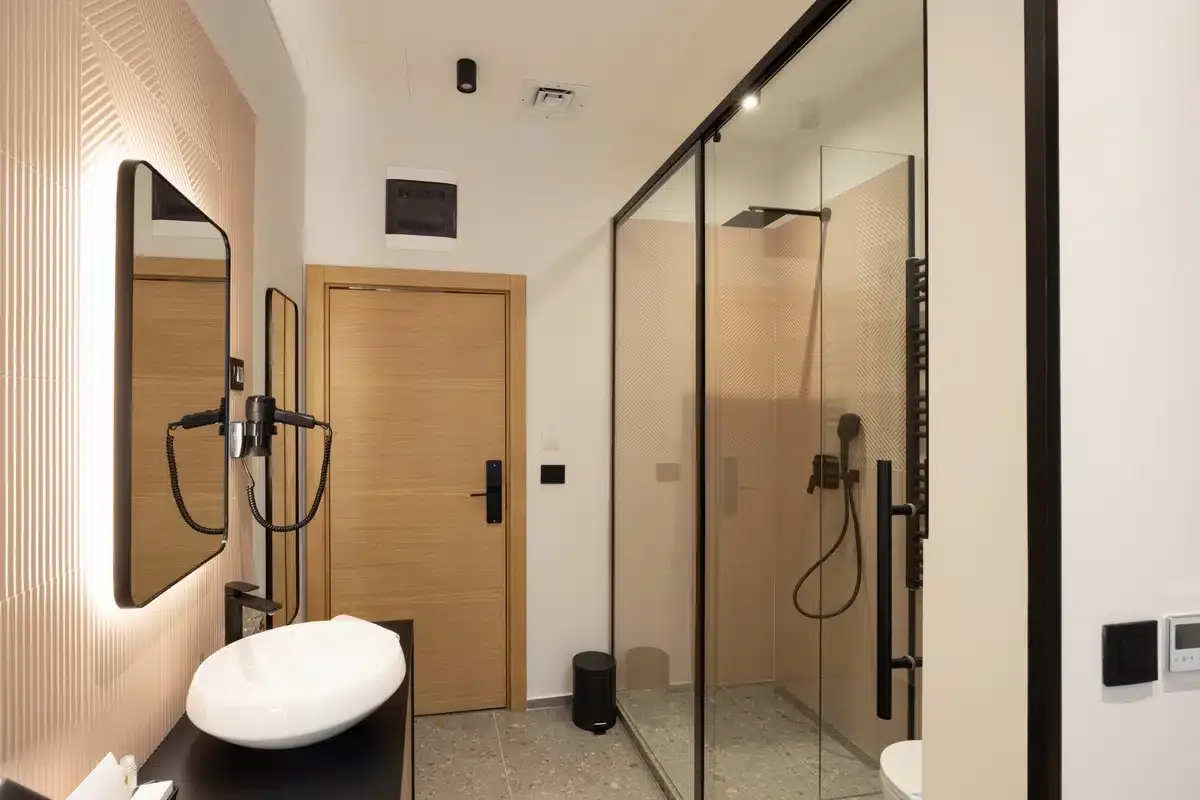
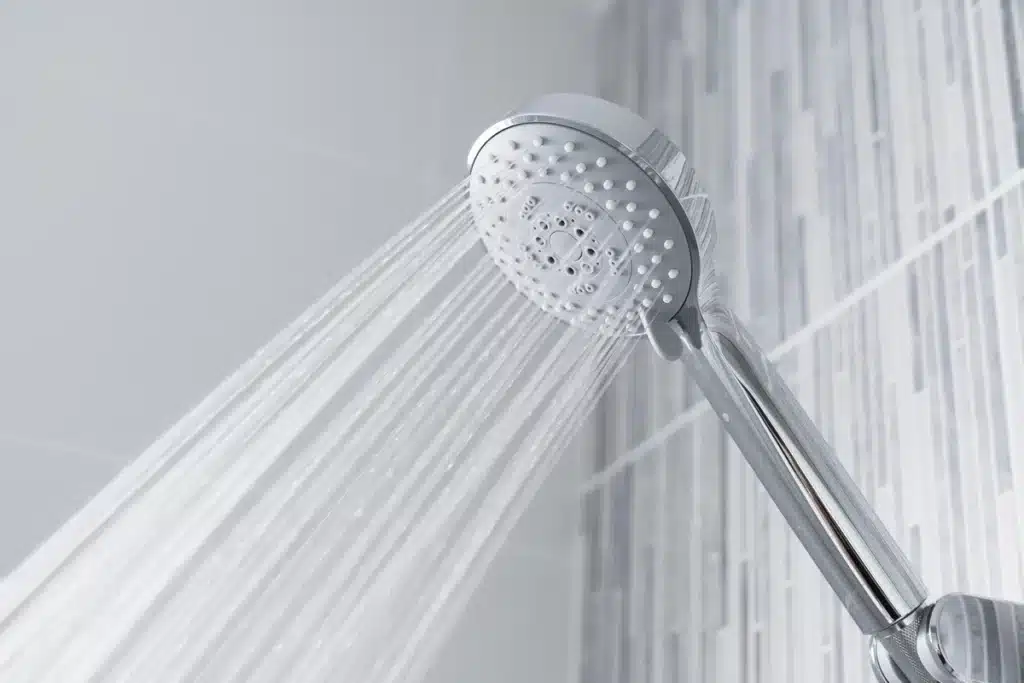
7. Fixture Installation and Repair

From installing new sinks and faucets to repairing toilets and showerheads, plumbers handle all types of fixture-related services. They ensure that fixtures are properly installed and functioning correctly, which contributes to the overall efficiency and aesthetics of the plumbing system.

8. Water Treatment Services

Plumbers also offer water treatment services to ensure that the water supply is safe and clean. This includes installing and maintaining water softeners, filters, and purification systems. These systems can remove contaminants and improve the taste and quality of the water.

⚡️ Expertise and Skills of Plumbers

plumber using hand tools to work on sink drain

In addition to the essential services, plumbers bring a wealth of expertise and specialized skills to their work. Their training and experience enable them to tackle a wide range of complex plumbing issues efficiently and effectively.

  • Technical Knowledge: Plumbers possess extensive technical knowledge about plumbing systems and the materials and tools used in their work. They understand the intricacies of water supply and drainage systems and are familiar with local building codes and regulations.
  • Problem-Solving Skills: Effective problem-solving skills are crucial for plumbers. They need to diagnose issues accurately and determine the best course of action to resolve them. This often requires creative thinking and the ability to adapt to unexpected challenges.
  • Physical Stamina: Plumbing work can be physically demanding, requiring plumbers to work in various conditions and positions. They need physical stamina and dexterity to perform tasks such as lifting heavy pipes, accessing tight spaces, and using hand and power tools.
  • Attention to Detail: Precision is essential in plumbing work. Plumbers must pay close attention to detail to ensure that installations and repairs are done correctly. A small mistake can lead to significant problems, so accuracy is paramount.
  • Communication Skills: Plumbers must communicate effectively with clients, contractors, and other professionals. They need to explain technical information in a way that is easy to understand and provide clear instructions and recommendations.
  • Customer Service: Providing excellent customer service is a vital aspect of a plumber’s job. They must be courteous, reliable, and responsive to clients’ needs. Building good relationships with customers can lead to repeat business and positive referrals.

🚿 Specialized Areas in Plumbing

In the following section, we will delve into the specialized areas of plumbing that go beyond basic services. These specialties require advanced knowledge and techniques to handle intricate and demanding plumbing challenges.

  • Residential Plumbing: Residential plumbers focus on plumbing systems in homes and apartments. They handle tasks such as installing and repairing household fixtures, clearing drains, and maintaining water heaters. Their work ensures that residential plumbing systems operate efficiently and reliably.
  • Commercial Plumbing: Commercial plumbers work in settings such as office buildings, restaurants, and shopping centers. They deal with larger, more complex plumbing systems that serve multiple users. Their responsibilities include maintaining commercial water and sewage systems, installing fixtures in public restrooms, and ensuring compliance with health and safety regulations.
  • Industrial Plumbing: Industrial plumbers specialize in plumbing systems for factories, warehouses, and other industrial facilities. These systems often involve high-pressure pipes, hazardous materials, and specialized equipment. Industrial plumbers must have advanced knowledge and skills to handle these complex and demanding environments.
  • Service and Repair Plumbing: Service and repair plumbers focus on diagnosing and fixing plumbing issues. They respond to service calls, troubleshoot problems, and perform necessary repairs. Their expertise lies in quickly identifying issues and providing effective solutions to restore plumbing systems to proper working order.
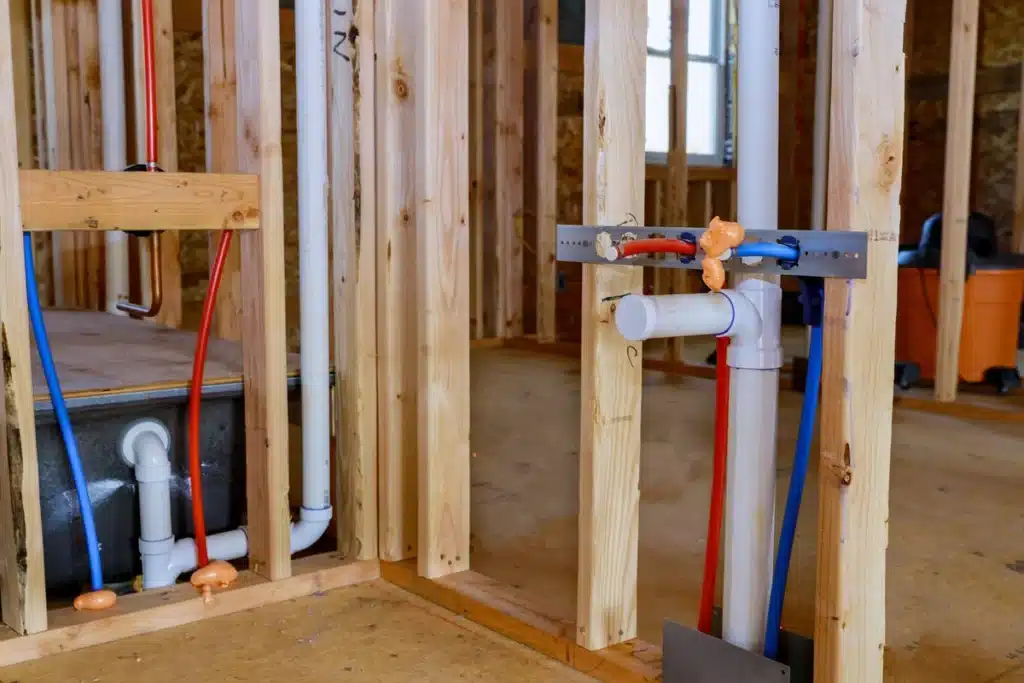
  • Construction Plumbing: Construction plumbers work on new building projects, installing the initial plumbing systems. They collaborate with architects, engineers, and other construction professionals to ensure that the plumbing systems are integrated into the building’s design and meet all necessary specifications and codes.

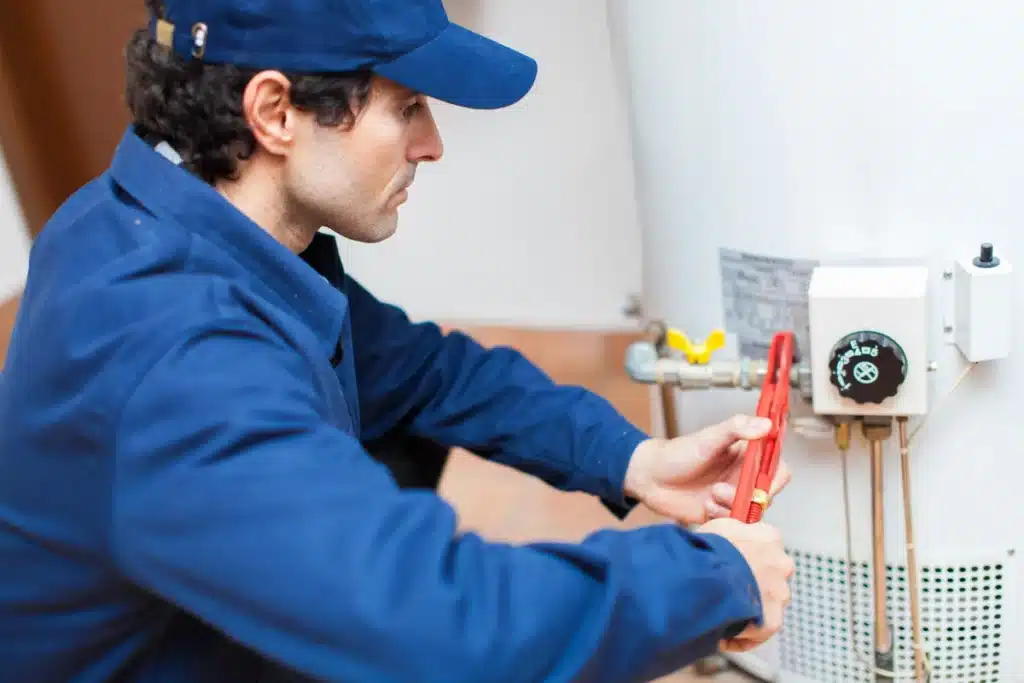
❗️ The Importance of Hiring a Professional Plumber

plumber working on a drain system on the bathroom floor

Hiring a professional plumber is crucial for ensuring the long-term integrity and safety of your plumbing system. Professional plumbers possess the necessary training, expertise, and tools to diagnose and resolve a variety of plumbing issues effectively.

  • Quality Workmanship: Professional plumbers have the training and experience to perform high-quality work. They use the right tools and techniques to ensure that installations and repairs are done correctly and safely.
  • Compliance with Codes and Regulations: Plumbing work must comply with local building codes and regulations. Professional plumbers are familiar with these requirements and ensure that their work meets all necessary standards. This helps prevent legal issues and ensures the safety and functionality of the plumbing system.
  • Time and Cost Savings: Hiring a professional plumber can save time and money in the long run. They can quickly diagnose and fix issues, preventing minor problems from becoming major, costly repairs. Additionally, professional plumbers often have access to high-quality materials and tools that can enhance the durability and efficiency of the plumbing system.
  • Expert Advice: Professional plumbers can provide valuable advice on maintaining plumbing systems and preventing future issues. They can recommend upgrades or improvements that enhance the performance and efficiency of the system, ultimately saving money and resources.
  • Peace of Mind: Knowing that a qualified professional is handling your plumbing needs provides peace of mind. You can trust that the work will be done correctly and that any issues will be resolved effectively.

🙌 Thelen Plumbing, Heating, and Air is Your Go-To Solution for All Plumbing Needs

Plumbers are crucial for keeping your home’s water and waste systems functional and safe. At Thelen Plumbing, Heating, and Air, our team stands out for their extensive expertise, which covers a wide range of services—from installation and maintenance to emergency repairs and water treatment. When you choose Thelen Plumbing, Heating, and Air, you trust that your plumbing systems are in skilled hands, providing you with reliable service and peace of mind. Whether it’s a minor repair or a complex installation, our team has the knowledge and experience to do the job right. Trust Thelen Plumbing, Heating, and Air for all your home plumbing needs and feel the difference. Contact us today!

fully installed shower fully installed shower

Shower Plumbing Diagram, Products, & More (Homeowner’s Guide)

Upgrading or maintaining your shower is a key aspect of home improvement that can greatly enhance your daily routine. Understanding shower plumbing and the products available can save you time, money, and frustration. In this comprehensive guide, we’ll cover the basics of shower plumbing, including:

  • Understanding shower plumbing
  • Shower plumbing diagram
  • Essential shower plumbing products
  • DIY tips for shower plumbing
  • Advanced shower plumbing projects
  • Maintenance tips for long-lasting shower plumbing

🤔 Understanding Shower Plumbing

To effectively tackle any shower-related project, you need a basic understanding of shower plumbing. This includes knowing the components involved and how they work together.

Basic Components of Shower Plumbing

  • Water Supply Lines: These pipes deliver hot and cold water to your shower. Typically made from copper, PEX, or CPVC, these lines are critical for controlling water temperature and flow.
  • Shut-Off Valves: Located near the shower, these valves allow you to turn off the water supply to the shower without affecting the rest of the house. This is particularly useful during repairs.
  • Shower Valve: This device mixes hot and cold water to the desired temperature. Modern shower valves often come with anti-scald features to prevent sudden temperature changes.
  • Shower Head: The part where water exits the system. Shower heads come in various designs, from basic fixed heads to advanced rain showers and handheld models.
  • Shower Drain and P-Trap: The drain removes wastewater from the shower, while the P-trap prevents sewer gases from entering your home. The P-trap holds a small amount of water to block these gases.
  • Vent Pipe: Essential for maintaining proper drainage, the vent pipe allows air to enter the plumbing system, preventing vacuum locks and ensuring smooth water flow.

✅ Shower Plumbing Diagram

Understanding the layout of your shower plumbing is crucial for troubleshooting and repairs. Here’s a simplified bathroom plumbing diagram to help you visualize the setup:

  • Water Supply Lines: Hot and cold lines run from your home’s main supply to the shower valve.
  • Shut-Off Valves: Located along the supply lines for easy access.
  • Shower Valve: Installed within the wall, this controls water mix and flow.
  • Riser Pipe: Carries mixed water from the valve to the shower head.
  • Shower Head: Mounted at the end of the riser pipe.
  • Shower Drain: Located at the base of the shower, connected to the P-trap.
  • P-Trap: A U-shaped pipe beneath the drain.
  • Vent Pipe: Connected to the P-trap and extending up through the roof.

🛀 Essential Shower Plumbing Products

Choosing the right products for your shower can enhance functionality and aesthetics. Here’s a list of must-have items:

Shower Valves

  • Single-Handle Valves: Control both temperature and flow with one handle. Ideal for small spaces.
  • Dual-Handle Valves: Separate controls for hot and cold water. Offers precise temperature adjustments.
  • Thermostatic Valves: Maintain a constant water temperature, even if water pressure changes.

Shower Head

  • Fixed Shower Head: Simple, stationary heads. Available in various spray patterns.
  • Handheld Shower Head: Attached to a flexible hose. Great for targeted cleaning and rinsing.
  • Rain Shower Head: Large heads that simulate rainfall. Provide a luxurious shower experience.
  • Dual Shower Head: Combine a fixed and handheld showerhead. Offer versatility and convenience.

Shut-Off Valves

  • Ball Valves: Durable and reliable, with a lever handle.
  • Gate Valves: Less common but useful for infrequent shut-offs.
  • Angle Stop Valves: Compact, often used in tight spaces.

Pipes and Fittings

  • Copper Pipes: Traditional, durable, and resistant to corrosion.
  • PEX Pipes: Flexible, easy to install, and resistant to freezing.
  • CPVC Pipes: Affordable and easy to work with, suitable for hot and cold water.

Shower Drain Components

  • Shower Drain: Choose from basic models to decorative options with built-in hair catchers.
  • P-Traps: Ensure you have the right size and material for your plumbing system.
  • Drain Covers: Stainless steel or brass covers add a touch of elegance and prevent clogs.

🛠️ 3 DIY Tips for Shower Plumbing

framing out the bathroom and installing shower plumbing materials

Taking on shower plumbing projects yourself can be rewarding. Here are some tips to help you get started:

1. Planning and Preparation

  • Understand Local Codes: Ensure your work complies with local plumbing codes to avoid future issues.
  • Gather Tools and Materials: Make sure you have all necessary tools and materials before starting. This includes wrenches, pipe cutters, sealants, and replacement parts.

2. Basic Repairs

  • Fixing Leaks: Identify the source of the leak and replace worn-out washers, O-rings, or faulty valves.
  • Unclogging Drains: Use a plunger, plumber’s snake, or chemical drain cleaner to clear blockages.
  • Replacing Showerheads: Unscrew the old showerhead, apply plumber’s tape to the threads, and screw on the new head.

3. Installing New Fixtures

  • Shut Off Water Supply: Always turn off the water supply before starting any plumbing work.
  • Follow Manufacturer Instructions: Read and follow the instructions provided with new fixtures to ensure proper installation.
  • Check for Leaks: After installation, turn on the water supply and check for leaks. Tighten connections as needed.

🚿 Advanced Shower Plumbing Projects

For those with more experience or seeking a challenge, consider these advanced projects:

Installing a New Shower Valve

  • Cutting Access: If your wall lacks an access panel, carefully cut a section to reach the valve.
  • Soldering or Crimping Pipes: Depending on your pipe type, you’ll need to solder (for copper) or crimp (for PEX) connections.
  • Testing the System: After installation, test the valve to ensure it regulates temperature and flow correctly.

Adding a Handheld Shower

  • Mounting Bracket: Install a bracket on the wall to hold the handheld showerhead.
  • Diverter Valve: Install a diverter valve to switch between the fixed and handheld showerheads.
  • Connecting Hoses: Attach the hose to the diverter and handheld showerhead, ensuring all connections are secure.

Upgrading to a Rain Showerhead

  • Extending the Riser Pipe: You may need to extend or replace the riser pipe to accommodate the larger showerhead.
  • Ceiling Mounts: For true rainfall effect, consider ceiling-mounted options, which require additional plumbing work.

💡 Maintenance Tips for Long-Lasting Shower Plumbing

shower plumbing maintenance

Regular maintenance can prolong the life of your shower plumbing and prevent costly repairs. Here are some tips:

Clean Shower Heads and Fixtures

  • Descaling: Soak shower heads in vinegar to remove mineral deposits and maintain water flow.
  • Polishing: Use non-abrasive cleaners to keep fixtures shiny and free from corrosion.

Inspect and Replace Seals

  • Check for Leaks: Periodically inspect seals around the showerhead, valve, and drain for leaks.
  • Replace Worn Seals: Swap out any worn or cracked seals to prevent water damage.

Maintain Drains

  • Regular Cleaning: Clear hair and debris from the drain regularly to prevent clogs.
  • Use Drain Covers: Install covers to catch hair and other particles before they enter the drain.

🙌 Elevate Your Shower Experience with Thelen Plumbing, Heating, and Air’s Expert Plumbing Solutions

Mastering shower plumbing can significantly enhance your home improvement skills and ensure a more comfortable, efficient shower experience. But why go it alone when you have Thelen Plumbing, Heating, and Air? As your go-to team of specialists, we bring expertise in handling everything from basic repairs to advanced projects. Our team understands the intricacies of shower plumbing, ensures the use of top-quality products, and follows proper installation and maintenance practices to guarantee success. Trust Thelen Plumbing, Heating, and Air to tackle any shower plumbing challenge with precision and professionalism. Contact us today to schedule your consultation and experience the Thelen difference!

4 Best Furnace Filters (Homeowner’s Guide)

Are you tired of sneezing, coughing, or dealing with dusty air in your home? It might be time to upgrade your furnace filter! Furnace filters play a crucial role in improving indoor air quality by capturing dust, pollen, pet dander, and other airborne particles. With so many options on the market, choosing the right furnace filter can feel overwhelming. So in this comprehensive guide, we’ll highlight the four best furnace filters for homeowners, making it easy for you to breathe clean, fresh air in your home. Let’s get started!

Inside this blog:

  • A brief overview of furnace filters
  • The 4 best furnace filters on the market today
  • How to choose the right furnace filter for your home

Keep reading to learn more about the top 4 furnace filters that can improve your home’s comfortability and safety!

An Overview of Furnace Filters

Before we dive into the top furnace filters, let’s briefly discuss the importance of these essential components.

Furnace filters are designed to trap airborne particles as air passes through your heating system. They help improve indoor air quality by capturing dust, pollen, pet dander, mold spores, and other pollutants, preventing them from circulating throughout your home.

By regularly replacing your furnace filter, you can ensure that your heating system operates efficiently and effectively, providing clean and healthy air for you and your family to breathe. Don’t underestimate the power of a good furnace filter in keeping your home environment safe and comfortable.

The 4 Best Furnace Filters

Without further ado, here are the four best furnace filters that homeowners should consider:

1. MERV 13 Pleated Filters

  • Efficiency: MERV 13 pleated filters are highly efficient at capturing small particles, including allergens, bacteria, and viruses, making them ideal for households with allergy sufferers or respiratory issues.
  • Longevity: These filters have a longer lifespan compared to lower MERV-rated filters, typically lasting up to three months before needing replacement.
  • Compatibility: MERV 13 pleated filters are compatible with most HVAC systems and provide superior filtration without restricting airflow, ensuring optimal performance and energy efficiency.
air filter merv 13

2. HEPA Filters

  • High Efficiency: HEPA (High-Efficiency Particulate Air) filters are renowned for their exceptional filtration capabilities, capturing up to 99.97% of particles as small as 0.3 microns in size.
  • Air Purification: HEPA filters not only trap dust and allergens but also remove harmful pollutants such as smoke, odors, and volatile organic compounds (VOCs), resulting in cleaner, fresher indoor air.
  • Replacement: While HEPA filters offer superior filtration, they may require more frequent replacement due to their high capture efficiency, so be prepared for more regular filter changes.
air filter hepa

3. Washable Electrostatic Filters

  • Reusable: Washable electrostatic filters can be cleaned and reused multiple times, providing a cost-effective and environmentally friendly filtration solution.
  • Efficiency: These filters use an electrostatic charge to attract and capture airborne particles, including dust, pollen, and pet dander, effectively improving indoor air quality.
  • Maintenance: Regular cleaning is essential to maintain the effectiveness of washable electrostatic filters, so be sure to follow the manufacturer’s instructions for proper maintenance and care.
air filter electrostatic

4. Activated Carbon Filters

  • Odor Elimination: Activated carbon filters are highly effective at removing odors, gases, and VOCs from indoor air, making them ideal for households with pets, smokers, or cooking odors.
  • Chemical Filtration: These filters utilize activated carbon to adsorb and trap harmful chemicals and pollutants, providing an additional layer of protection for your home’s air quality.
  • Replacement: Activated carbon filters may need to be replaced more frequently than standard filters, depending on the level of contaminants present in your home and the filter’s capacity.
air filter carbon

Choosing the Right Furnace Filter

With so many options available, how do you choose the right furnace filter for your home? Here are 4 factors to consider:

1. Filter Efficiency

Look for filters with a high Minimum Efficiency Reporting Value (MERV) or HEPA rating to ensure effective filtration of airborne particles. Higher ratings mean the filter can capture smaller particles, keeping your indoor air cleaner and healthier for you and your family.

2. Compatibility

Check your HVAC system’s specifications to ensure compatibility with the filter you choose. Not all filters are suitable for every system, so it’s essential to select the right size and type for optimal performance. Choosing a filter that fits properly ensures that it works efficiently without causing any issues with your heating system.

3. Airflow

Avoid filters that restrict airflow, as this can reduce your heating system’s efficiency and potentially cause damage. Choose a filter that balances filtration efficiency with airflow requirements. Proper airflow ensures that your heating system works effectively and efficiently, keeping your home warm and comfortable without putting undue strain on the system.

4. Budget

Consider your budget when selecting a furnace filter. While HEPA filters and other high-efficiency options may have a higher upfront cost, they can provide long-term benefits in terms of improved air quality and reduced health risks. Investing in a quality filter may save you money in the long run by preventing costly repairs and medical expenses related to poor indoor air quality.

Make Your Home More Safe With a Better Furnace Filter

Upgrading your furnace filter is a simple yet effective way to improve indoor air quality and create a healthier, more comfortable home environment. Whether you opt for a MERV 13 pleated filter, HEPA filter, washable electrostatic filter, or activated carbon filter, each option offers unique benefits to suit your specific needs.

By choosing the right furnace filter and replacing it regularly, you can breathe easy knowing that your home’s air is clean, fresh, and free of harmful pollutants. Say goodbye to sneezing fits and dusty air – invest in a quality furnace filter today and enjoy cleaner, healthier indoor air for years to come! 

Contact our team of experts at Thelen Plumbing, Heating, and Air today for dedicated workmanship and unparalleled customer service. You can count on us to deliver speedy turnaround times and efficient solutions so your home stays comfortable throughout every season. Reach out today to get one step closer to top-notch HVAC, plumbing, and drain cleaning help.

furnace in basement furnace in basement

Boiler vs Furnace (Pros, Cons, & Considerations)

Are you considering upgrading your home heating system but feeling overwhelmed by the options available? Boilers and furnaces are two common choices for heating homes, each with its own set of advantages and considerations. In this comprehensive guide, we’ll explore the pros, cons, and key considerations of boilers and furnaces to help you make an informed decision that suits your home and budget. Let’s dive in and find the perfect heating solution for your needs!

Inside this blog:

  • A basic overview of boilers and furnaces
  • Pros + cons for boilers and furnaces to help you make an informed decision
  • 5 key considerations when choosing an option for your home

Keep reading to learn which heating system solution is right for you and your home!

Understanding Boilers and Furnaces

Before we delve into the specifics, let’s clarify what boilers and furnaces are:

Boiler

A boiler is a heating system that uses water or steam to distribute heat throughout a home. It typically consists of a central unit that heats water, which is then circulated through pipes to radiators or radiant floor heating systems. With a boiler, you can enjoy cozy warmth in every corner of your house, thanks to its efficient water-based heating method.

Furnace

A furnace is a heating system that heats air and distributes it through ductwork to various rooms in a home. It typically consists of a central unit that burns fuel (such as natural gas, oil, or propane) to generate heat, which is then blown into the living spaces through vents. Furnaces are like the heart of your home’s heating system, pumping warm air through your ducts to keep you comfortable during chilly weather.

Pros and Cons of Boilers

Let’s go over the typical pros and cons of boilers that homeowners should know.

☑️Pros

  • Even Heat Distribution: Boilers provide consistent, even heat distribution throughout the home, eliminating cold spots and drafts.
  • Quiet Operation: Boilers operate quietly, making them ideal for homes where noise is a concern.
  • Energy Efficiency: Boilers can be highly energy-efficient, especially when paired with modern condensing technology or high-efficiency pumps.

✖️Cons

  • Higher Installation Costs: Boilers tend to have higher upfront installation costs compared to furnaces, especially if your home doesn’t already have a hydronic heating system in place.
  • Space Requirements: Boilers require space for installation and may not be suitable for homes with limited space or where retrofitting is challenging.
  • Risk of Freezing: In colder climates, there’s a risk of pipes freezing if the boiler system fails or loses power during extreme weather conditions.

Pros and Cons of Furnaces

Below are a few of the common advantages and drawbacks of furnace systems to help you make an informed decision.

☑️Pros

  • Lower Installation Costs: Furnaces generally have lower upfront installation costs compared to boilers, making them a budget-friendly option for many homeowners.
  • Compatibility with Air Conditioning: Furnaces can be integrated with central air conditioning systems, providing both heating and cooling capabilities for year-round comfort.
  • Quick Heating Response: Furnaces can heat a home quickly, making them ideal for homes in colder climates or areas with fluctuating temperatures.

✖️Cons

  • Air Quality Concerns: Furnaces blow air through ducts, which can stir up dust, allergens, and other contaminants, potentially affecting indoor air quality.
  • Uneven Heating: Furnaces may produce uneven heating, with some rooms feeling warmer than others, especially if ductwork is poorly designed or insulated.
  • Regular Maintenance Required: Furnaces require regular maintenance, including filter changes and inspections, to ensure optimal performance and efficiency.
high efficiency furnace in basement

5 Key Considerations for Homeowners

Now that we’ve explored the pros and cons of boilers and furnaces, let’s consider some key factors to help you choose the right heating system for your home:

1. Home Size and Layout

Consider the size and layout of your home when choosing between a boiler and furnace. Boilers are often preferred for larger homes with multiple levels, while furnaces may be more suitable for smaller or single-story homes. Think about how your home is set up and where you need the most warmth to make the right choice.

2. Energy Efficiency Goals

If energy efficiency is a top priority for you, research the efficiency ratings and options available for both boilers and furnaces. Look for ENERGY STAR® certified models and consider factors such as fuel type, insulation, and zoning controls. By choosing an energy-efficient heating system, you can save money on your energy bills while reducing your carbon footprint.

3. Climate and Heating Needs

Consider your climate and heating needs when selecting a heating system. Boilers may be more efficient in colder climates where radiant heat provides consistent warmth, while furnaces may be preferred in milder climates with less demand for heating. Think about how cold it gets where you live and how much heating your home needs to stay cozy.

4. Budget and Installation Costs

Evaluate your budget and consider the upfront installation costs as well as long-term maintenance and operating expenses associated with boilers and furnaces. Factor in any potential rebates or incentives for energy-efficient upgrades. By planning your budget carefully, you can make sure you choose a heating system that meets your needs without breaking the bank.

5. Comfort and Air Quality Preferences

Consider your comfort preferences and any concerns about indoor air quality when choosing between boilers and furnaces. Boilers offer quiet, even heat distribution, while furnaces may provide quicker heating response but may affect air quality due to blowing air through ducts. Think about what matters most to you: a cozy, quiet home or quick warmth with good air circulation.

🏠 Boiler vs Furnace: Which One’s Right For Your Home?

Choosing between a boiler and furnace for your home heating needs involves weighing the pros and cons, considering key factors such as home size, energy efficiency goals, climate, budget, and comfort preferences. By understanding the differences between boilers and furnaces and evaluating your specific requirements, you can make an informed decision that provides optimal comfort, efficiency, and reliability for your home.

Whether you opt for the consistent warmth of a boiler or the quick heating response of a furnace, investing in a quality heating system will ensure your home stays cozy and comfortable for years to come.

Contact our team of experts at Thelen Plumbing, Heating, and Air today for dedicated workmanship and unparalleled customer service. You can count on us to deliver speedy turnaround times and efficient solutions so your home stays comfortable throughout every season. Reach out today to get one step closer to top-notch HVAC, plumbing, and drain cleaning help.

close up water heater reapir close up water heater reapir close up water heater reapir close up water heater reapir

Water Heater Repair Guide (Parts, Damages …)

Is your morning shower turning into an icy ordeal? Or maybe you’ve noticed some peculiar noises coming from your water heater? Don’t fret; we’re here to help! In this homeowner’s guide, we’ll delve into the world of water heater repair.

From common issues to essential parts and potential damages, you’ll find everything you need to troubleshoot and fix your water heater woes.

Inside this blog

  • 4 common water heater issues that homeowners experience
  • 6 critical parts of a water heater 
  • Potential damages each of the 6 parts can bring if they’re not working properly
  • Water heater DIY repair steps

Keep reading to learn how to tackle water heater repair like a real pro and ensure you have hot and cold water when you need it.

4 Common Water Heater Issues 🚫

water heater adjustment

Before we get into the nitty-gritty of water heater repair, let’s explore some of the most common issues homeowners encounter. Identifying the problem is the first step in resolving it.

1. No Hot Water 🥶

One of the most frustrating problems is the absence of hot water when you need it most. Several factors could cause this issue:

  • Heating Element Malfunction: Electric water heaters have heating elements that can fail over time.
  • Pilot Light Problems: In gas water heaters, a malfunctioning pilot light can lead to cold showers.
  • Thermostat Issues: Faulty thermostats may not trigger the heating element or gas burner as needed.

2. Strange Noises 🎵

If your water heater has started making unusual sounds like popping, banging, or hissing, it could be a sign of sediment buildup in the tank. Sediment can accumulate over time, causing the water heater to work less efficiently and make noises as it heats.

3. Leaks and Drips 💧

Water puddles around your water heater are never a good sign. Leaks can occur due to:

  • Pressure Relief Valve Issues: A faulty valve can lead to leaks.
  • Corrosion: Rust or corrosion on the tank can cause water to seep out.
  • Loose Connections: Sometimes, it’s as simple as tightening a loose valve or fitting.

4. Inconsistent Water Temperature 🌡️

If your water temperature fluctuates between hot and cold while using hot water, it may indicate a problem with the thermostat or heating element.

Now that we’ve identified some common issues let’s move on to understanding the essential parts of a water heater and potential damages they can incur.

6 Key Water Heater Parts and Potential Damages 

water heater repair-rusted water heater

Below we go over the 6 critical parts of a water heater and the potential damages they can bring if they’re not working properly.

1. Pressure Relief Valve (PRV) 

The PRV is a safety device that releases excess pressure from the tank to prevent explosions.

Potential Damage: If the PRV is malfunctioning, it can either lead to constant leaking or not relieve pressure when needed, putting the tank at risk of rupture.

2. Heating Elements 

Heating elements are found in electric water heaters and are responsible for heating the water.

Potential Damage: Elements can burn out over time, causing a lack of hot water. A multimeter can be used to test their continuity.

3. Anode Rod 

The anode rod is a sacrificial component that attracts corrosion, preventing the tank from rusting.

Potential Damage: If the anode rod is heavily corroded, the tank itself may start corroding, leading to leaks and tank failure.

4. Thermostats 

Thermostats control the temperature of the water.

Potential Damage: Malfunctioning thermostats can cause temperature inconsistencies, leading to cold or scalding hot water.

5. Dip Tube 

The dip tube directs incoming cold water to the bottom of the tank for heating.

Potential Damage: If the dip tube is cracked or broken, cold water may mix with hot water near the top, resulting in lukewarm water at the tap.

6. Tank 

The tank itself stores and heats the water.

Potential Damage: Corrosion, rust, or cracks in the tank can lead to leaks. Tanks that are past their warranty period are more prone to these issues.

Now that we’ve covered common water heater issues and essential parts, let’s explore how to tackle these problems and repair your water heater.

DIY Water Heater Repair Steps 🛠️

water heater repair

So when you’ve suffered enough cold showers in January and are ready to take on a DIY water heater repair, come back to the steps we’ve outlined below to ensure you repair everything correctly. And as always, consult the professionals if you’re at all worried or hesitant about fixing your water heater.

1. No Hot Water

Step 1: Check the Power Supply

For electric water heaters, ensure that the breaker hasn’t tripped. For gas heaters, check the pilot light; if it’s out, relight it following the manufacturer’s instructions.

Step 2: Test the Heating Element or Gas Burner

Use a multimeter to test the heating element’s continuity in electric heaters. If it’s not functioning, replace it. For gas heaters, if the pilot light is on but you still have no hot water, the gas burner or thermocouple may need replacement.

2. Strange Noises

Step 1: Drain and Flush the Tank

To remove sediment buildup, turn off the power supply and cold-water inlet. Connect a hose to the drain valve and open it. Let the tank drain completely, then close the valve. Turn on the cold water to flush out any remaining sediment.

3. Leaks and Drips

Step 1: Identify the Source

Inspect the tank, pressure relief valve, and fittings to locate the source of the leak. Tighten any loose connections or replace faulty parts like the PRV.

Step 2: Replace a Faulty Pressure Relief Valve

If the PRV is the culprit, turn off the power supply and cold-water inlet. Place a bucket under the valve, open it to release pressure, and unscrew it for replacement.

4. Inconsistent Water Temperature

Step 1: Adjust the Thermostat

For electric water heaters, adjust the thermostat to the desired temperature. If it’s a gas heater, the thermostat may need replacement if it’s malfunctioning.

5. Lukewarm Water

shower head-water heater repair

Step 1: Replace the Dip Tube

To replace a damaged dip tube, turn off the power supply and cold-water inlet. Drain the tank partially, remove the old dip tube, and insert the new one.

6. Rusty or Corroded Tank

Step 1: Evaluate the Tank’s Condition

Inspect the tank for signs of rust or corrosion. If you find any, it’s time to consider replacing your water heater, as these issues are often irreparable.

These DIY steps can help you address common water heater issues. However, if you’re uncomfortable performing these repairs or if the problem persists, it’s advisable to seek professional assistance.

When to Call a Professional 📞

If you’ve tried these methods and the issue persists, or if you’re dealing with complex repairs involving heating elements, gas burners, or tank replacement, it’s time to call a licensed plumber or HVAC technician. They have the expertise and tools to diagnose and resolve more extensive water heater problems safely.

Preventive Maintenance and Tips 🛡️

The best way to avoid water heater issues is through preventive maintenance and a few handy tips:

  • Annual Flushing: Drain and flush your water heater annually to remove sediment buildup. This helps maintain efficiency and extends the lifespan of the unit.
  • Pressure Relief Valve Inspection: Test the pressure relief valve annually to ensure it functions correctly. A faulty valve can lead to dangerous pressure buildup inside the tank.
  • Temperature Adjustment: Set your water heater’s temperature to 120°F (49°C) to prevent scalding and save energy. This setting strikes a balance between comfort and safety while reducing energy consumption.
  • Leak Checks: Regularly inspect your water heater and its surroundings for leaks or signs of corrosion. Early detection of leaks can prevent significant water damage and costly repairs.
  • Anode Rod Replacement: Check the anode rod every few years and replace it if necessary. The anode rod prevents corrosion inside the tank, helping to prolong the life of your water heater.
  • Insulate the Tank: Insulate your water heater tank and the first few feet of hot and cold water pipes to reduce heat loss, improve efficiency, and lower your energy bills.
  • Listen for Unusual Noises: Pay attention to any strange noises coming from your water heater, such as popping or banging sounds, which could indicate sediment buildup or other issues requiring attention.

Taking these preventive measures can extend the life of your water heater and ensure it provides hot water reliably.

Contact our expert and reliable team of technicians at Thelen Plumbing, Heating, and Air today. We’ll ensure your home stays comfortable and safe throughout every season!

water heater water heater water heater water heater

4 Best Types of Water Heaters (Homeowner’s Guide)

Are you tired of shivering through cold showers or constantly waiting for the water to heat up? It might be time to consider upgrading your water heater.

In this homeowner’s guide, we’ll explore four of the best types of water heaters to help you make an informed choice. Say goodbye to chilly mornings and hello to a reliable and efficient hot water supply!

Inside this blog

  • The importance of choosing the right water heater for your home
  • 4 best types of water heaters
  • Pros + cons for each type of heater
  • A comparison guide of the key factors for each water heater type

Ready to figure out which type of water heater will benefit your home the most? Start reading!

Why Choosing the Right Water Heater is Key 

water heater repair

Before we dive into 4 different types of water heaters, let’s understand why selecting the right one is essential.

Your choice of a water heater can impact the following:

  • Comfort: Enjoy consistent hot water when you need it.
  • Energy Efficiency: Save on energy bills with a more efficient unit.
  • Longevity: A well-chosen water heater can last for many years.
  • Environmental Impact: Some models are more eco-friendly.

Now, let’s explore the 4 best types of water heaters to help you find the perfect fit for your home.

1. Tank Water Heater 

Tank water heaters are the traditional choice for many homes. They store and heat a fixed amount of water in a tank, ready for use when you turn on a faucet. While they are reliable and budget-friendly, they have limitations when it comes to hot water supply and energy efficiency.

Pros 👍

  • Common and widely available.
  • Affordable upfront cost.
  • Simple installation and maintenance.
  • Suitable for small to large households.

Cons 👎

  • Limited hot water supply.
  • Less energy-efficient than newer options.

2. Tankless Water Heater 

tankless water heater

Tankless water heaters, also known as on-demand or instant water heaters, heat water only when you need it. They don’t store hot water in a tank, which means you’ll never run out of hot water, making them ideal for busy households. While they are more energy-efficient, the initial cost can be higher.

Pros 👍

  • On-demand hot water.
  • Compact and space-saving.
  • Energy-efficient, saving on utility bills.
  • Longer lifespan than tank heaters.

Cons 👎

  • Higher upfront cost.
  • May require electrical upgrades.
  • Limited hot water flow for simultaneous use.

3. Heat Pump Water Heater 

Heat pump water heaters operate by transferring heat from the air or ground to heat the water. They are exceptionally energy-efficient, making them an eco-friendly choice while also saving on utility bills. However, they may not be as effective in colder climates and may require more installation space.

Pros 👍

  • Highly energy-efficient.
  • Cost-effective for long-term savings.
  • Environmentally friendly.
  • Can dehumidify and cool the surrounding air.

Cons 👎

  • Higher upfront cost.
  • Requires adequate installation space.
  • Less efficient in colder climates.

4. Solar Water Heater 

Solar water heaters harness energy from the sun to heat water. They are an eco-conscious choice and can significantly reduce your energy bills. However, they come with a substantial initial investment and require a sunny climate to be most effective. A backup system is also necessary for cloudy days or high demand.

Pros 👍

  • Uses renewable energy sources.
  • Low operating costs once installed.
  • Environmentally friendly.
  • May qualify for tax incentives.

Cons 👎

  • High upfront cost.
  • Requires a sunny climate.
  • Backup system needed for cloudy days.

A Quick Comparison 🧐

To help you choose the right water heater, let’s compare the four types based on specific criteria.

Cost

  • Tank Water Heater: Affordable upfront cost.
  • Tankless Water Heater: Higher upfront cost.
  • Heat Pump Water Heater: Higher upfront cost.
  • Solar Water Heater: High upfront cost.

Hot Water Supply

  • Tank Water Heater: Limited by the tank’s capacity.
  • Tankless Water Heater: Continuous on-demand hot water.
  • Heat Pump Water Heater: Limited hot water flow for simultaneous use.
  • Solar Water Heater: Depends on sunlight availability.

Energy Efficiency

  • Tank Water Heater: Less energy-efficient.
  • Tankless Water Heater: Highly energy-efficient.
  • Heat Pump Water Heater: Very energy-efficient.
  • Solar Water Heater: Extremely energy-efficient when sunlight is abundant.

Installation and Space

  • Tank Water Heater: Simple installation; requires tank space.
  • Tankless Water Heater: Compact and space-saving.
  • Heat Pump Water Heater: Requires adequate installation space.
  • Solar Water Heater: Requires space for solar panels and storage tank.

Environmental Impact

  • Tank Water Heater: Moderate environmental impact.
  • Tankless Water Heater: Lower environmental impact.
  • Heat Pump Water Heater: Low environmental impact.
  • Solar Water Heater: Minimal environmental impact.

How to Choose the Right Water Heater for Your Home 🏡

Selecting the best water heater for your home involves considering various factors. Below, we cover 7 factors you should think about when deciding on a water heater for your home.

1. Hot Water Demand

Assess your household’s hot water needs, including the number of occupants and simultaneous water usage.

2. Energy Efficiency

Determine your preference for energy efficiency and its impact on long-term savings.

3. Installation Space

Evaluate the available space for installation, both indoors and outdoors.

4. Budget

Consider your budget for the initial purchase and installation.

5. Environmental Concerns

If environmental impact is a priority, focus on eco-friendly options.

6. Climate

Your geographical location can influence the effectiveness of certain water heater types.

7. Incentives

Check if there are local or federal incentives or rebates for specific water heater types.

Which Water Heater Will You Choose?

Investing in the right water heater can significantly improve your daily comfort while also reducing energy bills and environmental impact. Consider your hot water needs, budget, and long-term goals when choosing from the four best types of water heaters: tank, tankless, heat pump, and solar. With the right choice, you can enjoy a consistent supply of hot water without breaking the bank. Say goodbye to cold showers and hello to a warm, comfortable home!

Contact our expert and reliable team of technicians at Thelen Plumbing, Heating, and Air today. We’ll ensure your home stays comfortable and safe throughout every season!

Heating vent-heat not working in house Heating vent-heat not working in house Heating vent-heat not working in house Heating vent-heat not working in house

Heat Not Working In House: 6 Common Issues (& Solutions)

Imagine a frigid winter morning, and you’re craving the warmth of your cozy home. But as you crank up the thermostat, you’re met with a dreaded realization—the heat not working in house.

It may be time to repair your HVAC system.

Before you panic or bundle up in layers, let’s embark on a journey to uncover the most common issues that might be keeping your home from feeling like a toasty haven and their DIY solutions.

What you’ll find in this blog:

Keep reading to become an empowered homeowner and learn how to take matters into your own hands–literally!–when it comes to fixing the heat in your home.

Why DIY Heat Repair Matters 🫡

Before we dive into troubleshooting, let’s take a moment to understand why taking matters into your own hands can be a real game-changer.

  • Immediate Relief: DIY solutions can often get your heat up and running faster than waiting for a professional technician (unless you need a major HVAC system repair or replacement done).
  • Cost Savings: A service call from a local HVAC technician can be expensive depending on what furnace maintenance you need done. By addressing minor issues yourself, you can save money.
  • Empowerment: Learning how to troubleshoot your heating system gives you more control over your home’s comfort and can be an essential skill in emergencies.

Now, let’s roll up our sleeves and tackle those furnace problems in 6 simple steps.

1. Check the Thermostat

HVAC professional adjusts thermostat

First and foremost, it’s essential to check your thermostat settings to ensure they’re appropriately configured. Make sure that your thermostat is set to the “heat” mode and that the desired temperature is higher than the current room temperature. This ensures that your heating system is actively engaged and trying to reach the set temperature.

Additionally, if your thermostat relies on batteries for power, it’s crucial to perform a battery check. Replacing the batteries, if necessary, ensures that your thermostat is receiving a consistent power supply, allowing it to function effectively and communicate with your heating system accurately. These straightforward steps lay the foundation for troubleshooting your heating issues and getting your home comfortably warm once again.

2. Inspect the Air Filter

Inspecting the air filter is a vital part of ensuring your heating system’s optimal performance. A clogged or dirty air filter not only restricts airflow but can also lead to increased energy consumption and even potential damage to your system over time.

To maintain efficient heating, it’s essential not only to check the filter condition but also to replace it as needed. Regular filter replacement helps maintain proper airflow, improves heating efficiency, and ensures a healthier indoor environment for you and your family.

3. Ventilation Check

When conducting a ventilation check, it’s essential to pay close attention to your heating vents. In addition to ensuring they are open and unobstructed, take a moment to examine the surrounding area to prevent any objects, furniture, or debris from inadvertently blocking the vents.

This proactive approach ensures that warm air can flow freely throughout your home, maximizing the efficiency of your heating system and keeping you comfortably warm during the colder months.

4. Reset the Circuit Breaker

Resetting the circuit breaker is a straightforward yet crucial step in troubleshooting heating issues. If you find that the breaker has tripped, it’s important not only to reset it but also to investigate the potential causes behind the tripping to prevent future disruptions in your heating system. Identifying and addressing any underlying electrical issues ensures a more reliable and uninterrupted heat supply in your home.

5. Check the Gas Supply

Verifying the status of the gas supply valve is a vital step for gas-powered heating systems. After ensuring the valve is open, allow a few minutes for the gas to flow and reach your heating system before attempting to restart it. This brief waiting period ensures that the gas supply is fully restored, helping your heating system operate smoothly and efficiently once again.

6. Bleed Radiators (For Radiant Heating)

Bleeding the radiators in a radiant heating system is a crucial maintenance task that helps release any trapped air, allowing hot water to circulate freely and ensure efficient heating throughout your home. By regularly checking and addressing air pockets in your radiators, you can maintain consistent warmth and comfort during the colder months.

6 Common Heating Issues & How to Fix ‘Em 🔧

furnace repair

Below we’ll cover 6 typical heating problems and how you can fix them like a true champ!

1. No Heat at All

If your heating system isn’t producing any heat, check the thermostat settings, air filter, circuit breaker, and gas supply. If these are fine, it might be a faulty ignition system or a more complex issue that requires professional help. Ignoring this problem could lead to further complications, so it’s best to address it as soon as possible.

2. Insufficient Heat

If your home isn’t warming up as expected, a dirty air filter, blocked vents, or thermostat issues might be to blame. Check and address these issues before considering professional assistance. If left unchecked, these problems can cause your system to work harder, leading to increased energy costs. Frequent cycling can also cause unnecessary wear and tear on the system, reducing its lifespan.

3. Heater Keeps Turning On and Off

Frequent cycling could be due to a malfunctioning thermostat, a dirty filter, or improper airflow. Try replacing the thermostat batteries, cleaning the filter, or ensuring unobstructed vents. Frequent cycling can also cause unnecessary wear and tear on the system, reducing its lifespan.

4. Loud or Unusual Noises

Unusual sounds like banging, clanging, or rattling could indicate a problem with the blower motor or other components. Inspect and clean the blower or consult a professional if needed. Continuing to run the system with these noises could lead to more significant and costly repairs.

5. Uneven Heating

If some rooms in your home are warmer than others, it might be due to blocked vents, a malfunctioning damper, or an improperly sized heating system. Check and address these issues to balance the heating. Ensuring balanced airflow can also improve your overall comfort and energy efficiency.

6. Pilot Light Issues

If you have a gas furnace with a pilot light, ensure it’s lit. If it’s not, follow your furnace’s instructions to relight it. If the pilot light won’t stay lit, it could be a thermocouple issue that might require professional repair. Regularly checking and maintaining the pilot light can prevent future ignition issues.

A Warm & Cozy Home Awaits 🧣

While some heating problems may require professional assistance, these common DIY solutions can often get your heat back on track. Remember, safety comes first—always turn off the power before attempting any repairs. By troubleshooting and addressing minor issues, you can enjoy a warm and cozy home during those cold winter days and nights. Get in touch with our top-notch technicians at Thelen Plumbing, Heating, and Air today for all your HVAC & Plumbing needs. We’ll make sure your home stays in solid shape with the proper TLC it deserves!

furnace in basement furnace in basement

11 Step Furnace Repair Guide (Homeowner’s Guide)

When the temperatures drop and you rely on your furnace for warmth, a malfunctioning heating system can leave you in the cold.

It may be time to repair or replace your furnace.

But before you reach for that emergency hotline with your icy-cold fingers, let’s explore an easy furnace repair guide that might just help you solve common issues with your heating system. Prepare to live in a warm home again!

What you’ll find in this article:

  • Benefits of a DIY furnace repair
  • 11 actionable steps to take to tackle furnace repair effectively
  • 5 common furnace problems + solutions
  • Common mistakes homeowners make

Read on to discover everything you need to know about how to DIY repair your faulty furnace like a real pro!

pilot light on a gas furnace

Why DIY Furnace Repair Matters

Before diving into the step-by-step fixes, let’s look at why learning basic furnace troubleshooting is a smart move—especially for Minnesota homeowners who rely on heat for survival, not just comfort.

💰 Cost Savings

Professional HVAC service calls can run $100 to $300—before any actual repairs. Tackling small issues like a dirty filter or tripped breaker can save you money and prevent unnecessary technician visits.

⏱️ Faster Fixes

When your furnace stops working at 10 p.m. during a Minnesota cold snap, waiting for next-day service isn’t ideal. Knowing what to check first can restore heat in minutes, not hours.

🧠 Knowledge Is Power

Understanding how your system works gives you peace of mind and confidence in maintaining your home. Even if you end up calling a pro, you’ll speak their language—and avoid being upsold on things you don’t need.

🚨 Emergency Readiness

Blizzards, power outages, and subzero temps are part of Minnesota winters. If your furnace cuts out during a storm, basic troubleshooting can be the difference between a minor inconvenience and pipes freezing overnight. For more, check out this guide from the U.S. Department of Energy on home heating systems

🧊 Fun fact: Pipes can freeze in as little as 6 hours if indoor temps drop below 32°F. Knowing how to restart your furnace quickly could save thousands in water damage.

Now, let’s get down to the nitty-gritty of furnace repair with these 11 easy-to-follow steps.

Where To Find Components of A Typical Gas Furnace

11 Step Furnace Repair Troubleshooting Checklist

1. Turn Off the Power First

Safety is top priority. Locate the power switch or circuit breaker for your furnace and turn it off before you begin any repairs.

2. Check the Thermostat

Ensure your thermostat is set to “heat” mode and the temperature is higher than the current room temperature. And, if your thermostat uses batteries, replace them to rule out a power issue.

3. Inspect the Air Filter

A dirty or clogged air filter can restrict airflow and affect your furnace’s efficiency which is no fun. Replace the air filters if necessary to keep up with proper furnace maintenance.

checking the air filter in your furnace repair checklist

4. Reset the Circuit Breaker

If the furnace isn’t responding, check the circuit breaker to ensure it hasn’t tripped. Reset it if needed.

5. Look at the Gas Supply

Make sure the gas supply valve to the furnace is open. If it’s off, turn it on and wait a few minutes before trying again.

6. Check the Pilot Light

If you have a gas furnace with a pilot light, ensure it’s lit. If not, follow your furnace’s instructions to relight it.

7. Inspect the Blower Fan

Dust and debris can accumulate on the blower fan, reducing its efficiency. Clean it gently to improve airflow.

8. Vent and Duct Inspection

Check for any obstructions or blockages in the exhaust vent. Ensure it’s clear of snow, leaves, or debris. You should also examine your ductwork for any visible damage or disconnections.

9. Listen for Unusual Noises

Pay attention to any unusual sounds coming from your furnace. Different noises can indicate specific issues.

10. Check Thermostat Wiring

Ensure the thermostat wiring is intact and correctly connected. Loose or damaged wires can disrupt communication with the furnace.

11. Consult Your Furnace Manual

If you have your furnace manual, consult it for troubleshooting steps specific to your make and model. Remember, you can always lean on the expertise of a furnace repair technician if you’re worried about repairing your furnace correctly.

5 Common Furnace Problems + Solutions 💡

Below we’ll go over 5 typical problems that homeowners face with their furnace and how to effectively solve them.

1. No Heat

  • Possible Causes: Dead thermostat, tripped breaker, faulty igniter
  • Try This: Check thermostat settings and breaker; relight pilot

2. Insufficient Heat

  • Possible Causes: Clogged filter, blocked vents, blower motor issues
  • Try This: Replace the filter and clear vents; if no improvement, call for service

3. Short Cycling (On/Off Frequently)

  • Possible Causes: Dirty filter, oversized system, thermostat error
  • Try This: Replace the filter, and check thermostat placement

4. Loud Noises

  • Possible Causes: Loose parts, motor failure, burner issues
  • Try This: Tighten screws, clean burners. If noises persist, call a pro.

5. Noisy or Banging Ducts

  • Possible Causes: Expanding metal, debris in ductwork
  • Try This: Add insulation or consult a tech for duct adjustment or cleaning

Common Furnace Mistakes Homeowners Make

Forgetting to Change the Air Filter

Why it matters: A clogged filter restricts airflow, forces your system to work harder, and can cause overheating or short cycling.

How to avoid it:
Change your filter every 1–3 months, especially during peak winter months when your furnace is running daily. If you have pets or allergies, change it more frequently.

homeowner closing a vent in his home

Blocking or Closing Too Many Vents

Why it matters: Many homeowners think closing vents in unused rooms will save energy. In reality, it throws off the pressure balance and can damage your blower motor.

How to avoid it:
Keep at least 80% of your vents open at all times and ensure furniture or rugs aren’t covering supply or return vents.

Ignoring Strange Sounds or Smells

Why it matters: Banging, rattling, or burning smells are often early warning signs of mechanical issues. Waiting too long can turn a minor repair into a major one.

How to avoid it:
If you hear unusual noises or smell something off (especially rotten eggs or burning plastic), turn off your furnace and call a technician immediately.

🔥 Rotten egg smell? That could be a gas leak—evacuate and call 911 and your gas provider.

Skipping Annual Tune-Ups

Why it matters: Small problems like dirty burners, loose wiring, or low gas pressure are easily caught during regular inspections—but not during a cold snap at 2 a.m.

How to avoid it:
Schedule a professional tune-up every fall, before heating season kicks in. Many HVAC companies (like us!) offer maintenance plans that include annual inspections and priority service.

🧰 When to Call a Professional

DIY is great—but some problems need a licensed technician. Contact an expert if:

  • The furnace is leaking or smells like gas
  • There’s rust or water around the unit
  • You see error codes or flashing lights
  • You’ve done all the steps and it still doesn’t work

Rely On Thelen Plumbing, Heating, and Air For All Your Furnace Repair Needs

While some furnace issues may require professional attention, this 11-step furnace repair guide empowers you to tackle common problems and restore warmth to your home. Remember, safety comes first—always turn off the power before attempting any repairs or replacing. With a little knowledge and these DIY steps, you can keep your home cozy and comfortable even when your furnace decides to take a break.

Get in touch with our top-notch technicians at Thelen Plumbing, Heating, and Air today for all your HVAC & Plumbing needs. We’ll make sure your home stays in solid shape with the proper TLC it deserves!

FAQs

What’s the average cost of furnace repair in Minnesota?

Most furnace repairs in Minnesota range from $150 to $600, depending on the issue. Replacing a blower motor or igniter is more expensive than fixing a thermostat or changing a clogged filter.

How often should I schedule furnace maintenance?

You should schedule professional maintenance once a year, ideally in the fall before peak heating season. This can catch issues early and improve efficiency.

How long do furnace repairs usually take?

Most repairs can be completed in 1–2 hours after diagnosis. However, delays can happen if parts need to be ordered or if it’s a weekend or emergency call.

Can a furnace repair improve energy efficiency?

Yes. Fixing issues like dirty burners, leaky ducts, or malfunctioning thermostats can significantly reduce energy waste and lower your monthly heating bills.

Schedule Service

"*" indicates required fields

This field is for validation purposes and should be left unchanged.