
What Is An Air Handler? 5 Things You Should Know

Air handlers are key components in HVAC systems, yet they often go unnoticed compared to furnaces or air conditioners. If you’ve come across the term “air handler” and wondered what it is or what it does, you’re not alone.

An air handler plays an essential role in keeping your home comfortable by circulating and regulating indoor air. Whether you’re managing heating, cooling, or maintaining air quality, an air handler is a vital piece of your HVAC system puzzle.

Here’s what you’ll learn in this blog post:

  • What an air handler is and how it works
  • 5 crucial things you should know about air handlers
  • Maintenance tips to keep your air handler running smoothly

🤔 What Is an Air Handler and How Does It Work?

Heating and air conditioning inverter used to climatize  a home

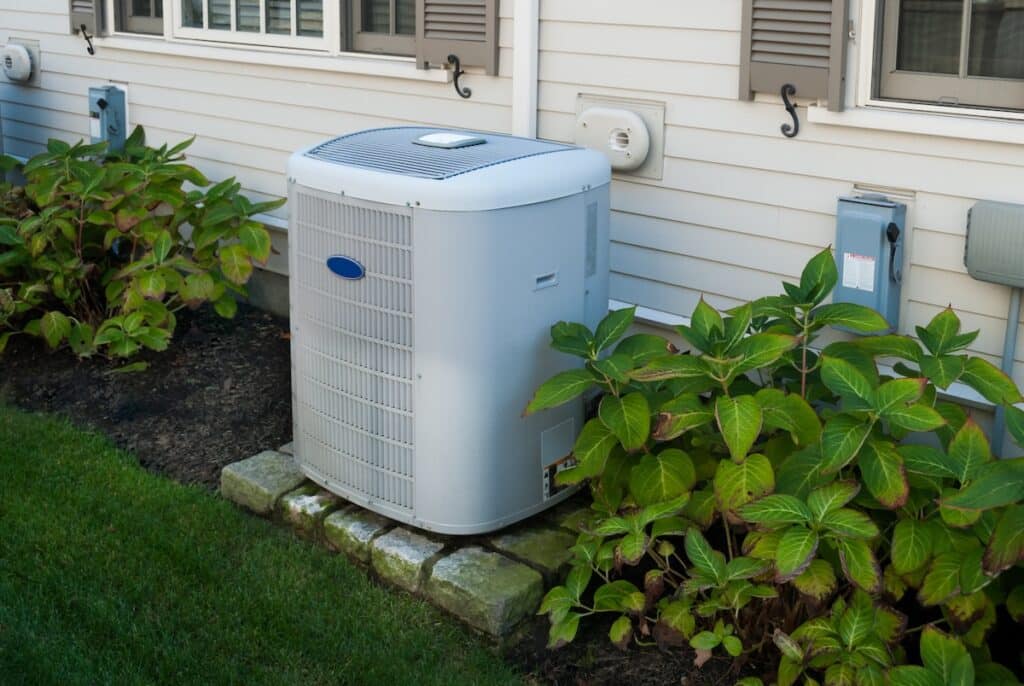
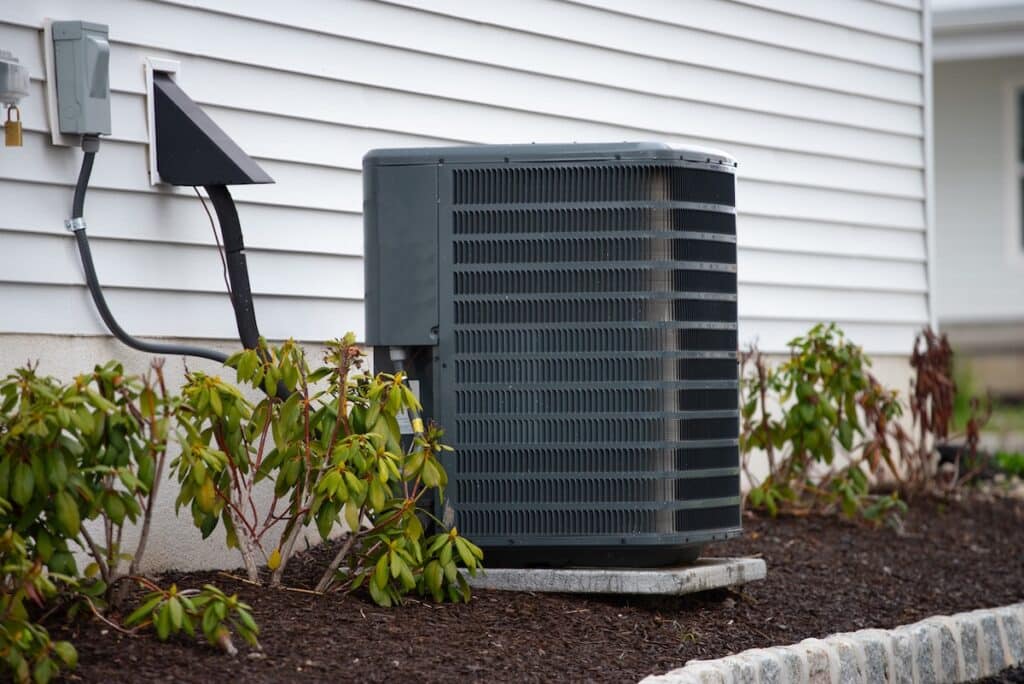
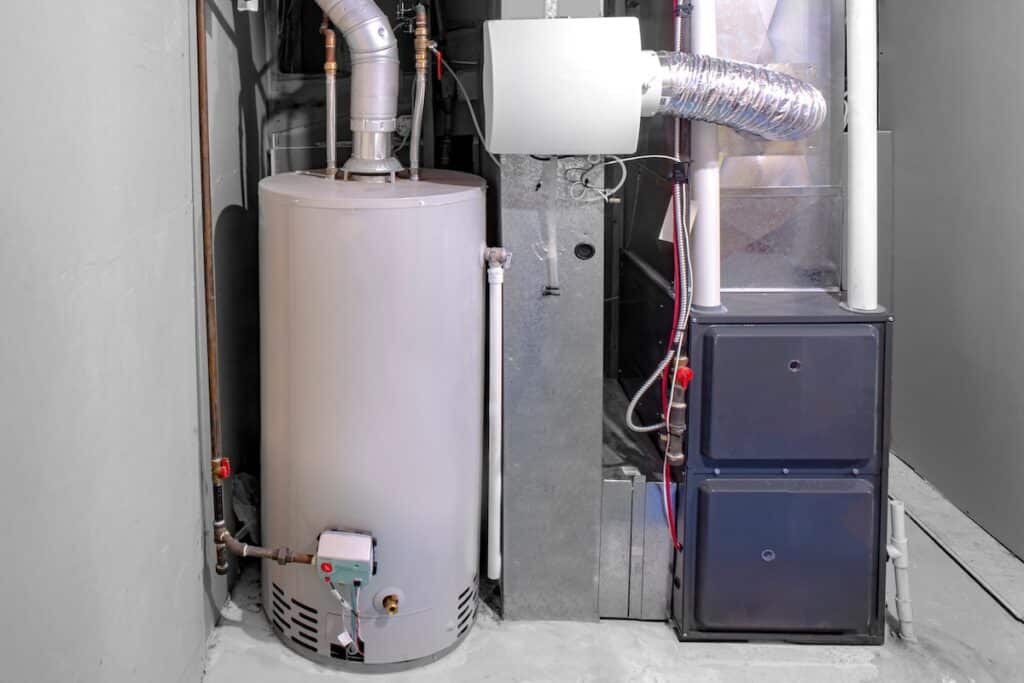
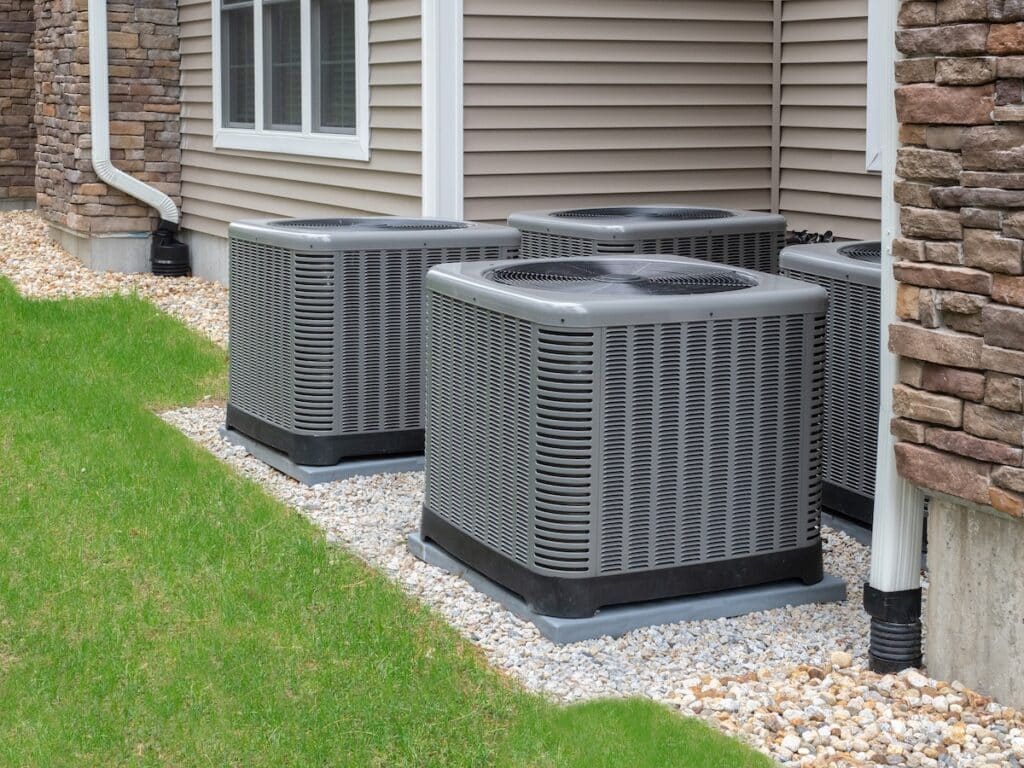
An air handler is a metal encased unit that looks similar to a furnace. Its primary job is to circulate air throughout your home. It contains essential components like a fan, evaporator coil (for cooling), and filters. Together, these parts help distribute warm or cool air efficiently and keep your home comfortable all year long.

Unlike a furnace, which generates heat, or an air conditioner, which cools air, the air handler works as the circulatory system of your HVAC system. It pushes the conditioned air (heated or cooled) into your ductwork and distributes it across your home.

Are Air Handlers and Furnaces the Same?

A common misconception is that air handlers and furnaces are interchangeable. However, they are two different HVAC components. While both look similar and are used in climate control, their functions set them apart:

  • Furnace: Generates heat using fuel, such as gas or electricity.
  • Air Handler: Circulates and distributes heated or cooled air; often used in homes with heat pumps.

⭐️ 5 Things You Should Know About Air Handlers

Outdoor air conditioning and heat pump units

Air handlers are essential for maintaining proper airflow and temperature in your HVAC system, ensuring your home or business stays comfortable year-round. Understanding how they work can help improve energy efficiency and reduce maintenance costs.

1. They Work with Heat Pumps

Air handlers are a critical component in homes with heat pump systems. Heat pumps work by transferring heat from one area to another, whether it’s moving heat into your home during the winter or extracting it during the summer. The air handler plays an essential role in this process by distributing the conditioned air throughout your living spaces, ensuring that every room remains comfortable. Without an air handler, the heat pump cannot function effectively, leaving your home unevenly heated or cooled.

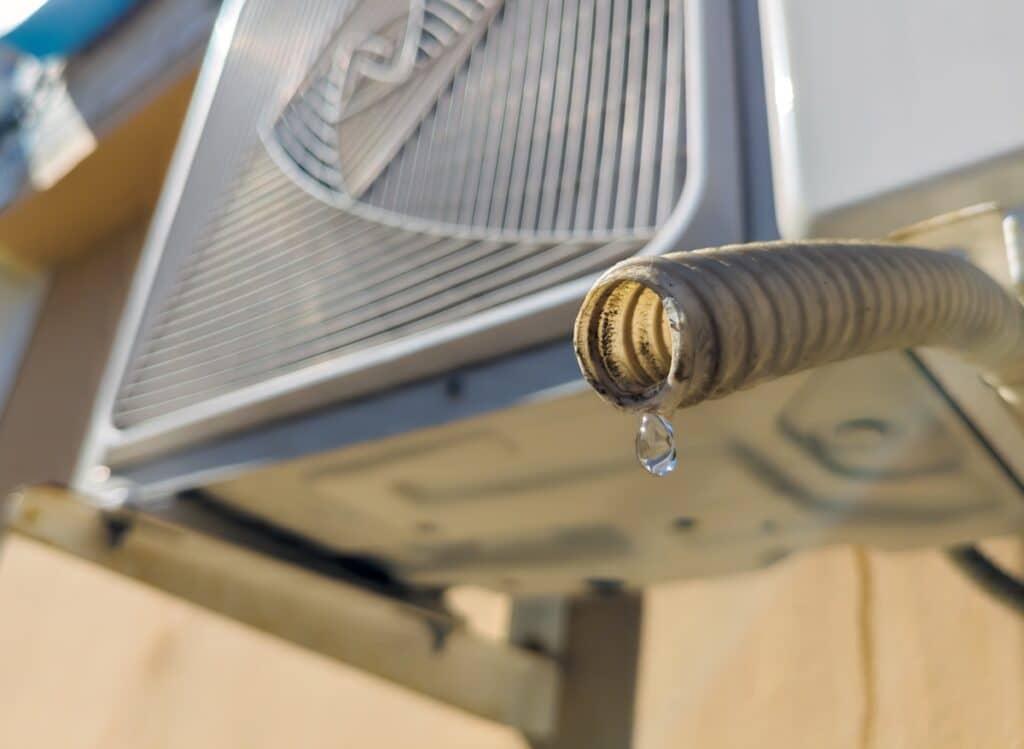
2. They Have Built-In Evaporator Coils

To keep your home cool during hot weather, air handlers are equipped with evaporator coils. These coils work by absorbing heat from the air that passes over them. The refrigerant inside the coils takes this heat and transfers it out of your home, leaving the air cooler. The cooled air is then circulated into your living spaces, providing relief from the heat. This process is vital for maintaining a comfortable indoor temperature, especially during the summer months.

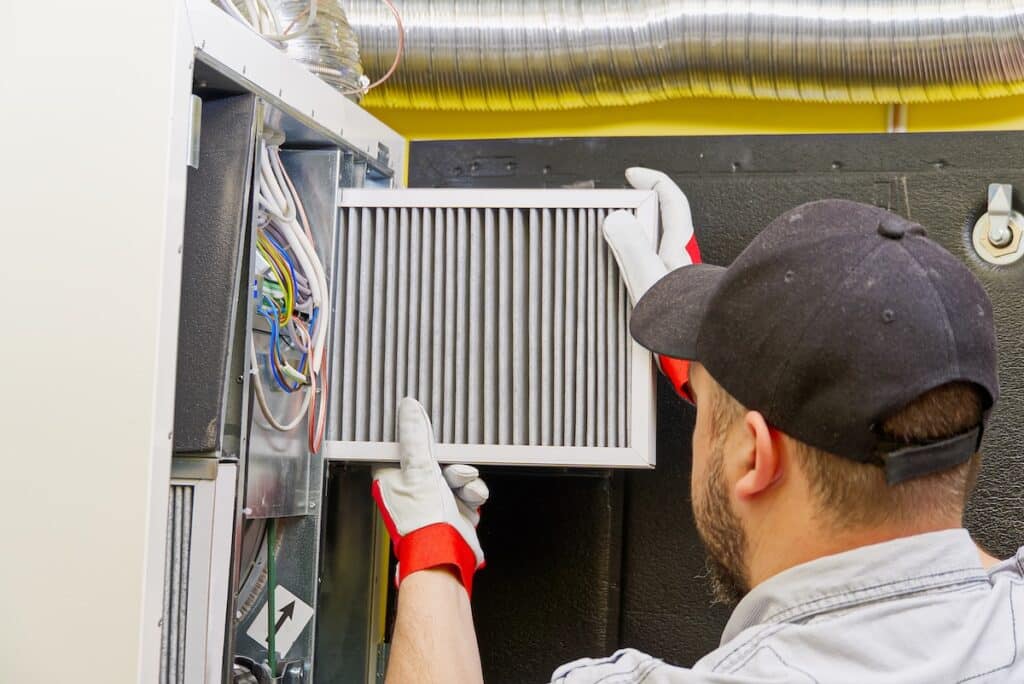
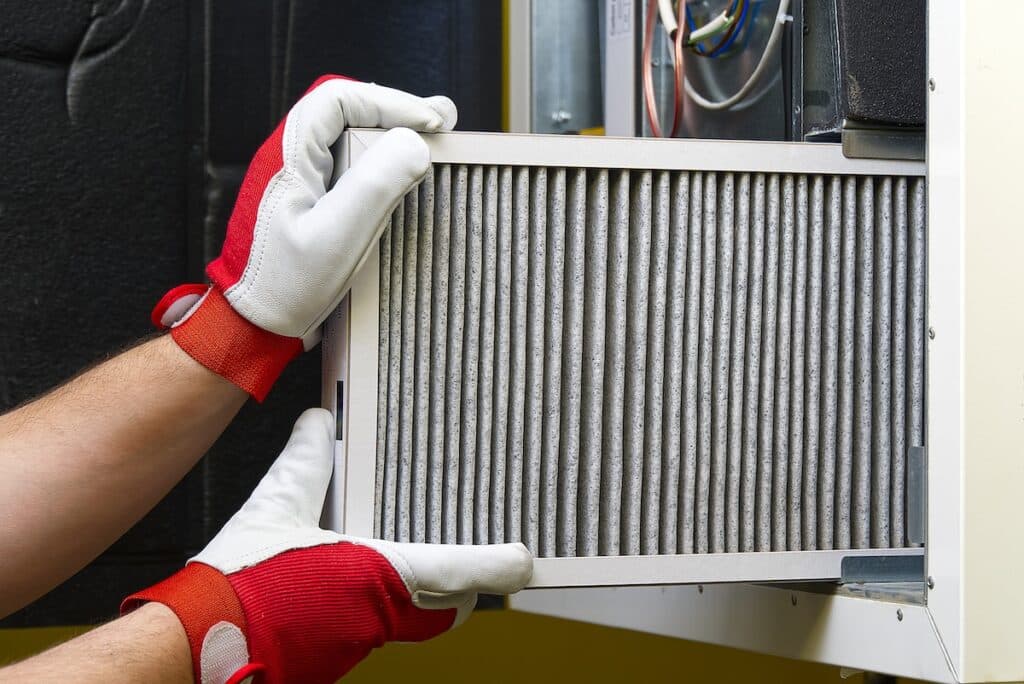
3. They’re Equipped with Filters for Clean Air

Air handlers don’t just control the temperature in your home—they also improve the air quality. They come with built-in filters that trap airborne particles such as dust, pet dander, pollen, and other allergens. This filtration process ensures that the air circulating throughout your home is clean and healthier to breathe. By removing these particles, air handlers can help reduce allergy symptoms and create a more comfortable environment, particularly for those with respiratory issues.

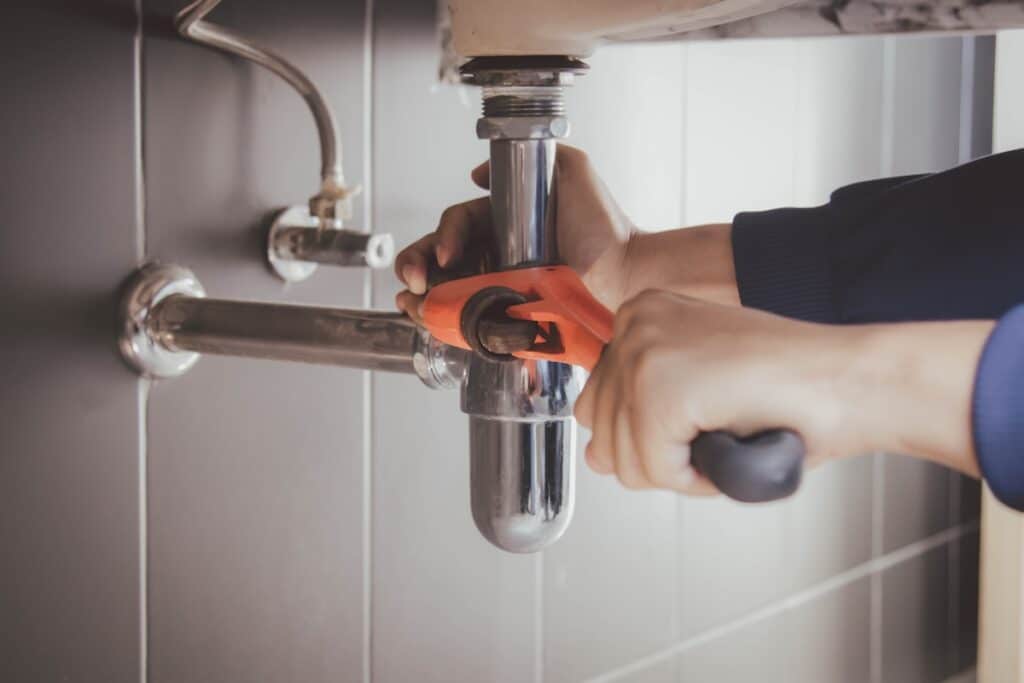
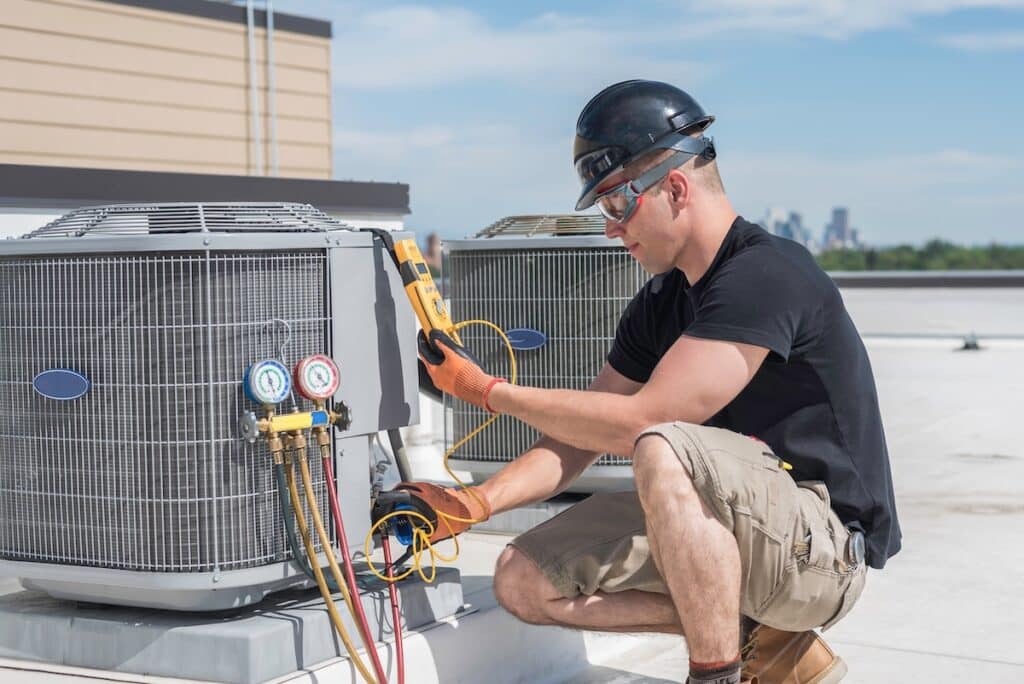
4. They Require Regular Maintenance

Like any other home appliance, air handlers need regular maintenance to operate at their best. Over time, filters can become clogged with dust and debris, which reduces airflow and forces the system to work harder, lowering efficiency. Fans and other components can also wear out or become dirty, further impacting performance. Regular maintenance checks, including cleaning or replacing filters and inspecting components, ensure that your air handler operates efficiently and lasts longer. Neglecting maintenance can lead to higher energy bills, poor air quality, and costly repairs.

5. They Offer Better Energy Efficiency

Modern air handlers are designed with energy efficiency in mind. Many models now feature variable-speed fans, which allow for precise control of air circulation. Unlike older single-speed fans that run at full power all the time, variable-speed fans adjust their speed based on your home’s needs. This not only provides more consistent and comfortable temperatures but also reduces energy usage, lowering your utility bills. Investing in an energy-efficient air handler can pay off in the long run with reduced operational costs and a smaller environmental footprint.

🛠️ Proper Maintenance for Air Handlers

air conditioner near the new house cold fan install supply system wall climate what is an air handler

Air handlers are durable, but they require regular upkeep to ensure peak performance. Here are some maintenance tips:
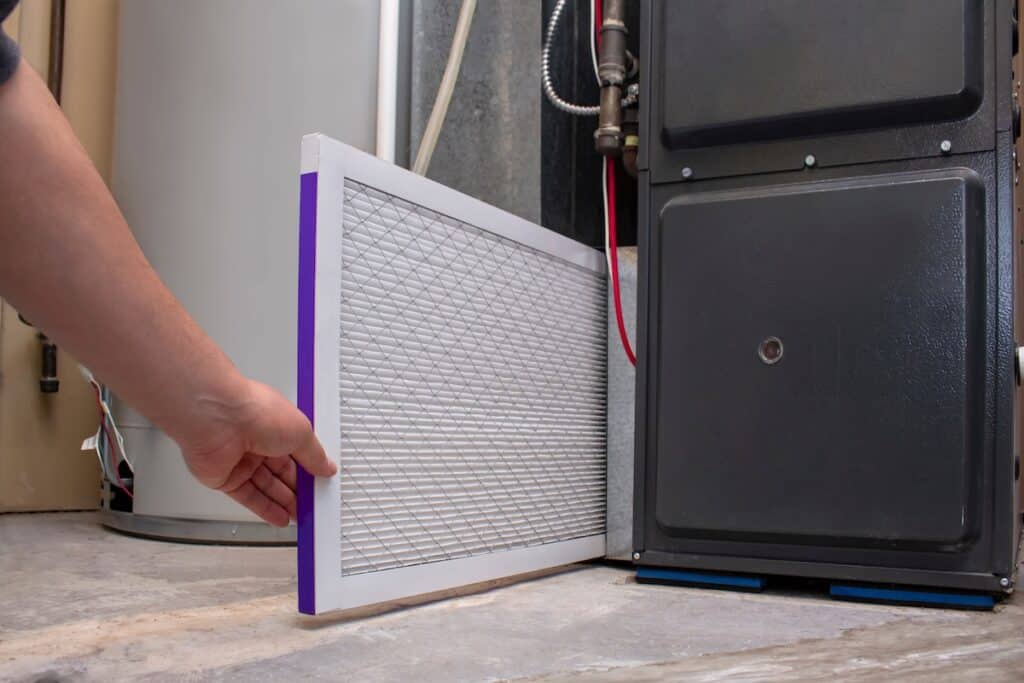
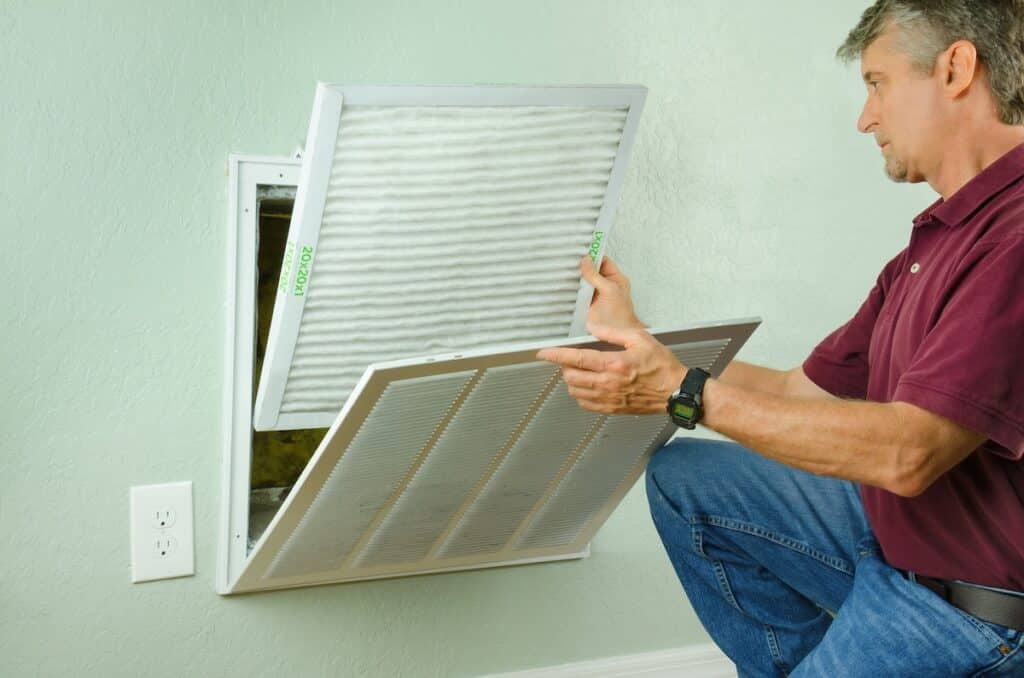
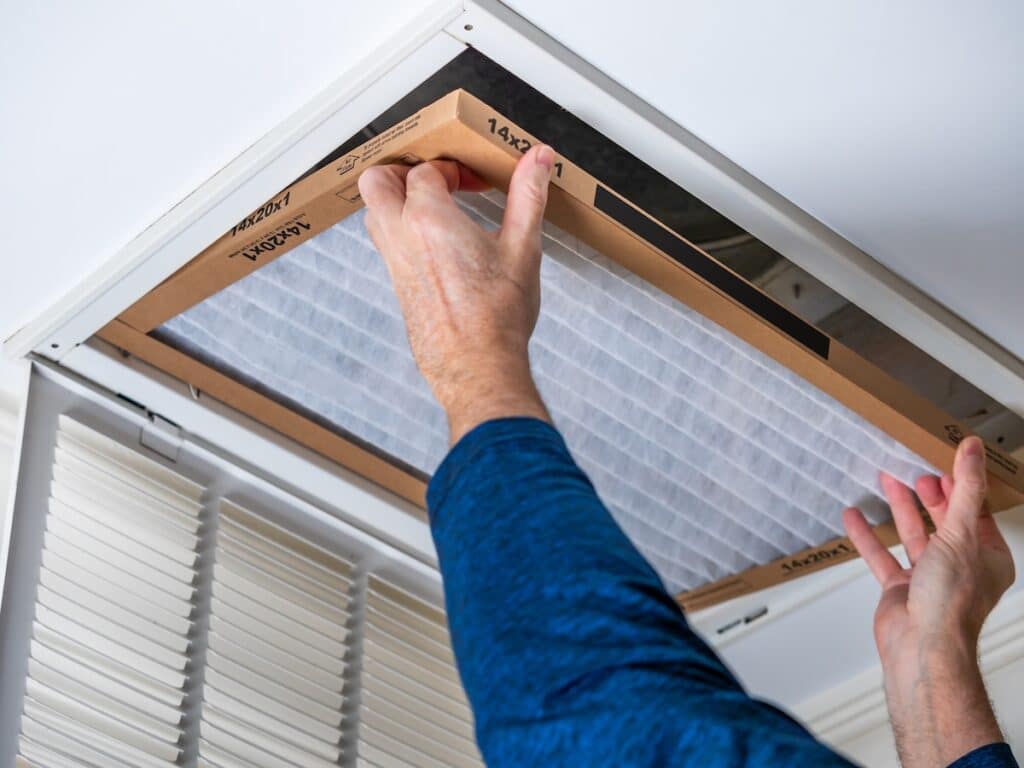
Change Air Filters

Regularly replacing your air filters is one of the easiest yet most effective ways to keep your air handler running smoothly. Clean filters ensure proper airflow, improve energy efficiency, and prevent dust buildup inside the system. Neglecting this simple task can lead to clogged filters, reduced performance, and even damage to your HVAC system. Aim to check and change filters every 1-3 months, depending on usage and air quality.

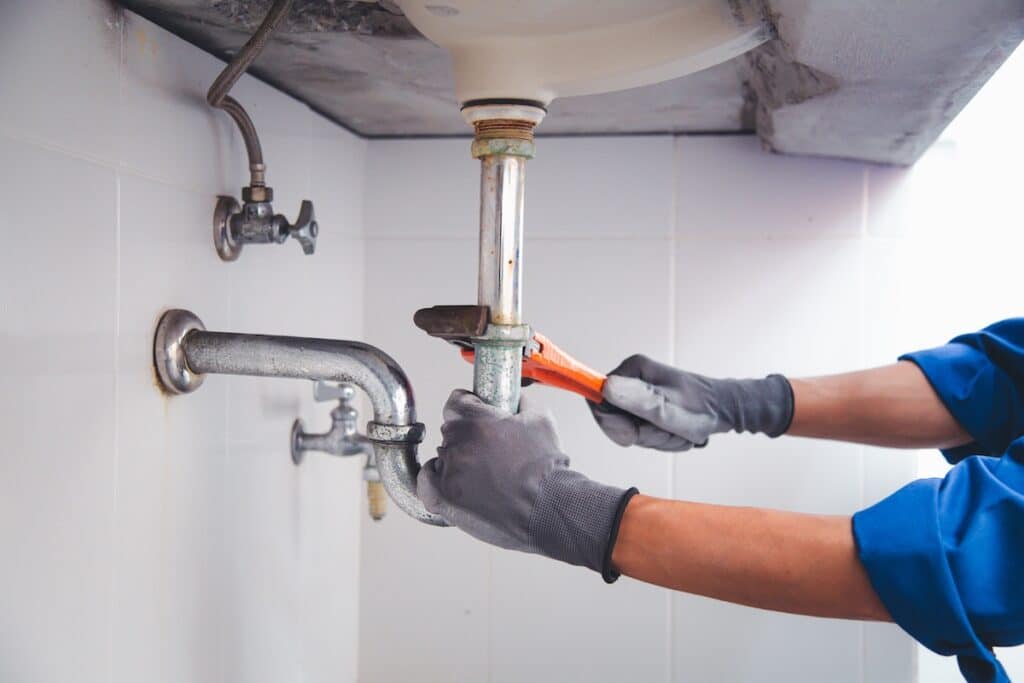
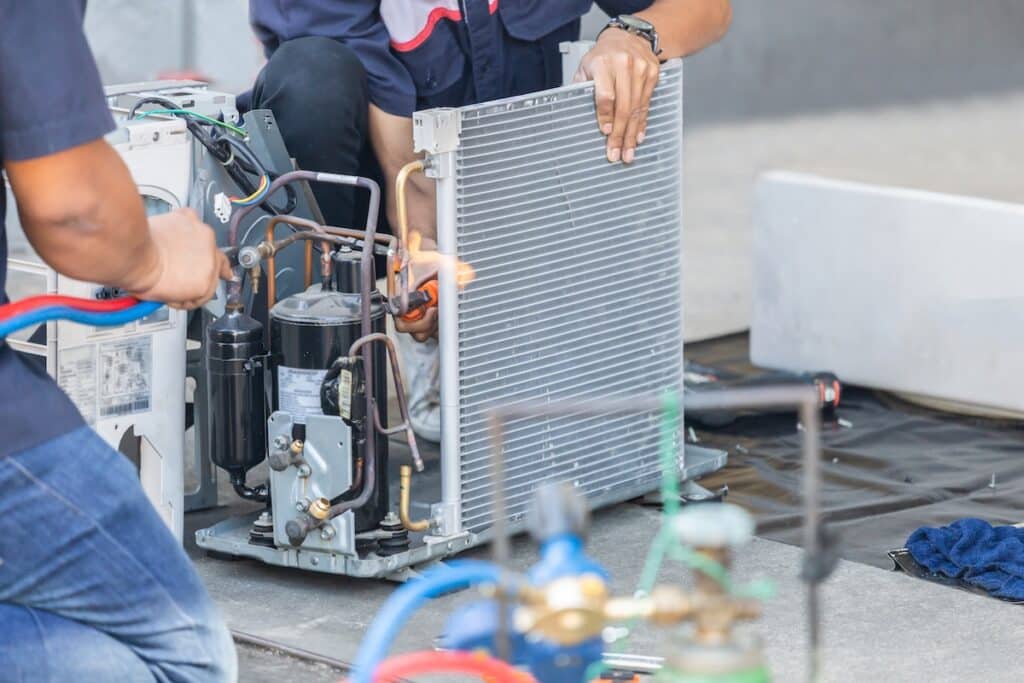
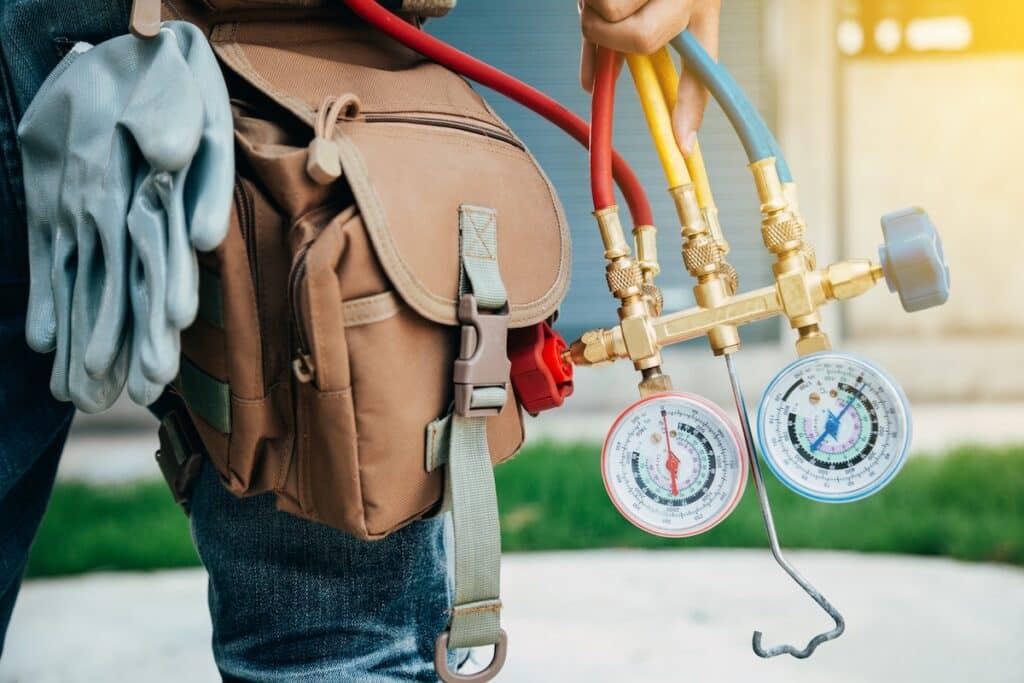
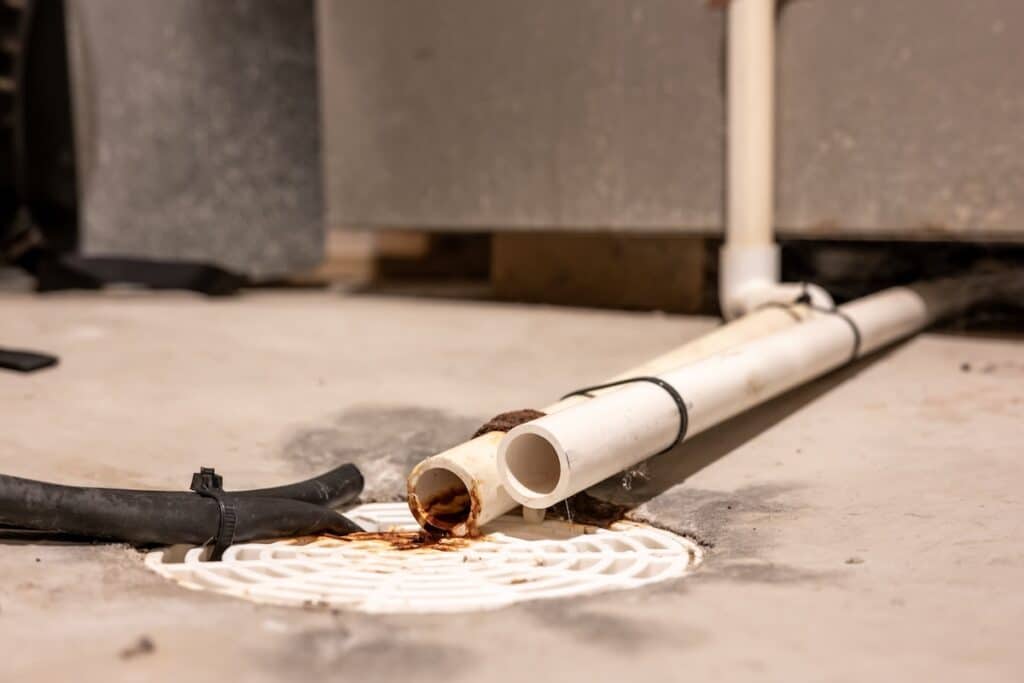
Clean the Evaporator Coil

Over time, the evaporator coil collects dust and grime, which can disrupt the cooling process and reduce the efficiency of your air handler. A dirty coil forces your system to work harder, increasing energy costs and wear on components. It’s best to leave coil cleaning to professional HVAC technicians during routine servicing, as they have the tools and expertise to do it safely and effectively.

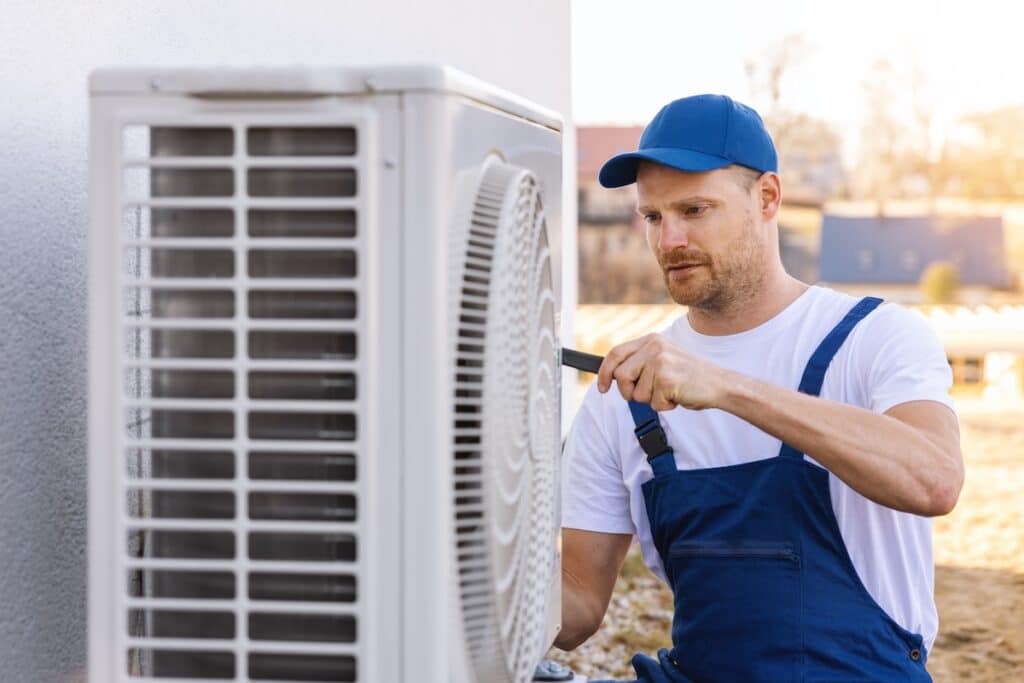
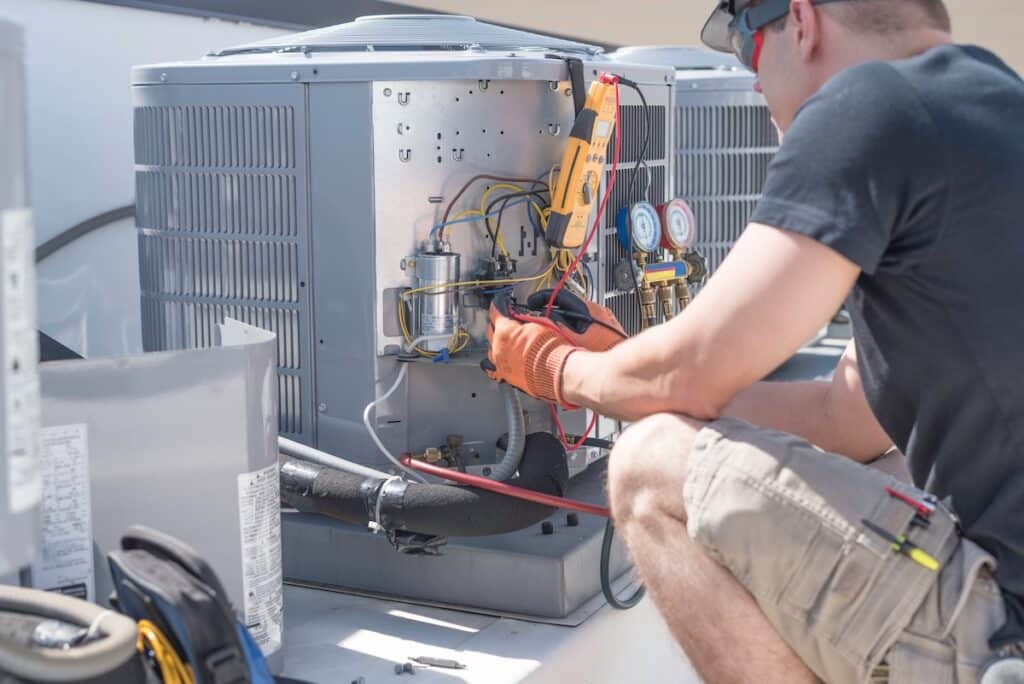
Check for Loose Wiring or Parts

Regular inspections of your air handler can help you catch small issues, such as loose wiring or components, before they become major problems. Loose connections can result in electrical malfunctions, reduced efficiency, or even system failure. Conduct a visual inspection yourself or have an HVAC technician do it during a maintenance visit to ensure everything is secure and functioning as it should.

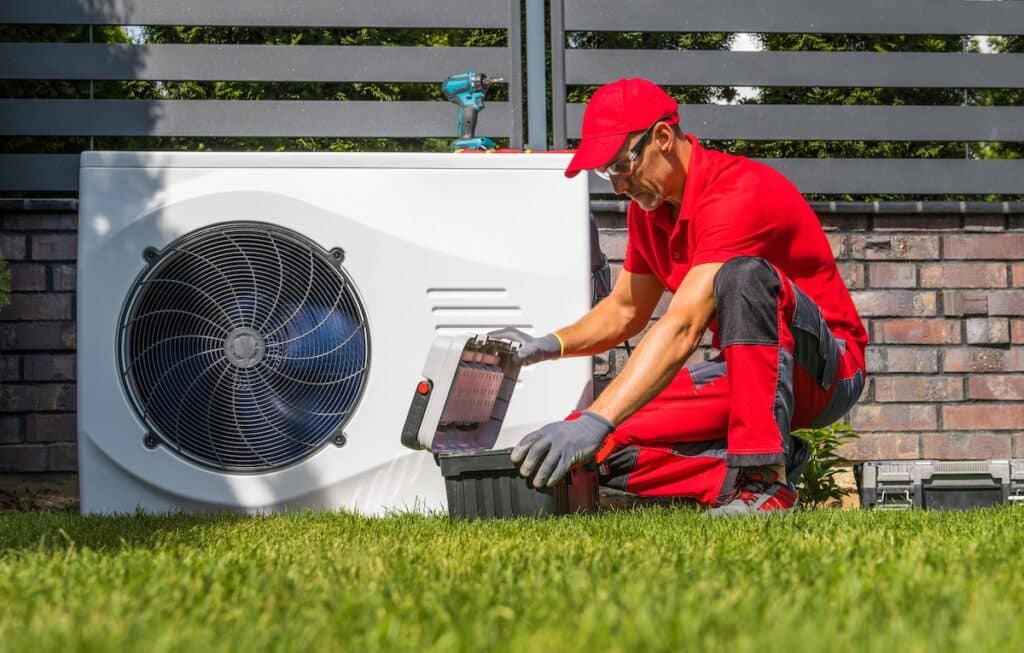
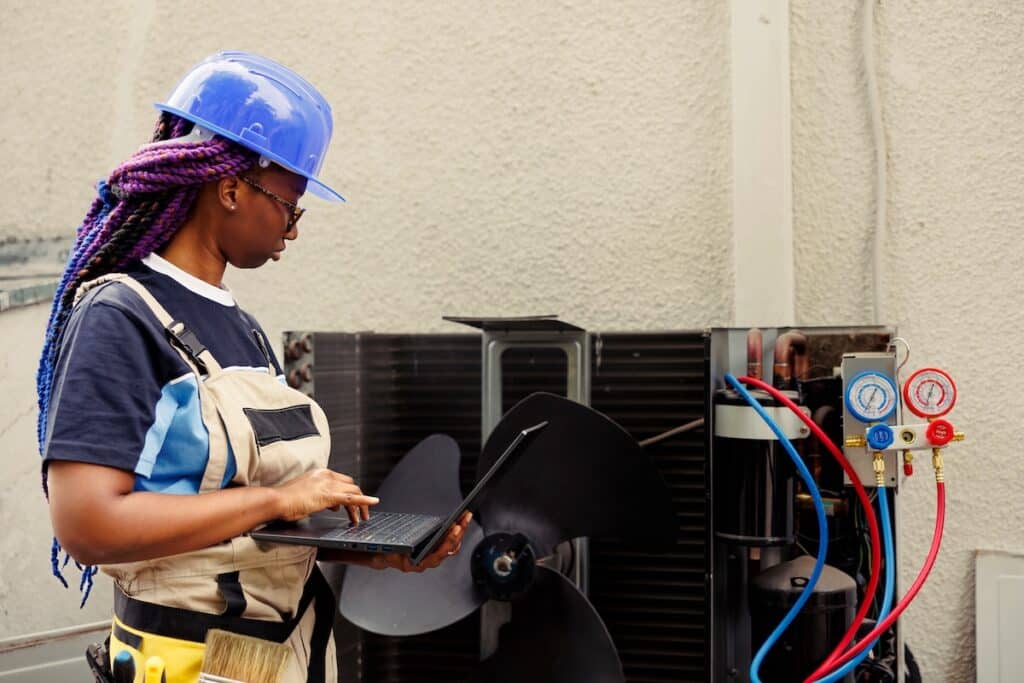
Schedule Routine Service

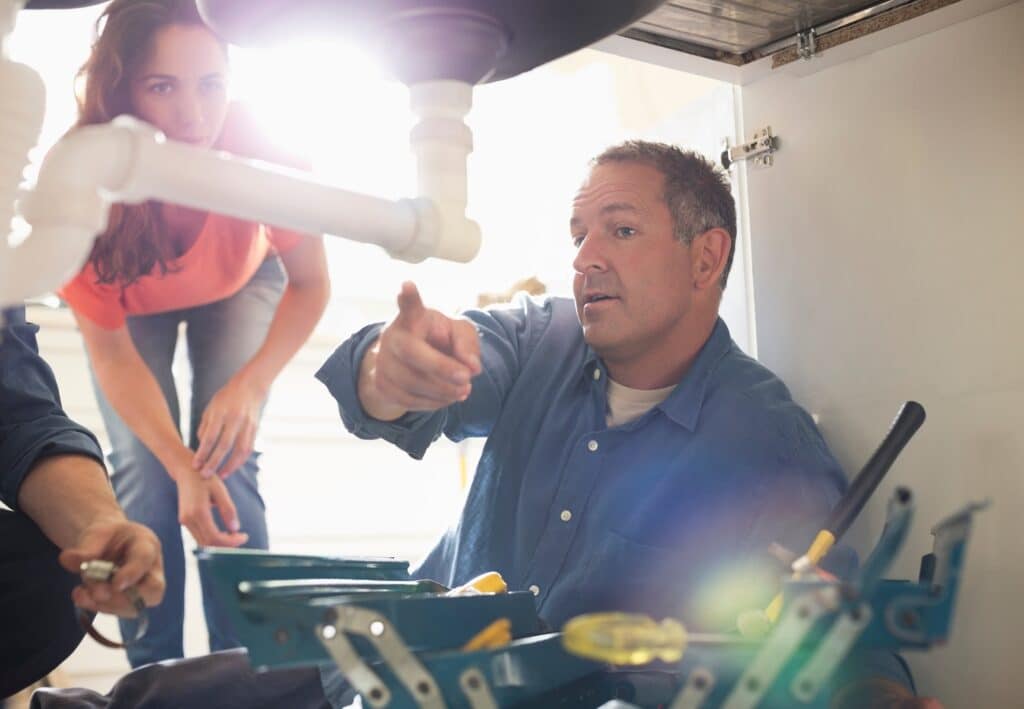
Annual professional maintenance is crucial for keeping your air handler in top condition. HVAC technicians can perform a thorough inspection, clean critical components, and address any issues before they escalate. Routine service not only prevents costly repairs but also extends the lifespan of your air handler, ensuring it operates efficiently for years to come. Scheduling regular service is an investment in the long-term performance of your system.

👉 Air Handler Things To Know

An air handler is an essential component of your HVAC system, ensuring your home stays comfortable year-round by properly circulating and conditioning air. When it comes to keeping your air handler—and your entire HVAC system—running smoothly, Thelen Plumbing, Heating, and Air is the team you can trust. With over a decade of experience serving homeowners in the Minneapolis and Twin Cities Metro Area, we combine expertise, affordability, and 24/7 availability to deliver unmatched service.

Whether you need a repair, maintenance, or a new installation, we’re here to ensure your home’s comfort is never compromised. Ready to get started? Contact us today to schedule your service and experience the Thelen difference!

5 Air Conditioner Brands to Avoid (Buyer’s Guide)

When it comes to keeping your home cool and comfortable, choosing the right air conditioner is essential. Unfortunately, not all air conditioners are created equal, and some brands tend to fall short in performance, durability, or efficiency. To help you make an informed decision, we’ve put together this buyer’s guide highlighting air conditioner brands to avoid and offering practical tips to ensure you get the most out of your investment. Here’s an overview of what we’ll cover:

  • Signs of air conditioner brands to avoid
  • 5 air conditioner brands to avoid
  • Why trust Thelen Plumbing, Heating, and Air for HVAC services?

🔎 Signs of Air Conditioner Brands to Avoid

outdoor unit of the air conditioner

Not all air conditioner problems are created equal, and some brands have recurring issues that can greatly impact performance and longevity. One major red flag to look out for is frequent repairs and maintenance. Certain brands are notorious for needing constant fixes, even within the first few years, leading to frustration and significant expenses over time.

Energy efficiency is another crucial factor when choosing an air conditioning unit. Brands with poor SEER (Seasonal Energy Efficiency Ratio) ratings can result in higher energy bills and wasted power, making them a costly choice in the long run. It’s important to prioritize units with strong energy efficiency to save on both money and environmental impact.

Common Issues with Low-Quality Air Conditioners

Investing in a low-quality air conditioner might save money upfront, but it can lead to a range of problems that affect comfort, efficiency, and long-term costs. A poorly performing system can struggle with everyday cooling needs, create disruptions in your home, and even require costly repairs over time. Before making your choice, it’s important to be aware of some of the most common issues associated with low-quality air conditioners:

  • Inefficient cooling in budget units struggles with larger spaces or even air distribution.
  • Noisy operation disrupts home tranquility, common in low-quality brands.
  • Shorter lifespan means some systems fail well before the 10–15 year expectation.
  • Frequent repairs from issues like compressor failures or refrigerant leaks drive up costs.

⚠️ 5 Air Conditioner Brands to Avoid

Close up view on HVAC units (heating, ventilation and air conditioning). 3D rendered illustration.

When shopping for an air conditioning system, it’s crucial to avoid brands known for recurring issues or poor performance. Choosing the wrong brand can lead to inefficiencies, frequent repairs, or premature replacements. Here are some air conditioner brands with notable red flags to consider before making a purchase:

1. Goodman

Goodman air conditioning units are often seen as a budget-friendly alternative, making them a popular choice for buyers looking to save on upfront costs. The brand appeals to cost-conscious customers by offering a range of affordable models that can meet basic cooling needs. However, Goodman’s lower price point comes with certain compromises. The brand’s product line has been criticized for inconsistent quality, with some models faring better than others. This inconsistency can lead to frequent breakdowns or malfunctions, which may result in higher maintenance costs over the lifespan of the unit. Additionally, Goodman’s warranty coverage, while helpful, might not entirely offset the inconvenience of persistent repairs. While Goodman suits those seeking a low-cost cooling solution, buyers should carefully assess the long-term risks to durability and reliability before making a purchase.

2. Daikin

Daikin is a global leader in the HVAC industry, known for its extensive product range and advanced technology. Their air conditioning units often deliver strong performance and energy efficiency, making them a good choice for households and businesses alike. However, Daikin’s strong reputation is not without some challenges, particularly in certain regions. Customers in various areas have reported issues with poor customer service, which can make addressing problems more difficult. Additionally, the availability of replacement parts can sometimes be limited, leading to frustrating delays in repairs. For buyers relying on quick fixes, this lack of accessibility can be a major drawback. While Daikin air conditioners are generally well-regarded for their performance and innovation, these logistical and service-related issues may detract from an otherwise solid brand choice.

3. Frigidaire

Frigidaire has built its name on offering air conditioning units at an affordable price point, making them a practical option for buyers prioritizing cost savings. These units are easy to find and often come with simple installation processes, adding to their appeal. However, Frigidaire air conditioners come with notable trade-offs, particularly in terms of energy efficiency. Many models have lower SEER (Seasonal Energy Efficiency Ratio) ratings when compared to competitors, which means they consume more energy during operation. This can lead to higher utility bills over time, negating some of the upfront savings. Furthermore, for environmentally conscious buyers or those looking to minimize energy consumption, Frigidaire may not be the ideal choice. While they are a budget-friendly option, it’s important to consider the potential for higher long-term costs and environmental impact before committing to a Frigidaire unit.

4. LG

LG is a well-known name in electronics, and their air conditioning units draw attention due to the brand’s reputation for innovation and technology. LG offers a wide range of models, including budget-friendly options aimed at buyers looking to save. However, while their premium models may perform well, some of their more affordable units have been reported to suffer from high failure rates. This can result in frequent repairs or, in some cases, the need to replace the unit earlier than expected. Additionally, LG units sometimes face criticism for inconsistent cooling performance, particularly in extremely hot or demanding conditions. While LG’s air conditioners may be appealing due to their affordability and brand recognition, buyers should weigh the reliability of their chosen model against the potential repair and replacement expenses.

5. Haier

Haier air conditioners are often chosen for their affordability, making them an attractive option for buyers on a tight budget. The brand focuses on providing accessible solutions to basic cooling needs, and their units are widely available in many markets. However, the low price often comes with compromises in durability and overall performance. Many users report issues with inconsistent cooling, with some units struggling to maintain efficiency over time. This can lead to increased energy usage and higher operational costs, which undercuts the initial savings. Haier’s air conditioners are generally best suited for temporary or short-term use, but they may not be the best choice for buyers seeking a long-lasting, reliable solution. For those prioritizing durability and consistent performance, exploring other brands may be a better option.

👨‍🔧 Why Trust Thelen Plumbing, Heating, and Air for HVAC Services?

air conditioner near the house unit compressor cool fan system cooler air conditioner brands to avoid

At Thelen Plumbing, Heating, and Air, we understand how crucial it is to have an air conditioning system you can rely on. Our experienced technicians are committed to helping you choose the ideal system for your home while ensuring it performs efficiently for years to come. What sets us apart?

Customer-Focused Service

Your satisfaction is not just a goal—it’s the foundation of everything we do. From the moment you reach out to us, we’re here to guide you through every step of the process. Whether it’s your initial consultation, helping you choose the right HVAC system for your needs, or providing top-notch installation and ongoing servicing, we’re committed to ensuring your experience is smooth and stress-free. Our team listens to your concerns, answers all your questions, and prioritizes your comfort above all else. With us, you can count on personalized care every time.

Comprehensive HVAC Expertise

Our team brings extensive expertise in heating, cooling, and plumbing, making us your one-stop solution for all your HVAC needs. We thoroughly understand a wide variety of systems, including the latest energy-efficient technologies and traditional setups. Whether you’re looking to install a brand-new system, need urgent repairs to get your home back to a comfortable temperature, or require regular maintenance to keep your HVAC system running smoothly, we’ve got the skills and experience to handle it all. No matter the challenge, we’re here to deliver reliable solutions tailored to your home and lifestyle.

Transparent Pricing

We believe that quality HVAC services shouldn’t break the bank. That’s why we’re committed to providing exceptional craftsmanship at prices that fit your budget. With our transparent pricing, you’ll never have to worry about hidden fees or unexpected charges. Before we begin any work, we’ll provide a clear and detailed estimate, so you know exactly what to expect. We work with you to find the best solutions that prioritize both your home’s comfort and your financial peace of mind. Affordable pricing and great service—because you deserve both.

Lightning-Fast Turnaround

We value your time and understand how important it is to resolve HVAC issues quickly. That’s why we’ve designed a streamlined process that ensures your repair, installation, or maintenance is completed efficiently without compromising on quality. Our expert team arrives on time, works diligently, and pays attention to every detail to get the job done right the first time. Whether it’s a freezing winter day or a scorching summer afternoon, you can trust us to deliver prompt and effective service to restore your home’s comfort as quickly as possible.

❄️ Air Conditioner Brands to Avoid

Choosing the right air conditioner is key to staying cool and comfortable, but navigating the many options can feel overwhelming. That’s where Thelen Plumbing, Heating, and Air comes in. With years of experience and a commitment to top-notch service, our team is dedicated to helping you find reliable, efficient solutions tailored to your needs.

From avoiding unreliable brands to providing expert advice and dependable installations, you can count on us to keep your home running smoothly. Ready to upgrade your cooling system or have questions about your options? Contact us today for a free inspection or consultation and experience the Thelen difference!

Water Pipe Repair How to Fix Leaks and Prevent Damage

A leaking water pipe is more than just an annoyance; it can lead to costly water bills and potential damage to your home. With proper knowledge and timely action, you can address leaks effectively and even prevent future issues.

This blog will walk you through everything you need to know about water pipe repair, including:

  • How to identify common water pipe issues
  • A step-by-step guide to fixing leaks
  • Key tips for preventing future damage

💡 Understanding Common Water Pipe Issues

Plumbers working on pipes under sink

Water pipes are critical to the smooth functioning of any home or building, but they’re not immune to problems. Ignoring even minor issues can lead to costly repairs and damage. That’s why it’s essential to identify potential trouble early on and understand what might be causing it. By staying proactive, you can save yourself time, money, and unnecessary stress in the long run.

Signs of Problems

Keep an eye out for the following warning signs:

  • Unusual water bills: A sudden spike in your water bill may signal a hidden leak.
  • Low water pressure: Reduced water flow could mean pipe damage or a clog.
  • Visible moisture or water damage: This includes damp walls, ceilings, or puddles near pipes.
  • Mold or mildew growth: Persistent moisture encourages these unwanted guests.

Common Causes

Here are the typical culprits behind water pipe issues:

  • Corrosion: Older pipes made from materials like galvanized steel are prone to rust.
  • Freezing temperatures: Water expands as it freezes, potentially causing pipes to burst.
  • Wear and tear: Over time, materials weaken due to high water pressure and general use.

✅ 5 Steps to Repair a Leaking Water Pipe

plumber at work in a bathroom, plumbing repair service , fix water plumbing leaks, replace the kitchen sink drain

Fixing a leaking pipe might sound daunting, but with the right guidance and tools, small repairs can be manageable even for beginners. Here’s a step-by-step breakdown:

1. Shut Off the Water Supply

The first and most important step is to stop the flow of water to the pipe. Locate the main water valve in your home, which is typically near where the water line enters the house or in a utility area. Turn the valve off completely to ensure no water continues flowing to the affected area. This step is critical to prevent further water damage while you work on the repair.

2. Identify the Leak

Carefully inspect the pipe to locate the exact source of the leak. Look for signs of a small puncture, crack, or even a loose joint. Once you have identified the area causing the issue, use a clean cloth to dry it thoroughly. Ensuring the surface is dry is essential, as it will help the repair materials adhere properly and create a stronger seal.

3. Choose the Right Repair Method

After identifying the leak, select a repair method appropriate for the severity of the problem. For small cracks or punctures, you can use a pipe clamp, which is wrapped around the leak and tightened securely to stop the flow of water. Alternatively, you can try epoxy putty. This material needs to be mixed and molded by hand, then pressed over the leak until it hardens and creates a seal. For minor leaks, pipe tape can be an effective solution. This self-adhesive tape is stretched and wrapped tightly around the affected area to seal the leak. Each of these methods works well for certain types of leaks, so carefully assess the damage before proceeding.

4. Replace Damaged Sections

If the pipe has a larger break or significant damage, you may need to replace the affected section of the pipe entirely. Begin by cutting out the damaged portion using a pipe cutter or hacksaw. Be precise to ensure the edges of the remaining pipe are clean and even. Then, take a new section of pipe that matches in size and material, and secure it in place using pipe couplings. Make sure all connections are tightened and sealed properly to prevent further leaks.

5. Test Your Repair

Once the repair is completed, it’s crucial to test your work. Turn the water supply back on slowly, and carefully monitor the repaired area. Check for any remaining drips, moisture, or pressure issues that could indicate an incomplete repair. If the leak has been successfully resolved, the pipe should remain dry and the water pressure should stabilize. However, if the issue persists or the damage is too extensive, it may be necessary to seek help from a professional plumber.

While these steps can resolve many minor leaks, don’t hesitate to call in an expert for more complex or recurring problems. A professional repair ensures the issue is handled properly and prevents further damage.

👉 Preventing Future Pipe Damage

Technician plumber using a wrench to repair a water pipe under the sink. Concept of maintenance, fix water plumbing leaks, replace the kitchen sink drain, cleaning clogged pipes is dirty or rusty.

Prevention is always better than repair. Maintain your pipes and safeguard your home against future issues by following these tips.

Protect Against Freezing

To protect your pipes from freezing, it’s important to insulate those located in unheated areas, such as basements, garages, or exterior walls. This insulation helps maintain a stable temperature even during extreme cold weather. Additionally, during freezing conditions, letting faucets drip slightly can prevent water from freezing inside the pipes. The movement of water, even a small amount, reduces the chances of ice forming and causing blockages or bursts.

Monitor Water Pressure

High water pressure may seem harmless, but it creates unnecessary stress on your plumbing system, which can lead to damage over time. Excess pressure makes pipes more susceptible to pipe leaks, cracks, and other failures. To mitigate this risk, installing a pressure regulator is a smart solution. This device helps maintain safe water pressure levels, extending the lifespan of your pipes and reducing the risk of costly damage.

Conduct Annual Inspections

Regular inspections are key to maintaining the health of your plumbing system. Hiring a licensed plumber to inspect your pipe materials at least once a year is a proactive step that can save you from expensive repairs in the future. During these inspections, plumbers can spot early signs of corrosion, wear, or other potential issues. Addressing these problems early ensures they don’t escalate into major plumbing emergencies.

Act Quickly

When it comes to plumbing problems, time is of the essence. Even a small leak can quickly grow into a significant issue that causes extensive water damage and higher repair costs. Acting swiftly to repair minor leaky pipes or plumbing problems prevents them from escalating and keeps your system functioning efficiently. Procrastination can lead to more severe damage, so addressing issues promptly is always the best approach.

🛠️ Water Pipe Repair

When it comes to water pipe repair, Thelen Plumbing, Heating, and Air is the team you can trust to get the job done right. With 24/7 emergency service, skilled craftsmanship, and affordable solutions, we’re dedicated to providing reliable plumbing services that put your home and family first.

Don’t let leaks or pipe issues disrupt your day—contact Thelen Mechanical today for fast, professional repairs you can count on. Call us now or schedule your service online!

Tankless Water Heater vs Tank: Which One is Best?

Deciding between a tankless water heater and a traditional tank-style water heater can feel like a daunting task. Each option has its unique benefits and drawbacks, but the right choice often comes down to your home’s needs, your budget, and your lifestyle preferences.

Whether you’re replacing an older water heater or considering an upgrade, this guide covers everything you need to know, including:

  • The differences between tank vs tankless water heaters
  • 6 key differences between tank and tankless water heaters
  • A detailed comparison to help determine the best fit for your home

🔎 Tank vs. Tankless Water Heaters

the man tightens the pipe nut in the water heating system. The master installs the water heater. The concept of bathroom maintenance.

When choosing a water heater, two main options are available: tank water heaters and tankless (on-demand) water heaters. Here’s a comparison of how they work, along with their pros and cons, to help you decide which suits your needs.

Tank Water Heaters

Tank water heaters are the traditional choice, storing a set amount of water (typically 30 to 80 gallons) in a tank that is heated and kept warm until needed.

  • Lower upfront cost – Affordable to purchase and install.
  • Easy maintenance and repairs – Simple design makes upkeep manageable.
  • Limited hot water supply – Runs out if multiple showers or appliances are used simultaneously.
  • Energy wastage – Continuously heats water, leading to “standby heat loss” and higher energy bills.

Tankless Water Heaters

Tankless water heaters heat water only when needed, offering more energy efficiency and a compact design.

  • Unlimited hot water – Never runs out, even during high usage.
  • Energy efficiency – Reduces energy consumption by only heating water as needed.
  • Higher upfront costs – More expensive to purchase and install.
  • Limited water flow – May struggle to meet simultaneous high demand across multiple fixtures.

⚖️ 6 Key Differences Between Tank and Tankless Water Heaters

The boiler room with a lot of different equipment as a boiler, heater,pipes, expansion tank and other

Here’s a side-by-side comparison to help you visualize the differences between these systems.

1. Cost

Tank water heaters have a lower upfront cost, typically ranging from $300 to $1,000, making them a more affordable option for initial installation. However, they come with higher energy bills over time due to the constant need to keep water heated within the tank. On the other hand, tankless water heaters have a significantly higher upfront cost, usually between $2,000 and $3,000, including installation. Despite the higher initial investment, tankless heaters result in lower long-term energy expenses, making them a cost-effective choice over their lifespan.

2. Energy Efficiency

Tank water heaters are less energy-efficient because they suffer from standby heat loss. This means energy is constantly used to keep the water in the tank warm, even when it’s not being used. In contrast, tankless water heaters are highly energy-efficient since they heat water only when it’s needed. This on-demand system eliminates energy waste, reducing overall usage and providing a more efficient solution for homeowners.

3. Space Requirements

Tank water heaters require a significant amount of floor space for installation, as the tank itself is large and typically occupies a dedicated area in the home. This can be an issue in smaller homes or apartments with limited space. Tankless water heaters, however, feature a compact design and can be wall-mounted, saving valuable space. Their smaller size makes them an attractive option for those looking to maximize the usable square footage in their home.

4. Capacity

The capacity of a tank water heater is limited by its tank size. Once the tank is emptied during heavy usage, you’ll need to wait for it to refill and reheat before more hot water is available. This can be inconvenient for larger households or during peak usage times. Tankless water heaters, by comparison, provide hot water on demand, allowing for continuous usage without waiting. However, they may have a reduced flow rate when multiple fixtures are used simultaneously, which can be a drawback during heavy usage periods.

5. Lifespan

Tank water heaters typically last between 10 to 15 years with proper maintenance. Over time, sediment buildup and wear can reduce their efficiency, requiring eventual replacement. Tankless water heaters, in contrast, have a longer lifespan, often exceeding 20 years with proper care. This extended lifespan offers better long-term value, as the need for replacement is less frequent compared to traditional tank systems.

6. Environmental Impact

Tank water heaters have a higher environmental impact due to their constant energy usage, which contributes to greater carbon emissions. The energy required to maintain the water temperature leads to unnecessary waste, making them less eco-friendly. Tankless water heaters are more environmentally conscious, as they consume less energy by heating water only when needed. Their longer lifespan also means fewer units are discarded, reducing waste and making them a more sustainable choice for environmentally minded homeowners.

❗️ Making the Right Choice for Your Home

tankless water heater vs tank

Choosing the right options for your home is essential to create a comfortable, functional, and personalized space. It ensures your living environment aligns with your needs and lifestyle.

Consider Your Budget

If upfront cost is your primary concern, a tank system may be the way to go. Tank water heaters are generally more affordable to purchase and install compared to their tankless counterparts. They have lower initial costs, making them an appealing choice for those on a tighter budget or looking for a quick, cost-effective solution. However, it’s worth noting that while the upfront expense is lower, tank systems may incur higher energy costs over time due to their continuous heating of water.

Prioritize Energy Efficiency

If energy efficiency and long-term savings matter most, a tankless system could be the better choice. Unlike tank systems, which keep a reserve of hot water heated at all times, tankless water heaters heat water only when it’s needed. This “on-demand” functionality can significantly reduce energy usage, especially in households with lower hot water consumption. While the initial investment for a tankless system is higher, the potential for lower utility bills and environmental benefits makes it an attractive option for those prioritizing efficiency.

Think About Hot Water Needs

For unlimited hot water on demand, a tankless system is your best bet. This type of system provides a continuous supply of hot water, making it ideal for larger households or homes with high hot water demands. Say goodbye to running out of hot water during back-to-back showers or while running multiple appliances. However, keep in mind that tankless systems can have limitations in supplying hot water to multiple outlets at the same time, so assessing your household’s specific needs is important when making your decision.

👨‍🔧 Water Heater Composition

Choosing between a tankless water heater and a traditional tank model is an important decision that depends on your home’s needs, budget, and energy efficiency goals. No matter which option you choose, our team at Thelen Mechanical is here to make the process seamless and stress-free.

With unmatched craftsmanship, affordable pricing, and 24/7 emergency repair services, we’re the team you can trust for all your plumbing needs in Minneapolis and the Twin Cities Metro Area. Ready to upgrade your water heater or need expert advice? Contact Thelen Mechanical today for a consultation or to schedule your installation!

DC vs AC Current: What Are the Key Differences?

Electricity powers almost every aspect of our daily lives, yet many of us rarely stop to think about the type of current running through our home devices. When we discuss electricity, two terms often pop up: Direct Current (DC) and Alternating Current (AC). Both play vital roles in powering the world, but their differences are significant in how they function and are utilized—a crucial distinction for understanding energy use in the modern world.

In the late 19th century, Thomas Edison was a key proponent of direct current (DC) systems, while General Electric played a major role in the development and adoption of alternating current (AC) technology. Their involvement shaped the historical ‘Battle of the Currents’ and influenced how electricity is distributed today.

If you’ve always wondered about the differences between DC vs AC current, you’re in the right place. This guide will explore the basics, key differences, and real-world applications of both currents. Here’s what we’ll cover:

  • Understanding DC and AC Current
  • Key differences between DC and AC current
  • Applications of DC and AC current

💡 Understanding DC and AC Current

Hvac technician inspecting an condensing unit.

Electric current is the flow of electric charge, where electrical charge is the fundamental property that enables current flow in a circuit. It comes in two main types: Direct Current (DC) and Alternating Current (AC). These two types of current are essential for powering various devices and systems in our daily lives, but they function in distinct ways and are suited for different applications. The key difference is that current flow in DC is steady and moves in a single direction, while in AC, the current flow periodically reverses direction. Let’s take a closer look at each type:

  • DC Current: Direct Current flows steadily in a single direction, making it ideal for a consistent power supply. It’s generated by sources like batteries and solar panels and is commonly used in electronics like laptops, cell phones, and electric vehicles.
  • AC Current: Alternating Current changes direction periodically, with a specific frequency (e.g., 60 Hz in the US). It’s produced by power plants and transmitted through the grid, powering home appliances, large motors, and factory equipment.

⚖️ 6 Key Differences Between DC and AC Current

Close up of Air Conditioning Repair team use fuel gases and oxygen to weld or cut metals, Oxy-fuel welding and oxy-fuel cutting processes, repairman on the floor fixing air conditioning system

To have a deeper understanding, let’s break this down into a numbered list of key differences:

1. Direction of Flow in Direct Current (DC)

Direct current (DC) flows continuously in a single, consistent direction, making it stable and predictable. This unidirectional flow of electricity is often represented graphically as a straight line, reflecting its constant nature. DC is particularly useful in applications where a steady and reliable power supply is critical, such as in portable devices, electronic circuits, and certain industrial processes.

Alternating current (AC), on the other hand, periodically reverses its direction, switching back and forth as it flows through a circuit. This reversal occurs many times per second, depending on the frequency of the AC system. In practical terms, this means that the flow of electricity alternates between positive and negative phases, creating a wave-like pattern. AC’s oscillating nature allows it to be easily transmitted over long distances, which is why it is the preferred choice for large-scale power distribution.

The fundamental difference between ac and dc is the direction of current flow: DC flows in one direction, while AC reverses direction periodically.

2. Voltage Consistency

DC provides a steady, unchanging voltage, known as constant voltage, which makes it ideal for powering sensitive electronic devices that require a constant energy supply. Devices like smartphones, laptops, and low-voltage sensors depend on this stable power source to function accurately and reliably. Because DC doesn’t fluctuate, it’s also less likely to cause interference in delicate circuits, making it the preferred choice for many precision applications, including medical devices and laboratory equipment.

In contrast, AC voltage continuously fluctuates, rising and falling in a wave-like pattern. The voltage amplitude of AC varies over time, and its waveform is typically a sine wave. This fluctuation is represented by sinusoidal waves, which are critical to AC’s functionality. The instantaneous voltage at any point in time changes sinusoidally, reaching a maximum value called the peak voltage, while the effective value for power calculations is the rms value. The alternating voltage pattern is advantageous for energy transmission because it minimizes power loss over long distances. This is why AC is used in electrical grids around the world—it balances efficiency and reliability when delivering energy to homes, businesses, and industries. However, the fluctuation in voltage makes AC less suitable for certain sensitive applications that demand consistent power. For such cases, voltage regulation is essential to maintain a stable output and protect sensitive devices.

3. Source

DC is typically generated from sources like batteries, solar panels, and other systems designed to produce a stable flow of electricity. Batteries, for example, store energy chemically and release a steady current through their positive and negative terminals, with the negative terminal establishing proper polarity for safe energy transfer. This is why they are widely used in portable electronic devices. Similarly, solar panels generate DC power by converting sunlight into electricity through photovoltaic cells; solar cells specifically generate DC voltage, which is essential for renewable energy systems. Many electronic devices rely on DC voltage supplied via USB cables for charging and operation. These DC sources are common in renewable energy systems, where stability and reliability are crucial. Additionally, DC power is often stored in energy storage systems, such as power banks and backup batteries, to provide a reliable energy supply when needed. The operation of many devices and systems power relies on a stable DC voltage for effective performance.

AC, however, is primarily generated by power plants, which use mechanical energy from turbines driven by water, steam, wind, or other sources to produce electricity. This energy is converted into AC power using large generators, which are specifically designed for mass energy production. AC is then distributed through the electrical grid to meet the energy demands of homes, businesses, and industries. Its compatibility with the grid and its efficiency in high-power applications make AC the backbone of modern energy distribution systems.

4. Transmission

One of the major challenges with DC is its inefficiency over long distances. DC power suffers significant energy losses during transmission due to resistance in the wires, which converts some electrical energy into heat. To minimize these power losses, expensive and specialized technologies, such as high voltage direct current (HVDC) systems, are required. High voltage direct current is used for long-distance power transmission, especially in applications like underwater power cables and connecting different AC systems, as it helps reduce power losses compared to traditional DC transmission. However, HVDC systems come with higher costs and complexity, which limit their widespread adoption.

AC, by contrast, is much more efficient for long-distance power transmission because it can easily be stepped up to high voltages for transport and then stepped down to safer voltages for end users. High voltage transmission over power lines reduces power losses and minimizes excess energy dissipated as heat. In resistive wires, the same heating effect occurs for a given current, but by transmitting at higher voltages and lower currents, high voltage transmission helps reduce this heat loss. Power lines and the power line infrastructure play a crucial role in transporting AC efficiently over long distances, enabling reliable delivery of electricity to homes and businesses. By increasing the voltage for transmission, energy losses due to resistance are significantly reduced, allowing AC power to be transported over hundreds of miles with minimal efficiency losses. Once it reaches its destination, the voltage is stepped down to levels that are safe for household and industrial use. The advantages of transporting AC for power transmission include efficient long-distance delivery, ease of voltage conversion, and suitability for large-scale distribution systems. This ability to efficiently transmit power over long distances is a key reason why AC dominates global power distribution.

5. Frequency and AC Voltage

DC does not have a frequency because it flows continuously in one direction without oscillating. Its constant, unidirectional nature makes it simple and straightforward to use, particularly in devices where a steady power supply is essential. This lack of frequency is one of the reasons DC is so reliable for powering electronic devices, as it avoids the complications associated with fluctuating currents.

Meanwhile, AC operates at a specific frequency, which is the number of times the current changes direction in one second. This frequency is measured in hertz (Hz). Most countries use an AC frequency of 50 Hz, while others, such as the United States, use 60 Hz. The frequency of AC is an important aspect of its functionality, as it determines the behavior of the electrical system and its compatibility with appliances and equipment. For example, household appliances and industrial machines are designed to operate at the specific frequency of the local power supply, making it crucial for the frequency to remain consistent across the grid. In power transmission systems, both voltage and current are maintained at the same frequency throughout the grid to ensure efficient distribution and compatibility. In AC circuits, reactive components like inductors and capacitors introduce a phase difference between voltage and current, which affects power flow and circuit behavior. Three phase AC and three phase power systems are widely used for efficient power transmission and industrial applications, where line voltage is a key parameter in understanding how electricity is distributed and utilized.

6. Applications

DC is widely used to power low-voltage devices such as smartphones, laptops, and other electronics that require consistent and stable energy. Many electronic devices and electrical devices require DC power internally, and AC/DC power supplies are used to convert AC to DC for their operation. An AC source provides alternating current, which is converted to DC for use in many devices. DC is also vital in renewable energy systems, such as solar power installations, where solar panels generate DC electricity. Additionally, DC is used in electric vehicles, where it powers motors and charges batteries. Its reliability and compatibility with storage systems make DC an essential component of many modern technologies, supporting the delivery of electric power and electrical power to a wide range of applications.

AC, on the other hand, is the standard for powering most household appliances, lighting systems, and industrial machinery. It is well-suited to high-power applications due to its ability to be easily transmitted and converted to different voltage levels. AC is commonly used for powering electric motors in appliances such as washing machines and vacuum cleaners, as well as in other devices that require significant electrical power. In industrial applications, AC is essential for supplying power to large equipment and systems, making it a key component in manufacturing plants and other industrial facilities. AC powers everything from refrigerators and air conditioners to factory equipment and office buildings. Its versatility and efficiency in large-scale energy distribution make AC the foundation of modern electrical infrastructure, ensuring the effective supply of electric power and electrical power across various sectors.

🛠️ Applications of DC and AC Current

Professional Caucasian Heat Pumps Technician in His 40s Installing New Residential Modern Heating Device. HVAC Industry Theme. dc vs ac current

Understanding the applications of DC and AC current is crucial because they power nearly all modern electrical systems. From batteries (DC) to home appliances and power grids (AC), these currents enable the functionality of essential technologies.

Real-world uses of DC current

Direct current (DC) is widely used in various aspects of modern life, particularly in devices and systems that require consistent, unidirectional power flow. Portable devices such as smartphones, laptops, and flashlights rely on DC power to operate effectively, providing the steady, reliable energy they need. In the field of renewable energy, solar energy systems are a prime example of DC application. Solar panels generate DC electricity, which is then stored in batteries for later use or converted to alternating current (AC) to be supplied to the power grid. Additionally, electric vehicles depend heavily on DC power, as the batteries within these cars charge and operate using direct current, enabling them to function efficiently.

Real-world uses of AC current

Alternating current (AC) plays a crucial role in powering homes, industries, and infrastructure. In residential settings, AC electricity is essential for operating everyday appliances such as refrigerators, microwaves, televisions, and air conditioners. The ability to efficiently power these devices has made AC the standard for household electricity. In industrial settings, AC is indispensable for running heavy-duty machinery and equipment used in factories and businesses. Its capability to handle high-power applications makes it suitable for large-scale operations. Furthermore, the transmission of electricity over long distances relies on AC power. Unlike DC, alternating current can be easily converted to higher or lower voltages using transformers, minimizing energy loss and making it ideal for distributing electricity across vast areas.

🏡 DC vs AC

When it comes to understanding the differences between DC and AC current and how they impact your HVAC system, having a knowledgeable team on your side makes all the difference. At Thelen Mechanical, we combine expertise, reliability, and a commitment to customer satisfaction to ensure your home stays comfortable and energy-efficient year-round.

From system upgrades to routine maintenance and emergency repairs, our team is here to help you make informed decisions and provide top-notch service you can trust. Ready to take the next step? Contact Thelen Mechanical today to learn how we can meet your HVAC needs and keep your home running smoothly.

Pros & Cons Of Salt Free Water Softener

If you’ve been exploring water softening solutions for your home, you’ve probably come across the term “salt free water softener.” With traditional water softeners being salt-based, it’s natural to wonder how salt-free alternatives stack up. Are these systems better for your household, or do they come with tradeoffs?

This guide dives deep into the pros and cons of salt-free water softeners, helping you determine whether they are the right choice for your home. Here’s what we’ll cover:

  • How salt free water softeners work
  • Benefits of a salt free water softener
  • Limitations of a salt free water softener

🤔 What Is a Salt-Free Water Softener?

A woman uses hand to measure the water temperature from a water heater before taking a shower

A salt-free water softener, often referred to as a water conditioner, is a system that addresses hard water issues without using salt. Unlike traditional water softeners that remove minerals like calcium and magnesium from your water, salt-free systems work differently. They rely on a process called Template Assisted Crystallization (TAC) to neutralize hardness-causing minerals rather than removing them. This process changes the structure of the minerals, preventing them from sticking to surfaces and causing scale buildup in pipes, faucets, and appliances. Essentially, salt-free systems condition your water rather than truly softening it.

How It Works:

  • Template Assisted Crystallization (TAC): Changes calcium and magnesium into stable crystals that won’t stick to surfaces.
  • No Sodium Exchange: Unlike traditional softeners, salt-free systems don’t add sodium, ideal for low-sodium diets.
  • Healthier and Efficient: Provides a salt-free and eco-friendly solution for reducing hard water effects.

⭐️ 6 Benefits of a Salt Free Water Softener

faucet and water flow

Installing a salt free water softener comes with several advantages. Here are the top reasons why homeowners opt for this plumbing solution.

1. Environmentally Friendly

Salt-free water softening systems are a sustainable choice because they do not release brine (salty wastewater) into the environment. Traditional salt-based softeners discharge this brine during the regeneration process, which can harm aquatic ecosystems and pollute local water sources. Salt-free systems, on the other hand, avoid this entirely, making them a great option for environmentally conscious homeowners. This is especially beneficial in areas with water treatment regulations that limit the use of salt-based systems, ensuring you stay compliant while reducing your environmental footprint.

2. Low Maintenance

With salt-free systems, you can say goodbye to the hassle of lugging around heavy bags of salt or regularly refilling a brine tank. Unlike traditional water softeners that require frequent maintenance, salt-free systems are designed for simplicity. Once installed, these units generally operate smoothly with little to no upkeep. They don’t require regular monitoring or complicated care routines, giving you more time to focus on other tasks. This makes them a convenient, low-effort solution for busy households or those who prefer a hands-off approach.

3. Retains Healthy Minerals

Salt-free water conditioners treat water without removing beneficial minerals like magnesium and calcium. While these minerals are responsible for hard water deposits or scaling, they are also vital for maintaining a healthy diet. Traditional systems strip water of these nutrients, but salt-free options leave them intact while preventing them from forming hard deposits on pipes and appliances. This way, you enjoy the best of both worlds – water that’s gentle on your plumbing and appliances, while still providing essential minerals for your body.

4. Works Without Electricity

Salt-free systems don’t rely on electricity to function, setting them apart from traditional softeners that require power to regenerate. By operating without electricity, these systems not only cut down on energy costs but also ensure uninterrupted functionality during power outages. This can be especially useful in areas prone to blackouts or for those looking to lower their overall energy consumption. The energy-free design also makes salt-free systems a reliable and cost-effective option for anyone wanting a more self-sufficient water treatment solution.

5. Compact and Space-Saving

Salt-free water softeners are designed with modern living in mind. Unlike bulky salt-based systems that often require large tanks and additional components, salt-free systems are compact and easy to install. Their streamlined design allows them to fit into tight spaces like utility closets, under sinks, or small laundry rooms, making them ideal for apartments, condos, and homes with limited storage areas. This compact design not only saves space but also makes these systems more visually appealing and less obtrusive in your home.

6. No Salt Taste or Sodium Added

One of the biggest drawbacks of salt-based systems is the potential for adding sodium to your water, which can alter its taste and may not be suitable for those on low-sodium diets. Salt-free systems solve this problem by conditioning water without adding any sodium. This ensures your drinking water remains pure, neutral in taste, and better for your health. Whether you’re drinking it straight from the tap or using it for cooking, you’ll appreciate water that’s clean, natural, and free of any salty aftertaste.

❗️ Limitations of a Salt Free Water Softener

New water softening unit or tank ready alongside the old one for installation to replace it in a utility room with a portable tool kit in a box on the floor salt free water softener

While salt-free water softeners come with several benefits, they aren’t without their limitations. Understanding these drawbacks can help you decide whether they’re compatible with your needs.

1. Doesn’t Remove Hardness Minerals

Unlike traditional water softeners that remove hardness-causing minerals like calcium and magnesium through an ion exchange process, salt-free systems work differently. They neutralize these minerals instead of eliminating them. This process, known as template-assisted crystallization (TAC), changes the structure of the minerals so they are less likely to form scale. However, the minerals remain in the water, meaning the water isn’t technically “soft.” As a result, you might notice a difference in how the water feels, particularly during cleaning or bathing. For instance, it may not feel as silky or smooth as water treated with a traditional softener.

2. Not Effective for Extreme Hard Water

Salt-free systems are generally effective for conditioning moderately hard water, but they may struggle in situations where water hardness levels are exceptionally high. In cases of extreme hardness, these systems may not be able to prevent significant scaling on pipes, fixtures, or appliances. Traditional salt-based water softeners are better equipped to handle such conditions because they physically remove the hardness minerals from the water. If you live in an area with very hard water, a salt-free system may not provide the level of protection you need, and scaling could still occur over time.

3. No Soap Lather Improvement

One of the most appreciated benefits of traditional water softeners is the improvement in soap lathering. When hardness minerals are removed from the water, soap and detergents can lather and clean more effectively, resulting in softer skin, shinier hair, and cleaner laundry. With salt-free systems, since the hardness minerals are still present, there’s no noticeable improvement in soap performance. You may find that you still need to use the same amount of soap or detergent as you did before installing the system, which might be a drawback if you were hoping for this specific benefit.

4. Initial Costs May Be Higher

Salt-free water softeners often come with a higher upfront price tag compared to traditional salt-based systems. This is primarily due to the advanced technology used for conditioning water without the need for chemicals like salt. While the initial investment can seem steep, it’s important to consider the long-term savings. Salt-free systems require little to no ongoing maintenance, and you won’t need to purchase bags of salt or pay for regular refills. Over time, these savings can help offset the higher upfront costs, making a salt-free system a worthwhile investment for some households.

5. Limited Household Applications

Salt-free water softeners are effective for many general household uses, such as reducing scale buildup in pipes and improving the lifespan of water-using appliances. However, they may not be suitable for all applications. For instance, certain appliances, like dishwashers and washing machines, often require completely softened water to function optimally and avoid residue or spotting. In these cases, a salt-free system might not deliver the desired results. If you rely heavily on appliances that require true softened water, you may need to weigh the benefits and limitations of a salt-free system carefully.

💧 Salt-Free Softener

Choosing the right water softener can make a huge difference in the quality of your water and the efficiency of your home. At Thelen Mechanical, we bring years of expertise and a commitment to customer satisfaction to every project. Our skilled team is here to guide you through the process, ensuring you find the perfect salt-free water softener tailored to your needs.

If you’re ready to upgrade your home’s water system, contact Thelen Mechanical today for expert advice and reliable installation services. Let us help you enjoy the benefits of better water—schedule your consultation now!

What Water Hardness Scale Means for Your Home

Water quality affects nearly every aspect of your home, from the way your appliances function to the quality of your drinking water. One factor that plays a significant role in water quality is the water hardness scale. But what does this scale mean, and how does it impact your home?

Here’s what we’ll cover in this guide:

  • Understanding water hardness and the water hardness scale
  • Six essential steps to take if you notice high water hardness
  • The effects of hard and soft water on your home

🤔 What is Water Hardness and How is it Measured?

TDS measurement of water. Electronic pH meter in a glass of water. In the background there is a tap for drinking water. The concept of testing water for miralization

Water hardness affects the quality of water for drinking, cleaning, and industrial use. Understanding and measuring it ensures better appliance performance, cleaner laundry, and improved water taste.

The Basics of Water Hardness

Water hardness refers to the amount of dissolved minerals, primarily calcium and magnesium, in your water. These minerals are harmless to health but can have significant implications for your home and lifestyle.

Understanding the Water Hardness Scale

The water hardness scale measures how hard or soft your water is, categorized in grains per gallon (GPG) or parts per million (PPM). Here’s a quick breakdown of the scale:

  • Soft Water: 0-3 GPG (or 0-60 PPM)
  • Slightly Hard: 3-7 GPG (or 60-120 PPM)
  • Moderately Hard: 7-10 GPG (or 120-180 PPM)
  • Very Hard: Over 10 GPG (or over 180 PPM)

✅ 6 Steps to Take When You Notice High Water Hardness

water hardness scale

If you suspect your water hardness is on the high side, here’s how to address the problem effectively:

1. Test Your Water Hardness

The first step in dealing with hard water is identifying whether it’s an issue in your home. Test your water’s hardness level using a DIY test kit, which you can easily find online or in hardware stores. These kits can quickly determine the levels of calcium and magnesium in your water. For a more detailed and accurate analysis, consider reaching out to professionals, like our team at Thelen Mechanical, who can provide a comprehensive water quality assessment and tailored recommendations.

2. Identify Problem Areas

Once you’ve confirmed hard water, take a closer look at how it’s affecting your home. Check for limescale buildup in kettles, faucets, showerheads, and other appliances. Limescale looks like white, chalky deposits that accumulate over time. You might also notice soap scum in sinks, bathtubs, or showers. Additionally, hard water can cause dry, irritated skin and hair. Identifying these problem areas will help you understand the extent of the issue and guide you toward the right solution.

3. Consider Installing a Water Softener

Investing in a water softener is one of the most effective ways to tackle hard water problems. A water softener works by removing excess calcium and magnesium from your water supply. Salt-based softeners are common and highly effective, but salt-free alternatives are also available if you prefer a more eco-friendly option. Choose a system that suits your household’s needs, water usage, and budget. If you’re unsure which type of water softener is right for you, consult a professional for expert guidance.

4. Maintain Appliances and Fixtures

Hard water can significantly shorten the lifespan of your appliances and fixtures due to mineral buildup. To prevent this, regularly descale items like coffee makers, kettles, dishwashers, and washing machines. Use commercial limescale removers or natural alternatives like vinegar to clean these items and keep them running efficiently. Incorporating regular maintenance into your routine will not only extend the life of your appliances but also save you money in the long run.

5. Adjust Your Cleaning Routine

Hard water can make cleaning more challenging, but switching to detergents and cleaning products formulated for hard water can help. These products are designed to work effectively in mineral-rich water, reducing soap scum and improving cleaning results. For dishes, consider using rinse aids to prevent water spots and streaks. Updating your cleaning routine to match the challenges of hard water will make your home easier to maintain.

6. Consult Plumbing Experts

If hard water issues persist or you’re considering installing a water treatment system, it’s best to consult a licensed professional. Experienced plumbers, like our team at Thelen Mechanical, can assess your home, recommend the best solutions, and handle installation with precision. Whether you’re looking to install a water softener, a filtration system, or simply need advice, we’re here to provide tailored solutions that meet your specific needs. Don’t hesitate to reach out for expert help.

👉 Effects of Hard and Soft Water on Your Home

Man washing hands in bathroom sink at home checking temperature touching running water with hand. Closeup on fingers under hot water out of a faucet of a sink.

If you have hard water running through your home, you may notice these common impacts:

Limescale Buildup

Hard water can lead to the formation of chalky deposits, known as limescale, in pipes, appliances, and fixtures. Over time, this buildup can restrict water flow, reduce the efficiency of appliances like dishwashers and water heaters, and even shorten their lifespan. Regular maintenance or water softeners may be necessary to combat this issue and protect your plumbing system.

Soap and Detergent Issues

Hard water makes it harder for soap and shampoo to lather properly. This means you often need to use more product to get the desired result, which can be wasteful and costly. Additionally, the minerals in hard water can react with soap, leaving behind a residue known as soap scum. This buildup can stick to your skin, hair, and bathroom surfaces, making cleaning more challenging.

Spotty Dishes and Glassware

If you notice spots or streaks on your dishes and glassware after washing, hard water is likely the culprit. The minerals in hard water, such as calcium and magnesium, leave behind residue as the water dries. This can make your dishes look dirty, even after they’ve been cleaned, which can be frustrating and unsightly.

Dry Skin and Hair

Hard water can strip natural oils from your skin and hair, leaving them feeling dry, itchy, and irritated. Over time, this can result in flaky skin and brittle hair that is difficult to manage. People with sensitive skin or conditions like eczema may find that hard water exacerbates their symptoms, making it important to consider solutions like water softeners or specialized skincare products.

💧 Water Hardness Explained

Understanding the water hardness scale is an important step in protecting your home, appliances, and overall water quality. At Thelen Mechanical, we take the guesswork out of water treatment with expert solutions tailored to your needs. With years of experience and a commitment to top-notch service, our team is the one you can trust for all your plumbing and water treatment needs.

Don’t let hard water cause unnecessary stress—contact Thelen Mechanical today for a free consultation and let us help you achieve cleaner, healthier water for your home.

How Often Should You Change Your Air Filter?

Wondering how often you should change your air filter? You’re not alone. Homeowners everywhere ask this question to keep their homes comfortable, their air clean, and their HVAC systems running efficiently. Changing your air filter isn’t just about avoiding dust buildup; it’s about protecting your health, your wallet, and the lifespan of your HVAC system. This guide will help you understand:

  • What factors influence how often to change air filter
  • Signs it’s time to replace your air filter
  • Best practices for maintaining your air filters

🔎 Factors That Determine How Often to Change Your Air Filter

HVAC service technician changing dirty indoor air filter in residential heating and air conditioning system. Home air duct ventilation system maintenance for clean air.

How often you need to replace your air filter depends on several factors, including the type of filter, the number of people in your home, and whether you have pets. Fiberglass filters, which are low-cost, should be replaced every 30 days, while pleated filters can last 60-90 days. High-efficiency filters, designed for advanced filtration, can often last up to six months, but it’s always best to check the manufacturer’s recommendation. Homes with larger families or pets will require more frequent changes, as filters can quickly become clogged with dust, pet hair, and dander. If you or someone in your household suffers from allergies or respiratory issues, replacing filters every 30 days and using high-quality options can help reduce allergens and improve air quality.

Risks of Neglecting Air Filter Replacement

If you forget to change your air filter regularly, you’re not just risking your HVAC system’s performance. Neglect has wider implications:

  • Higher Energy Bills: A clogged filter forces your HVAC system to work harder, increasing energy consumption.
  • Reduced Lifespan of Your HVAC System: Overworking your system due to restricted airflow can lead to wear and tear, shortening its lifespan.
  • Poor Air Quality: Dust, allergens, and pollutants circulating in the air can affect your family’s health.
  • Costly Repairs: Blocked filters can cause HVAC system malfunctions that are expensive to fix.

⚠️ Signs It’s Time to Replace Your Air Filter

Adult Male Removing Air Filter from a Home Furnace Ceiling Vent

Not sure when to replace your filter? Keep an eye out for these warning signs:

1. Your Energy Bills Are Climbing

If you’ve noticed your energy bills increasing unexpectedly, it might not just be due to seasonal changes or rate hikes. One of the culprits could be a clogged air filter. When your air filter becomes packed with dust, dirt, and debris, it blocks the airflow in your HVAC system. This forces the system to work much harder to push air through the obstruction, consuming far more energy than it typically would. This inefficiency directly translates into higher energy costs, which can quickly add up over time. Additionally, this extra strain on your system can lead to wear and tear on the components, potentially shortening the lifespan of your HVAC unit. To avoid this, it’s crucial to replace your air filter regularly. Not only will this keep your system running smoothly and efficiently, but it will also save you money in the long run by reducing your utility bills and the need for costly repairs.

2. Dust Is Accumulating Quickly

Are you constantly wiping dust off your furniture, only to see it piling up again a day or two later? This could be a sign that your air filter isn’t doing its job effectively. When an air filter becomes too dirty or clogged, it can no longer trap dust, dirt, and other airborne particles efficiently. As a result, these particles circulate freely through your home, settling on surfaces and affecting your indoor air quality. Over time, this can lead to a buildup of allergens and irritants in the air, which can trigger allergies or respiratory problems for you and your family. Regularly replacing your air filter is a simple yet effective way to combat this issue. A clean filter will trap more dust and debris, reducing the amount that settles in your home and creating a fresher, healthier living environment. Plus, less dust cleaning means more time for the things you truly enjoy.

3. Your HVAC System Runs Constantly

If you’ve noticed that your HVAC system seems to be running non-stop, it’s worth checking your air filter. A clogged filter restricts airflow, making it harder for your heating or cooling system to maintain the temperature you’ve set on your thermostat. This means your system has to work overtime, running for longer periods and more frequently than it should. Not only does this lead to higher energy bills, but it also places unnecessary stress on your HVAC unit. Over time, this constant strain can cause components to wear out faster, leading to breakdowns and expensive repairs. In some cases, it may even shorten the overall lifespan of your system, forcing you to invest in a replacement sooner than expected. By changing your air filter regularly, you can ensure consistent airflow, reduce the workload on your HVAC system, and avoid unnecessary wear and tear. This simple maintenance step can save you money and keep your system functioning efficiently for years to come.

4. You Notice a Drop in Cooling or Heating Efficiency

Does your home feel too warm in the summer or too chilly in the winter, even though your thermostat is set correctly? If so, a clogged air filter might be the problem. When the filter is dirty, it restricts airflow, making it harder for your HVAC system to disperse cool or warm air evenly throughout your home. This can result in uneven temperatures, where some rooms feel comfortable while others remain too hot or cold. Not only is this frustrating, but it also forces your HVAC system to work harder to try and maintain the desired temperature, increasing energy usage and utility costs in the process. Replacing the air filter can restore proper airflow, allowing your system to distribute air more effectively and maintain consistent comfort throughout your home. It’s a simple fix that can make a big difference in both your comfort and your system’s efficiency.

5. The Filter Is Visibly Dirty

Sometimes, you don’t need to rely on signs like high energy bills or uneven temperatures to know it’s time to replace your air filter. A quick visual inspection can tell you all you need to know. If your filter looks gray, dusty, or clogged with debris, it’s a clear indication that it’s overdue for a replacement. A dirty air filter not only reduces airflow and makes your HVAC system work harder, but it also allows more dust, allergens, and pollutants to circulate through your home. This can lead to poor indoor air quality, which may cause allergies, respiratory issues, or general discomfort for your household. Checking your air filter once a month is a good habit to develop, especially during peak heating or cooling seasons when your system is working harder. By replacing the filter as soon as it starts to look dirty, you can ensure better air quality, lower energy bills, and a longer lifespan for your HVAC system. A clean filter is a small investment that pays off in big ways.

👉 Best Practices for Maintaining Air Filters

Home owner putting new air filter on air conditioner

To ensure optimal HVAC performance and clean indoor air:

Set Reminders

Staying on top of filter replacement can be tough, but setting reminders makes it easier. Use calendar apps, phone alerts, or even smart home devices to notify you when it’s time to check or replace your filter. Regular reminders ensure you never forget, keeping your system running efficiently.

Buy Filters in Bulk

Running out of filters when it’s time for replacement can be frustrating. Buying filters in bulk not only saves you time but often saves you money too. Having extras on hand means you’re always prepared, especially during seasons when your HVAC system works harder, like summer or winter.

Inspect Monthly

Even if your filter doesn’t need to be replaced every month, it’s a good habit to inspect it regularly. Check for dirt buildup, discoloration, or any signs that the filter is nearing the end of its lifespan. A quick inspection can help you catch potential issues early and ensure optimal air quality in your home.

Invest in High-Quality Filters

It might be tempting to opt for cheaper filters, but high-quality filters are worth the investment. They trap smaller particles, improving air quality and protecting your HVAC system from dust and debris. Plus, they often last longer, reducing the frequency of replacements and saving you money in the long run.

Schedule Regular HVAC Maintenance

Don’t overlook professional HVAC tune-ups. Regular maintenance by a qualified technician ensures your system is running smoothly and efficiently. During these check-ups, potential problems are identified early, preventing costly repairs or breakdowns later on. It’s a proactive step towards extending your HVAC system’s lifespan.

🛠️ Air Filter Maintenance

Keeping your air filter clean is essential for maintaining a healthy home and an efficient HVAC system. At Thelen Plumbing, Heating, and Air, we’re committed to making HVAC care simple and stress-free. With our certified technicians, personalized service, and convenient maintenance solutions, you can trust us to keep your system running smoothly all year long.

Ready to enjoy cleaner air and a more reliable HVAC system? Contact us today or sign up for one of our maintenance plans to get started!

HVAC Inspection: Why It’s Crucial for Your System’s Efficiency

Your HVAC (Heating, Ventilation, and Air Conditioning) system is the backbone of home comfort. Whether it’s the heat of summer or the chill of winter, a well-functioning system keeps your home pleasant year-round. But what ensures your system keeps running smoothly? The answer lies in a regular HVAC inspection.

This blog highlights the importance of HVAC inspections for homeowners by covering the following topics:

  • Why regular HVAC inspections matter
  • The steps involved in an HVAC inspection
  • How inspections save you money in the long run

🤔 Why Regular HVAC Inspections Matter

Electrician leak checking hvac system

Think of your HVAC system like a car. Would you drive year after year without changing the oil or inspecting the engine? Of course not. Skipping regular HVAC inspections can lead to inefficiency, costly repairs, and even premature system failure. Just like routine car maintenance, regular HVAC check-ups ensure everything is running smoothly and efficiently.

Regular inspections offer several key benefits. They improve energy efficiency by catching small issues, like dirty filters or clogged airflow, before they turn into major problems. Addressing minor fixes early prevents expensive breakdowns and extends your system’s lifespan. Inspections also enhance air quality by identifying issues like mold, dust, or clogged filters that impact your home’s indoor environment.

Common HVAC Issues Inspections Can Uncover

HVAC systems are complex, and without maintenance, they can develop problems that compromise their efficiency. Professional inspections can uncover these common issues:

  • Clogged Air Filters: Dirty filters reduce airflow, lower efficiency, and harm air quality.
  • Refrigerant Leaks: Leaks decrease cooling performance and strain the system.
  • Faulty Thermostat: Malfunctioning thermostats lead to uneven heating or cooling.
  • Dirty Coils: Dirt on coils hinders heat transfer, raising energy costs.
  • Electrical Issues: Damaged wiring can disrupt performance and pose safety risks.

✅ 5 Key Steps to an HVAC Inspection

Two workers in uniform, air conditioning masters using ladder while installing a new air conditioner in the apartment. Construction, maintenance and repair concept

A typical HVAC inspection is thorough, ensuring your system is working efficiently. While every professional might have their unique checklist, these five steps are standard in most inspections:

1. Inspect and Replace Filters

The first and most essential step in maintaining your HVAC system is inspecting and replacing the filters. Your HVAC technician will examine the filters to determine their condition. Filters play a critical role in ensuring proper airflow and maintaining your system’s efficiency. Over time, these filters can become clogged with dust, dirt, and other airborne particles, obstructing airflow and causing your system to work harder than necessary. This not only leads to higher energy consumption but can also reduce the lifespan of your HVAC system.

Dirty filters also have a direct impact on indoor air quality, as they can circulate allergens, dust, and even bacteria throughout your home. For households with pets, smokers, or individuals with allergies, clean filters are even more crucial. Replacing a dirty or worn-out filter helps restore optimal airflow, improves the efficiency of your system, and ensures cleaner, healthier air for your family to breathe. For maximum performance, most filters should be replaced at least every 1-3 months, depending on usage and environmental factors.

2. Check Refrigerant Levels

Refrigerant is the lifeblood of your HVAC system’s cooling function, and ensuring it is at the correct level is essential for efficient operation. During this step, your technician will measure the refrigerant levels in your system to ensure they are within the manufacturer’s recommended range. Low refrigerant levels can significantly reduce your system’s cooling capacity, making it harder to maintain comfortable indoor temperatures, especially during the hottest months.

Low refrigerant may also be a sign of a larger problem, such as a leak in the system. If a leak is suspected, the technician will locate the source and repair it before recharging the system. Ignoring refrigerant issues can lead to more severe damage over time, including frozen coils, compressor failure, or complete system breakdown. Once the refrigerant is properly refilled to the appropriate level, your HVAC system will operate more efficiently, saving energy and ensuring your home remains cool and comfortable during warm weather.

3. Test Thermostat Settings

Your thermostat serves as the control center for your HVAC system, and its accuracy is key to maintaining consistent and efficient temperature control in your home. If the thermostat is improperly calibrated, it can lead to uneven heating or cooling, increased energy bills, and discomfort. During this step, the technician will test the thermostat settings to ensure it’s providing accurate temperature readings and controlling the system as intended.

If any issues are found, the technician may recalibrate the thermostat to improve its accuracy or suggest upgrading to a more advanced model, such as a programmable or smart thermostat. Programmable thermostats allow you to set temperature schedules based on your daily routine, while smart thermostats can be controlled remotely via smartphone apps and adapt to your usage patterns over time. These updates can significantly enhance your HVAC system’s efficiency and provide you with greater control over your home’s comfort.

4. Inspect Electrical Components

Electrical components are a critical part of your HVAC system, and any issues with these components can compromise both safety and performance. The technician will conduct a thorough inspection of all electrical elements, including wiring, circuit breakers, relays, capacitors, and contactors, to ensure everything is in good working order. Loose connections, worn-out components, or damaged wires can lead to system malfunctions, reduced efficiency, or even pose fire hazards.

Identifying and addressing electrical issues early can prevent costly repairs and ensure your system operates reliably. For example, a failing capacitor may cause the system to struggle during startup, while faulty wiring can lead to short circuits or intermittent operation. By carefully inspecting and repairing these components, your technician ensures your HVAC system remains safe and operates at peak performance, giving you peace of mind.

5. Clean and Inspect Coils

The coils in your HVAC system, including the evaporator and condenser coils, are responsible for the heat exchange process that cools or heats your home. Over time, these coils can accumulate dirt, dust, and debris, particularly if the surrounding area isn’t kept clean. When dirt builds up on the coils, it acts as insulation and reduces their ability to transfer heat effectively. This forces your system to work harder, increasing energy usage and putting unnecessary strain on components.

During this step, the technician will thoroughly clean both the evaporator and condenser coils to remove all debris and buildup. This is a meticulous process, as damaged coils can impact performance. Clean coils not only improve energy efficiency but also help extend the lifespan of your HVAC system by preventing overheating or overworking. This step is particularly important as it ensures your HVAC can maintain a comfortable indoor environment while keeping operating costs low. Regular coil cleaning can result in lower energy bills and fewer maintenance issues over the life of your system.

👉 How Regular HVAC Inspections Save You Money

Air Conditioning Technician and A part of preparing to install new air conditioner.

It might feel counterintuitive to spend money on inspections when your system seems to be working fine. However, in the long run, routine HVAC checks actually save you money. Here’s how:

Lower Energy Costs

Keeping your HVAC system well-maintained ensures it operates at peak efficiency, using less energy to keep your home comfortable. This not only reduces your utility bills but also lessens your environmental impact. An efficient system means you can enjoy consistent temperatures throughout your home without worrying about energy waste.

Fewer Emergency Repairs

Unexpected repairs can be both inconvenient and expensive, especially during extreme weather conditions like the heat of summer or the chill of winter. Routine maintenance allows professionals to identify and fix small issues before they escalate into major problems. This proactive approach saves you from costly emergency repairs and ensures your system is ready when you need it most.

Protection Against Premature Replacement

Replacing an HVAC system is a significant investment, and you want to get the most out of your current system. Regular maintenance extends the lifespan of your HVAC unit by keeping it in good working condition. By addressing wear and tear early, you can avoid the need for a premature replacement and maximize the value of your initial investment.

Added Value for Home Resale

When it comes time to sell your home, a well-maintained and efficient HVAC system can be a key selling point. Potential buyers will appreciate a system that’s in good condition, as it means fewer expenses and headaches for them. Having a documented history of regular maintenance can also increase your home’s resale value and give buyers confidence in their investment.

🔎 HVAC Inspection

At Thelen Plumbing, Heating, and Air, we understand that your HVAC system is more than just a piece of equipment—it’s what keeps your home comfortable and your family safe year-round. With experienced technicians, comprehensive services, and a commitment to customer satisfaction, we go above and beyond to ensure your system runs smoothly.

Whether it’s a routine inspection or an urgent repair, you can trust our team to deliver reliable, top-quality service every time. Don’t wait for a breakdown—schedule your HVAC inspection today and experience the difference with Thelen Plumbing, Heating, and Air. Your comfort is our priority!

FPR vs MERV: Which Air Filter Rating is Right for Your Home?

When it comes to keeping the air in your home clean and healthy, choosing the right air filter is crucial. Two of the most common rating systems for air filters are FPR (Filter Performance Rating) and MERV (Minimum Efficiency Reporting Value). If you’re a homeowner trying to understand which rating system suits your needs, you’re in the right place. What you’ll learn in this blog:

  • What FPR vs MERV are and how they work
  • The key differences between FPR and MERV (in a helpful numbered list)
  • How to choose the best option for your home’s air quality needs

🤔 What Are FPR and MERV?

Man replacing dirty HVAC air filter in ceiling vent. Home air duct system maintenance for clean air.

Before we compare FPR and MERV, you need to understand what these systems are.

What is FPR?

FPR, or Filter Performance Rating, is a system developed by The Home Depot to simplify air filter selection for homeowners. FPR ratings range from 1 to 10 and are grouped into these categories:

  • Green (4–5): Captures dust and pollen.
  • Red (6–7): Traps mold spores and pet dander.
  • Purple (8–10): Removes ultra-fine particles like bacteria and smoke.
  • Simplifies filter choices for shoppers.

What is MERV?

MERV, or Minimum Efficiency Reporting Value, is a universal rating by ASHRAE that measures filter performance. MERV ratings range as follows:

  • 1–4: Filters large dust and lint particles.
  • 5–8: Captures pet dander and mold spores.
  • 9–12: Traps smaller allergens and particles.
  • 13–16: Removes bacteria, viruses, and smoke with hospital-grade filtration.

⚖️ 5 Key Differences Between FPR and MERV

HVAC service technician changing dirty air filter in the central ventilation system

If you’re debating FPR vs MERV, here are the main distinctions to keep in mind:

1. Rating Scale

The FPR (Filter Performance Rating) system uses a scale ranging from 1 to 10 to measure the efficiency and performance of air filters. To make it easier for consumers to understand, this scale is further divided into color-coded categories, such as green, red, and purple, allowing for quick and intuitive navigation when selecting a filter. On the other hand, the MERV (Minimum Efficiency Reporting Value) system offers a more detailed measurement, with a scale ranging from 1 to 16. This higher range provides a finer breakdown of filter efficiency, offering a clearer understanding of performance differences.

2. Specificity

When it comes to precision, the FPR system is slightly less detailed compared to MERV. The FPR system is exclusive to filters sold at The Home Depot, meaning it is tailored specifically to the products available in their stores. In contrast, the MERV system is universally recognized and provides more specific performance levels. This makes MERV a more comprehensive standard for comparing air filters across different manufacturers and stores.

3. Particle Removal

Both FPR and MERV assess a filter’s ability to capture airborne particles such as dust, pollen, mold, and bacteria. However, the MERV system is considerably more granular in its approach. It offers better clarity and detail regarding the exact particle sizes a filter can capture. This can be particularly useful for individuals who need a deeper understanding of a filter’s performance, especially in environments where air quality is a critical concern.

4. Availability

In terms of availability, FPR filters are primarily limited to The Home Depot, as they are exclusive to that retailer. This makes FPR filters a convenient option for shoppers who prefer to purchase their filters in-store at Home Depot locations. In contrast, MERV filters are widely available across various stores and manufacturers. This broader availability makes MERV filters a more versatile choice for consumers looking for options beyond a single retailer.

5. Best Use Cases

The FPR system is designed to cater to casual shoppers who want a simple and straightforward way to choose an air filter during their in-store visits. It provides general guidance and is ideal for those who may not need detailed technical comparisons. On the other hand, the MERV system is better suited for individuals who require precise technical comparisons of filter performance. Its universal recognition and broader availability make it a preferred choice for those seeking more specific information and greater flexibility in purchasing options.

🔎 How to Choose the Right Filter for Your Home

Replacing the filter in the central ventilation system. Replacing Dirty Air filter for home central air conditioning system. Change filter in rotary heat exchanger recuperator.

Now that you know the key differences, here’s how to make your decision:

1. Consider Air Quality Needs

When choosing an air filter, it’s important to evaluate the specific air quality needs of your household. If you or your family members suffer from allergies, asthma, or other sensitivities, selecting the right filter can make a significant difference. Filters rated MERV 9 or higher are specifically designed to capture smaller particles like dust, pollen, and even some bacteria, helping to improve indoor air quality dramatically in these situations. Taking the time to assess your needs ensures a healthier and more comfortable living environment for everyone in your home.

2. Review HVAC System Specifications

Before upgrading to a higher-rated filter, always check the specifications of your HVAC system. Your system’s user manual will usually provide guidance on the types of filters it supports. Some HVAC units may not be compatible with higher-rated MERV filters due to their ability to restrict airflow. Using an incompatible filter can lead to reduced system efficiency, higher energy costs, and even potential damage to the unit. By reviewing the system’s requirements, you can avoid costly repairs and ensure optimal performance.

3. Think About Maintenance and Cost

High-performance filters, whether rated with FPR or MERV, often come with a higher price tag and require more frequent replacement. While they provide better filtration, this can lead to additional ongoing maintenance costs. It’s essential to factor this into your budget to avoid unexpected expenses later. Planning for regular filter replacements will not only help you maintain good air quality but also ensure that your HVAC system runs efficiently over time.

4. Where Are You Shopping?

The type of filter available to you may depend on where you shop. For instance, if you’re purchasing from Home Depot, you’ll likely encounter FPR-rated filters, which are straightforward and easy to understand. However, MERV-rated filters are more universal and may be a better choice if you’re shopping elsewhere or need a broader selection. Choosing the right filter also depends on your system’s compatibility, so be sure to consider where you’re buying and what options are available to you.

5. Get Expert Advice

If you’re still unsure which air filter is best for your home, seeking guidance from an HVAC professional can save you time and stress. Experts like our team at Thelen Plumbing, Heating, and Air specialize in assessing individual setups and making tailored recommendations. They’ll consider factors such as your HVAC system, specific air quality needs, and maintenance preferences to help you make the most informed decision. Getting expert advice ensures you choose the right filter for your home while maximizing performance and efficiency.

🏡 Air Filter Ratings

Choosing the right air filtration system can feel overwhelming, but at Thelen Plumbing, Heating, and Air, we’re here to make it simple. Whether you’re deciding between FPR and MERV ratings or need expert advice on improving your home’s air quality, our experienced team is ready to help.

With a commitment to reliable service, personalized solutions, and your complete satisfaction, you can trust us to keep your home comfortable and your air clean. Contact us today to schedule a consultation and take the first step toward better air quality for your home!

Emergency AC Repair: What to Do When Your AC Breaks Down?

Nothing disrupts a summer day faster than an AC system deciding to call it quits. Whether you’re dealing with skyrocketing temperatures or an unexpected mechanical issue, knowing how to handle an air conditioning breakdown is vital for your comfort and peace of mind.

This guide will walk you through the steps you should take in the event of an air conditioner breakdown and provide tips for staying cool while waiting for an emergency AC repair. Here’s what you’ll learn:

  • Signs your air conditioner might need an immediate repair
  • Steps to take when your AC stops working (including a detailed checklist)
  • Why choosing a reliable HVAC contractor makes all the difference

🔎 How to Know if Your Air Conditioner Needs Emergency Repair

emergency ac repair

Air conditioners don’t always stop working without warning. Often, they leave clues that something isn’t quite right. Spotting these signs early can help prevent a full-on breakdown and potentially save you from costly repairs.

  • Warm air instead of cold: Your AC blowing warm air could mean a refrigerant leak or compressor failure.
  • Weak or no airflow: Blockages, frozen coils, or a failing blower motor may be the cause.
  • Unusual noises: Banging, hissing, or grinding sounds signal loose parts, leaks, or failing components.
  • Strange odors: Burning smells indicate electrical issues, while musty odors suggest mold in ducts.
  • Frequent cycling: Frequent on-and-off cycles can point to thermostat problems or trouble maintaining temperature.

✅ 6 Steps to Take When Your AC Stops Working

Air conditioner check service, leak detection, fill refrigerant, device meter liquid cooling

When your air conditioner unexpectedly stops working, don’t panic. Follow these simple steps to troubleshoot the issue and prepare for a repair technician’s visit.

1. Check Your Thermostat Settings

Start by examining your thermostat to ensure it’s set to the correct mode and temperature. Make sure the thermostat is set to “Cool” mode rather than “Heat” or “Off,” and check that the temperature is set lower than the current room temperature. For example, if your room is 75°F, the thermostat should be set to at least 74°F or lower. A simple mistake like this can sometimes be the reason your AC isn’t turning on. If your thermostat remains unresponsive, the issue may lie in the batteries. Thermostats powered by batteries often stop working properly when the batteries die. Replace the old batteries with fresh ones and recheck the system. If the AC starts functioning after the battery replacement, you’ve solved the issue without further hassle. For smart thermostats, ensure the device is connected to Wi-Fi and functioning correctly.

2. Inspect the Air Filter

Air filters play a crucial role in your AC system by trapping dust, debris, and other particles from circulating through your home. However, if the filter becomes too dirty or clogged, it can restrict airflow and reduce your AC’s performance—or even cause it to stop working altogether. Locate the air filter, which is often found near the return air duct or within the air handler. Remove it and inspect its condition. If it’s covered in dust or debris, it’s time to replace it. Air filters should typically be changed every 1–3 months, depending on the manufacturer’s recommendations and your system’s usage. Regular filter changes not only ensure optimal airflow but also improve the overall efficiency and lifespan of your AC system. Additionally, a clean filter enhances indoor air quality by preventing the circulation of allergens and pollutants.

3. Look for Power Issues

If your AC isn’t turning on at all, the problem could be related to power. Start by checking the circuit breaker panel in your home. A tripped breaker can interrupt the power supply to your AC unit. Look for the breaker labeled “AC” or “HVAC System” and see if it’s in the “Off” position. If it is, reset it by flipping it back to “On.” Be cautious, however—if the breaker trips repeatedly, it could indicate a deeper electrical issue that requires professional attention. Next, check the power switch near the outdoor condenser unit. Sometimes, this switch can accidentally be turned off during maintenance or yard work. Ensure it’s in the “On” position. Finally, inspect the AC’s power cord and outlet, especially for window units. Make sure the cord is securely plugged in and that the outlet is providing power. If you suspect a power supply problem, it may be worth testing the outlet with another device.

4. Examine the Outdoor Unit

Your outdoor condenser unit is critical to your AC’s functionality, as it releases the heat absorbed from inside your home. If the outdoor unit is obstructed or damaged, your AC may struggle to cool effectively. Begin by visually inspecting the unit. Remove any debris such as leaves, tall grass, sticks, or dirt that may have accumulated around it. These obstructions can block airflow and reduce the unit’s efficiency. Make sure there’s at least 2–3 feet of clear space around the unit for proper airflow. Additionally, check the condenser fins for any visible damage or bending. Bent fins can restrict airflow and should be straightened using a fin comb. Look for signs of refrigerant leaks, such as oily residue or hissing noises, as these issues require immediate professional attention. Keeping the outdoor unit clean and free of debris will help maintain optimal performance.

5. Stay Cool While You Wait

If your AC is still not functioning and you’re waiting for a technician to arrive, there are several ways to stay comfortable in the meantime. First, reduce the heat entering your home by closing curtains, blinds, or shades on windows that receive direct sunlight. This can help lower indoor temperatures. Use ceiling fans or portable fans to circulate the air, creating a cooling effect. Position fans near windows during the evening to draw in cooler air and push out warmer air. Stay hydrated by drinking plenty of water and avoiding dehydrating beverages like caffeine or alcohol. Wear lightweight, breathable clothing made of natural fabrics like cotton to stay comfortable. If the heat becomes too overwhelming, consider visiting a public space like a library, mall, or community center with air conditioning until your system is repaired.

6. Call for Emergency AC Repair

If all troubleshooting steps fail, it’s time to contact a professional AC repair service. When calling for emergency assistance, be prepared to provide as much detail as possible about the issue. Describe what you’ve already tried, any unusual noises or smells the unit has produced, and its recent performance. For example, mention if the AC was blowing warm air before it stopped working or if it shut down abruptly. This information helps technicians diagnose the problem faster and ensures they arrive prepared with the necessary tools and replacement parts. While waiting for the technician, avoid attempting advanced repairs yourself, as this can lead to damage or safety risks. A professional will quickly identify the issue, whether it’s a refrigerant leak, electrical problem, or mechanical failure, and get your system back up and running efficiently.

👨‍🔧 Why Choosing the Right HVAC Contractor Is Crucial

HVAC technician working on controls of air conditioner

Hiring the right professionals for your emergency AC repair is essential. Not all HVAC contractors offer the expertise, quick response times, and reliability you need during an urgent situation.

At Thelen Plumbing, Heating, and Air, we pride ourselves on providing top-notch service when you need it most. Here’s why hundreds of homeowners trust us for their AC repair needs:

24/7 Emergency Service

We’re here for you anytime—day or night—because we know air conditioning problems don’t wait for business hours. Whether it’s a sweltering summer evening or early morning, our team is ready to provide fast, reliable emergency service whenever you need it.

Certified Technicians

Our team consists of highly trained, certified technicians who can handle any air conditioner make or model. With years of experience and ongoing training, you can trust that your AC system is in expert hands, ensuring repairs and maintenance are done right the first time.

Transparent Pricing

Say goodbye to hidden fees and unexpected charges. We believe in complete transparency, offering upfront pricing so you know exactly what to expect. With us, there are no surprises—just honest, straightforward service.

Community-Focused Values

As a locally owned and operated business, we’re proud to serve our neighbors. We are deeply invested in the comfort and satisfaction of our community, and we strive to build lasting relationships by delivering exceptional service and care every time.

❄️ Emergency AC Solutions

At Thelen Plumbing, Heating, and Air, we understand how stressful an AC breakdown can be, especially during the peak of summer. That’s why our team is committed to providing fast, reliable, and professional service when you need it most. With years of experience, 24/7 availability, and a dedication to keeping your home comfortable, you can trust us to handle all your HVAC needs with care and expertise.

Don’t let a broken air conditioner disrupt your day—call Thelen Plumbing, Heating, and Air today for emergency repairs or to schedule preventative maintenance. Let us help you stay cool and stress-free!

How to Clean AC Drain Line? (A Step-by-Step Guide)

Your air conditioning (AC) system works hard to keep your home comfortable, but over time, its drain line can clog with debris, mold, or algae. This may lead to water leaks, reduced efficiency, or even system failure if left untreated. The good news is that cleaning your AC drain line is a straightforward task, and doing it yourself could save you a call to your HVAC technician.

This guide will walk you through everything you need to know how to clean AC drain line effectively. Here’s what we’ll cover:

  • What is an AC drain line, and why does it need cleaning?
  • Step-by-step guide to cleaning your AC drain line
  • Preventive measures to keep your drain line clear

🤔 What is an AC Drain Line, and Why Does It Need Cleaning?

Selective focus on a residential house basement floor drain with furnace and water softener drain lines

Your AC drain line, also known as the condensate drain line, removes excess moisture produced by your air conditioner. When the AC cools your home, it also eliminates humidity from the air, directing the collected water through the drain line and out of your home.

Over time, the drain line can become clogged with dirt, mold, algae, and even insects. These clogs can cause water leaks around your unit, bad odors from stagnant water, poor system performance, and higher utility bills as your AC works harder to compensate.

Signs That Your AC Drain Line is Clogged

  • Water puddles near your indoor AC unit
  • Your AC keeps shutting off unexpectedly
  • Noticeable musty or damp odors
  • Higher-than-normal humidity inside your home
  • Your AC system fails to cool effectively

✅ 6 Steps to Cleaning Your AC Drain Line

Water dripping from the drain pipe of the outdoor unit of the air conditioner,

Cleaning your AC drain line might sound intimidating, but it’s surprisingly manageable. Just follow these steps:

1. Turn off your AC unit

The first and most critical step in maintaining your AC system is ensuring your safety. Before doing any work on your air conditioning unit, turn off the power to avoid the risk of electrical accidents. You can switch off the power at the thermostat by setting it to “off” or go directly to your home’s breaker box to cut off electricity to the unit entirely. This precaution is essential because even seemingly minor electrical currents can cause injury. Additionally, working on your system while it’s still powered on carries the risk of damaging the components. Taking this step ensures a safe environment for you to carry out the maintenance work.

2. Locate the drain line

Once the power is off, the next step is to locate the AC drain line. This is a small but essential part of your air conditioning system, as it removes condensation generated during the cooling process. Typically, the drain line is a PVC pipe situated near the indoor air handler unit. The air handler is often found in places like the basement, attic, utility room, or even a dedicated closet. Look for a T-shaped vent or an access cap along the pipe—this is the point where you’ll perform the cleaning. If you’re unsure where to find the drain line, consult your AC system’s user manual or contact a professional for guidance.

3. Unclog the line manually

After locating the drain line, you’ll need to remove any clogs manually. Take off the cap from the access point at the vent on the pipe. Using a flexible brush, pipe cleaner, or plumbing snake, gently insert the tool into the pipe to dislodge any debris, mold, or other blockages that may be causing the line to back up. It’s important to apply only light pressure when doing this to avoid accidentally damaging the pipe, which could result in the need for costly repairs. Gently work the tool through the pipe until you feel resistance ease, indicating the debris has been loosened.

4. Vacuum out the clog

Once the blockage has been loosened, it’s time to remove it entirely using a wet/dry vacuum. Position the vacuum at the end of the drain line outside your home, where the pipe usually terminates. To create a good seal and ensure strong suction, use duct tape, a cloth, or your hand to secure the connection. Turn on the vacuum and let it run for one to two minutes to extract any remaining debris. You may notice water, dirt, or sludge being sucked into the vacuum—this is a sign that the clog is being cleared successfully. Repeat the process if necessary to ensure the line is completely clean.

5. Flush the line with vinegar

With the bulk of the clog removed, it’s time to clean and disinfect the drain line to prevent future blockages. Mix one cup of distilled white vinegar with warm water to create a simple yet effective cleaning solution. If you prefer, you can use a commercial AC drip pan cleaner designed for this purpose. Using a funnel or small cup, carefully pour the solution into the access point of the drain line. Allow it to sit for about 30 minutes to break down any remaining debris, mold, or algae inside the pipe. This step not only clears out residue but also helps prevent the growth of bacteria and mold that could lead to odors or further clogs.

6. Check for proper drainage

The final step is to ensure that the drain line is functioning as it should. Pour a cup of clean water into the access point and observe whether it flows freely through the pipe. Then, go outside and check that water is exiting from the drain pipe’s outdoor end. If you see a steady stream of water, your cleaning efforts have been successful! If you still notice issues, additional cleaning may be needed, or there might be a more significant problem requiring professional attention. Regularly checking for and addressing clogs in your AC drain line ensures your system operates efficiently and helps prevent costly repairs down the line.

🛠️ Preventive Measures to Keep Your Drain Line Clear

Modern HVAC air conditioner unit on concrete slab outside of house.

Regular maintenance can help prevent clogs in the future. Here’s what you can do:

Flush the Drain Line Routinely

Keep your AC drain line clear by flushing it with distilled white vinegar or a suitable cleaner every three months. This simple step helps prevent clogs caused by mold, algae, and debris buildup, ensuring your air conditioning system runs smoothly. Regular cleaning can also reduce the risk of water overflow and potential damage to your home.

Install an AC Condensate Trap

An AC condensate trap is a critical addition to your system. It prevents insects, dirt, and debris from entering the drain pipe, which can lead to blockages or even damage to your system. Installing a trap can also improve the efficiency of your AC by maintaining proper airflow and drainage.

Check the Line During Seasonal Maintenance

Seasonal maintenance is an essential part of keeping your HVAC system in top condition. Each spring and fall, take time to inspect the AC drain line for clogs, leaks, or signs of wear. Early detection of issues can save you from costly repairs and ensure your system is ready for the changing seasons.

Schedule Annual Professional Maintenance

While regular DIY maintenance is important, scheduling a professional tune-up once a year is crucial. HVAC technicians can thoroughly inspect your system, clean the drain line, and address any hidden issues. This annual check ensures that all components, including the drain line, are working efficiently and effectively, extending the lifespan of your AC system.

⭐️ Clean AC Drain

Keeping your AC drain line clean is essential for maintaining the efficiency and longevity of your system, but sometimes the job requires professional expertise. That’s where our team at Thelen Plumbing, Heating, and Air comes in. With years of experience, top-notch service, and a commitment to customer satisfaction, we’re the trusted partner you can rely on for all your HVAC needs.

Whether it’s routine maintenance, repairs, or expert advice, we’re here to ensure your home stays comfortable year-round. Don’t let AC issues disrupt your comfort—call us today or book an appointment online for fast, reliable service you can count on!

Schedule Service

"*" indicates required fields

This field is for validation purposes and should be left unchanged.