
11 Main Water Softener Parts Everyone Should Know

Water softeners are a critical component in maintaining the quality and longevity of your plumbing system and appliances. For homeowners, understanding the essential parts of a water softener can lead to better maintenance and more informed decisions when selecting or repairing units. But where do you start? In this guide, we’ll explore the key water softener parts that you should know about, ensuring you’re equipped with the knowledge to keep your system running smoothly. Here’s what you can expect to learn:

  • Brine Tank
  • Resin Tank
  • Control Valve
  • Salt Bridge
  • Resin Beads
  • Brine Solution
  • Bypass Valve
  • Brine Injector
  • Float Valve
  • Drain Line
  • Water Meter

💡 11 Parts of a Water Softener You Should Know

water softener parts-utility room with water heater, washing machine, and water softener

Understanding the 11 parts of a water softener is crucial for effective maintenance and troubleshooting. Familiarity with these components can help ensure optimal performance and longevity of the system, ultimately improving water quality in your home.
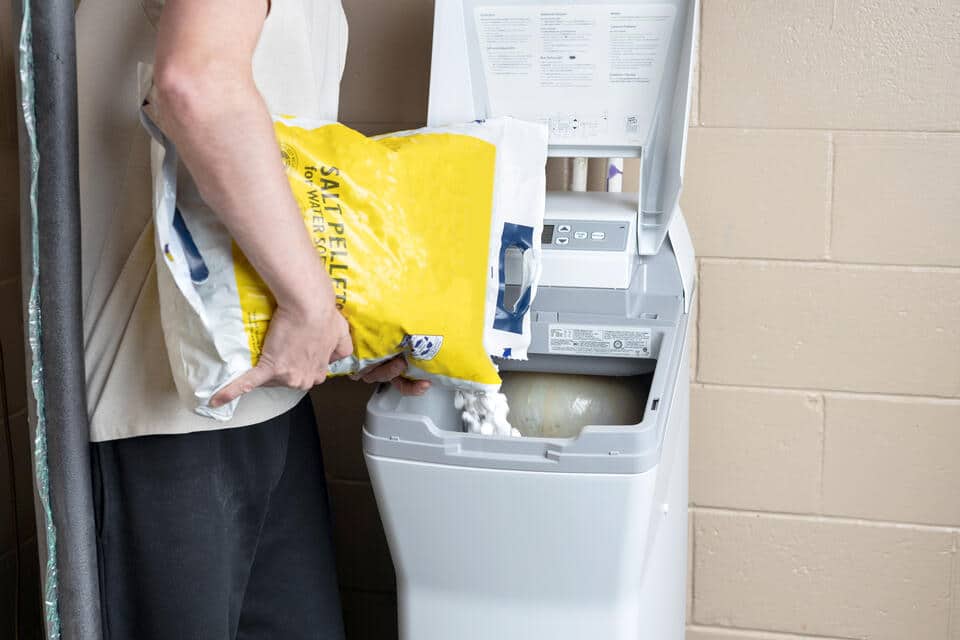
1. Brine Tank

The brine tank is a vital part of your water softener system. It holds the salt that regenerates the resin beads responsible for softening water. Typically made of durable plastic, this tank is crucial for maintaining your system’s efficiency. Maintaining your brine tank involves regular checks to ensure it’s not overfilled and that the salt hasn’t clumped together. A well-managed brine tank will result in a more efficient water softening process and fewer issues down the line. Beyond just holding salt, the brine tank works in tandem with the resin tank to ensure continuous soft water. By understanding its role, you can prevent common issues like salt bridging and ensure your home always has soft, usable water.

2. Resin Tank

The resin tank is where the actual softening magic happens. Filled with resin beads, this tank facilitates the ion exchange process that removes calcium and magnesium from your water. The resin beads are coated with sodium ions. When hard water passes over them, the calcium and magnesium ions are exchanged for sodium ions, effectively softening the water. It’s a straightforward process but vital for maintaining water quality. Regular maintenance, such as cleaning and occasionally replacing the resin, ensures optimal performance. Understanding how your resin tank works helps you troubleshoot and maintain better water quality in your home.
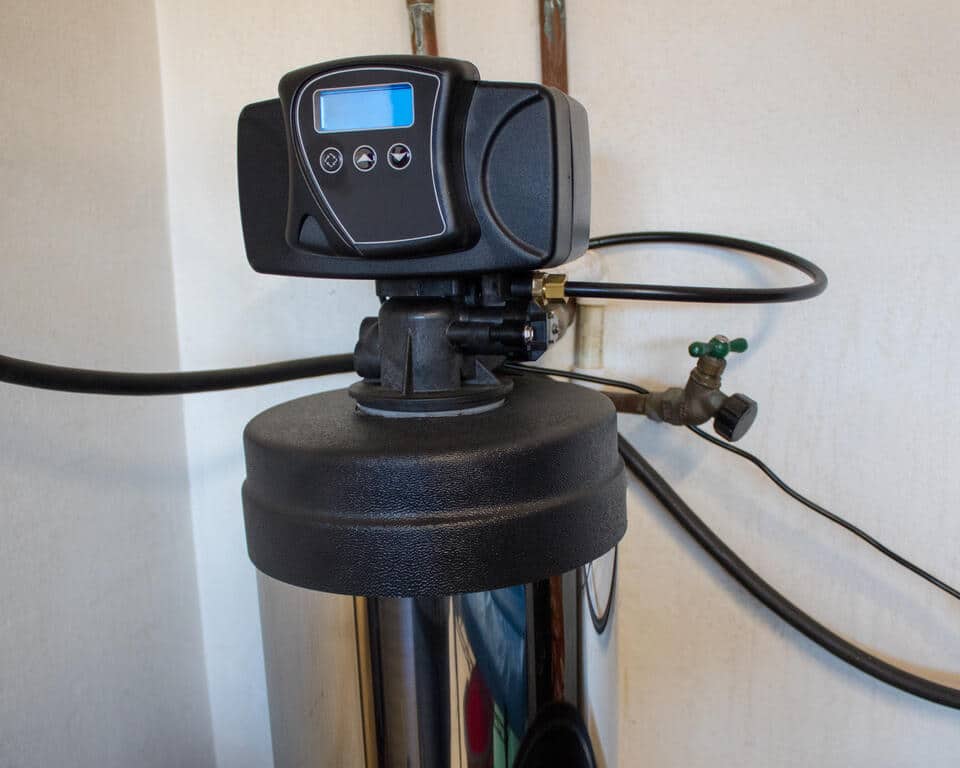
3. Control Valve

The control valve functions as the brain of the water softener system. It regulates the flow of water, directs it through the appropriate cycles, and initiates the regeneration of the resin beads. This component is essential for efficiently managing water usage in your home. A malfunctioning control valve can lead to inefficiencies, either over-regenerating or failing to regenerate the resin beads. Staying informed about your control valve’s operation can help you quickly identify potential problems, ensuring that water softening remains consistent and your system operates at peak efficiency.
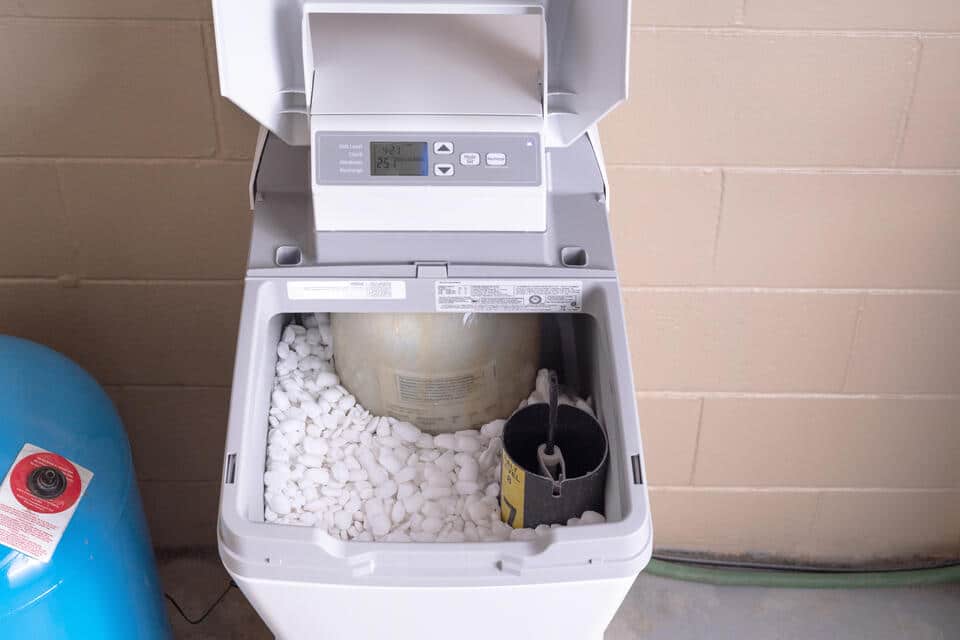
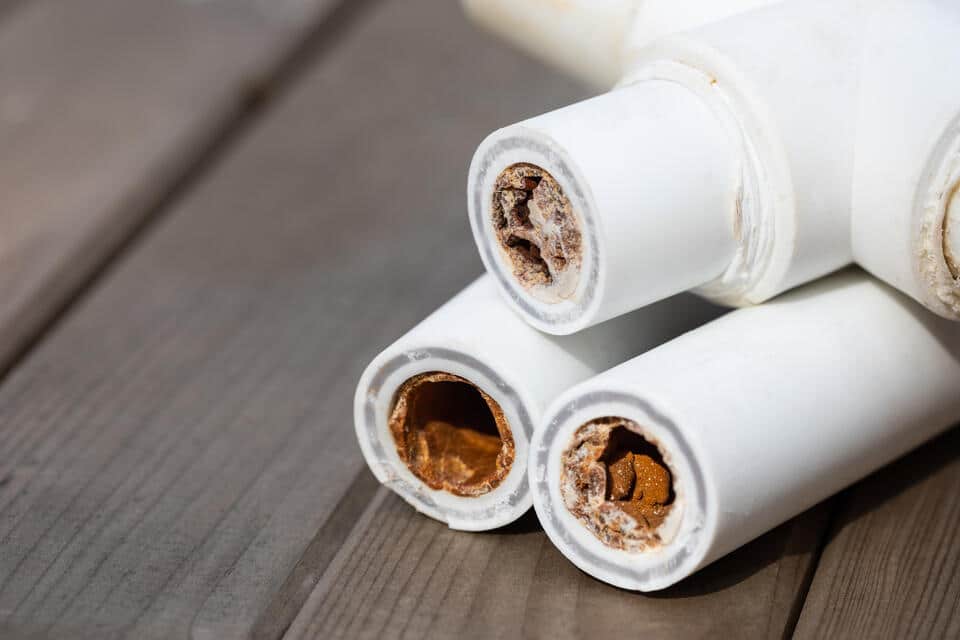
4. Salt Bridge

Salt bridging occurs when a hard crust forms in the brine tank, preventing proper regeneration of the resin beads. This is an issue that can lead to hard water slipping through your system. Preventing salt bridging involves regular tank inspections and maintaining optimal humidity levels in your storage area. Using high-quality salt can also minimize the risk of formation. Addressing a salt bridge promptly is crucial. Breaking up the crust ensures proper brine formation, which is necessary for effective water softening.
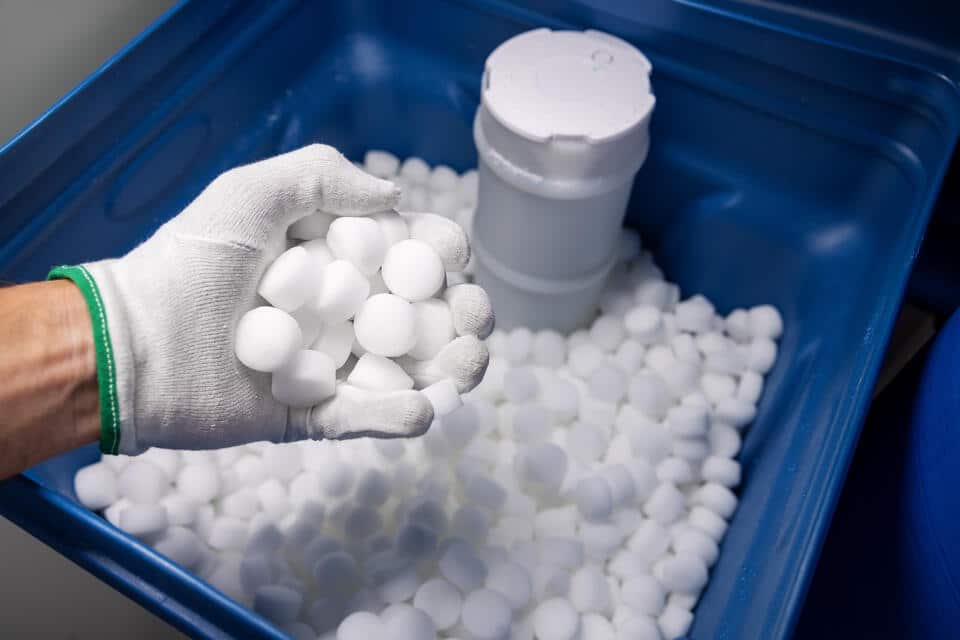
5. Resin Beads

Resin beads are the unsung heroes of your water softener. They carry out the critical ion exchange process, swapping calcium and magnesium ions in your water for sodium ions. These tiny components are durable but still require attention over time. Regular cleaning and occasional replacement will ensure they continue performing their duties effectively. Understanding the role of resin beads helps homeowners appreciate their value, leading to better maintenance and longer-lasting softening results.

6. Brine Solution

The brine solution is a mixture of salt and water used to regenerate the resin beads. It is an essential part of ensuring continued water softening. An effective brine solution needs a balanced concentration. Too much or too little salt can hinder the regeneration process, impacting water quality. Regularly checking the salinity of your brine solution can help maintain the effectiveness of your water softener and ensure you continue to receive high-quality water.
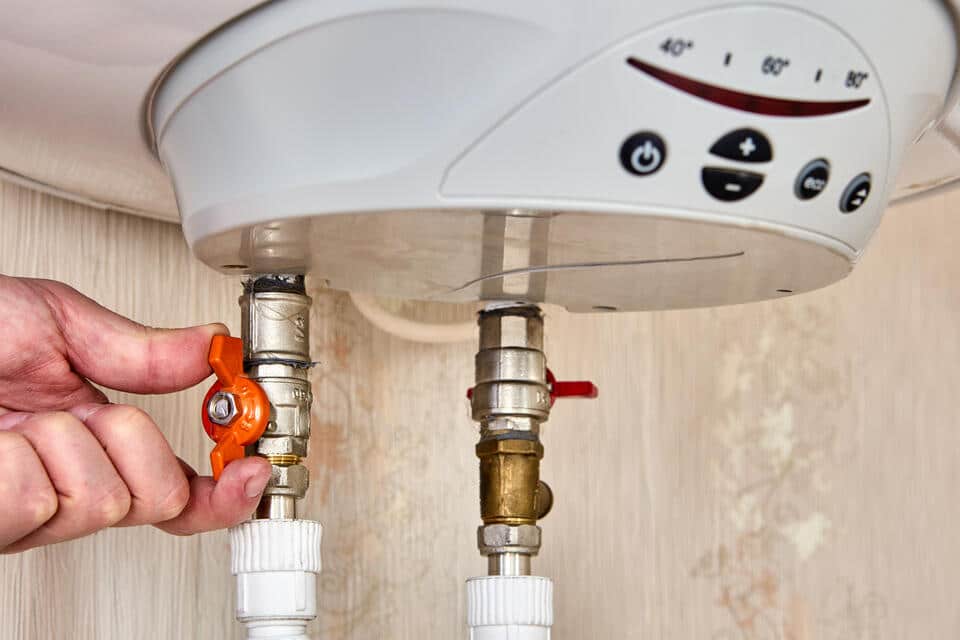
7. Bypass Valve

water softener parts-bypass valve

The bypass valve allows you to shut off the water softener without disrupting the entire water supply. This is particularly useful during maintenance or repairs. Knowing how to use the bypass valve effectively can save you time and prevent unnecessary stress. It’s a handy feature that adds convenience to water softener ownership. Regularly testing your bypass valve ensures it functions correctly when needed, enhancing the overall reliability of your water softener system.

8. Brine Injector

The brine injector plays a pivotal role in directing the brine solution into the resin tank for regeneration. Over time, it can become clogged with impurities. Regular cleaning of the brine injector prevents blockages that could compromise the softening process. Ensuring a clear pathway maintains the efficiency of your water softener. Understanding how the brine injector fits into the overall system helps homeowners troubleshoot and maintain consistent soft water quality.

9. Float Valve

The float valve in the brine tank regulates the water level to prevent overflow. It’s a simple yet vital component for maintaining system balance. Regular checks ensure the float valve functions properly. A malfunctioning float valve can lead to brine tank issues, affecting the softening process. Being familiar with the float valve helps homeowners quickly identify and address potential issues, ensuring the water softener operates smoothly.
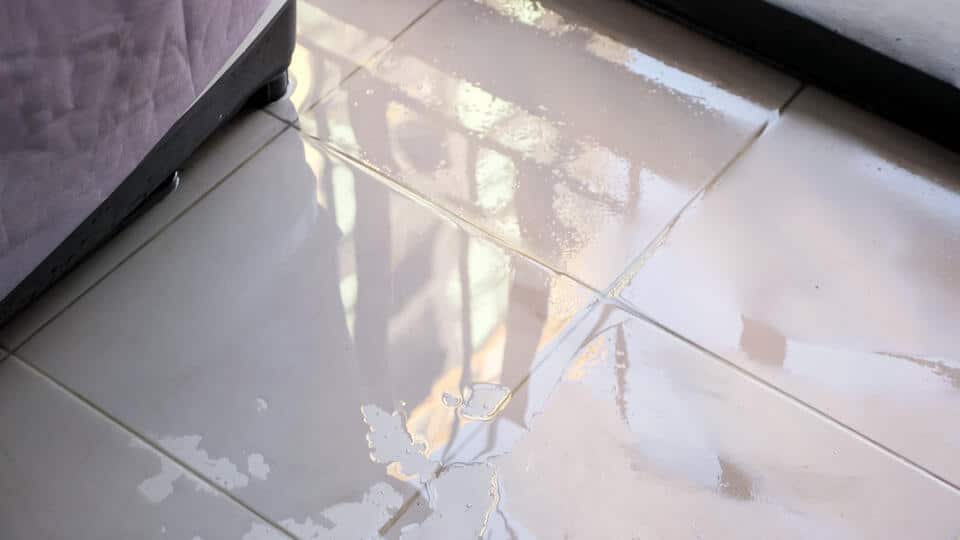
10. Drain Line

The drain line removes wastewater from the regeneration process. Proper functioning is crucial for efficient operation and preventing water damage. Checking for clogs or leaks in the drain line should be part of your regular maintenance routine. This ensures the water softener system operates efficiently and safely. By understanding the role of the drain line, homeowners can better maintain their systems, prolonging the life of their water softener.

11. Water Meter

water softener parts-water meter

A water meter measures water usage and helps the control valve determine when resin beads need regenerating. It’s an essential tool for optimizing water softening. Regularly monitoring your water meter can provide insights into your water usage patterns, helping you fine-tune your system for maximum efficiency. Understanding how the water meter interacts with other components aids homeowners in keeping their water softener systems efficient and cost-effective.

🙌 Trust Thelen Plumbing, Heating, and Air for Expert Service

Understanding the main parts of a water softener empowers homeowners to maintain their systems effectively, ensuring a consistent supply of soft water. Whether it’s tackling common issues like salt bridging or keeping components like the resin beads in top condition, a well-maintained water softener protects your appliances and plumbing system. At Thelen Plumbing, Heating, and Air, we pride ourselves on providing top-notch service and expertise to homeowners. Our team is dedicated to ensuring your home’s water softener system operates smoothly and efficiently. Trust us to deliver exceptional service, from routine maintenance to emergency repairs. Contact us today to schedule a consultation and experience our commitment to quality and customer satisfaction. Your home deserves the best, and we’re here to provide it.

3 Best Water Softener Salt Brands You Can Use

Hard water is a common household issue, affecting everything from laundry to the lifespan of appliances. Enter water softeners—a must-have for homeowners looking to improve water quality. However, choosing the right water softener salt is crucial for optimal performance. Here, we’ll guide you through the best brands available, ensuring your system runs smoothly and efficiently, including:

  • Why water softener salt matters
  • Recognizing the Benefits of High-Quality Softener Salt
  • 3 Best Water Softener Salt Brands
  • Tips for Maintaining Your Water Softener System
  • The Impact of Soft Water on Household Appliances
  • FAQs

🤔 Why Water Softener Salt Matters

best water softener salt-man pouring water softener salt into brine tank

Water softener salt is essential for reducing the minerals in hard water. It helps regenerate the resin beads that trap calcium and magnesium, preventing buildup in pipes and appliances.

The Role of Water Softener Salt in Softening Water

Without the right salt, a water softener cannot effectively remove the minerals that cause hard water. Salt ensures that these minerals do not cling to your pipes or shorten the lifespan of your appliances, saving you money in repairs and replacements.

Different Types of Water Softener Salt

There are several types of water softener salts, including solar, evaporated, and rock. Each type comes in various shapes and styles, such as salt crystals, salt pellets, rock salt, and blocks, which can influence how efficiently your system operates. Choosing the right type and form can make a significant difference in water quality.

How to Determine the Best Type for Your Home

Consider factors like water hardness level, household size, and softener compatibility. Understanding these elements will help you select the most efficient and cost-effective salt for your needs.

Recognizing the Benefits of High-Quality Softener Salt

Investing in high-quality water softener salt enhances both the performance of your system and the quality of your water.

  • Improved Appliance Longevity: Using quality salt prevents mineral buildup, prolonging the life of water-dependent appliances. This means fewer repairs and replacements, providing long-term savings.
  • Enhanced Cleaning Efficiency: Softened water improves the effectiveness of soaps and detergents, leading to cleaner dishes, clothes, and surfaces. It also reduces soap scum, making cleaning easier and more efficient.
  • Skin and Hair Care Benefits: By reducing the mineral content in your water, high-quality salt improves skin hydration and hair texture, offering noticeable benefits for your personal care routine.

✅ 3 Best Water Softener Salt Brands

best water softener salt-gloved hand holding water softener tablets

Choosing the best brands ensures reliability and performance, providing peace of mind for your household. Water softeners play a crucial role in improving water quality by removing minerals like calcium and magnesium that cause hardness. Selecting the right salt not only enhances the efficiency of the softening process but also prolongs the lifespan of your system.

1. Morton Salt

Renowned for its high purity and effective results, Morton Salt has established itself as a popular choice among homeowners for decades. This brand offers a wide range of products, including pellet and crystal forms, tailored to suit various water softener systems and household needs. The unique formulation of Morton Salt helps prevent the buildup of deposits in your water softener, ensuring efficient operation. Additionally, Morton is committed to sustainability, with initiatives aimed at reducing environmental impact, making it a responsible choice for eco-conscious consumers.

2. Diamond Crystal Bright & Soft Salt

Known for its high solubility and effectiveness, Diamond Crystal offers excellent value for money, making it a favorite among many users. Its formulation is specifically designed to reduce issues such as bridging and mushing, which can disrupt the softening process and lead to inefficiencies. With a commitment to quality, Diamond Crystal ensures that its salt dissolves quickly and completely, helping to maintain a consistent flow in your softener. Their products are also compatible with a variety of systems, making it easy for homeowners to find the right solution for their specific needs.

3. Cargill Salt

Offering both solar and evaporated options, Cargill Salt stands out for its versatility and efficiency in the water softening market. With a focus on high purity, Cargill’s products help ensure optimal performance in softening systems, which can lead to significant savings in maintenance and replacement costs over time. The brand is known for its rigorous quality control processes, guaranteeing that its salt meets the highest standards. Moreover, Cargill Salt is dedicated to sustainability, utilizing environmentally friendly practices in its production processes, making it an excellent choice for those looking to balance performance with ecological responsibility.

💡 Tips for Maintaining Your Water Softener System

Regular maintenance keeps your water softener in top condition, ensuring continuous water quality improvement.

  • Regular Cleaning and Inspection: Inspect your softener regularly for buildup and clean it as needed. This prevents clogging and maintains efficient operation.
  • Monitoring Salt Levels: Check salt levels monthly to ensure your softener functions correctly. Top off the salt when necessary to avoid interruptions in soft water supply.
  • Professional Servicing: Schedule annual servicing with a professional to address any potential issues before they become major problems, ensuring long-term efficiency.
  • Setting the Right Water Hardness Level: Adjust the hardness setting on your water softener according to your local water quality. This ensures optimal performance and helps prolong the lifespan of the system.
  • Flushing the System: Periodically flush your water softener system to remove any accumulated minerals and debris. This helps maintain its efficiency and improves overall water quality.

🚰 The Impact of Soft Water on Household Appliances

Soft water significantly enhances the performance and longevity of your household appliances, offering numerous benefits that can lead to a more efficient and cost-effective home.

Reduced Scale Build-Up

Hard water contains high levels of minerals such as calcium and magnesium, which can lead to scale buildup in your appliances over time. This buildup can clog pipes, reduce water flow, and decrease the efficiency of appliances like dishwashers, washing machines, and water heaters. By minimizing mineral deposits, soft water helps keep these appliances running smoothly and efficiently. This not only improves their performance but also means fewer maintenance issues and less frequent repairs, giving you peace of mind.

Energy Efficiency

Appliances that use soft water operate more efficiently because they do not have to work as hard to overcome the effects of scale and mineral buildup. For example, water heaters can heat water more quickly and efficiently, resulting in quicker showers and less energy consumption. As a result, using soft water can lead to significant savings on your utility bills. Over time, these savings can add up to a substantial amount, making soft water a smart choice for both your wallet and the environment.

Longer Appliance Lifespan

The reduced wear and tear on appliances due to lower mineral deposits translates to a longer lifespan. Appliances that are not constantly battling against scale buildup will experience fewer breakdowns and require less frequent replacements. This longevity not only saves you money on costly repairs and replacements but also reduces the amount of waste generated from discarded appliances. By investing in a water softener or ensuring that your household has access to soft water, you can enhance the longevity of your appliances and contribute to a more sustainable home.

How Water Softener Salt Enhances Everyday Living

The right water softener salt transforms everyday activities, from bathing to cleaning, offering tangible benefits for homeowners.

Improved Cooking and Tasting: Soft water enhances the flavors of your food and beverages, making them taste better. It also prevents mineral deposits in cookware and coffee makers.

Easier Laundry Days: Soft water improves the effectiveness of laundry detergents, leading to softer, cleaner clothes with less residue.

Eco-Friendly Cleaning: Using soft water reduces the need for harsh cleaning chemicals, supporting environmentally friendly practices in your household.

❓ FAQs

best water softener salt-overhead view of water softener full of pellets

Answers to common questions help homeowners make informed decisions about their water softener systems.

Q: Is All Water Softener Salt the Same?

No, there are different types and qualities of salt, each affecting the performance and efficiency of your softener. Choose based on your specific water conditions and system requirements.

Q: How Often Should I Refill My Water Softener with Salt?

The frequency depends on your water usage and softener size. Check levels monthly and refill as needed to maintain soft water supply.

Q: Can I Use Any Brand of Salt in My Water Softener?

While many brands are compatible, it’s best to follow manufacturer recommendations for optimal performance and to avoid potential issues.

🙌 Your Guide to Choosing the Best Water Softener Salt

Choosing the best water softener salt is essential for maintaining high-quality water and extending the life of your appliances. Our team at Thelen Plumbing, Heating, and Air is here to assist you with your water softening needs and ensure you make the best choice for your home. With our expertise and commitment to quality service, you can trust us to keep your home running smoothly. Contact us today to learn more about our services and how we can help you achieve stress-free living with our comprehensive home solutions.

Burst Pipe Repair When To Call a Professional

Imagine waking up to the sound of rushing water only to find your home flooded due to a burst pipe. It’s a nightmare scenario for any homeowner, but understanding when to call in the experts can save you time, money, and a lot of stress. In this guide, we’ll explore everything you need to know about burst pipe repair, including:

  • Understanding Burst Pipes
  • 9 Steps to Take When you discover a burst pipe
  • Common Causes of Burst Pipes
  • DIY vs. Professional Repair
  • Cost Implications of Pipe Repairs
  • Preventive Measures for Homeowners

🤔 Understanding Burst Pipes

burst pipe repair-woman catching leaking water from a pipe into a bucket and holding a cloth over the pipe

Burst pipes are a common yet potentially devastating issue for homeowners. A burst pipe occurs when the pressure in the pipe exceeds what it can handle, causing the pipe to rupture. This can lead to significant water damage, which can be costly to repair. Common causes include freezing temperatures and a buildup of pressure due to clogs. Recognizing the early signs of a burst pipe can help mitigate damage and reduce repair costs.

In most homes, pipes are made of copper, PVC, or galvanized steel. Each material has its strengths and weaknesses, and knowing which type you have can help you understand the risks and maintenance needs. For instance, older homes often have galvanized steel pipes, which can rust and corrode over time, leading to weaknesses that might cause a burst.

The location of the pipe is another important factor. Pipes located in exterior walls, basements, or attics are more susceptible to freezing. It’s crucial to monitor these areas, especially during cold spells, to ensure your pipes are in good condition.

Signs Your Pipe Has Burst

Detecting a burst pipe early can prevent extensive damage to your home. Here are some signs to watch for:

  • Sound of rushing water: If you hear water flowing in your walls or beneath your floors, act quickly.
  • Sudden drop in water pressure: A decrease in pressure at your shower or faucets could indicate a burst pipe.
  • Discoloration in water: Rust or debris may be present from damaged pipes.
  • Unexpected puddles or damp patches: Spotting these on floors, walls, or ceilings means immediate investigation is needed.

Ignoring these signs can lead to mold growth and structural damage, which can be costly to repair.

👉 9 Steps to Take When You Discover a Burst Pipe

When you suspect a burst pipe, acting quickly is key to minimizing damage. Here’s a detailed guide on what you should do:

1. Turn Off the Water Supply

The first and most crucial step is to locate your main water shut-off valve and turn it off. This valve is typically found in the basement, crawl space, or near your water meter. By stopping the flow of water, you can significantly mitigate the risk of flooding and prevent further damage to your home and belongings. Make sure everyone in your household knows where this valve is located for future emergencies.

2. Drain the System

Once the water supply is off, open all faucets in your home, including sinks, bathtubs, and outdoor spigots. This allows any remaining water in the pipes to drain out, reducing pressure and minimizing the chance of additional leaks occurring. You might also want to flush toilets to ensure all water is emptied from the system. This step is essential to prevent further complications.

3. Assess the Damage

Carefully inspect the affected area to determine the extent of the damage. Look for visible signs such as cracks in the walls, damp spots, or water accumulation on the floor. Pay close attention to surrounding areas where water may have migrated. It’s important to document your findings, as this information will be useful when discussing repairs with your plumber or insurance agent.

4. Call a Plumber

As soon as you have assessed the situation, contact a professional plumber. Their expertise is invaluable in this situation; they will be able to diagnose the problem, recommend the best course of action, and carry out necessary repairs. Make sure to choose a licensed and insured plumber to ensure that the work is done correctly and safely.

5. Turn Off Electricity

If the burst pipe is near electrical outlets or appliances, it’s essential to turn off the electricity in that area. Do this at your circuit breaker to prevent any risks of electric shock or fire hazards. Water and electricity don’t mix, so taking this precaution is crucial for your safety. If you’re unsure about handling the electrical components, it’s best to call an electrician for assistance.

6. Document the Damage

burst pipe repair-water pooling on tile floor from a burst pipe

Take comprehensive photos or videos of the damage for insurance purposes. Capture all affected areas, including close-ups of any leaks or structural damage. This documentation is vital for any claims you may need to file with your insurance company. Be thorough, as having detailed evidence can help expedite the claims process and ensure you receive the coverage you’re entitled to.

7. Remove Belongings

If safe to do so, remove any valuable items, furniture, or personal belongings from the affected area. This includes electronics, artwork, and sentimental items that could be damaged by water. If necessary, store these items in a dry place to prevent further damage. Taking prompt action can save your belongings and reduce the need for extensive repairs later.

8. Use Towels or Buckets

If water is pooling on the floor, act quickly to soak up as much water as possible using towels or buckets. This initial response can help prevent water from spreading to other areas of your home. If you have access to a wet/dry vacuum, use it to remove larger amounts of water. Keeping the area as dry as possible will help reduce the risk of mold growth and additional damage.

9. Check for Mold

Once the immediate situation is under control, continue to monitor the area for any signs of mold growth. Mold can develop rapidly in damp conditions, usually within 24-48 hours. If you notice any discoloration, musty odors, or visible mold, it’s important to act quickly. Consider hiring a mold remediation specialist to assess the situation and recommend appropriate steps to eliminate the mold safely. Regular inspections will help ensure that your home remains safe and healthy.

👉 Common Causes of Burst Pipes

Understanding what causes burst pipes can help you take preventive measures. Freezing temperatures are a leading cause, as water expands when it freezes, increasing pressure on the pipes. Insulating exposed pipes can help prevent this issue.

Corrosion is another common cause, particularly in older homes with galvanized steel pipes. Over time, these pipes can rust and weaken, making them prone to bursting. Regular inspections can help you identify and replace corroded pipes before they fail.

High water pressure and clogs within the plumbing system can also lead to burst pipes. Installing a pressure regulator and routinely clearing drains can mitigate these risks.

👨‍🔧 DIY vs. Professional Repair

When faced with a burst pipe, deciding whether to attempt a DIY repair or call a professional can be challenging. Simple leaks or minor damage may be manageable for a skilled DIYer, but burst pipes often require specialized tools and expertise.

Professional plumbers have the experience to accurately diagnose the problem and implement a long-term solution. They can identify potential underlying issues, like corrosion or improper installation, that might not be apparent to the untrained eye.

Additionally, professionals can ensure repairs comply with local building codes, which is crucial for maintaining your home’s safety and value.

Key Benefits of Hiring Professionals

Hiring a professional for burst pipe repair offers several advantages:

  • Quick Problem Identification: Experts can quickly identify the source of the issue and implement an effective fix, minimizing further damage to your home.
  • Access to Quality Materials: Professionals have access to high-quality materials and tools, ensuring repairs are durable and long-lasting.
  • Preventive Advice: They can provide valuable advice on preventing future issues, such as routine maintenance or upgrading old pipes.
  • Emergency Services: In emergency situations, time is of the essence. Professional plumbers often offer 24/7 emergency services, ensuring that help is available when you need it most.

What to Expect During a Professional Repair

During a professional burst pipe repair, the plumber will begin by assessing the damage and identifying the source of the leak. They may use specialized tools, such as cameras or leak detection equipment, to locate the problem accurately.

Once the issue is pinpointed, the plumber will outline the necessary repairs and provide an estimate for the work. This transparency ensures you understand the scope of the project and any associated costs.

The repair process typically involves replacing damaged sections of pipe and reinforcing connections to prevent future leaks. Once complete, the plumber will test the system to ensure everything is functioning correctly before cleaning up the work area.

💵 Cost Implications of Pipe Repairs

burst pipe repair-water leaking from ceiling due to pipe burst

The cost of repairing a burst pipe can vary widely depending on factors like the severity of the damage, the location of the pipe, and the materials used. On average, homeowners can expect to pay between $200 and $500 for minor repairs, while more extensive damage can cost upwards of $1,000.

It’s essential to consider both the immediate repair costs and potential future expenses when evaluating your options. While a DIY fix might seem more affordable initially, improper repairs can lead to more significant problems down the line, increasing overall costs.

Many plumbing services offer financing options or payment plans to help manage the cost of repairs without straining your budget.

💡 Preventive Measures for Homeowners

Taking proactive steps to prevent burst pipes can save you time, money, and stress. Here are some key measures to consider:

  • Insulate exposed pipes, especially in unheated areas, to protect against freezing temperatures.
  • Conduct regular maintenance by inspecting pipes for signs of corrosion or leaks to identify potential issues early.
  • Install a water pressure regulator to prevent damage from excessive pressure.
  • Perform routine drain cleaning to reduce the risk of clogs.
  • Schedule annual inspections with a professional plumber to ensure your plumbing system is in good condition and address any concerns proactively.

🙌 Exceptional Burst Pipe Repair Services by Thelen Plumbing, Heating, and Air

When it comes to burst pipe repair, trust Thelen Plumbing, Heating, and Air to deliver exceptional service and peace of mind. With years of experience in the Twin Cities region, our team of skilled professionals is equipped to handle any plumbing challenge, big or small. We pride ourselves on our commitment to quality craftsmanship, affordability, and lightning-fast turnaround times. Our 24/7 emergency repair services ensure we’re always available when you need us most. Don’t leave your plumbing needs to chance—reach out to Thelen Plumbing, Heating, and Air today and experience the difference for yourself. Whether it’s a burst pipe or routine maintenance, we’ve got you covered.

How To Unclog Garbage Disposal In 6 Different Ways

Garbage disposals are a modern kitchen convenience, but they can become a source of frustration when they get clogged. Whether you’re dealing with a minor blockage or a more serious jam, knowing how to unclog a garbage disposal can save you time, money, and stress. This comprehensive guide will walk you through how to unclog garbage disposal units and other measures to prevent clogs, including:

  • Common reasons a garbage disposal get clogged
  • Prepping to unclog a disposal
  • 6 ways to unclog a garbage disposal
  • Preventative measures

🤔 Common Reasons a Garbage Disposal Gets Clogged

how to unclog garbage disposal-woman peeling vegetables directly into a garbage disposal

Understanding the common reasons behind garbage disposal clogs can help in both preventing future issues and addressing current ones. Here are some primary culprits:

  • Improper food waste disposal: Certain items should never be put down the garbage disposal. Eggshells can create a sandy texture that clogs the blades, while coffee grounds can build up and create sludge. Fibrous vegetables like celery and potato peels can wrap around the disposal’s components, leading to blockages. Always check what you are discarding and opt for composting or trashing items that could cause issues.
  • Overloading the disposal: Every garbage disposal has a limit on how much food it can handle at once. When too much food is put in, it can overwhelm the system, causing it to jam or fail to grind the waste properly. To avoid this, feed the disposal gradually, allowing it to process small amounts before adding more. This not only prevents clogs but also extends the life of your appliance.
  • Accumulation of grease and fat: Pouring grease or fat down the disposal might seem convenient, but these substances can solidify in the pipes as they cool, leading to persistent clogs. Instead of disposing of oils in the sink, save them in a container and throw them in the trash once they have cooled. Regularly running hot water and soap through the disposal can help keep grease buildup in check.
  • Foreign objects: It’s easy to accidentally drop items like utensils, bones, or even small toys into the disposal. These foreign objects can cause serious mechanical jams that might require professional repair. To prevent this, always be mindful when using the disposal and avoid placing your hands or any other objects near the opening. If something does get stuck, turn off the disposal immediately and use tongs or pliers to retrieve the item safely.

By recognizing these common causes, you can take better care of your garbage disposal and reduce the risk of clogs. Regular maintenance and mindful disposal practices will ensure your unit operates smoothly and efficiently for years to come.

👉 Prepping to Unclog a Disposal

Prepping to unclog a disposal is crucial to ensure a safe and effective process. Proper preparation allows you to identify the clog accurately and take necessary safety precautions, preventing potential injuries and further damage to your disposal unit.

Safety First

Before you begin, ensure your safety by disconnecting the power supply to the disposal. This prevents any accidental activation while you’re working on the unit.

Disconnect the Power: Locate the breaker that controls your garbage disposal and switch it off. Alternatively, unplug the unit from the outlet under your sink if it’s connected this way.

Use Protective Gear: Wear rubber gloves to protect your hands from sharp objects and debris. Safety goggles are also a good idea in case of any splashes.

Identifying the Clog

Understanding the nature of the clog can help you determine the best method to unclog it.

Check for Visible Obstructions: Shine a flashlight into the disposal to see if there are any visible obstructions that you can remove manually.

Listen for Unusual Sounds: Turn on the disposal (with the power reconnected) to see if it makes unusual noises, like humming without grinding. This can indicate that the blades are jammed.

💡 6 Ways to Unclog a Garbage Disposal

Unclogging a garbage disposal is crucial for maintaining kitchen hygiene and preventing plumbing issues. Regular maintenance ensures your disposal operates efficiently, reducing the risk of costly repairs and unpleasant odors.

1. Resetting the Disposal

Sometimes, a simple reset is all it takes to fix a clogged disposal.

Locate the Reset Button: Find the reset button underneath the disposal unit. It’s usually a small red button.

Press and Hold the Button: Press and hold the reset button for about 10-15 seconds. This can reset the internal circuit and potentially clear minor clogs.

2. Manual Crank Method

If the reset button doesn’t work, try manually turning the disposal blades.

Use an Allen Wrench: Insert an Allen wrench into the hole at the bottom of the disposal. Turn the wrench back and forth to manually rotate the blades and dislodge any debris.

Check for Movement: Once the blades start moving freely, the clog may be cleared. Reconnect the power and test the disposal.

3. Using a Plunger

how to unclog garbage disposal-gloves and plunger in a sink to unclog the drain

A plunger can create suction and pressure to dislodge the clog.

Position the Plunger: Place the plunger over the sink drain and fill the sink with enough water to cover the plunger’s bell.

Plunge Vigorously: Use quick, forceful plunges to create suction. This can help push the clog through the pipes.

4. Baking Soda and Vinegar Solution

This natural solution can help break down food particles and grease.

Mix the Solution: Pour half a cup of baking soda into the disposal, followed by a cup of vinegar.

Wait and Flush: Allow the mixture to fizz and sit for about 10-15 minutes. Then, flush the disposal with hot water.

5. Boiling Water Method

Boiling water can help dissolve grease and flush out debris.

Boil Water: Bring a pot of water to a boil on your stove.

Pour Carefully: Carefully pour the boiling water down the drain in stages, allowing it to work through the clog.

6. Cleaning the P-Trap

If other methods fail, the clog may be in the P-trap under the sink.

Remove the P-Trap: Place a bucket under the P-trap to catch water and debris. Loosen the slip nuts with a wrench and remove the P-trap.

Clear the Blockage: Clean out any debris from the P-trap and reassemble it. Reconnect the power and test the disposal.

👇 Preventative Measures

Taking proactive steps to prevent clogs can save you from future headaches and costly repairs. Here are a few essential tips:

Avoid Hard or Fibrous Foods: Stay clear of putting hard items like bones and tough, fibrous foods like celery down the disposal. These can damage the blades and lead to blockages, so opt for softer food scraps instead.

Regular Maintenance: To keep your disposal in top shape, run cold water before and after use. This helps flush away food particles. Additionally, grinding ice cubes every few weeks can help clean the blades and prevent buildup.

When to Call a Professional

If you’ve tried all these methods and the disposal is still clogged, it may be time to call in a professional.

Expertise and Tools: Professional plumbers come equipped with specialized tools and extensive knowledge to diagnose and resolve more serious issues effectively. They can identify underlying problems without causing damage to your plumbing system.

Thelen Plumbing, Heating, and Air

Our team at Thelen Plumbing, Heating, and Air is dedicated to providing expert plumbing services, including garbage disposal repair and maintenance. We take pride in our fast turnaround times and commitment to quality craftsmanship, all at affordable prices. Whether you need routine maintenance or urgent repairs, we’re here to help.

how to unclog garbage disposal-close up of water and bubbles being rinsed down a garbage disposal

🙌 A Guide to Unclogging and Professional Help

Unclogging a garbage disposal can be a straightforward task if you know the right methods. From simple resets to more involved techniques, this guide provides you with the tools to tackle common clogs. However, if you find yourself facing persistent issues, don’t hesitate to reach out to professionals. At Thelen Plumbing, Heating, and Air, we’re here to help with all your plumbing needs, ensuring your home remains comfortable and functional. Ready to solve your garbage disposal woes? Contact us today for expert assistance.

Tankless Water Heater Installation Guide (2024 Update)

Are you considering upgrading to a tankless water heater? You’re not alone. Many homeowners are making the switch to enjoy endless hot water and energy savings. But where do you start? This comprehensive guide will walk you through everything you need to know about tankless water heater installation, including:

  • Understanding tankless water heaters
  • Choosing the right tankless water heater
  • 8 step tankless water heater installation guide
  • Maintenance tips for longevity
  • Troubleshooting common issues

🤔 Understanding Tankless Water Heaters

tankless water heater installation-hand adjusting knobs on water heater

The Shift Towards Tankless Water Heaters

The choice to go tankless is growing in popularity among homeowners. Traditional water heaters with tanks have been the standard for years, but the advantages of tankless water heaters are hard to ignore. They offer energy efficiency, space-saving design, and on-demand hot water, making them an appealing option for modern homes.

What is a Tankless Water Heater?

A tankless water heater, also known as an on-demand water heater, heats water only when you need it. Unlike traditional models that store hot water in a tank, tankless units heat water directly as it flows through the system, providing a constant supply of hot water without the wait.

Benefits of Installing a Tankless Water Heater

  • Energy Efficiency: Tankless water heaters use less energy because they only heat water when needed.
  • Space Saving: These units are compact and can be installed in small spaces, freeing up valuable storage areas.
  • Endless Hot Water: Enjoy a continuous supply of hot water for showers, laundry, and more.

👉 Choosing the Right Tankless Water Heater

Choosing the right tankless water heater is crucial because it directly impacts your home’s energy efficiency and hot water supply. A well-suited unit can save you money on energy bills while ensuring you have a steady flow of hot water when you need it.

Assessing Your Hot Water Needs: Before selecting a tankless water heater, calculate the peak hot water demand in your household. Consider the number of bathrooms, appliances, and family members to ensure you choose a unit that can handle your needs.

Fuel Type Considerations: Tankless water heaters can be powered by electricity, natural gas, or propane. Each type has its own advantages and installation requirements, so it’s essential to choose the one that best fits your home’s infrastructure.

Understanding Flow Rate and Temperature Rise: Flow rate, measured in gallons per minute (GPM), indicates how much hot water the unit can produce. Temperature rise is the difference between the incoming water temperature and the desired output temperature. Make sure to choose a unit that meets your demands for both.

Preparing for Installation

Safety Precautions and Permits

When installing a tankless water heater, safety should always come first. Ensure that you follow all safety guidelines to protect yourself during the electrical and plumbing work. It’s important to check with your local building department to obtain any necessary permits, as this will help ensure that your installation meets legal and safety standards. Familiarizing yourself with local building codes is key to avoiding any potential issues down the line.

Tools and Materials Needed

Before you begin, make sure you have all the essential tools on hand. Pipe wrenches are crucial for securing fittings, while screwdrivers will assist with mounting and electrical connections. A tubing cutter will help you make clean cuts for pipes. Additionally, gather materials such as venting pipes to exhaust gases, mounting brackets to secure the unit, and gas lines if you’re using a gas-powered heater. Having everything ready will streamline the installation process.

Locating the Ideal Installation Spot

Selecting the right location for your tankless water heater is vital for both functionality and convenience. Aim for a spot that allows easy access for future maintenance and is in close proximity to existing water and power supplies. It’s also essential to choose an area that permits adequate venting to the outside of your home, ensuring safety and efficiency. Proper planning will facilitate a smoother installation and optimal performance of your new unit.

🛠️ 8 Step Tankless Water Heater Installation Guide

tankless water heater installation-tech installing and testing new water heater system

Installing a tankless water heater can greatly enhance energy efficiency and provide a continuous supply of hot water, making it a valuable upgrade for any home. This step-by-step guide ensures that you can complete the installation safely and effectively, maximizing the benefits of your new system.

1. Turn Off Utilities

Before starting the installation process, it is critical to ensure safety by turning off the water supply to the existing water heater. Locate the shut-off valve on the cold water line leading to the heater and turn it clockwise until it stops. Additionally, disconnect the power source to the existing water heater, which typically involves switching off the circuit breaker at your home’s electrical panel. If you are working with a gas water heater, ensure that the gas supply is also turned off. Taking these steps not only assures a safe working environment but also prevents any accidental leaks or electrical hazards while you work.

2. Remove the Old Water Heater

Begin by carefully draining the tank of the old water heater. This involves connecting a hose to the drain valve at the bottom of the tank and directing the water to a suitable drainage area. Once drained, disconnect the cold and hot water supply lines as well as the power lines, if applicable. Use appropriate tools such as a wrench for pipe fittings. After disconnection, gently remove the old unit from its installation area; this may require assistance due to its weight. Ensure that you dispose of the old water heater following local regulations.

3. Install New Water Lines

With the old unit removed, it’s time to install new water lines that will connect the tankless unit to your household’s water supply. Measure the distance from the tankless water heater to the existing pipes to determine the necessary length of piping. Use high-quality, corrosion-resistant materials and appropriate fittings for a secure connection. It’s essential to follow local plumbing codes during installation and to ensure that all connections are tight to prevent leaks. Consider using Teflon tape on threaded connections for added protection against leaks.

4. Mount the Tankless Water Heater

Ensure you have the appropriate mounting bracket included with your new tankless water heater. Secure the bracket to the wall per the manufacturer’s instructions, making sure it is level; this will help in proper functioning and maintenance of the unit. Once the bracket is in place, carefully lift and attach the tankless water heater. It is essential to ensure that the unit is stable and firmly attached to the wall to prevent any accidents or damage during use.

5. Connect Electrical Supply

For electric tankless water heaters, run electrical wiring from your home’s breaker box to the heater. This step can involve significant electrical work, so consult the manufacturer’s manual for specific instructions regarding wire gauge and connections. If you are not experienced with electrical installations, it’s advisable to hire a licensed electrician to ensure safety and compliance with local codes. Double-check that all connections are tight and properly insulated to prevent any electrical issues.

6. Connect Gas Line (if applicable)

If you are installing a gas-powered tankless water heater, carefully connect the gas line to the unit, ensuring that all fittings are secure. It’s crucial to check for gas leaks after making the connection; you can do this by applying a mixture of soap and water to the joints: if bubbles form, there is a leak. Because working with gas can be dangerous, it is highly recommended to involve a professional plumber or technician for this step to ensure safety and compliance with local regulations.

7. Install Venting System

Correct venting is vital for the safe operation of gas-powered tankless water heaters. Follow the manufacturer’s guidelines for vent installation closely, which typically involve attaching vent pipes that lead safely to the outside of your home. Ensure that the venting system is installed at the correct angle and that it is clear of any obstructions to allow for proper airflow and exhaust. Regularly inspect the venting system for blockages or wear to maintain safe operation.

8. Final Steps

After all connections have been securely made, turn on the water supply slowly and check for any leaks at all connection points. This involves turning the shut-off valve counterclockwise to allow water to flow into the unit. If leaks are detected, tighten fittings as necessary. Once you confirm that there are no leaks, restore power to the unit and follow the manufacturer’s instructions to test its operation. Check the hot water output in nearby faucets to ensure that the tankless water heater is functioning correctly and efficiently. Regular maintenance checks will ensure the longevity and performance of your new heater.

💡 Maintenance Tips for Longevity

tankless water heater installation-tankless water heater system on a wall in a basement

Regular maintenance is crucial for ensuring the longevity of equipment and assets, as it helps prevent breakdowns and costly repairs. By proactively addressing issues, you can enhance performance and extend the lifespan of your investments.

  • Regular Descaling: Mineral buildup can affect the efficiency of your tankless water heater. Perform regular descaling to keep the unit running smoothly.
  • Annual Check-ups: Schedule annual maintenance checks with a professional to inspect and service your tankless water heater. This can help prevent unexpected issues and extend the unit’s lifespan.
  • Monitoring System Performance: Keep an eye on the unit’s performance and address any irregularities promptly. Most modern tankless water heaters come with diagnostic systems that alert you to potential problems.
  • Clean the Filters: Regularly clean or replace the water filters to ensure optimal flow and efficiency.
  • Check for Leaks: Periodically inspect for any leaks in the system, as they can lead to water damage and decreased efficiency.
  • Flush the System: Consider flushing the system annually to remove sediment buildup, which can impact performance.
  • Adjust Temperature Settings: Set the water heater to an optimal temperature (around 120°F) to prevent overheating and save energy.
  • Insulate Pipes: Insulating the pipes leading to and from the heater can help maintain water temperature and improve efficiency.

Troubleshooting Common Issues

Troubleshooting common issues is essential for tankless water heaters to ensure they operate efficiently and reliably. Addressing problems quickly can prevent costly repairs and extend the lifespan of the unit.

Inconsistent Water Temperature

If you experience fluctuating water temperatures, check the flow rate and ensure the unit is sized correctly for your household’s needs. An undersized unit may struggle to keep up with demand. Additionally, inspect for any blockages in the water lines, as sediment or debris can impede water flow and lead to temperature variations.

No Hot Water

Ensure the power supply is connected and the unit is receiving water. Confirm that the inlet filter is free of clogs, as even minor blockages can disrupt the heating process. It’s also important to verify that the temperature settings are correct; sometimes, accidental adjustments can prevent the unit from heating properly.

Strange Noises

Unusual noises can indicate sediment buildup or loose components. Regular maintenance, such as flushing the system to remove sediment, can help prevent these issues. Additionally, inspect and tighten any loose parts to minimize vibrations and ensure the unit operates smoothly. Regular checks can prolong the life of your equipment and enhance performance.

🙌 Your Guide to Installation and Expert Support

Switching to a tankless water heater is a smart investment for your home, offering energy efficiency, space savings, and endless hot water. By following this comprehensive guide, you’ll be well-equipped to handle the installation process. Remember, if you need professional assistance, our team at Thelen Plumbing, Heating, and Air is here to help. Contact us today to schedule your installation and experience the difference of expert craftsmanship and exceptional service.

6 Tell-Tale Signs Of Hard Water In Your Home

Is the water in your home causing unseen damage? Many homeowners are unaware of the effects that hard water can have on their households until the signs become impossible to ignore. In this post, we’ll explore the signs of hard water, helping you identify and address this common issue before it wreaks havoc on your home. You’ll learn about the following:

  • What is hard water?
  • 6 common signs of hard water
  • Effects on appliances and plumbing
  • Impact on personal care and cleaning
  • How to test for hard water
  • Solutions and treatment options
  • Benefits of addressing hard water
  • Expert tips for maintaining water quality

🤔 What is Hard Water?

signs of hard water-gloved hand trying to remove hard water stains from shower faucet

Hard water is water that contains a high concentration of dissolved minerals, particularly calcium and magnesium. These minerals accumulate as water travels through soil and rock, eventually making their way into your home’s water supply.

Why It Matters

Understanding hard water is crucial for homeowners because its effects can be far-reaching, impacting everything from your plumbing to your daily hygiene routines.

The Difference From Soft Water

Soft water, on the other hand, contains fewer of these minerals, making it gentler on appliances, plumbing, and skin.

The Science Behind Hard Water

Hard water affects the efficiency of household appliances and the quality of water consumed. Hard water can impact skin and hair health, making it important to address for overall well-being. Here are some good-to-know things about hard water, so you can keep your home comfortable:

  • Mineral Composition: The primary minerals responsible for hard water are calcium carbonate and magnesium carbonate. When these minerals dissolve in water, they contribute to its hardness.
  • Measuring Water Hardness: Water hardness is typically measured in grains per gallon (gpg) or parts per million (ppm). Water with a hardness level above 7 gpg is generally considered hard.
  • Environmental Factors: Geographical location and natural water sources can influence water hardness levels. Regions with limestone bedrock, for example, often have harder water.

⚠️ 6 Common Signs of Hard Water

Understanding the signs of hard water is crucial because it can lead to issues such as clogged pipes, reduced appliance efficiency, and dry skin or hair. Identifying these signs early can help homeowners take corrective measures to protect their plumbing and improve water quality.

1. Scale Buildup

One of the most noticeable signs of hard water is scale buildup on faucets, showerheads, and other fixtures. This white, chalky residue occurs when the minerals in hard water, particularly calcium and magnesium, remain after the water evaporates. Over time, this buildup can not only make your fixtures look unsightly but can also affect the functionality of your plumbing. If left untreated, scale can lead to more significant blockages and may require professional cleaning or replacement of fixtures.

2. Soap Scum

Another tell-tale sign is soap scum in sinks, tubs, and showers. Hard water makes it difficult for soap to dissolve effectively, leading to the formation of a thick, slippery residue that clings to surfaces. This soap scum is often challenging to clean and can contribute to the growth of mold and mildew in damp areas. Switching to a liquid soap or specially formulated hard water soap can help mitigate this issue, but regular cleaning is still required to keep surfaces looking their best.

3. Stiff Laundry

Hard water can make clothes feel stiff and scratchy after washing. The high mineral content interferes with the detergent’s ability to break down and rinse out properly, leaving behind residues that make fabrics feel rough and less absorbent. This can be particularly bothersome for items like towels and sheets, which are meant to be soft and fluffy. To combat this, using a water softener or adding vinegar to the rinse cycle can help soften clothes and improve their feel.

4. Dull Hair

If your hair feels dull or looks lifeless after washing, hard water may be the culprit. The minerals in hard water can build up on the hair, preventing shampoos and conditioners from rinsing out completely. This residue can weigh your hair down, making it appear flat and lifeless. Additionally, hard water can strip the natural oils from your hair, leading to dryness and frizz. Consider using a chelating shampoo specifically designed to remove mineral buildup or installing a shower filter to help improve hair health.

5. Reduced Water Pressure

Mineral buildup in pipes can lead to reduced water pressure over time. As scale accumulates inside plumbing, it narrows the diameter of the pipes, restricting water flow. If you notice a decrease in water pressure when taking a shower or using faucets, it might be due to the accumulation of scale. This issue can escalate if not addressed, potentially leading to leaks and further plumbing complications. Regular maintenance and, if necessary, professional intervention can help restore proper water pressure.

6. Frequent Plumbing Issues

If you frequently experience plumbing problems, such as clogs or leaks, hard water buildup could be a contributing factor. The minerals can accumulate in pipes and fixtures, causing blockages that lead to slow drains or even complete obstructions. Additionally, mineral deposits can corrode pipes over time, resulting in leaks and costly repairs. If you suspect that hard water is causing these issues, consider consulting a plumbing professional who can assess your situation and recommend appropriate solutions, such as water softeners or regular descaling treatments.

❗️ The Impact of Hard Water on Your Home and Your Body

Understanding the impact of hard water is crucial because it can lead to various issues in your home, such as scale buildup in plumbing and appliances, which reduces their efficiency and lifespan. Additionally, hard water can affect your skin and hair, potentially causing dryness and irritation.

Effects on Appliances and Plumbing

signs of hard water-pipes with their cross section exposed, revealing hard water mineral build up

Hard water can lead to mineral buildup in appliances and plumbing, which may reduce their efficiency and lifespan. It’s important to consider this to avoid costly repairs and ensure your appliances operate effectively.

Decreased Efficiency: Hard water is notorious for creating mineral buildup, particularly in appliances such as dishwashers, washing machines, and water heaters. This buildup can hinder their performance, leading to longer cycle times and increased energy consumption, ultimately resulting in higher utility bills.

Increased Wear and Tear: The constant exposure to hard water can accelerate the deterioration of plumbing systems and appliances. Over time, this can lead to significant issues, including rust and corrosion, which not only shorten the lifespan of these items but also lead to expensive repairs or the need for premature replacements.

Pipe Blockages: As minerals from hard water accumulate, they can form deposits inside pipes, which restricts water flow. This buildup not only increases the likelihood of blockages but also raises the risk of leaks, potentially causing water damage and requiring urgent plumbing services to resolve the issue.

Impact on Personal Care and Cleaning

Hard water can significantly affect personal care and cleaning routines, as it often leaves behind mineral deposits that reduce the effectiveness of soaps and detergents. Understanding its impact is crucial for choosing the right products and methods to maintain cleanliness and skin health.

Skin and Hair: Hard water can make skin feel dry and itchy and hair appear dull and lifeless. The high mineral content in hard water strips away natural oils, leading to increased dryness and irritation. This can exacerbate skin conditions like eczema and make hair more prone to breakage, leaving it looking frizzy and unmanageable.

Dishwashing Challenges: When washing dishes, hard water can leave spots and streaks, making it difficult to achieve a spotless finish. The mineral buildup not only affects the appearance of your dishes but can also impact the effectiveness of detergents, requiring you to use more product and still not get the desired clean.

Cleaning Difficulties: Hard water makes cleaning more labor-intensive, requiring more soap and effort to achieve the same results as with soft water. Soap scum and mineral deposits can also be stubborn and difficult to remove, leading to a buildup on fixtures and surfaces. This can result in more frequent cleaning sessions and the need for specialized cleaning products to tackle the residue effectively.

Benefits of Addressing Hard Water

  • Improved Appliance Longevity: By reducing mineral buildup, you can extend the lifespan of your appliances and plumbing, saving money on repairs and replacements.
  • Enhanced Cleaning Efficiency: Softened water makes cleaning easier and more effective, reducing the amount of soap and effort required to achieve a spotless finish.
  • Better Personal Care: Soft water is gentler on skin and hair, leading to improved hydration and a healthier appearance.
  • Softer Laundry: Washing clothes in softened water can result in fabrics feeling softer and looking brighter, enhancing their overall appearance.
  • Reduced Soap Usage: With softened water, you’ll use less detergent, which can lead to cost savings over time.
  • Fewer Mineral Stains: Softened water helps prevent the buildup of mineral deposits on dishes, glassware, and surfaces, keeping them cleaner.
  • Improved Water Heater Efficiency: Reducing scale buildup in water heaters can improve their efficiency and lower energy bills.
  • Healthier Plumbing System: Addressing hard water can prevent clogs and improve water flow in your plumbing system, leading to fewer plumbing issues.

🚰 How to Test for Hard Water

signs of hard water-testing water from tap for hardness

Home Test Kits

Home test kits are a convenient way to measure water hardness right from your home. These kits typically include test strips that change color based on the mineral content in your water, allowing you to quickly assess the hardness level. They are easy to use and provide immediate results, making them a popular choice for homeowners looking to understand their water quality.

Professional Testing

For more accurate results, consider having your water tested by a professional. This service often includes a comprehensive analysis of your water’s mineral content, taking into account various factors such as calcium and magnesium levels. Professional testing can also help identify potential issues, such as contaminants or imbalances, providing you with actionable insights to improve your water quality.

Visual Indicators

Observing visual signs can also help you determine if you have hard water. Look for scale buildup on faucets and showerheads, which is often a white, chalky residue left by mineral deposits. Additionally, soap scum that clings to surfaces and reduces the effectiveness of soap can be another indicator of hard water. These visual cues, combined with testing, can give you a clearer picture of your water hardness.

Solutions and Treatment Options

Water Softening Systems: Installing a water softener is one of the most effective ways to combat hard water. These systems work by exchanging calcium and magnesium ions for sodium or potassium ions, reducing the hardness of your water.

Descaling Agents: Descaling agents can help remove mineral buildup from appliances and plumbing. These products dissolve the minerals, making them easier to wash away.

Regular Maintenance: Regularly maintaining your appliances and plumbing can help reduce the impact of hard water. This includes cleaning fixtures, using descaling products, and scheduling professional inspections.

💡 Expert Tips for Maintaining Water Quality

Maintaining water quality is crucial when dealing with hard water, as it can lead to scale buildup in plumbing and appliances, reducing their efficiency and lifespan. Ensuring good water quality helps prevent potential health issues and enhances the overall effectiveness of soap and detergents.

  • Regular Testing: Regularly testing your water can help you stay on top of any changes in its hardness and address issues before they become more significant problems.
  • Routine Maintenance: Performing routine maintenance on your water softening system and other appliances can help ensure they continue to operate efficiently.
  • Professional Inspections: Scheduling regular professional inspections can help identify and address any potential issues with your water quality or plumbing.

🙌 Conquer Hard Water for a Comfortable Home

Addressing hard water is essential for maintaining the comfort, efficiency, and longevity of your home. By understanding the signs of hard water and implementing effective solutions, you can protect your appliances, plumbing, and personal well-being. Trust Thelen Plumbing, Heating, and Air to help you tackle your hard water issues and keep your home running smoothly. Contact us today to learn more about our services and how we can assist you.

How To Calibrate A Thermostat In 6 Simple Steps

Thermostats are essential for maintaining a comfortable home environment. However, if they’re not properly calibrated, they can lead to uneven temperatures and higher energy bills. This guide will help you understand how to calibrate a thermostat effectively, including:

  • Understanding Your Thermostat
  • 6 Step Guide to Calibrating Your Thermostat
  • Choosing the Right Thermostat for Your Home
  • Professional Help vs. DIY Calibration

🤔 Understanding Your Thermostat

how to calibrate a thermostat-mother and daughter adjusting a thermostat tablet on a wall

Thermostats come in various types, including manual, programmable, and smart thermostats. Each type has its unique features and benefits. Understanding how your specific thermostat works is crucial before attempting to calibrate it. Manual thermostats are the most straightforward and require you to set the temperature manually. Programmable thermostats allow you to set different temperatures for different times of the day, while smart thermostats can be controlled remotely and adjust settings based on your habits. Knowing your thermostat’s type will help you follow the correct calibration steps and ensure accurate temperature control.

Why Calibration is Important

Calibration ensures that your thermostat accurately reflects your home’s temperature. An uncalibrated thermostat can result in inconsistent heating or cooling, leading to discomfort and increased energy costs. Accurate calibration helps maintain a consistent temperature, improving energy efficiency and comfort. It also prolongs the lifespan of your HVAC system by reducing the strain caused by incorrect settings. Regular calibration checks can prevent these issues and keep your home comfortable year-round.

Benefits of a Well-Calibrated Thermostat

A well-calibrated thermostat offers several benefits, including:

  • Improved comfort
  • Energy efficiency
  • Cost savings
  • Ensures optimal operation of HVAC system, reducing wear and tear
  • Provides consistent temperature control, enhancing indoor air quality
  • Prevents hot or cold spots
  • Contributes to lower energy bills by avoiding unnecessary heating or cooling
  • Regular calibration checks help maintain a comfortable home environment

👉 6 Step Guide to Calibrating Your Thermostat

how to calibrate a thermostat-close up of hand adjusting a wall thermostat

Calibrating your thermostat is crucial for ensuring accurate temperature control in your home, which directly impacts comfort and energy efficiency. Proper calibration can help reduce energy costs and maintain a consistent environment, enhancing both your comfort and the longevity of your HVAC system.

Before you begin calibrating your thermostat, gather the necessary tools:

  • A reliable thermometer: to compare the actual room temperature with your thermostat’s display.
  • A screwdriver: essential for accessing the thermostat’s internal components.
  • Your thermostat’s manual: provides specific instructions for your model, making the calibration process smoother.

1. Turn Off Your HVAC System

Before starting the calibration process, it’s crucial to turn off your HVAC system. This step is vital for safety, as it prevents any accidental activation of the system while you’re working on the thermostat. Additionally, turning off the system ensures that you can focus on the calibration without any interruptions or fluctuations in temperature that could affect your readings.

2. Remove the Thermostat Cover

Using a screwdriver, carefully remove the cover of your thermostat. Take your time with this step to avoid damaging any components. The cover usually snaps off or is secured with screws, so make sure to keep track of any screws you remove. Once the cover is off, you’ll have direct access to the internal components of the thermostat, allowing you to proceed with the calibration process.

3. Compare Temperatures

To begin the calibration, place a reliable thermometer next to your thermostat and allow it to sit for a few minutes to stabilize. This is important because ambient temperature can fluctuate slightly in the room. After a few minutes, compare the reading on the thermometer with the display on your thermostat. This comparison will help you determine if there is a significant discrepancy between the actual temperature and what your thermostat is reading.

4. Adjust the Calibration Screw

If you notice a difference between the thermometer reading and the thermostat display, it’s time to adjust the calibration screw. Typically found on the internal mechanism of the thermostat, this screw is designed to help align the temperature readings. Use a small screwdriver to turn the screw slightly—clockwise usually increases the temperature reading, while counterclockwise decreases it. Make small adjustments and frequently check the thermometer until the readings match as closely as possible.

5. Reassemble the Thermostat

After achieving a match between the thermometer and thermostat readings, it’s time to put everything back together. Carefully replace the thermostat cover, ensuring that it fits securely. If the cover is held in place with screws, make sure to tighten them gently to avoid stripping the holes. This step is essential to protect the internal components and maintain the integrity of the thermostat’s functionality.

6. Turn On Your HVAC System

Once the thermostat is reassembled, turn your HVAC system back on. It’s a good idea to set the thermostat to the desired temperature and monitor the environment for a little while. Keep an eye on how quickly the system responds and whether the temperature remains consistent with your settings. This monitoring period will help confirm that the calibration was successful and that your HVAC system is operating efficiently. If you notice any issues, you may need to revisit the calibration process.

👇 Choosing the Right Thermostat for Your Home

Selecting the right thermostat is crucial for effective temperature control and can significantly impact your home’s comfort and energy efficiency. When making your choice, consider several factors:

  • Compatibility: Ensure the thermostat works seamlessly with your existing HVAC system. Not all thermostats are compatible with every system, so check specifications before purchasing.
  • Ease of Use: Look for a user-friendly interface that allows for straightforward programming and adjustments. A touchscreen display or smartphone app can enhance convenience.
  • Features: Programmable thermostats are great for those with a consistent schedule, allowing you to set temperatures for different times of the day. On the other hand, smart thermostats offer advanced features such as remote control via your smartphone, learning algorithms that adapt to your habits, and energy usage reports that help you optimize your settings.
  • Energy Savings: Consider models that promote energy efficiency. Many smart thermostats can help lower your energy bills by optimizing heating and cooling based on your usage patterns.

Take the time to research various models and read customer reviews to ensure you find the best thermostat tailored to your home’s specific needs and your lifestyle. A well-chosen thermostat can lead to increased comfort and lower energy costs in the long run.

Common Issues and Troubleshooting Tips

Even a properly calibrated thermostat can occasionally cause issues that affect comfort and energy efficiency. Here are some of the most common problems homeowners face—and how to troubleshoot them effectively.

1. Inaccurate Temperature Readings

If your thermostat seems off by several degrees, it may be located in a poor spot. Avoid placing thermostats near heat sources (like lamps or direct sunlight), above vents, or in drafty hallways. These areas can mislead your thermostat and cause it to trigger your HVAC system unnecessarily.

2. Frequent System Cycling

Does your heating or cooling system turn on and off more than usual? This “short cycling” can be caused by:

  • An improperly sized HVAC unit
  • A dirty air filter
  • A malfunctioning thermostat or temperature sensor
    Short cycling not only reduces comfort but can also drive up energy bills and wear down equipment.

3. Unresponsive or Blank Display

If your thermostat doesn’t respond or has a blank screen, start with these quick checks:

  • Replace the batteries
  • Inspect the wiring connections (especially if it’s an older unit)
  • Reset the device using the manufacturer’s instructions
    If the display remains blank or buttons are unresponsive, the thermostat may need to be replaced.

4. General Troubleshooting Advice

Always refer to your thermostat’s user manual for model-specific troubleshooting steps. Most digital thermostats also have a reset or diagnostic function that can help pinpoint the issue.

Pro Tip: If your thermostat continues to act up after basic troubleshooting, it’s time to contact a licensed HVAC professional. Persistent issues may indicate a deeper problem with the system—not just the thermostat.

👨‍🔧 Professional Help vs. DIY Calibration

how to calibrate a thermostat-woman trying to adjust her thermostat

While DIY calibration is possible, seeking professional help guarantees both accuracy and efficiency. HVAC technicians are equipped with the expertise and specialized tools necessary to properly calibrate your thermostat, ensuring optimal performance.

Professional calibration involves a comprehensive inspection of your entire HVAC system, allowing for the identification of any underlying issues that could impact performance. This proactive approach not only enhances comfort but also contributes to energy savings, making it a worthwhile investment.

To maintain the longevity and efficiency of your thermostat and HVAC system, consider scheduling regular maintenance with a reputable HVAC company. This will help ensure your system runs smoothly and efficiently throughout the year, ultimately leading to a more comfortable living environment.

Maintaining Your Thermostat

Regular maintenance is essential for optimal thermostat performance:

  • Clean the thermostat periodically to remove dust and debris that can affect its operation; this simple step can improve accuracy and responsiveness.
  • Check the batteries regularly and replace them as needed for uninterrupted functionality.
  • Verify that the thermostat is level and securely mounted on the wall to avoid inaccurate temperature readings and enhance overall efficiency.
  • Schedule annual HVAC inspections to identify potential issues early, addressing them before they become costly problems and keeping both your system and thermostat functioning efficiently.

🙌 Expert Thermostat Calibration and HVAC Services by Thelen Plumbing, Heating, and Air

At Thelen Plumbing, Heating, and Air, we understand the importance of a well-calibrated thermostat for your home’s comfort and energy efficiency. Our team of experienced technicians provides expert calibration services, ensuring your thermostat operates accurately and efficiently.

We offer comprehensive HVAC services, including installation, maintenance, and repairs. Our commitment to quality craftsmanship and customer satisfaction makes us the trusted choice for homeowners in the Twin Cities and North West Metro areas. Ready to experience the benefits of a perfectly calibrated thermostat? Contact us today to schedule a service and join the many satisfied customers who rely on Thelen Plumbing, Heating, and Air for their HVAC needs.

What To Do When Your Thermostat Is Not Working Properly

Is your thermostat not working, leaving your home feeling unusually warm or cold despite adjusting the thermostat? A malfunctioning thermostat can be a major headache for any homeowner. Whether your thermostat is not responding at all, or it’s just not maintaining the desired temperature, it’s crucial to diagnose and fix the issue promptly to ensure your home remains comfortable. In this blog post, we’ll walk you through common problems that cause thermostats to stop working and more, including:

  • Understanding the importance of a functional thermostat
  • 5 steps to take when your thermostat is not working
  • When to call a professional
  • Thermostat maintenance tips

🤔 Understanding the Importance of a Functional Thermostat

thermostat not working-close up of hand adjusting a wall thermostat

A thermostat is the control center of your home’s heating and cooling system. It regulates temperature by communicating with your HVAC system to maintain the desired comfort level. Without a properly functioning thermostat, your system won’t operate efficiently, leading to discomfort and higher energy bills.

Inconsistent temperatures can strain HVAC systems, causing it to work harder than necessary. This increased workload can lead to premature wear and tear, resulting in costly repairs. Therefore, maintaining a functional thermostat is key to ensuring the efficiency and longevity of your HVAC system.

Common Signs Your Thermostat is Malfunctioning

Identifying a malfunctioning thermostat is the first step to resolving the issue. Here are some common signs to watch out for:

  • Inconsistent Temperatures: If certain areas of your home are warmer or cooler than others, your thermostat may not be reading temperatures accurately.
  • Unresponsive Thermostat: If your thermostat doesn’t respond to changes in settings, it could indicate a power issue or internal malfunction.
  • HVAC System Won’t Turn On or Off: If your heating or cooling system isn’t cycling on or off as expected, the thermostat may not be sending the correct signals.
  • Display Issues: A blank or flickering display can indicate problems with the thermostat’s power supply or internal components.

👉 5 Steps to Take When Your Thermostat is Not Working Properly

thermostat not working-gloved hands replacing batteries on a wall thermostat

A malfunctioning thermostat can lead to uncomfortable temperatures, increased energy bills, and even potential damage to your HVAC system. Addressing thermostat issues promptly ensures a comfortable living environment and helps maintain energy efficiency.

1. Initial Troubleshooting Steps

Before jumping to conclusions, there are a few initial steps you can take to troubleshoot a malfunctioning thermostat:

Check the Thermostat’s Power Supply: Ensure the thermostat is receiving power. If it’s battery-operated, try replacing the batteries. For wired thermostats, check the circuit breaker for a blown fuse or tripped breaker.

Inspect the Thermostat Settings: Confirm that the thermostat is set to the correct mode (heating or cooling) and the desired temperature. Also, make sure the schedule settings haven’t been accidentally altered.

Clean the Thermostat: Dust and debris can affect the thermostat’s sensors. Gently clean the thermostat with a soft brush or cloth to remove any buildup.

2. Checking the Power Supply

A lack of power is a common cause of thermostat issues. Follow these steps to ensure your thermostat is receiving adequate power:

Replace Batteries: For battery-operated thermostats, replace the batteries with fresh ones. Low battery power can cause the thermostat to malfunction.

Check Circuit Breakers: Inspect your home’s circuit breaker panel to see if the breaker controlling your HVAC system has tripped. If so, reset it and check if the thermostat begins to function.

Inspect Wiring Connections: If you’re comfortable doing so, remove the thermostat cover and check for loose or disconnected wires. Ensure that all wiring connections are secure.

3. Inspecting the Thermostat Settings

Incorrect thermostat settings can often be the root cause of heating and cooling issues. Here’s how to verify your settings:

Mode and Temperature Settings: Ensure the thermostat is set to the appropriate mode (heating or cooling) and the desired temperature. Double-check these settings to avoid any accidental adjustments.

Fan Settings: Verify whether the fan is set to “auto” or “on.” In the “auto” mode, the fan only runs when heating or cooling is active. In the “on” mode, the fan runs continuously.

Programming Schedule: Many modern thermostats have programmable schedules. Ensure the schedule is set correctly and hasn’t been altered unintentionally.

4. Ensuring Proper Installation

Improper installation can lead to various thermostat issues. Follow these guidelines to ensure your thermostat is installed correctly:

Location: Place the thermostat away from direct sunlight, drafts, and heat sources. An ideal location is on an interior wall, approximately five feet above the floor.

Leveling: Use a level to ensure the thermostat is mounted straight. An uneven installation can affect the accuracy of temperature readings.

Secure Mounting: Ensure the thermostat is securely mounted to the wall. Loose mounting can lead to poor connections and inaccurate readings.

5. Calibrating Your Thermostat

Over time, thermostats can lose their calibration and provide inaccurate temperature readings. Here’s how to recalibrate your thermostat:

Consult the Manual: Refer to the thermostat’s user manual for specific calibration instructions, as each model may have different procedures.

Use a Thermometer: Place a reliable thermometer next to the thermostat, compare the readings, and adjust the calibration settings accordingly.

Regular Calibration: Periodically recalibrate your thermostat to ensure accurate temperature control and efficient HVAC operation.

👨‍🔧 When to Call a Professional

While many thermostat issues can be resolved with DIY troubleshooting, some situations require professional expertise. Consider calling a professional if:

Persistent Issues

If the problem persists despite your efforts, it may indicate a deeper underlying issue that only a professional can diagnose. They have the tools and experience to identify hidden problems that may not be immediately apparent.

Complex Wiring Problems

If you’re uncomfortable dealing with wiring connections or lack the necessary knowledge, it’s best to leave it to a qualified technician. Incorrect handling of wiring can lead to safety hazards or further complications, so it’s wise to seek professional help.

Unclear Diagnosis

If you’re unsure about the cause of the problem, a professional can perform a thorough inspection to pinpoint the exact issue. They possess the expertise to interpret symptoms accurately and provide effective solutions, saving you time and potential frustration.

💡 Thermostat Maintenance Tips

thermostat not working-man troubleshooting a thermostat

Routine maintenance can prevent many thermostat issues. Follow these tips to keep your thermostat in top condition:

  • Regular Cleaning: Clean the thermostat regularly to prevent dust buildup, which can affect its performance. Use a soft brush or cloth to gently clean the surface and sensors.
  • Battery Replacement: For battery-operated thermostats, replace the batteries annually or as recommended by the manufacturer. Low battery power can lead to malfunctions.
  • Software Updates: If your thermostat is equipped with software, check for updates periodically. Manufacturers often release updates to improve performance and fix bugs.
  • Calibration Check: Ensure your thermostat is accurately reading the temperature. You can check this by comparing it to a separate thermometer. If it’s off, recalibrate it according to the manufacturer’s instructions.
  • Wiring Inspection: Periodically inspect the wiring for any signs of wear or damage. Loose or frayed wires can lead to performance issues and safety hazards. If you notice any concerns, consult a professional.
  • Location Assessment: Make sure your thermostat is placed in an appropriate location, away from direct sunlight, drafts, or heat sources, which can affect its readings and performance.
  • Humidity Control: If your thermostat has a humidity control feature, regularly check and adjust settings based on seasonal changes to maintain comfort and efficiency.
  • Professional Servicing: Consider scheduling an annual check-up with a heating and cooling professional to ensure everything is functioning optimally and to address any potential issues before they arise.

🙌 Troubleshooting Your Thermostat and Reliable HVAC Solutions with Thelen Plumbing, Heating, and Air

A malfunctioning thermostat can cause significant discomfort and inefficiency in your home. By following the steps outlined in this guide, you can troubleshoot and resolve many common thermostat issues. However, when in doubt, it’s always best to seek professional assistance.

At Thelen Plumbing, Heating, and Air, we understand the importance of a properly functioning thermostat and efficient HVAC system. Our team of experienced technicians is here to help you with all your heating and cooling needs. Whether it’s a simple repair or a complex installation, you can trust us to deliver exceptional service and quality craftsmanship. Don’t wait until your home becomes unbearably hot or cold. Contact Thelen Plumbing, Heating, and Air today to schedule an inspection and get your thermostat working perfectly again.

Step-by-Step Guide: How to Install a Window Air Conditioner Like a Pro

Feeling the heat this summer and thinking about installing a window air conditioner? You’ve come to the right place. This guide will walk you through the step-by-step process of how to install window air conditioner units efficiently and safely. Whether you’re a seasoned DIYer or a first-time homeowner, this guide will show you exactly how to install a window air conditioner—safely, efficiently, and step by step.

Here’s what you’ll learn:

  • Why a window AC might be the right choice for your home
  • How to install a window air conditioner in 7 clear steps
  • Simple maintenance tips to keep it running like new
how to install window air conditioner-window ac unit on a brick house

🤔 Why You Might Consider Installing a Window Air Conditioner

Window air conditioners can be a lifesaver during the sweltering summer months—especially if your home doesn’t have central air. Here’s why they’re a smart cooling solution:

Affordable & Efficient

  • Lower upfront cost than central air systems.
  • Energy-efficient models can keep your electric bill in check while still cooling the room effectively.

Easy to Install, Easy to Remove

  • Designed to fit snugly in standard windows.
  • No ductwork or professional HVAC setup needed—most homeowners can install them in under an hour.
  • Can be removed and stored during cooler months to save space and energy.

Flexible Cooling for Individual Rooms

  • Ideal for apartments, dorms, or single rooms in homes where central cooling isn’t practical.
  • Lets you cool only the space you’re using, which cuts costs and energy usage.

Improves Indoor Comfort & Air Quality

  • Many models come with filters that trap dust and allergens, improving air quality.
  • Helps reduce indoor humidity, creating a more comfortable environment.

Window AC Unit or Portable AC Unit? A Quick Comparison

FeatureWindow Air ConditionerPortable Air Conditioner
Cooling EfficiencyMore efficient for the same BTU ratingGenerally less efficient; some cooling is lost through the exhaust hose
InstallationRequires window access and mounting setupFreestanding; only requires a window for exhaust venting
PortabilityFixed in place during useEasily movable between rooms
Space UsageDoes not occupy floor spaceTakes up floor space; may reduce usable room area
Noise LevelTypically quieter indoors as the compressor is outside the roomCompressor is inside the room, so generally noisier
Energy ConsumptionMore energy-efficient over timeTends to consume more electricity for the same cooling output
AestheticsMounted in the window; minimally visibleBulky appearance; can clash with room decor
Best ForLong-term or semi-permanent cooling in a specific roomTemporary setups, apartments, or where window mounting isn’t allowed
Seasonal StorageNeeds to be removed or covered in off-seasonEasy to unplug and store in a closet or storage area
CostTypically lower upfront cost for the same BTUSlightly higher cost for similar performance

Which Should You Choose?

  • Choose a window AC if you’re cooling a single room and want long-term efficiency with less floor space used.
  • Choose a portable AC if you’re a renter, need mobility, or want something you can use without altering your window setup.

🛠️ How to Install Window Air Conditioner (Step-by-Step with Pro Tips)

Installing a window air conditioner correctly is essential not only for comfort but also for energy efficiency, safety, and noise reduction. Below is a detailed, beginner-friendly guide to help you get it right the first time.

1. Assess Your Cooling Needs

🔍 Choose the Right BTU Rating

  • Use a BTU calculator based on your room’s square footage, ceiling height, insulation, and sun exposure.
  • Pro Tip: An oversized unit may short cycle, increasing humidity instead of cooling efficiently.

📏 Measure Your Window

  • Measure width, height, and sill depth. Compare these to the unit’s specifications.
  • Common Mistake to Avoid: Don’t forget to check if the window opens vertically (double-hung) or horizontally—some AC units aren’t compatible with all window types.

⚡ Check Power Requirements

Safety Tip: Avoid using extension cords unless recommended by the manufacturer.

Confirm the voltage and plug type. Most units use a standard 110V outlet, but some larger units require 220V.

man measuring his window for installing an AC unit

2. Gather Tools & Materials

🧰 Tools Checklist

  • Screwdriver (Phillips/flathead)
  • Level
  • Measuring tape
  • Drill (if brackets need anchoring)
  • Adjustable wrench (optional)

🧤 Safety Gear

  • Gloves
  • Safety glasses
  • Optional: Non-slip mat or helper for lifting

📦 Materials

  • Screws (included with unit)
  • Weatherstripping
  • Foam insulation
  • Support bracket (especially for second-floor windows)

3. Install the Mounting Bracket (If Required)

🔧 Step-by-Step:

  1. Read the manual – bracket designs vary by brand.
  2. Mark & drill holes – ensure alignment and level.
  3. Secure bracket – use all fasteners for maximum support.

🛑 Safety Check

Pro Tip: Slight downward tilt (½ inch) away from the window helps drain condensation safely.e it’s securely fastened and can support the weight of the air conditioner.

Shake the bracket lightly. It should feel rock solid.

4. Prepare the Window

🧼 Clean the Area

  • Remove dirt, loose paint, and debris—this helps the seal adhere better.
window weather stripping

🔒 Install Weatherstripping

Optional Upgrade: Use insulated side panels for quieter operation and better insulation.

Apply foam along the window sash and bottom to prevent air leaks.

5. Position the Air Conditioner

🏋️‍♂️ Lift with Support

  • AC units can weigh 40–80 lbs+. Ask for help or use a lifting strap.
  • Align with the bracket and set it down slowly.

🪟 Secure with Window Sash

Model Note: Some units come with top support frames—install them now if applicable.

Lower the sash to hold the unit firmly in place.

6. Secure and Seal the Unit

🛠️ Extend and Attach Side Panels

  • Slide them out fully and screw them into the window frame (or attach with clips).

🧯 Secure the Unit

  • Use screws through the top flange and side brackets to anchor the unit.
  • Fill any remaining gaps with foam or insulation strips.

❄️ Final Weatherproofing

Seal small leaks around the unit with caulk or additional foam.

7. Test the Unit & Optimize if Needed

⚙️ Power Up Safely

  • Plug the unit into a dedicated wall outlet (avoid extension cords unless approved by the manufacturer).
  • Turn on the AC and run it through all key modes (cooling, fan, dehumidifier if available) to ensure full functionality.

🧪 Leak Check

  • Run your hand around the edges of the unit.
  • Feel for warm air escaping or cool air leaking out—especially near the side panels, sash, and bottom seal.
  • Adjust foam, weatherstripping, or panels as needed for a tight fit.

📖 Fine-Tune Your Comfort Settings

  • Set to eco mode for energy savings or timer mode to auto-shutoff when you’re asleep or out.
  • Pro Tip: Enable smart scheduling (if available) via app or remote to reduce power usage during peak hours.

💡 Window AC Maintenance Tips

Proper maintenance ensures your air conditioner runs efficiently, lasts longer, and avoids mid-summer breakdowns. Follow these simple tips:

Clean or Replace the Filter Monthly

  • A clogged filter restricts airflow and forces your unit to work harder.
  • Remove and rinse the filter with warm water every 30 days during heavy use.
  • Some filters may need replacing—check your user manual.

Inspect the Unit Regularly

  • Look for signs of wear such as cracks in the frame, frayed cords, or unusual noises.
  • Check the seal between the unit and the window frame to ensure it hasn’t loosened.
  • Tighten screws and ensure drainage holes are clear.

Store It Properly in the Off-Season

  • Unplug the unit and clean both the filter and exterior before storage.
  • Let it dry completely to prevent mold and mildew buildup.
  • Store in a dry, covered area—ideally off the ground and in its original box, if available.

🙌 Stay Cool This Summer with Thelen Plumbing, Heating, and Air

Installing a window air conditioner is a straightforward process that can greatly enhance your comfort during hot weather. By following these steps, you’ll ensure a successful installation and enjoy a cooler home in no time. At Thelen Plumbing, Heating, and Air, we pride ourselves on providing top-notch HVAC services to homeowners. If you need assistance or professional installation, trust our expert team to get the job done right.

Be sure to stay cool this summer: Contact Thelen Plumbing, Heating, and Air today for all your cooling needs!

FAQs

Do I need a support bracket to install a window air conditioner?

Most window air conditioners under 100 pounds don’t require a support bracket if installed properly. However, for added safety—especially on upper floors—a bracket is highly recommended to prevent damage or injury.

Can I install a window AC in a sliding or crank window?

Standard window AC units are designed for double-hung vertical windows. For sliding or crank windows, you’ll need either a specially designed unit or a vertical AC kit and custom mounting support.

How do I know what size air conditioner I need?

The cooling power of an AC unit is measured in BTUs (British Thermal Units). A general rule of thumb is 20 BTUs per square foot of living space. Consider ceiling height, sunlight, and insulation when choosing.

A Breakdown Of The Central Air Installation Process

Installing central air conditioning in your home is a game-changer. Imagine the sweltering summer heat outside while you relax in the cool comfort of your living room. But how does central air installation work, and what should you expect? This guide aims to demystify the process for homeowners considering this major upgrade, including:

  • Benefits of Central Air Conditioning
  • Assessing Your Home’s Needs
  • Choosing the Right System
  • Preparing for Installation
  • 6 Step Installation Process
  • Post-Installation Tips
  • Frequently Asked Questions

✅ Benefits of Central Air Conditioning

central air installation-repair tech using tools to install an ac unit

Central air conditioning provides consistent and efficient cooling throughout a home, enhancing comfort during hot weather. It also improves air quality by filtering out dust and allergens, creating a healthier indoor environment.

Consistent Cooling: Unlike window units or portable ACs, central air conditioning maintains a uniform temperature across all rooms. No more “hot spots” or uneven cooling—just consistent comfort.

Energy Efficiency: Modern central air systems are designed to be energy efficient, which can save you money on utility bills. Many systems come with programmable thermostats, allowing you to set cooling schedules that optimize energy use.

Improved Air Quality: Central air systems filter out dust, pollen, and other allergens, improving the air quality inside your home. This is particularly beneficial for individuals with allergies or respiratory issues.

Quieter Operation: Central air conditioning units operate much more quietly than window or portable units, allowing you to enjoy a peaceful indoor environment without the constant noise of traditional AC systems.

Increased Home Value: Installing a central air conditioning system can boost your home’s value and appeal to potential buyers, making it a worthwhile investment for future resale.

🤔 Choosing the Right System

Choosing the right system is crucial for maximizing comfort and energy efficiency in your home. The right central air conditioner can significantly impact your overall cooling experience, utility costs, and long-term satisfaction. To make the best decision for your home, some considerations include:

  • Types of Central Air Systems: There are several types of central air systems, including split systems, packaged systems, and ductless mini-split systems. Each has its pros and cons, so it’s crucial to consult with an HVAC professional to determine the best fit for your home.
  • Energy Efficiency Ratings: Look for systems with high SEER (Seasonal Energy Efficiency Ratio) ratings. A higher SEER rating indicates better energy efficiency, which translates to lower operating costs.
  • Additional Features: Modern central air systems come with various features like smart thermostats, zoning capabilities, and variable-speed fans. These features can enhance comfort and efficiency.

Assessing Your Home’s Needs

Assessing your home’s needs is crucial when considering a central air conditioner, as it ensures you choose a system that effectively meets your cooling requirements and optimizes energy efficiency. Understanding factors like square footage, insulation, and climate can help you make an informed decision that enhances comfort while potentially lowering energy costs.

Home Size and Layout

The size and layout of your home significantly influence the type and capacity of the central air system you require. Larger homes may need more powerful units or multiple zones to ensure even cooling, while smaller spaces might only need a single unit. A professional assessment can provide insights into the best system for your specific needs, taking into account factors like square footage, ceiling height, and room arrangement.

Existing Ductwork

If your home already has ductwork installed for heating, you might have the option to utilize it for your new central air system, which can save on installation costs. However, it’s crucial to conduct a thorough inspection to verify that the ducts are in good condition, free from leaks, and appropriately sized to handle the increased airflow required for cooling. This ensures optimal efficiency and comfort in your home.

Budget Considerations

While installing central air can be a significant investment, establishing a clear budget is vital for managing costs effectively. Take the time to research various financing options, such as loans or payment plans, which can make the initial outlay more manageable. Additionally, inquire about available rebates or tax credits that might apply, as these can help reduce overall expenses and make the transition to central air more affordable.

👉 Preparing for Installation

Preparing for installation is crucial for ensuring that your central air conditioner operates efficiently and effectively. Proper preparation helps prevent potential issues, optimizes performance, and guarantees that your cooling system will function reliably throughout the hot seasons.

  • Scheduling a Professional Assessment: Before installation, schedule a professional assessment to evaluate your home’s cooling needs. This assessment will cover aspects like ductwork condition, electrical capacity, and system placement.
  • Clearing the Installation Area: Clear the areas where the indoor and outdoor units will be installed. This makes it easier for technicians to work and ensures a smooth installation process.
  • Temporary Cooling Solutions: Consider temporary cooling solutions during the installation period, especially if you’re installing in the middle of summer. Portable fans or window units can provide relief until your central air system is up and running.

🛠️ 6 Step Installation Process

central air installation-technician working with ductwork in a house attic

The step-by-step installation process is crucial for ensuring that central air conditioners operate efficiently and effectively. Proper installation not only maximizes performance but also helps prevent costly repairs and extends the lifespan of the unit.

1. Removing the Old System

Before installing a new air conditioning system, it’s essential to remove the existing one. This process begins by turning off the power to the old unit to ensure safety. Technicians will then disconnect refrigerant lines, electrical wiring, and drain lines. After all connections are safely detached, they will carefully remove the unit from its mounting and prepare the installation area. This may involve cleaning up any debris and ensuring the space is clear and ready for the new system.

2. Installing the New Ductwork

If your home requires new ductwork, this step is crucial for ensuring efficient airflow and cooling. Technicians will assess the layout of your home and determine the best locations for the ducts, which may involve working in the attic, basement, or crawl spaces. They will measure and cut the necessary materials, laying out the duct system to optimize airflow. Proper sealing and insulation of the ducts will also be performed to prevent energy loss and ensure that the system operates efficiently.

3. Setting Up the Indoor Unit

The indoor unit, also known as the evaporator coil, is a key component of your air conditioning system. It’s typically installed in a location that allows for optimal airflow, such as in the basement or attic. Technicians will securely mount the unit and connect it to the newly installed ductwork. They will also ensure that the unit is properly sealed and insulated to prevent air leaks. This setup is critical for maximizing the cooling efficiency and maintaining a comfortable indoor environment.

4. Installing the Outdoor Unit

The outdoor unit, or condenser, plays a vital role in the air conditioning process. It is usually installed outside your home on a concrete pad, which provides stability and proper drainage. Technicians will carefully connect the outdoor unit to the indoor system using refrigerant lines and electrical wiring. They will ensure that these connections are secure and comply with local building codes. Proper installation of the outdoor unit is essential for the overall efficiency and longevity of your air conditioning system.

5. Connecting the Thermostat

The thermostat acts as the control center for your central air system, allowing you to set and adjust your desired indoor temperature. During this step, technicians will install the thermostat in a convenient location that is easily accessible. They will also program it according to your preferences, which may include setting up schedules for cooling during specific times of the day. Ensuring that the thermostat is correctly installed and calibrated is vital for optimal performance and energy efficiency.

6. Testing the System

Once all components are connected, thorough testing is performed to ensure the system is functioning correctly. Technicians will check for any refrigerant leaks, verify that airflow is adequate, and assess the cooling performance. They may also conduct system diagnostics to identify any potential issues before they arise. This step is crucial for ensuring that your new air conditioning system operates efficiently and effectively, providing you with the comfort you need.

👇 Post-Installation Tips

Post-installation tips are crucial for ensuring your central air conditioner operates efficiently and effectively. Following these guidelines can help extend the lifespan of your system, improve air quality, and reduce energy costs.

  • Maintenance and Care: Regular maintenance is key to extending the life of your central air system. Schedule annual inspections, change filters regularly, and keep the outdoor unit free of debris.
  • Energy-Saving Tips: Optimize your system’s efficiency by using a programmable thermostat, setting temperature schedules, and keeping doors and windows closed while the AC is running.
  • Troubleshooting Common Issues: Familiarize yourself with common issues like uneven cooling, strange noises, or reduced airflow. Knowing how to troubleshoot these problems can save you time and money.

❓ Frequently Asked Questions

central air installation-technician inserting a new filter to central ac unit

Q: How long does central air installation take?

The installation process typically takes one to three days, depending on the complexity of the job and the condition of your existing ductwork.

Q: What is the average cost of central air installation?

The cost can vary widely based on factors like system type, home size, and additional features. On average, homeowners can expect to spend between $3,000 and $7,000.

Q: How often should I service my central air system?

Annual maintenance is recommended to keep your system running efficiently and to catch any potential issues before they become major problems.

🙌 Enhance Your Home Comfort with Central Air Conditioning

Installing central air conditioning is a significant yet worthwhile investment for any homeowner. It not only enhances your comfort but also increases your home’s value. If you’re considering central air installation, trust Thelen Plumbing, Heating, and Air to guide you through the process from start to finish. Contact us today to schedule your free assessment and take the first step toward a cooler, more comfortable home.

What Is An AC Condenser And What Does It Do?

Air conditioning has become an essential aspect of modern living, especially during those scorching summer months. But have you ever wondered what makes your AC system work so efficiently? One of the critical components is the AC condenser. In this blog post, we’ll explore what an AC condenser is, its role in your air conditioning system, and why understanding it can help you maintain a cooler home. Here’s what we’ll cover:

  • Understanding an AC Condenser
  • Different Types of AC Condensers
  • Signs Your AC Condenser Needs Maintenance
  • Common AC Condenser Problems
  • Benefits of Regular AC Condenser Maintenance
  • Professional Maintenance vs. DIY
  • FAQs

🤔 Understanding an AC Condenser

ac condenser-distant view of an ac unit next to a gray sided house

The AC condenser unit is a vital part of your air conditioning system. It plays a crucial role in converting refrigerant gas into a liquid, which helps in the cooling process. Typically located outside your home, the condenser is responsible for releasing the heat absorbed by the refrigerant inside your home.

While it may seem complex, the condenser’s operation is straightforward once you understand its components and function.

How an AC Condenser Works

Understanding how an AC condenser works is crucial for maintaining optimal cooling efficiency in air conditioning systems. This knowledge can help homeowners troubleshoot issues and ensure their units operate effectively, ultimately prolonging the lifespan of the system.

The Cooling Process

The primary role of an AC condenser is to release the heat that the refrigerant absorbs from inside your home. When the refrigerant gas reaches the condenser, it is compressed, causing it to become hot. This hot gas then flows through the condenser coils, dissipating the heat into the surrounding air.

Components of an AC Condenser

An AC condenser comprises several parts, including the compressor, condenser coils, fan, and refrigerant lines. Each component works together to ensure efficient heat release and cooling.

The Role of Refrigerant

Refrigerant is the lifeblood of your AC system, cycling between the evaporator and condenser. It absorbs heat from inside your home and releases it outside, keeping your indoor environment cool and comfortable.

Importance of the AC Condenser in Your AC System

The AC condenser plays a crucial role in your air conditioning system by dissipating heat from the refrigerant, allowing for efficient cooling. Without a properly functioning condenser, your AC system can struggle to maintain desired temperatures, leading to increased energy consumption and discomfort. Some key features of an AC condenser include:

  • Efficient Heat Transfer: The AC condenser is crucial for efficient heat transfer. Without it, your air conditioning system would struggle to release the heat absorbed from your home, leading to poor cooling performance.
  • Energy Efficiency: A well-maintained condenser ensures your AC system operates efficiently. This translates to lower energy bills and a reduced carbon footprint.
  • Longevity of Your AC System: Regular maintenance and proper functioning of the condenser can extend the lifespan of your air conditioning system, saving you money on costly replacements.

Different Types of AC Condensers

Air-Cooled Condensers

Air-cooled condensers are the most common type found in residential AC systems. They use a fan to blow air over the condenser coils, dissipating heat into the surrounding air.

Water-Cooled Condensers

Water-cooled condensers use water to absorb and dissipate heat. These are typically more efficient than air-cooled condensers but require a water source and additional maintenance.

Evaporative Condensers

Evaporative condensers combine elements of both air-cooled and water-cooled systems. They use a fan and a water spray to cool the refrigerant, making them highly efficient but more complex.

⚠️ Signs Your AC Condenser Needs Maintenance

Regular maintenance of your AC condenser is crucial to ensure optimal cooling performance and energy efficiency. Neglecting its upkeep can lead to costly repairs and reduced lifespan, making it essential to recognize the signs that indicate it needs attention.

  • Reduced Cooling Efficiency: If your AC system isn’t cooling as effectively as it used to, the condenser might be dirty or malfunctioning.
  • Strange Noises: Unusual noises from the condenser unit could indicate a problem with the fan, compressor, or other components.
  • Increased Energy Bills: A sudden spike in your energy bills could be a sign that your condenser is working harder than it should, often due to dirt or mechanical issues.
  • Leaking or Pooling Water: If you notice water pooling around your AC unit, it could indicate a refrigerant leak or a blocked drain line.
  • Frequent Cycling: If your AC turns on and off more often than normal, it may be a sign that the condenser is struggling to keep up.
  • Foul Odors: Unpleasant smells coming from the unit can indicate mold or mildew buildup, which requires immediate attention.
  • Poor Air Flow: If you’re experiencing weak airflow from the vents, it might point to issues with the condenser or ductwork.
  • Age of the Unit: If your AC condenser is older than 10-15 years, regular maintenance becomes crucial to ensure its efficiency and longevity.

Common AC Condenser Problems

ac condenser-technician performing maintenance on an ac unit

Understanding common AC condenser problems is crucial for maintaining optimal cooling efficiency and prolonging the lifespan of your air conditioning system. By identifying and addressing these issues early, homeowners can avoid costly repairs and ensure a comfortable indoor environment.

Dirty Coils: Dirty condenser coils can significantly reduce the efficiency of your AC system. Regular cleaning can prevent this issue.

Refrigerant Leaks: Leaks in the refrigerant lines can cause the system to lose its cooling capacity. It’s essential to address refrigerant leaks promptly to prevent damage.

Electrical Issues: Faulty wiring or electrical components can cause the condenser to malfunction. Regular inspections can help identify and fix these issues.

✅ Benefits of Regular AC Condenser Maintenance

Regular maintenance of your AC condenser is crucial for ensuring optimal performance and efficiency. It helps prevent breakdowns, extends the lifespan of the unit, and can lead to significant energy savings, keeping your home comfortable while reducing utility costs.

1. Improved Efficiency

Regular maintenance ensures your condenser operates at peak efficiency, providing better cooling and lower energy bills. This not only enhances comfort but also reduces overall energy consumption, making your system more eco-friendly.

2. Extended Lifespan

Routine maintenance can extend the lifespan of your AC system, preventing costly repairs and replacements. By addressing minor issues before they escalate, you can enjoy a longer-lasting unit that serves you well for years.

3. Enhanced Comfort

A well-maintained condenser ensures your home remains cool and comfortable, even during the hottest days. This consistent performance contributes to a more enjoyable living environment, allowing you to relax without worrying about temperature fluctuations.

4. Better Air Quality

Regular maintenance helps prevent dirt and debris buildup, promoting cleaner air and reducing allergens in your home. This is especially beneficial for those with allergies or respiratory issues, as it creates a healthier indoor atmosphere.

5. Fewer Breakdowns

Routine check-ups can identify potential issues early, reducing the likelihood of unexpected breakdowns. This proactive approach not only saves you from the inconvenience of sudden failures but also reduces repair costs over time.

6. Lower Environmental Impact

An efficient AC system consumes less energy, leading to a smaller carbon footprint and environmentally friendly performance. By investing in maintenance, you’re contributing to a sustainable future while enjoying comfortable indoor temperatures.

7. Warranty Protection

Keeping up with maintenance often ensures that your warranty remains valid, protecting your investment in the long run. This peace of mind means you can enjoy your AC system without worrying about voiding crucial coverage.

Professional Maintenance vs. DIY

Pros of Professional Maintenance

Professional technicians have the expertise and tools to perform thorough maintenance, ensuring all components are in good working condition.

Cons of DIY

While DIY maintenance can save money, it may not address all potential issues, leading to costly repairs down the line.

Deciding What’s Best for You

Consider your comfort level with DIY tasks and the complexity of the maintenance required. For critical issues, professional maintenance is often the best choice.

How to Clean Your AC Condenser

Cleaning your AC condenser is crucial for maintaining optimal efficiency and prolonging the lifespan of your air conditioning unit. A clean condenser ensures better airflow and heat exchange, which can lead to reduced energy costs and improved cooling performance.

Turn Off the Power

Before cleaning, always turn off the power to the condenser to ensure safety. This is a vital step to prevent any electrical accidents and to allow you to work on the unit without risk.

Remove Debris

Clear any debris, leaves, or dirt from around the condenser unit to ensure proper airflow. This involves checking not just the top but also the sides of the unit, as well as the surrounding area. Regularly removing debris helps maintain efficient air circulation and prevents overheating.

Clean the Coils

Use a coil cleaner or a mixture of water and mild detergent to clean the condenser coils. Gently spray or apply the cleaner and scrub if necessary, being cautious not to damage the fins. Rinse thoroughly and allow them to dry before turning the power back on. This step is important as dirty coils can significantly hinder the cooling efficiency of your AC unit.

❓ FAQs

ac condenser-two ac units next to each other next to a gray sided house

Q: How Often Should I Clean My AC Condenser?

It’s recommended to clean your condenser at least once a year, preferably before the cooling season begins.

Q: Can I Replace My AC Condenser Myself?

While some DIY enthusiasts may be able to handle condenser replacement, it’s generally best to hire a professional to ensure proper installation and avoid potential issues.

Q: What Are the Signs of a Failing AC Condenser?

Signs of a failing condenser include reduced cooling efficiency, strange noises, and increased energy bills. Regular maintenance can help prevent these issues.

🙌 Ensuring Optimal AC Condenser Performance for a Comfortable Home

Ensuring the optimal performance of your AC condenser is crucial for efficiency, longevity, and comfort in your home. At Thelen Plumbing, Heating, and Air, our dedicated team brings extensive expertise in HVAC systems, providing reliable maintenance and repair services tailored to your specific needs. We understand the importance of a well-functioning condenser and are committed to delivering top-notch service with a focus on quality and customer satisfaction. Don’t let AC issues linger—trust the professionals at Thelen Plumbing, Heating, and Air to keep your system running smoothly. Contact us today to schedule your maintenance appointment and ensure your home stays cool and comfortable all season long!

Is AC Coil Cleaner Worth It? (3 Best Brands To Use)

Maintaining your air conditioning system is crucial for its efficiency and longevity. One key aspect of maintenance is cleaning the AC coils, but this is often overlooked by homeowners. In this post, we’ll explore whether investing in an AC coil cleaner is worth it and look at the best brands to use. Here’s what we’ll cover:

  • Understanding AC Coils and Why They Need Cleaning
  • Types of AC Coil Cleaners
  • DIY vs. Professional Cleaning
  • Signs That Your AC Coils Need Cleaning
  • Safety Tips for Using AC Coil Cleaners
  • Step-by-Step Guide to Cleaning Your AC Coils
  • 3 Best AC Coil Cleaner Brands to Use
  • Common Mistakes to Avoid When Cleaning AC Coils
  • Frequently Asked Questions

🤔 Understanding AC Coils and Why They Need Cleaning

ac coil cleaner-close up of ac unit with debris-free coils

AC coils play a crucial role in your air conditioning system. They help transfer heat from inside your home to the outside, keeping your house cool. Over time, these coils can accumulate dirt, dust, and other debris, which can affect their efficiency. Dirty coils can lead to higher energy bills, reduced cooling performance, and even system breakdowns.

Cleaning your AC coils helps maintain optimal performance and prolongs the lifespan of your unit. It ensures that your system runs efficiently, providing you with consistent cooling and saving you money on energy costs.

Benefits of Using an AC Coil Cleaner

Using an AC coil cleaner provides several significant benefits.

First and foremost, clean coils enhance the efficiency of your air conditioning system. When the coils are free of dirt and debris, your AC unit can operate more effectively, which in turn reduces energy consumption and lowers your utility bills.

Regular cleaning of the coils contributes to an extended lifespan for your AC system. By preventing the buildup of grime that can lead to wear and tear, you ensure that your unit lasts longer and functions optimally.

Maintaining clean coils directly impacts the air quality in your home. By removing dust and debris from the coils, you help improve the overall air quality, creating a healthier living environment.

Keeping your coils clean can lead to reduced maintenance costs. Regular upkeep helps prevent costly repairs and system breakdowns, ultimately saving you money in the long run.

👉 Types of AC Coil Cleaners

There are several types of AC coil cleaners available, each designed to cater to specific needs:

Foam Cleaners:

  • Popular option due to ease of application
  • Highly effective at breaking down dirt and grime
  • Expands to cover the entire coil surface
  • Easily rinsed off with water after use

Liquid Cleaners:

  • Offer a more potent solution
  • Can be sprayed directly onto the coils for targeted application
  • Requires rinsing after application to remove residues

No-Rinse Cleaners:

  • Convenient choice that evaporates after breaking down dirt
  • Eliminates the need for rinsing altogether

Biodegradable Cleaners:

  • Eco-friendly options that are safe for the environment and your AC system
  • Provide a responsible way to maintain your equipment without harming nature

How to Choose the Right AC Coil Cleaner

Choosing the right AC coil cleaner involves considering several important factors. First, you should determine the type of coils in your AC system. It is essential to check whether your system is equipped with aluminum or copper coils, as some cleaners are specifically formulated for one type or the other.

Next, think about the ease of use of the cleaner. Consider how simple it is to apply and whether you have a preference for a foam, liquid, or no-rinse option. The convenience of the application can greatly influence your cleaning experience.

Effectiveness is a key aspect to keep in mind. Look for cleaners that have high ratings for their cleaning power and efficiency, as this will ensure that you achieve the best results.

Safety is paramount. Make sure the cleaner you choose is safe for use with your AC system and does not contain harsh chemicals that could potentially damage the coils. By considering these factors, you can select the right AC coil cleaner for your needs.

👨‍🔧 DIY vs. Professional Cleaning

ac coil cleaner-person rinsing dirty ac coils with a hose

While DIY cleaning can be effective, there are times when professional cleaning is necessary:

Benefits of DIY Cleaning

First, one of the key benefits is cost-effectiveness. By opting for this approach, individuals can save money that would otherwise be spent on professional services.

Additionally, convenience plays a significant role. This method allows you to work on your own schedule, making it easier to fit into your busy life.

Finally, there is a sense of satisfaction that comes from completing the task yourself. This accomplishment can boost confidence and provide a rewarding experience.

When to Call a Professional

Severe buildup can occur if the coils are heavily soiled or covered in mold. This accumulation not only affects the efficiency of the system but can also lead to more significant issues down the line.

Another factor to consider is the lack of proper tools. Professional cleaners possess specialized equipment designed for thorough cleaning, ensuring that every part of your AC system is addressed effectively.

Finally, having a maintenance plan is crucial. Regular professional maintenance can significantly prolong the lifespan of your AC system, keeping it running smoothly and efficiently for years to come.

⚠️ Signs That Your AC Coils Need Cleaning

It is important to look out for signs that indicate your AC coils need cleaning. One of the main signs is reduced cooling efficiency. If you notice that your air conditioning unit isn’t cooling as effectively as it used to, dirty coils may be the underlying cause.

Another indication that your coils need attention is a rise in your energy bills. Increased energy consumption can occur when coils are dirty, leading to higher costs.

It’s crucial to inspect your coils regularly for any visible dirt and debris. If you notice a buildup, it is essential to clean them to ensure optimal performance. Keeping your AC coils clean will help maintain efficiency and prolong the life of your air conditioning system.

Maintaining Your AC System Year-Round

To ensure your air conditioning system operates smoothly, it’s important to follow a few essential maintenance tips.

Conduct regular inspections of your AC system to look for any signs of wear and tear. This proactive approach can help you catch potential issues early.

Make it a habit to replace the filters every one to three months. This practice is vital for maintaining optimal airflow and enhancing the overall efficiency of your system.

Don’t forget to schedule professional maintenance. Having your air conditioning system inspected and serviced by a professional at least once a year can significantly extend its lifespan and performance. By following these guidelines, you can keep your AC system in top condition.

🦺 Safety Tips for Using AC Coil Cleaners

When using AC coil cleaners, safety is of utmost importance. To ensure a safe cleaning process, there are several key tips to keep in mind.

First, it is essential to wear protective gear. Using gloves and safety goggles will help protect your skin and eyes from any harmful chemicals that may be present in the cleaners.

Make sure to ensure proper ventilation while cleaning. It is best to clean your coils in a well-ventilated area to avoid inhaling any potentially harmful fumes.

Always follow the manufacturer’s instructions for application and safety precautions. Adhering to these guidelines will help ensure effective and safe use of the product.

Remember to keep cleaning products away from children and pets. Storing cleaners out of reach can prevent accidental ingestion or contact, further ensuring a safe cleaning environment.

🧼 Step-by-Step Guide to Cleaning Your AC Coils

ac coil cleaner-close up image showing the difference between dirty and cleaned coils

Cleaning your AC coils is a straightforward process that can significantly improve your system’s efficiency. Follow these detailed steps for the best results:

Turn Off the Power

Before starting any maintenance work, safety should be your top priority. Locate the power switch for your AC unit and turn it off completely. If your unit is connected to a circuit breaker, switch that off as well. This step is crucial to prevent any risk of electric shock or injury while you’re working on the unit.

Access the Coils

To effectively clean your AC coils, you need to gain access to them. Start by removing the outer casing of your AC unit. This may involve unscrewing several screws or clips, so having the right tools on hand is essential. If you’re unsure how to proceed, refer to your unit’s manual for specific instructions, as different models may have different assembly designs. Take care not to damage any components during this process.

Apply the Cleaner

Once you have access to the coils, it’s time to apply the cleaner. Choose a high-quality AC coil cleaner that is suitable for your unit. Spray the cleaner evenly over the coils, ensuring that you cover all surfaces thoroughly. If you’re using a foam cleaner, apply it generously and allow it to expand, as this will help penetrate and loosen dirt and grime that has built up over time. Let the cleaner sit for the recommended amount of time indicated on the product label to achieve optimal results.

Rinse the Coils

After the cleaner has had time to work, it’s important to rinse the coils to remove any residue and loosened dirt. If your cleaner requires rinsing, use a hose or a spray bottle filled with water to gently spray the coils. Be thorough in this step, as leftover cleaner can lead to buildup and affect your AC’s performance. Make sure you rinse until the water runs clear and all traces of the cleaner are gone.

Reassemble the Unit

Once the coils are clean and completely dry, it’s time to put your AC unit back together. Carefully reattach the outer casing, ensuring all screws or clips are securely fastened. Before you turn the power back on, double-check that everything is in place and that there are no loose parts. Once you’re confident that the unit is reassembled correctly, restore the power and turn the AC back on. Monitor your system for a few minutes to ensure it’s running smoothly.

💡 3 Best AC Coil Cleaner Brands to Use

Choosing the right AC coil cleaner is crucial for maintaining the efficiency and longevity of your air conditioning system. The best brands offer effective solutions that remove dirt and debris, ensuring optimal performance and improved indoor air quality. Here are our top picks for AC coil cleaner brands:

1. Frost King ACF19 Foam Coil Cleaner

The product is highly effective at breaking down dirt and grime, making it an excellent choice for cleaning. Additionally, it is easy to apply and rinse off, providing a hassle-free user experience. Safety is also a priority, as it is safe for all types of coils, ensuring that users can clean with confidence.

2. Nu-Calgon 4171-75 Evap Foam No Rinse

The product boasts remarkable effectiveness, offering powerful cleaning action without the need for rinsing. This no-rinse formula provides unparalleled convenience, saving both time and effort in your cleaning routine. Additionally, it is eco-friendly, being biodegradable and safe for the environment, ensuring that you can clean without compromising on sustainability.

3. ComStar Coil Safe

The product offers impressive effectiveness, showcasing strong cleaning power for both aluminum and copper coils. Its versatility allows it to be suitable for various types of air conditioning systems, making it a practical choice for different needs. Additionally, safety is a key feature, as it contains no harsh chemicals, ensuring it is safe for regular use.

🚫 Common Mistakes to Avoid When Cleaning AC Coils

To ensure effective cleaning, it’s important to avoid some common mistakes. First, using harsh chemicals can be detrimental. It’s best to stick to cleaners specifically designed for AC coils, as harsher substances can cause damage.

Another mistake is improper rinsing. It’s crucial to make sure that all cleaner residue is thoroughly removed to prevent any buildup that could affect performance.

Lastly, never neglect safety gear. Always wear protective equipment to prevent injuries while cleaning. By being mindful of these points, you can achieve better cleaning results and maintain your equipment effectively.

❓ Frequently Asked Questions

Q: How Often Should I Clean My AC Coils?

It’s recommended to clean your AC coils at least once a year. However, if you live in a dusty environment or use your AC heavily, more frequent cleaning may be necessary.

Q: Can I Use Household Cleaners on My AC Coils?

It’s best to use products specifically designed for AC coils. Household cleaners may contain chemicals that can damage the coils or leave residues that affect performance.

Q: Do I Need to Rinse No-Rinse Cleaners?

No, no-rinse cleaners are designed to evaporate and don’t require rinsing. However, ensure you’re following the product instructions for best results.

🙌 AC Maintenance for Better Home Comfort

Keeping your AC coils clean is essential for maintaining the efficiency and longevity of your air conditioning system. By using the right AC coil cleaner and following proper cleaning techniques, you can enjoy consistent cooling and lower energy bills.

At Thelen Plumbing, Heating, and Air, we’re committed to helping you maintain a comfortable home environment. Our team of experts provides top-notch HVAC and plumbing services, ensuring your systems run smoothly year-round. Trust us for all your home comfort needs. Ready to experience the difference? Contact Thelen Plumbing, Heating, and Air today and discover why we’re the trusted name in home comfort.

Schedule Service

"*" indicates required fields

This field is for validation purposes and should be left unchanged.